Canon Laser Shot LBP5970 User Manual
Laser beam
Hide thumbs
Also See for Laser Shot LBP5970:
- Brochure & specs (2 pages) ,
- Getting started manual (73 pages)

Related Manuals for Canon Laser Shot LBP5970


Summary of Contents for Canon Laser Shot LBP5970
- Page 1 Laser Beam Printer User's Guide User's Guide IMPORTANT: Read this manual carefully before using your printer. Save this manual for future reference.
- Page 2 LBP5970 Laser Printer User's Guide...
- Page 3 Manuals for the Printer The manuals for this printer are arranged as follows. Please refer to them for detailed information. Guides with this symbol are PDF manuals included on the Guides with this symbol are printed manuals. CD-ROM accompanying CD-ROM. Installation •...
-
Page 4: How This Manual Is Organized
Routine Maintenance Chapter 7 Troubleshooting Chapter 8 Appendix Considerable effort has been made to ensure that this manual is free of inaccuracies and omissions. However, as we are constantly improving our products, if you need an exact specification, please contact Canon. -
Page 5: Table Of Contents
Contents Preface ............viii How To Use This Manual . - Page 6 Chapter 2 Using the Printer Turning the Printer ON/OFF ........2-2 Turning the Printer ON .
- Page 7 Chapter 3 Paper Loading and Output Tray Paper Requirements ..........3-2 Usable Paper .
- Page 8 Menu Structure ..........4-7 How to View the Display.
- Page 9 JOB Menu Settings ..........5-109 RESET Menu Settings .
- Page 10 Message List ...........7-23 Service Call Display .
-
Page 11: Preface
Preface Thank you for purchasing the Canon LASER SHOT LBP5970. Please read this manual thoroughly before operating the printer in order to familiarize yourself with its capabilities, and to make the most of its many functions. After reading this manual, store it in a safe place for future reference. -
Page 12: Illustrations Used In This Manual
For details on the procedures, instructions, and so on for Windows 7 and Server 2008, refer to those for Windows Vista. For details on the latest status of the supported operating systems and Service Pack, see the Canon Web site (http://www.canon.com/). -
Page 13: Abbreviations Used In This Manual
Abbreviations Used in This Manual In this manual, product names and model names are abbreviated as follows: Microsoft Windows 2000 operating system: Windows 2000 Microsoft Windows XP operating system: Windows XP Microsoft Windows Server 2003 operating system: Windows Server 2003 Microsoft Windows Vista operating system: Windows Vista Microsoft Windows Server 2008 operating system:... -
Page 14: Legal Notices
Legal Notices Product Name Safety regulations require the product's name to be registered. In some regions where this product is sold, the following name(s) in ( ) may be registered instead. LBP5970 (F151500) EMC requirements of EC Directive (220 - 240 V model) This equipment conforms with the essential EMC requirements of EC Directive. - Page 15 This printer is classified as a Class 1 laser product under IEC60825-1:2007, EN60825-1:2007, and as for the U.S.A., it is classified as Class 1 under the Code of Federal Regulations, 1040.10 of Title 21. This printer has been classified under IEC60825-1:2007, EN60825-1:2007 and conforms to the following classes: CLASS 1 LASER PRODUCT LASER KLASSE 1...
-
Page 16: International Energy Star-Program
International Energy Star-Program As an E Partner, Canon Inc. has determined that this NERGY product meets the E Program for energy efficiency. NERGY The International E Office Equipment Program is an NERGY international program that promotes energy saving through the use of computers and other office equipment. -
Page 17: Ipv6 Ready Logo
This machine has acquired IPv6 Ready Logo Phase-1, as established by the IPv6 Forum. Trademarks Canon, the Canon Logo, LASER SHOT, LBP, and NetSpot are trademarks of Canon Inc. Adobe, Adobe Acrobat, Adobe Reader, and PostScript are trademarks of Adobe Systems Incorporated. -
Page 18: Copyright
Disclaimers The information in this manual is subject to change without notice. CANON INC. MAKES NO WARRANTY OF ANY KIND WITH REGARD TO THIS MATERIAL, EITHER EXPRESS OR IMPLIED, EXCEPT AS PROVIDED HEREIN, INCLUDING WITHOUT LIMITATION, THEREOF, WARRANTIES AS TO MARKETABILITY, MERCHANTABILITY, FITNESS FOR A PARTICULAR PURPOSE OF USE OR AGAINST INFRINGEMENT OF ANY PATENT. -
Page 19: Legal Limitations On The Usage Of Your Product And The Use Of Images
Legal Limitations on the Usage of Your Product and the Use of Images Using your product to scan, print or otherwise reproduce certain documents, and the use of such images as scanned, printed or otherwise reproduced by your product, may be prohibited by law and may result in criminal and/or civil liability. A non-exhaustive list of these documents is set forth below. -
Page 20: Important Safety Instructions
USB cable b b b b if it is connected. Then, unplug the power plug from the AC power outlet c c c c and contact your local authorized Canon dealer. - Page 21 - Cups, vases, flowerpots, and other containers filled with water or liquids CAUTION Do not install the printer in unstable locations, such as unsteady platforms or • inclined floors, or in locations subject to excessive vibrations, as this may cause the printer to fall or tip over, resulting in personal injury.
-
Page 22: Power Supply
Power Supply WARNING Do not damage or modify the power cord. Also, do not place heavy objects on the • power cord, or pull on or excessively bend it, as this could cause electrical damage and result in a fire or electrical shock. Keep the power cord away from a heat source;... -
Page 23: Handling
Then, unplug the power plug from the AC power outlet and contact your local authorized Canon dealer. Otherwise, this may result in a fire or electrical shock. Do not use highly flammable sprays near the printer. If gas from these sprays comes •... -
Page 24: Maintenance And Inspections
The laser beam can be harmful to human bodies. Since radiation emitted inside the • printer is completely confined within protective housings and external covers, the laser beam cannot escape from the printer during any phase of user operation. Read the following remarks and instructions for safety. - Page 25 CAUTION Never attempt to service this printer yourself, except as explained in this manual. • There are no user serviceable parts inside the printer. Adjust only those controls that are covered in the operating instructions. Improper adjustment could result in personal injury and/or damage requiring extensive repair that may not be covered under your Limited Warranty.
-
Page 26: Consumables
Consumables WARNING Do not throw a used toner cartridge into open flames, as this may cause toner • remaining inside the cartridge to ignite and result in burns or a fire. Do not store a toner cartridge or copy paper in places exposed to open flames, as •... - Page 27 xxiv...
-
Page 28: Before You Start
Before You Start CHAPTER This chapter describes the major features and basic functions of this printer. Features and Benefits........... . 1-2 Standard Features . -
Page 29: Features And Benefits
The auto color function that automatically detects color pages frees you from having to switch between the black-and-white mode and color mode. As a matter of course, LBP5970 is equipped with ColorGear, Canon's original color management system that recreates the colors as you expect. This system achieves the user-friendly control of color matching that corrects color by each element of text, photographs, and pictures that make up a document. -
Page 30: Network Printer
■ Network Printer Equipped with a 10BASE-T/100BASE-TX print server as standard. Because LBP5970 compatible with the TCP/IP, AppleTalk, SMB, and NetWare protocols, you can instantly use this printer as a network printer that supports various kinds of host/operating system environments. Also the high-speed DMA transfer that directly transfers data to the printer memory and automatic interface switch function enable fine printing process in a network environment. -
Page 31: Printer Drivers And Utilities
The supplied CD-ROM does not include the printer driver for Macintosh. Download the printer driver for Macintosh that supports this printer from the Canon website. If you cannot find the printer driver for Macintosh that supports this printer on the Canon website, contact your local authorized Canon dealer. -
Page 32: Optional Equipment
256 MB of memory. One expansion RAM module can be added, and the memory capacity can be expanded up to a maximum of 768 MB. It is recommended that you should use Canon Expansion RAM ER-128A, ER-256A, or ER-512A as the expansion RAM. - Page 33 ■ Hard Disk You can use a hard disk that can be built in the printer to save the received print jobs temporarily. By installing the hard disk, you can use various functions such as print job spooling, e-mail print, encrypted secured print, secured print, electronic sort, and RIP Once.
-
Page 34: Parts And Their Functions
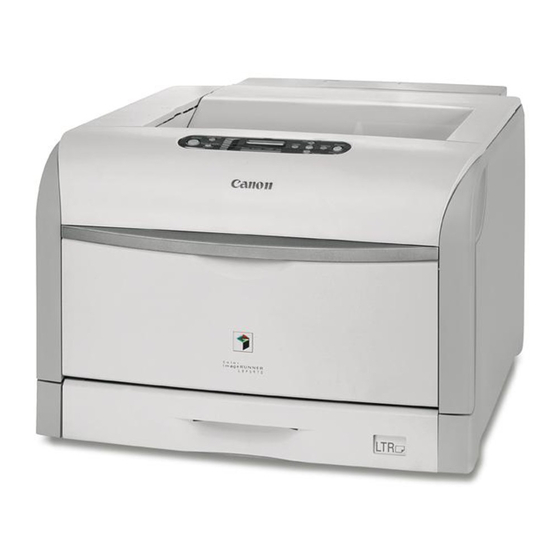
Parts and Their Functions This printer consists of components that perform various functions. This section describes the name and function of each part in order for you to use this printer properly to make full use of its functions. Printer Unit The following are the parts and functions of the printer unit. - Page 35 c c c c Paper Guides j j j j Power Switch Adjust the position of the paper guides to the width Turns the power of the printer ON/OFF. (See p. 2-2) of the paper loaded in the multi-purpose tray. You k k k k Lift Handles can load paper up to the load limit marks on this Hold these handles when moving the printer.
-
Page 36: Rear View
Rear View The following are the parts on the rear side of the printer and their functions. a a a a Ventilation Slots d d d d Rating Label Ventilate air to cool the insides of the printer. The current value indicated in this rating label shows the average power current consumption. -
Page 37: Inner View
Inner View The following are the parts inside the printer and their functions. a a a a ITB (Intermediate Transfer Belt) Unit d d d d Lock Release Button Transfers the toner of the four colors onto paper. Pressed when the top cover is opened. b b b b Fixing Unit (When laid) e e e e Serial Number Label Fixes toner onto paper. -
Page 38: Control Panel
Control Panel The control panel on the top of the printer allows you to check the printer status and use the printer functions. Cancel Job Online Power Utility Settings Feeder Selection Ready Message Main Power Reset g h i IMPORTANT Depending on the settings, the printer may operate differently from the description of the following "On menu operation". - Page 39 f f f f Ready Indicator (Green) k k k k [Job] ( ) Key On offline: The printer is ready to print. (If the printer has Does not function when the printer is offline. entered Power Save Mode when it is online, only the On online: Ready indicator (green) is on, and all the other Displays the JOB menu.
-
Page 40: Display
Display The display on the printer's control panel is shown as the following. It displays the printer status, messages, items and settings of the menu functions. When the printer is ready to print When operating the printer using the control panel 00 READY CONTROL MENU →... - Page 41 1-14 Parts and Their Functions...
-
Page 42: Using The Printer
Using the Printer CHAPTER This chapter describes the basic functions of this printer. Turning the Printer ON/OFF ..........2-2 Turning the Printer ON . -
Page 43: Turning The Printer On/Off
Turning the Printer ON/OFF The printer can be turned ON/OFF using the power switch on the right side of the printer body. Be sure to observe the following instructions in order to prevent unexpected problems. Turning the Printer ON To use this printer, press " " of the power switch to turn the printer ON. After running a self-diagnostic test on the printer unit and optional accessories, the printer will be ready to print. - Page 44 Press " " of the power switch on the printer. The indicators and display on the control panel come on, and the printer initiates a self-diagnostic test on the printer unit and optional accessories. If no abnormality is found during the self-diagnostic test, the Online indicator, Ready indicator and Paper Source indicator for the currently selected paper source come on, <00 READY>...
-
Page 45: Turning The Printer Off
Turning the Printer OFF Turn the printer OFF using the following procedure. The procedure for turning the printer OFF is different between when a hard disk is used and when it is not used. IMPORTANT When using the hard disk, be sure to turn the printer OFF as the procedure for the •... -
Page 46: When Using A Hard Disk (Only When A Hard Disk Is Installed)
Press " " of the power switch on the printer. When Using a Hard Disk (Only When a Hard Disk Is Installed) When using the optional hard disk, turn the printer OFF using the following procedure. IMPORTANT If you perform a shutdown when any job of which you stopped the operation or of •... -
Page 47: Power Saving (Power Save Mode)
Power Hold down the control panel power switch (sub power supply) on the control panel until <02 SHUTTING DOWN> is displayed, then release the switch. Hold down the switch (approximately 4 seconds) until <02 SHUTTING DOWN> is displayed. If the switch is released in less than 4 seconds, and POWER SAVE MODE is set to a setting value other than OFF, the printer enters Power Save Mode. -
Page 48: Setting The Printer To Power Save Mode
Setting the Printer to Power Save Mode There are the following four methods for setting the printer to Power Save Mode. Specify the time interval until the printer enters Power Setting the printer to Power Save Mode in POWER SAVE TIME. You can specify the Save Mode automatically time interval between 5 to 180 minutes. - Page 49 Settings for "POWER SAVE MODE" Types of Which Can be Entered Power Save Entering Conditions PANEL DEEP Mode SLEEP - The printer has already entered Power Save Mode 1. - The 10 minutes for which the printer is ready to print has elapsed since the printer was Power Save turned ON or Power Save...
-
Page 50: Releasing Power Save Mode
In the state that the SNTP or DHCP communication is going to be performed within a • minute or that the Wake Up function is going to be executed within a minute, the printer does not enter Power Save Mode 3. Releasing Power Save Mode The following are the methods to release Power Save Mode. -
Page 51: Online And Offline
Online and Offline When the printer can receive data from the computer and print the data, the printer is in the state of "Online", and when the printer is disconnected with the computer and cannot receive data, the printer is in the state of "Offline". To perform the settings for each menu using the control panel, switch the printer status as follows: : The status that you can enter the menu... -
Page 52: Placing The Printer Offline
NOTE If the printer has entered Power Save Mode, the Online indicator is off even when the printer is online, and only the Ready indicator is on. If the printer receives data while it is in Power Save Mode, the mode is released, the Online indicator comes on, and the printer is ready to print. -
Page 53: Direct Print
Direct Print Direct Print The direct print function is a function that transmits a file from the host terminal to the printer without the printer driver and allows the printer to detect the file and print. Therefore, you do not need to open a file to print. To perform printing, from the Remote UI, specify the PDF file, PS/EPS file, or image file in TIFF/JPEG format that you want to print. - Page 54 - Although the printer is compatible with PDF version 1.5, some of the functions are not supported by the printer. The PDF files of version 1.6 or later are processed by the functions compatible with the version 1.5 (However, some of the functions are excluded.).
- Page 55 SSL encrypted communication can be used only when an optional hard disk is • installed. To use SSL encrypted communication, a key and its certificate need to have been created and the key needs to have been registered as the default key. For details on the SSL encrypted communication function and the procedure for registering the default key, see "Remote UI Guide".
- Page 56 Select [PDF File] from the [Direct Print] menu. If IDs are managed on a departmental basis, a screen to enter [User Name] and [Password] appears. Enter [Department ID] and [Password] specified in [Department ID Management], and then click [OK]. Perform [Select the PDF File]. If specifying a file path (See p.
- Page 57 ❑ Click [Browse], select the PDF file, and then click [Open]. ❑ Proceed to Step 5. ● If specifying a URL ❑ Select [URL]. ❑ Enter the URL at which the PDF file to be printed is located. 2-16 Direct Print...
- Page 58 If you specified a URL which requires a user authentication, enter [User Name] and [Password]. ❑ Proceed to Step 5. NOTE When printing with a URL specified, you cannot print the next job until the PDF file • download finishes or the connection to the web server is disconnected. The protocol for printing with a URL specified supports only HTTP.
- Page 59 IMPORTANT If you try to print without entering the password, the error message <DA DATA • DECDE ER> is displayed and printing is canceled. If you want to print the PDF file which is prohibited to be printed, enter the master •...
- Page 60 Specify the settings for [Quality Settings] as the following, as needed. [Resolution] Specifies the resolution for when processing print data. [Gradation Level] Specifies the gradation level for printing data. Specify [High 1] when printing pictures or other data in general quality and specify [High 2] when printing in higher quality.
- Page 61 Specify the settings for [Color Settings] as the following, as needed. [Color Mode] Specifies whether to print in color or in black and white. [Render Color Specifies the method for rendering a PDF file. Space] [RGB Source Selects the profile appropriate for RGB data according to Profile] the monitor you are using.
- Page 62 [Use Black If the check box for this option is selected, the printer Overprinting] prints black text over a color background. If this option is used with [Use Pure Black Text], the printer prints all the background first, and then prints the text over the color background using only the black (Bk) toner.
- Page 63 [Fit to Page] If the check box for this option is selected, the printer prints with the page size of a PDF file reduced to fit within the printable area when the page size is larger than the printable area. Also, when the page size of a PDF file is smaller than the printable area, the printer prints with the page size expanded to the margins of the printable area.
-
Page 64: Printing The Ps/Eps File Using The Direct Print Function
Click [Start Print]. NOTE To reset the settings to the default values, click [Reset]. • Do not click [Start Print] repeatedly during the transmission of a PDF file. It may • take a long time to transmit a PDF file. If you click the button repeatedly during the transmission, you may have a problem with the PDF file, failing to transmit the file. - Page 65 NOTE If you are not sure about the IP address of the printer, ask your network • administrator. If the host name of the printer is registered in the DNS server, you can enter • ["hostname"."domain name"] instead of the IP address. Example: http://my_printer.xy_dept.company.com/ When you want to specify the settings with the Remote UI using SSL encrypted •...
- Page 66 Select [PS/EPS File] from the [Direct Print] menu. If IDs are managed on a departmental basis, a screen to enter [User Name] and [Password] appears. Enter [Department ID] and [Password] specified in [Department ID Management], and then click [OK]. Specify [File Path]. Click [Browse], select the file, and then click [Open].
- Page 67 Specify the settings for [Print Settings] as the following, as needed. [Color Mode] Specifies whether to print in color or in black and white. [Resolution] Specifies the resolution for when processing print data. [Copies] Enter the number of copies (1 to 9999) to be printed. [2-Sided Printing] Specifies whether the printer should perform automatic 2-sided printing.
-
Page 68: Printing The Image File Using The Direct Print Function
Click [Start Print]. NOTE To reset the settings to the default values, click [Reset]. • Do not click [Start Print] repeatedly during the transmission of a PS/EPS file. It may • take a long time to transmit a PS/EPS file. If you click the button repeatedly during the transmission, you may have a problem with the PS/EPS file, failing to transmit the file. - Page 69 - Unsupported encoding methods ITU-T recommendation T.82 JBIG ITU-T recommendation T.43 JBIG ITU-T recommendation T.44 MRC Run the web browser, enter the following URL in the address entry field, and then press the [ENTER] key on your keyboard. http://<the IP address of the printer>/ NOTE If you are not sure about the IP address of the printer, ask your network •...
- Page 70 Select the mode in which you want to log on to the Remote UI ([Administrator Mode] or [End-User Mode]), then click [OK]. If you select [Administrator Mode], enter the values for [Password], and then click [OK]. Select [Image File] from the [Direct Print] menu. If IDs are managed on a departmental basis, a screen to enter [User Name] and [Password] appears.
- Page 71 Specify [File Path]. Click [Browse], select the file, and then click [Open]. Specify the print range. If [Specify Print Range] is set to [All], entire range of the file is printed. If [Specify Print Range] is set to [Pages], data is printed on the print range specified by page number.
- Page 72 Specify the settings for [Print Settings] as the following, as needed. [Color Mode] Specifies whether to print in color or in black and white. [Copies] Enter the number of copies (1 to 9999) to be printed. [Paper Size] Specify the size of the paper to be printed. [Paper Type] Specify the type of the paper to be printed.
- Page 73 [2-Sided Printing] Specifies whether the printer should perform automatic 2-sided printing. If the check box for this option is selected, the printer prints on both sides of the paper. [Binding Location] Select the binding location for 2-sided printing from [Short Edge] and [Long Edge]. [Show Warnings] Select the display setting for the warning message in case of an error occurring from [Print], [Panel], and [Off].
-
Page 74: Direct Printing From Command Prompt
Direct Printing from Command Prompt You can perform direct printing from Command Prompt using LPR. Enter the command using the following format. You cannot use any other commands. lpr (a space) -P (a space) <the printer name> (a space) <the file name> The printer name: Enter the name of the printer. -
Page 75: E-Mail Print (Only When The Hard Disk Is Installed)
E-mail Print (Only When the Hard Disk Is Installed) E-mail Print E-mail print is a function in which this printer receives e-mails sent from the host terminal and prints the text as well as the attached files. Therefore, you do not need to use a printer driver or open the attached files to print. - Page 76 On e-mail print with this printer, JPEG data is in compliance with the specifications of • ITU-T recommendation T.81. TIFF data is in compliance with the specifications of Adobe TIFF Revision6.0 and IETF RFC2301 (File Format for Internet FAX). The e-mail print function of this printer supports Internet FAX Simple Mode. •...
-
Page 77: E-Mail Print Settings
E-mail Print Settings The settings related to e-mail print are as follows. You can specify the settings from the printer's control panel, the Remote UI, and FTP Client. For more details on the settings, see "Chapter 5 Printing Environment Settings", "Remote UI Guide", and "Network Guide". -
Page 78: Other Settings
■ Settings for Using the SMTP Protocol Setting Method Option Setting Control Remote Panel Client Specifies whether to enable the SMTP Receive e-mail print function. SMTP Server Specifies the port number for the Port Number server which receives e-mails. ■ Other Settings Setting Method Option Setting... -
Page 79: E-Mail Printing
E-mail Printing The method for receiving and printing e-mails varies depending on the protocol you are using. If You are Using the POP3 Protocol (See p. 2-38) • If You are Using the SMTP Protocol (See p. 2-41) • If You are Using the POP3 Protocol There are the following two methods for receiving and printing e-mails. - Page 80 Run the web browser, enter the following URL in the address entry field, and then press the [ENTER] key on your keyboard. http://<the IP address of the printer>/ NOTE If you are not sure about the IP address of the printer, ask your network •...
- Page 81 Select the mode in which you want to log on to the Remote UI ([Administrator Mode] or [End-User Mode]), then click [OK]. If you select [Administrator Mode], enter the values for [Password], and then click [OK]. From the [Device Manager] menu, select [Network]. 2-40 E-mail Print (Only When the Hard Disk Is Installed)
-
Page 82: If You Are Using The Smtp Protocol
Click [Receive E-mails]. The printer is connected to the mail server. The printer receives e-mails addressed to the printer and print them. If You are Using the SMTP Protocol If the printer receives e-mails, it prints them automatically. NOTE If you are using the SMTP protocol, you do not need to receive e-mails manually. Printing the E-mail Receive Log List You can print the e-mail receive log list. - Page 83 IMPORTANT If you format the hard disk using HDD MAINTENANCE in the [User Maintenance Menu] options in the SETUP menu, all the e-mail receive logs are erased. NOTE Up to 96 e-mail receive logs can be printed. • If an e-mail is not printed properly for some reason, an error code is printed in <Receive •...
- Page 84 Select [Administrator Mode], enter [Password], and then click [OK]. From the [Device Manager] menu, select [Status]. E-mail Print (Only When the Hard Disk Is Installed) 2-43...
- Page 85 Click [Utility] in the [Status] page. Select [Print Log List (E-mail Print) ], then click [Execute]. The e-mail receive log list is printed. 2-44 E-mail Print (Only When the Hard Disk Is Installed)
-
Page 86: When E-Mail Print Fails
When E-mail Print Fails If an e-mail is not printed properly for some reason, an error message appears in the display on the printer, the Remote UI, and N/W Status Print, or an error code is displayed in the e-mail receive log list. Apply the following remedies according to the displayed error message or code. - Page 87 ■ The error messages that appear in the display, Remote UI, and N/W Status Print Error Message Remote UI, Cause Remedy Display N/W Status Print Check the following points. - Whether the following settings in the [Network] page in the Could not Remote UI are correct POP3 Server...
- Page 88 Error Message Remote UI, Cause Remedy Display N/W Status Print The printer could not connect to EM E-MAIL the POP3 server Clear the hard disk error on the ERROR because an error POP3 server. had occurred in its hard disk. ■...
- Page 89 Error Code Cause Remedy An attached file in an Change the format of the attached file into TIFF unsupported format was or JPEG. sent. The number of the Reduce the number of the attached files to 14 attached files exceeded or less.
- Page 90 Error Code Cause Remedy The e-mail does not Enter the text. contain a text. The job was canceled Send the e-mail again. for some reason. An error has occurred Send the e-mail again. during the process. An error has occurred in See "Message List,"...
-
Page 91: Printing/Saving Jobs (Only When The Hard Disk Is Installed)
Printing/Saving Jobs (Only When the Hard Disk Is Installed) If you install an optional hard disk in this printer, you can use various print job process functions with the printer driver for this printer. NOTE You cannot use this function on the DOS application, UNIX or other computer on which the printer driver cannot be used. -
Page 92: Store] Mode
Remote UI. ■ [Edit and Preview] Mode This mode is used for editing multiple print jobs in [Canon PageComposer]. The edit function allows you to change the page order, display the preview of printout results, or print with the number of copies specified. This function is convenient when you print documents to make a simple booklet or edit and print document data from multiple applications or files into a booklet. -
Page 93: Printing With A Password Specified (Secured Print/Encrypted Secured Print)
Printing with a Password Specified (Secured Print/ Encrypted Secured Print) In a secured print or encrypted secured print, a password-protected job is saved in the printer, and the job is printed by the printer's control panel or Remote UI. For details on using the Remote UI, see "Remote UI Guide". - Page 94 Press [Job]. SECURED PRINT → The JOB menu is displayed. Utility Select SECURED PRINT or ENCRYPTED PRINT using [ ] and [ ], then press [OK]. Settings SECURED PRINT → UserName01 → Utility If the user names appear, select the target user name using ] and [ ], then press [OK].
-
Page 95: Printing A Job Saved In A Box (Stored Job Print)
Select a number using [ ] and [ ], then move a digit using ] and [ ]. Reset Repeat this operation to enter the password. Utility Settings NOTE Only numbers can be entered from the control panel. • Depending on the version of the encrypted secured print driver, you can specify •... - Page 96 Move to the printer when printing. Online Make sure that the printer is online. If the printer is not online, press [Online]. Press [Job]. SECURED PRINT → The JOB menu is displayed. Utility Select STOREJOB PRINT using [ ] and [ ], then press [OK]. Settings STOREJOB PRINT →...
- Page 97 Utility Select the name of the target file using [ ] and [ ], then press [OK]. Settings ListFile.doc → The specified file is printed. 2-56 Printing/Saving Jobs (Only When the Hard Disk Is Installed)
-
Page 98: Print Mode
Print Mode This printer has four emulation modes, "the PCL mode", "the PS mode", "the IMAGING mode", and "the PDF1.5 mode", and it detects received print data automatically and switches to the appropriate print mode and print. The printer switches the print mode by default normally. However, if the printer does not automatically switch the print mode successfully, change the setting. - Page 99 NOTE If the printer does not automatically switch the print mode successfully even after changing the setting, print with the print mode fixed at the appropriate one for the print data (See "MODE SELECTION," on p. 5-66). Settings Press [Settings]. SETUP CONTROL MENU →...
-
Page 100: Canceling A Job
Canceling a Job When a part of print data has already been sent to the printer, the print job may not be finished even if you cancel the job from the computer. In this case, you can output the data to finish the printing process of the printer or cancel the job being processed in the printer or all the jobs. -
Page 101: Canceling A Job (Cancel Job)
Press [Reset]. Reset RESET SOFT RESET → The RESET menu is displayed. Utility Select FORM FEED using [ ] and [ ], then press [OK]. Settings FORM FEED → The data remaining in the memory is printed. Canceling a Job (Cancel Job) If you want to cancel the job currently being printed, perform [Cancel Job] using the following procedure. -
Page 102: Canceling The Process Currently Being Performed (Soft Reset)
Cancel Job Press [Cancel Job]. When canceling the job, press [OK]. CANCEL? 03 CANCELING JOB 00 READY <03 CANCELING JOB> appears, and the print data being processed is canceled. The job is canceled when <00 READY> appears. IMPORTANT You cannot operate the printer while <03 CANCELING JOB> is displayed. Canceling the Process Currently Being Performed (Soft Reset) If you want to cancel the process currently being performed, perform [Soft Reset]... -
Page 103: Canceling All The Jobs (Hard Reset)
Utility Select SOFT RESET using [ ] and [ ], then press [OK]. Settings Holding down the [OK] key 3 seconds or more is the operation for HARD RESET. SOFT RESET → 03 SOFT RESET When <03 SOFT RESET> disappears, the soft reset is completed. Canceling All the Jobs (Hard Reset) When you want to delete all the jobs and data sent to memory for some reason, perform [Hard Reset] using the following procedure. - Page 104 Hold down [OK] until HARD RESET is displayed, then release the button. Hold down the button (approximately 3 seconds) until HARD RESET is displayed. Holding down the button less than 3 seconds is the operation for SOFT RESET. SOFT RESET HARD RESET 03 HARD RESET When <03 HARD RESET>...
- Page 105 2-64 Canceling a Job...
-
Page 106: Paper Loading And Output Tray
Paper Loading and Output Tray CHAPTER This chapter describes the types of paper that can be used with this printer, and how to load and output paper. Paper Requirements ........... . . 3-2 Usable Paper . -
Page 107: Paper Requirements
Paper Requirements Usable Paper To ensure optimum performance, use only paper that falls within the specifications in the following lists. Using inappropriate paper may result in deterioration in print quality or paper jams. IMPORTANT When continuously printing the paper of 279.4 mm wide (Letter size) or less, the safety function that prevents damages caused by heat may slow the print speed down in stages. - Page 108 Paper Information Cassette Cassette Cassette Paper Size Multi-purpose Cassette Tray (Optional) (Optional) (Optional) Custom Size Long Size* Envelope* Envelope DL 110.0 mm x 220.0 mm Envelope COM10 104.7 mm x 241.3 mm Envelope C5 162.0 mm x 229.0 mm Envelope Monarch 98.4 mm x 190.5 mm Envelope B5 176.0 mm x 250.0 mm...
-
Page 109: Paper Type
Paper Type The following shows the paper types that can be used with this printer. The symbol " " indicates the paper that can be used for 1-sided printing and automatic 2-sided printing, the symbol " " indicates the paper that can be used for only 1-sided printing, and the symbol "-"... - Page 110 ■ Label This printer can print A4 size labels. Labels can be fed from a paper cassette or the multi-purpose tray. IMPORTANT Do not use the labels in the following conditions. Using inappropriate labels may result in paper jams that are difficult to clear or may result in damage to the printer. - Peeled labels or partly used labels - Coated labels that are easily peeled off from the backing sheet - Labels with uneven adhesive...
- Page 111 When loading envelopes at a size of DL, COM10, C5, or Monarch, load them so that the • flap is toward the right of the printer when viewed from the front. When printing envelopes of the Envelope B5 size, close the flaps and load them so that •...
-
Page 112: Printable Area
Printable Area The following shows the printable area of this printer. However, if you are using the PS/UFR II printer driver and select the [Print with Upper Left of Sheet as Starting Point] check box, you can extend the printable area to near the edges of the paper. In order to specify the setting for [Print with Upper Left of Sheet as Starting Point], display the following dialog box. -
Page 113: Unusable Paper
■ Envelope The printable areas are as follows. You may have to change the printable area before printing depending on the application you use. (Sample: Envelope COM10) - UFR II/PCL 5c/PCL 6 Printer Driver - PS Printer Driver 241.3 mm 241.3 mm 10 mm 4 mm... -
Page 114: Storing Paper
Paper that damages the printer • - Carbon paper - Paper with staples, clips, ribbons or tapes - Paper that has already been printed by a copy machine or another laser printer (The reverse side of the paper is also unusable. Using the multi-purpose tray, however, you can perform 2-sided printing manually on the other side of previously printed paper. -
Page 115: Storing Printouts
Storing Printouts When handling or storing printouts printed by this printer, be careful of the following points: IMPORTANT Avoid storing printouts with PVC materials such as clear folders. Otherwise toner may • melt and stick to the PVC material. Use insoluble adhesive when gluing printouts. Toner may melt when soluble adhesive is •... -
Page 116: Paper Source
Paper Source This printer is supplied with two paper sources: the paper cassette (Cassette 1) and multi-purpose tray. By installing the optional paper feeders (Cassette 2, Cassette 3, and Cassette 4), you can use up to five paper sources. Paper Source Type This printer has the following paper sources: (A): Multi-purpose Tray (B): Cassette 1... -
Page 117: Paper Capacity Of Paper Source
Paper Capacity of Paper Source Paper Source Multi- Paper Type Cassette 2 Cassette 3 Cassette 4 purpose Cassette 1 (Optional) (Optional) (Optional) Tray Plain paper Approx. 90 Approx. 230 Approx. 550 Approx. 550 Approx. 550 (80 g/m sheets sheets sheets sheets sheets Heavy paper... -
Page 118: Precautions For Handling The Multi-Purpose Tray Or Paper Cassette
Feeder Selection Press [Feeder Selection]. PAPER SOURCE → PAPER SOURCE is displayed in the display. Utility Select PAPER SOURCE using [ ] and [ ], then press [OK]. Settings PAPER SOURCE → =AUTO → Utility Select the paper source using [ ] and [ ], then press [OK]. - Page 119 Do not put anything other than the printing paper on the multi-purpose tray. Also, do not • press on top of or apply excessive force to the multi-purpose tray. This may result in damage to the multi-purpose tray. Do not touch the black rubber pad in Cassette 1 and the paper feed rollers in Cassette 2, •...
- Page 120 NOTE Before closing the multi-purpose tray, remove any loaded paper. Keep the multi-purpose tray closed when it is not used. Paper Source 3-15...
-
Page 121: Output Trays
Output Trays Output Tray Printed paper is output to the output tray on the top of the printer with the printed side facing down. Printed paper piles in order of page. CAUTION Keep your hands or clothing away from the roller in the output area. Even if the printer is not printing, sudden rotation of the roller may catch your hands or clothing, resulting in personal injury. -
Page 122: Paper Capacity Of The Output Tray
Paper Capacity of the Output Tray Paper Type Paper Capacity* Plain paper (Ex. 80 g/m Approx. 250 sheets Heavy paper (Ex. 128 g/m Approx. 200 sheets Coated paper Approx. 150 sheets Label Approx. 100 sheets Envelope Approx. 20 sheets *1 Actual paper capacity varies depending on the installation environment or paper type. Output Trays 3-17... -
Page 123: Loading Paper In The Paper Cassette
Loading Paper in the Paper Cassette When printing from the paper cassette, perform the following procedure. ■ Loading paper The following kinds of paper can be loaded in the paper cassette. Paper Type Paper Size Loading Procedure A3, B4, A4, B5, A5, Ledger (11 Loading in Cassette 1: p. -
Page 124: Precautions On Loading Paper
Precautions on Loading Paper Load paper when the printer status is in any of the following. When the Job indicator is blinking, the printer is printing. Do not pull out the paper cassette. IMPORTANT Be sure not to open the covers or paper cassette during printing. The printer may stop, disabling printing. -
Page 125: Loading Paper In Cassette 1
Loading Paper in Cassette 1 Pull out the paper cassette. Pull the paper cassette out until it stops a . After lifting the paper cassette up a little b , pull it out while supporting it with the other hand c as shown in the figures. 3-20 Loading Paper in the Paper Cassette... -
Page 126: Paper Guides
CAUTION Be sure to take the paper cassette out of the printer before loading paper. If paper is loaded while the paper cassette is partially pulled out, the paper cassette may drop or the printer may become damaged resulting in personal injury. - Page 127 ● Adjust the length of the paper cassette according to the size of the paper to be loaded. When loading paper in landscape orientation, such as when loading A4, B5, A5, Letter, or Executive size paper, shorten the paper cassette. When loading paper in portrait orientation, such as when loading A3, B4, Ledger (11 x 17), or Legal size paper, extend the paper cassette.
- Page 128 ● While holding the lock release lever of the side paper guides slide the guides to the mark for the size of the paper to be loaded The side paper guides move together. Top View Top View Align this part with the size of the paper to be loaded.
-
Page 129: Paper Guide
Load the paper stack so that the rear edge is aligned with the paper guide. CAUTION When loading paper, take care not to cut your hands with the edges of the paper. IMPORTANT Be sure to check if the paper guide is at the position of the size of the loaded paper. •... - Page 130 Press down the paper stack so that it is loaded under the hooks on the side paper guides (A). Make sure that there is sufficient space between the hooks and paper stack. If there is no sufficient space, slightly reduce the amount of paper. IMPORTANT Up to approximately 230 sheets of plain paper (80 g/m ) or approximately 50...
- Page 131 While holding the tab (B) on the paper size setting switch (A) , align the triangular mark on the paper size setting switch with the size of the loaded paper The following shows the abbreviations of paper sizes that are marked on the paper cassette.
- Page 132 Set the paper cassette in the printer. While holding the paper cassette with both hands, insert it until it stops a as shown in the figure. After lifting the front of the paper cassette up a little b , push the paper cassette into the printer firmly until the front side of the paper cassette is flush with the front surface of the printer c .
-
Page 133: Loading Standard Size Paper In Cassette 2, 3, Or 4
Next, specify the type of the paper in the paper cassette (See p. 3-46). Loading Standard Size Paper in Cassette 2, 3, or 4 Pull out the paper cassette. Pull the paper cassette out until it stops a. 3-28 Loading Paper in the Paper Cassette... - Page 134 After lifting the front of the paper cassette up a little b, pull it out while supporting the cassette with your left hand until the handle (A) on the right side of the paper cassette appears completely c. While holding the paper cassette with both hands, pull it out completely d as shown in the figure.
- Page 135 IMPORTANT The paper cassette cannot be pulled out horizontally. If you try to pull it out • forcefully, this may result in damage to the paper cassette. Because the paper cassette is heavy, hold it with your both hands securely. •...
- Page 136 ● While holding the lock release lever of the side paper guides slide the guides to the mark for the size of the paper to be loaded The side paper guides move together. Before loading labels, fan them in small batches and align the edges.
- Page 137 Load the paper stack so that the rear edge is aligned with the paper guide. CAUTION When loading paper, take care not to cut your hands with the edges of the paper. IMPORTANT Be sure to check if the paper guide is at the position of the size of the loaded paper. •...
- Page 138 Press down the paper stack so that it is loaded under the hooks on the side paper guides (A). Make sure that there is sufficient space between the hooks and paper stack. If there is no sufficient space, slightly reduce the amount of paper. IMPORTANT Up to approximately 550 sheets of plain paper (80 g/m ) or approximately 50...
- Page 139 While holding the tab (B) on the paper size setting switch (A) , align the triangular mark on the paper size setting switch with the size of the loaded paper The following shows the abbreviations of paper sizes that are marked on the paper cassette.
- Page 140 Set the paper cassette in the paper feeder. While holding the paper cassette with both hands, push it to the position shown in the figure a. Then, hold the front of the paper cassette with your right hand and push it until it stops b. Loading Paper in the Paper Cassette 3-35...
- Page 141 After lifting the front of the paper cassette up a little c, push the paper cassette into the printer firmly until the front side of the paper cassette is flush with the front surface of the paper feeder d. CAUTION When setting the paper cassette in the paper feeder, be careful not to catch your fingers.
-
Page 142: Loading Custom Size Paper Or Paper At A Size Of 8K Or 16K In Cassette 2, 3, Or 4
Loading Custom Size Paper or Paper at a Size of 8K or 16K in Cassette 2, 3, or 4 You can load paper of the following custom sizes. When loading paper in portrait orientation: Width 210.0 to 297.0 mm; Length •... - Page 143 Pull out the paper cassette. Pull the paper cassette out until it stops a. 3-38 Loading Paper in the Paper Cassette...
- Page 144 After lifting the front of the paper cassette up a little b, pull it out while supporting the cassette with your left hand until the handle (A) on the right side of the paper cassette appears completely c. While holding the paper cassette with both hands, pull it out completely d as shown in the figure.
- Page 145 IMPORTANT The paper cassette cannot be pulled out horizontally. If you try to pull it out • forcefully, this may result in damage to the paper cassette. Because the paper cassette is heavy, hold it with your both hands securely. •...
- Page 146 Slide the paper guides. ● While holding the lock release lever of the rear paper guide , slide the guide to the mark for the size of the paper to be loaded ● While holding the lock release lever of the side paper guides slide the guides to the mark for the size of the paper to be loaded The side paper guides move together.
- Page 147 IMPORTANT Be sure to align the paper guides with the width of the paper. If the paper guides are too loose or too tight, this may result in misfeeds or paper jams. Press down the paper stack so that it is loaded under the hooks on the side paper guides (A).
- Page 148 While holding the tab (B) on the paper size setting switch (A) , align the triangular mark on the paper size setting switch with "CUSTOM" The default value is "A3". CUSTOM IMPORTANT Make sure that the paper size setting switch is set to "CUSTOM" before setting the paper cassette in the printer.
- Page 149 Set the paper cassette in the paper feeder. While holding the paper cassette with both hands, push it to the position shown in the figure a. Then, hold the front of the paper cassette with your right hand and push it until it stops b. 3-44 Loading Paper in the Paper Cassette...
- Page 150 After lifting the front of the paper cassette up a little c, push the paper cassette into the printer firmly until the front side of the paper cassette is flush with the front surface of the paper feeder d. CAUTION When setting the paper cassette in the paper feeder, be careful not to catch your fingers.
-
Page 151: Specifying The Type Of The Paper In The Paper Cassette
Utility Select CASSETTE(n) SIZE (n = 2, 3, 4) using [ ] and [ ], then press [OK]. Settings CASSETTE2 SIZE → =CUSTOM SIZE → Utility Select the paper size using [ ] and [ ], then press [OK]. Settings CUSTOM SIZER →... - Page 152 IMPORTANT Match the paper type specified in the SETUP menu in the printer and that specified in the • printer driver. If they do not match, the message <PC LOAD "size"> appears. In this case, the setting value for CASSETTE(n) TYPE (n = 1, 2, 3, 4) is changed to that in the printer driver by pressing [Online], allowing you to continue printing.
-
Page 153: Loading Paper In The Multi-Purpose Tray
Loading Paper in the Multi-purpose Tray When printing from the multi-purpose tray, perform the following procedure. Loading paper The following kinds of paper can be loaded in the multi-purpose tray. Paper Type Paper Size Loading Procedure Plain paper - Standard sizes Heavy paper A3, B4, A4, B5, A5, 12 x 18, (106 - 169 g/m... -
Page 154: Loading Paper (Other Than Envelopes)
IMPORTANT For more details on the usable paper, see "Usable Paper," on p. 3-2. • For details on how to handle the multi-purpose tray, see "Precautions for Handling the • Multi-purpose Tray or Paper Cassette," on p. 3-13. NOTE If you are printing from an operating system on which the printer driver cannot be used, previously specify the paper source to TRAY. - Page 155 When loading long-size paper such as A3 and A4, pull out the auxiliary tray a, and then open the tray extension b. Spread the paper guides a little wider than the actual paper width. 3-50 Loading Paper in the Multi-purpose Tray...
- Page 156 Before loading coated paper or labels, fan them in small batches and align the edges. Thoroughly fan in small batches Tap the edges on a flat surface a few times CAUTION When loading paper, take care not to cut your hands with the edges of the paper.
- Page 157 CAUTION When loading paper, take care not to cut your hands with the edges of the paper. IMPORTANT When loading long size paper, load one piece at a time in the multi-purpose tray as • shown in the figure. The multi-purpose tray can be loaded with up to the number of sheets listed below. •...
-
Page 158: Align The Paper Guides With Both Sides Of The Stack
NOTE If you want to print custom size paper of its long edges 297.0 mm or less when • TRAY PAPER SIZE in the FEEDER MENU options in the SETUP is set to MIXED SIZES, specify the settings according to the printer driver you are using as follows. - When using UFR II Printer Driver: Load the paper in landscape orientation - When not using UFR II Printer Driver: Load the paper in portrait orientation To print paper with letterheads or logos, see "Paper Loading Orientation"... -
Page 159: Loading Envelopes
Loading Envelopes You can load envelopes at sizes of DL, COM10, C5, Monarch, and B5 in the multi-purpose tray. Use the following procedure when loading envelopes in the multi-purpose tray. IMPORTANT The envelopes that can be used with this printer are Envelope DL, Envelope COM10, •... - Page 160 Open the multi-purpose tray. Holding the opening at the center of the printer, open the multi-purpose tray. Spread the paper guides a little wider than the actual envelope width. Loading Paper in the Multi-purpose Tray 3-55...
- Page 161 Place the stack of envelopes on a flat surface, flatten them to release any remaining air, and be sure that the edges are pressed tightly. CAUTION When loading paper, take care not to cut your hands with the edges of the paper.
- Page 162 Gently load the stack of envelopes with the address side facing down and with the flaps closed and on the right side, until it touches the back of the multi-purpose tray as shown in the figure. IMPORTANT Up to approximately 10 envelopes can be loaded in the multi-purpose tray. Make •...
- Page 163 When printing envelopes of the Envelope B5 size, close the flaps and load them so • that the envelopes are printed from the top (the edge with the flap). Align the paper guides with both sides of the stack. IMPORTANT Be sure to align the paper guides with the width of the envelopes.
-
Page 164: Specifying The Size Of The Paper In The Multi-Purpose Tray
Specifying the Size of the Paper in the Multi-purpose Tray When you loaded paper in the multi-purpose tray, specify the paper size for the multi-purpose tray using the control panel. When using paper or envelopes of standard size, specify its size. When loading non-standard size paper, specify CUSTOM SIZE or CUSTOM SIZER. - Page 165 Settings Press [Settings]. SETUP CONTROL MENU → Utility Select FEEDER MENU using [ ] and [ ], then press [OK]. Settings FEEDER MENU → TRAY PAPER SIZE→ Utility Select TRAY PAPER SIZE using [ ] and [ ], then press [OK]. Settings TRAY PAPER SIZE→...
-
Page 166: Specifying The Type Of The Paper In The Multi-Purpose Tray
Specifying the Type of the Paper in the Multi-purpose Tray When you loaded paper in the multi-purpose tray, specify the setting for TRAY PAPER TYPE according the paper type using the control panel. The printer applies the appropriate print mode to the paper type. The default value is PLAIN PAPER. Common SETUP Menu Paper Type Setting for TRAY PAPER TYPE... - Page 167 Utility Select FEEDER MENU using [ ] and [ ], then press [OK]. Settings FEEDER MENU → TRAY PAPER SIZE→ Utility Select TRAY PAPER TYPE using [ ] and [ ], then press [OK]. Settings TRAY PAPER TYPE→ =PLAIN PAPER →...
-
Page 168: 2-Sided Printing
2-sided Printing You can perform 2-sided printing with the standard equipment of this printer. Automatic 2-sided printing can be performed on plain paper at sizes of A3, B4, A4, B5, A5, Legal, Ledger (11 x 17), Statement, Letter, Executive, 8K, and 16K. The following custom paper sizes of plain paper can be used for automatic 2-sided printing. -
Page 169: Switching Between Automatic 2-Sided Printing And 1-Sided Printing
NOTE Depending on the capacity of the RAM in the printer, the print quality may deteriorate, or • the printer may not be able to print, displaying <SPL MEM.FULL> when performing automatic 2-sided printing on documents that make heavy use of lines or contain complicated diagrams, charts, or graphs. -
Page 170: Manual 2-Sided Printing
Utility Select 2-SIDED PRINT. using [ ] and [ ], then press [OK]. Settings 2-SIDED PRINT. → =OFF → Utility Select ON using [ ] and [ ], then press [OK]. Settings → → "=" is displayed on the left of ON, and 2-sided printing is specified. Manual 2-sided Printing Since this printer can print on the other side of previously printed paper, you can perform 2-sided printing on paper to which automatic 2-sided printing cannot be... - Page 171 Settings Press [Settings]. SETUP CONTROL MENU → Utility Select FEEDER MENU using [ ] and [ ], then press [OK]. Settings FEEDER MENU → TRAY PAPER SIZE→ Utility Select MANUAL 2-SIDED using [ ] and [ ], then press [OK]. Settings MANUAL 2-SIDED →...
-
Page 172: Printing With A Gutter
Printing with a Gutter You can print with a margin for a gutter applied to an edge of paper. When applying a gutter, specify the location (long edge or short edge) and the width (maximum: 50 mm). Binding location for when using Binding location for when using paper in portrait orientation paper in landscape orientation... -
Page 173: Specifying A Gutter
Specifying a Gutter ■ When printing from Windows Specify the following settings in the printer driver. For details on using the printer driver, see Help of the printer driver. 1. Display the [Finishing] sheet in the printer driver. 2. Specify [Binding Location]. 3. - Page 174 Utility Select the target binding location using [ ] and [ ], then press [OK]. Settings SHORT EDGE → =SHORT EDGE → The selected binding location is specified. Utility Select GUTTER using [ ] and [ ], then press [OK]. Settings GUTTER →...
-
Page 175: Paper Loading Orientation
Paper Loading Orientation To print paper with letterheads or logos, load the paper in the proper orientation as follows. in the table indicates the feeding directions. Loading A4, B5, A5, Letter, or Executive size Loading A3, B4, Ledger (11 x 17), or Legal size paper in landscape orientation paper in portrait orientation Portrait Layout... - Page 176 If you want to print custom size paper of its long edges 297.0 mm or less when • CASSETTE(n) SIZE (n = 2, 3, 4) or TRAY PAPER SIZE in the FEEDER MENU options in the SETUP menu is set to MIXED SIZES, specify the settings according to the printer driver you are using as follows.
- Page 177 3-72 Paper Loading Orientation...
-
Page 178: The Printing Environment
The Printing Environment CHAPTER This chapter describes the functions and categories of the menu displayed in the printer's control panel, how to use the operation keys, and how to view the display. Menu Functions ............4-2 Menu Functions . -
Page 179: Menu Functions
Menu Functions This section describes the menu functions and their categories. Menu Functions Before printing, specify the total print pages, paper size, etc. Generally, these settings are specified in an application or printer driver. This printer, however, is equipped with many functions as well as the settings for the total print pages and paper size, enabling printing for a wide array of uses. -
Page 180: Setting Priority
Setting Priority When the setting values for the same option are different between an application or the printer driver and the menu functions, the setting specified in the application or printer driver is effective. When specifying a setting only in the menu functions using the control panel or the Remote UI, the most recently specified setting is effective. -
Page 181: Menu Categories
Menu Categories There are the following six categories of the menu. For the functions and operation procedures, see "Menu Functions and Menu Operation," on p. 4-9. For details on each menu, see "Chapter 5 Printing Environment Settings". CANCEL JOB Menu UTILITY Menu JOB Menu Cancels the job currently being... -
Page 182: How To Use The Operation Keys
How to Use the Operation Keys Use the following keys for the menu operation. Among the keys, [Setting], [Utility], [Job], [Reset], [Cancel Job], and [Feeder Selection] have the function to display a menu. CANCEL JOB Menu JOB Menu Display SETUP Menu Cancel Job Online Power... - Page 183 Functions Immediately after Utility When the printer While the menu is placing the printer is online displayed* online (Utility) Displays the next left item in the same hierarchy. When the setting value is numeric, Displays the reduces the value. If you UTILITY menu.
-
Page 184: How To View The Display
How to View the Display This section describes the contents of the letters that appear in the display when specifying the menu functions. Menu Structure The menu structure looks like a chain (loop structure), and one of the menus on this chain is displayed in the display. - Page 185 If no action is taken after the lowest hierarchy in the menu is displayed, the item of the next upper hierarchy and that of the currently selected hierarchy are displayed alternately. POWER SAVE MODE PANEL OFF → "=" is displayed on the left in the display for the currently selected setting. How to View the Display...
-
Page 186: Menu Functions And Menu Operation
Menu Functions and Menu Operation This section describes the overview of the menus and operating procedures for them. SETUP Menu This section describes the function of the SETUP menu and the operating procedure for it. SETUP Menu Functions The SETUP menu allows you to configure a variety of printing environment such as printing position, type of character set, and the selection of the interface for connecting the printer to the computer. - Page 187 Display the SETUP menu. Press [Settings]. The SETUP menu is displayed. SETUP CONTROL MENU → Select the option. Press [ ] or [ ]. When the FEEDER MENU options are selected The target option is displayed. FEEDER MENU → Display the item. Press [OK].
-
Page 188: Utility Menu
UTILITY Menu This section describes the function of the UTILITY menu and the operating procedure for it. UTILITY Menu Functions The UTILITY menu allows you to print the settings for the SETUP menu or perform cleaning. NOTE For more details on the settings, see "UTILITY Menu Settings," on p. 5-104. Operating Procedure for the UTILITY Menu The UTILITY menu consists of two hierarchies: "Common Utilities"... -
Page 189: Job Menu
Select the Exclusive Utility. Press [ ] or [ ]. When FONTS LIST is selected The target Exclusive Utility is displayed. FONTS LIST → Determine the selected setting. Press [OK]. A fonts list is printed. NOTE If you did not select the Exclusive Utility (PCL UTILITY, PS UTILITY), Step 4 to 5 are •... -
Page 190: Reset Menu
Select the item that you want to print. Press [ ] or [ ]. When JOB LOG LIST is selected The target item is displayed. JOB LOG LIST → Print JOB LOG LIST. Press [OK]. JOB LOG LIST is printed. NOTE If you press [Online] during the setting, the setting is canceled. -
Page 191: Cancel Job Menu
Determine the selected item. Press [OK]. A soft reset is performed. NOTE HARD RESET is displayed after you keep holding down [OK] 3 seconds or more when SOFT RESET is displayed in the display. CANCEL JOB Menu This section describes the function of the CANCEL JOB menu and the operating procedure for it. -
Page 192: Select Feeder Menu
Execute the job cancel process. Press [OK]. Pressing [OK] starts the job cancel process. 03 CANCELING JOB When not executing the cancel job process, press any key other than [OK]. After completing the job cancel, the printer is ready to print. SELECT FEEDER Menu This section describes the function of the SELECT FEEDER menu and the operating procedure for it. - Page 193 Select the setting. Press [ ] or [ ]. When B5 is selected The target setting is displayed. → Determine the selected setting. Press [OK]. 4-16 Menu Functions and Menu Operation...
-
Page 194: Checking The Counter
Checking the Counter You can check the number of the printed pages using the control panel. Check the counter by selecting COUNTER CHECK in the hierarchy of "Options" in the SETUP menu. This section describes the procedure for checking the number of pages in color printing (large size) as an example. -
Page 195: Initializing The Setup Menu
Initializing the SETUP Menu Initialization of the SETUP menu resets the settings specified in the SETUP menu to the default settings. Initialize the menu by selecting INITIALIZE MENU in the hierarchy of "Options" in the SETUP menu. Start the key operation from Step 1. Operation Procedure Key Operation Display the SETUP menu. - Page 196 NOTE If you press [Online] during the setting, the setting is canceled. However, you cannot • cancel the setting when <INITIALIZING> is displayed even if you press [Online]. The following items in the common SETUP menu are not initialized. • - ADJ.START POS., SP.S-SIZE MODE1, and SP.S-SIZE MODE2 in the USER MAIN.
- Page 197 4-20 Initializing the SETUP Menu...
-
Page 198: Printing Environment Settings
Printing Environment Settings CHAPTER This chapter describes the options that you can specify on the printer's control panel. Setting Items............5-2 SETUP Menu . -
Page 199: Setting Items
Setting Items SETUP Menu ■ CONTROL MENU Options Applicable Item Settings Page POWER SAVE MODE ON*, DEEP SLEEP, OFF, PANEL OFF p. 5-18 PWR SAVE IN ERR ON*, OFF p. 5-19 10 minutes*, 15 minutes, 30 minutes, 60 POWER SAVE TIME p. - Page 200 TIMER SETTINGS WAKE UP TIMER OFF*, ON p. 5-23 WAKE UP TIME 00:00 to 23:59 p. 5-24 POW. SAVE TIMER OFF*, ON p. 5-24 POWER SAVE TIME 00:00 to 23:59 p. 5-25 CALIBRATE TIMER OFF*, ON p. 5-25 CALIBRATE TIME 00:00 to 23:59 p.
-
Page 201: Layout Menu Options
INVLDPAPER TRAY OFF*, ON p. 5-32 TRAY: ON*, OFF CASSETTE 1: ON*, OFF AUTO SELECTION CASSETTE 2* : ON*, OFF p. 5-33 CASSETTE 3* : ON*, OFF CASSETTE 4* : ON*, OFF PLAIN PAPER*, PLAIN PAPER L, HEAVY STD PAPER TYPE PAPER 1, HEAVY PAPER 2, ENVELOPE, p. - Page 202 ■ QUALITY MENU Options Applicable Item Settings Page RESOLUTION FINE*, SUPER FINE p. 5-43 GRADATION LEVEL HIGH 1* * , HIGH 2* , STANDARD* p. 5-44 TONER SAVE OFF*, ON p. 5-44 DENSITY: CYAN 1 to 16; 9* p. 5-45 DENSITY: MAGENTA 1 to 16;...
- Page 203 TEXT: sRGB_v1.31*, HDTV_gamma_1.5, HDTV_gamma_1.8, HDTV_gamma_2.4, Download Profile* GRAPHICS: sRGB_v1.31*, HDTV_gamma_1.5, RGB SRCE PROF. p. 5-50 HDTV_gamma_1.8, HDTV_gamma_2.4, Download Profile* IMAGE: sRGB_v1.31*, HDTV_gamma_1.5, HDTV_gamma_1.8, HDTV_gamma_2.4, Download Profile* TEXT: Normal*, Photo OUTPUT PROFILE GRAPHICS: Normal*, Photo p. 5-51 IMAGE: Photo*, Normal TEXT: SATURATION*, COLORIMETRIC, PERCEPTUAL GRAPHICS:...
- Page 204 ■ INTERFACE MENU Options Applicable Item Settings Page USB: ON*, OFF I/F CONNECTION p. 5-55 NETWORK: ON*, OFF MODE TIMEOUT OFF, 5 to 300 seconds; 15 seconds* p. 5-56 Setting Items...
- Page 205 NETWORK MENU* IP V. 4 SETTING: IP MODE..........MANUAL*, AUTO PROTOCOL* DHCP ............. OFF*, ON BOOTP ............OFF*, ON RARP ............. OFF*, ON IP SETTINGS: IP ADDRESS............0.0.0.0* SUBNET MASK..........0.0.0.0* GATEWAY ADDRESS ........0.0.0.0* IP ADD.RANGE: REJECT RX/PRT ........... OFF*, ON REJECT ADD.SET.* .........
- Page 206 NETWARE: OFF*, ON FRAME TYPE: AUTO DETECT*, ETHERNET 2, ETHERNET NETWARE SETTING p. 5-62 802.2, ETHERNET 802.3, ETHERNET SNAP PRINT SERVICE: NDS PSERVER*, NPRINTER, BINDERYPSERVER, RPRINTER APPLETALK OFF*, ON p. 5-62 SMB SERVER: OFF*, ON p. 5-62 SMB* OFF*, ON SNMP V.
-
Page 207: Print Mode Options
EXTENSION CARD* p. 5-66 CONNECT.RECOG. ON*, OFF p. 5-66 EXT.RX BUFFER* OFF*, ON p. 5-66 An asterisk (*) indicates the default setting. May not be displayed depending on the availability of the optional accessories and other settings. ■ PRINT MODE Options Applicable Item Settings... - Page 208 SP.S-SIZE MODE2 -2 to 2; 0* p. 5-72 CLEANING p. 5-72 HDD MAINTENANCE* HDD ALL ERASE OFF*, ON p. 5-73 QUICK FORMAT* p. 5-73 STD FORMAT p. 5-74 SP.PRINT MODE PLAIN PAPER OFF*, MODE 1, MODE 2, MODE 3 p. 5-74 COATED PAPER OFF*, ON p.
- Page 209 98.0 to 320.0 mm; 320.0 mm* X DIMENSION* p. 5-77 (3.86 to 12.60 inches; 12.60 inches*) 139.7 to 1200.0 mm; 457.2 mm* Y DIMENSION* p. 5-78 (5.50 to 47.24 inches; 18.00 inches*) APPEND CR TO LF NO*, YES p. 5-78 ENLRG A4 WIDTH OFF*, ON p.
- Page 210 ■ PDF1.5 Options IMPORTANT The PDF1.5 menu is displayed when all the following optional accessories are installed. - Hard Disk - PS ROM or PS/Barcode ROM - RAM (ER-256A, ER-512A) Applicable Item Settings Page RENDER CL SPACE AUTO*, CMYK p. 5-84 sRGB*, GAMMA 1.5, GAMMA 1.8, GAMMA RGB SRCE PROF.
- Page 211 TEXT: RESOLUTION*, GRADATION, COLOR TONE, HIGH RESOL., ERR DIFFUSION* GRAPHICS: COLOR HALFTONES COLOR TONE*, HIGH RESOL., ERR p. 5-93 DIFFUSION* , RESOLUTION, GRADATION IMAGE: COLOR TONE*, HIGH RESOL., ERR DIFFUSION* , RESOLUTION, GRADATION COMMENT PRINT AUTO*, ON, OFF p. 5-94 SMOOTHING (AST): SMOOTH *, SMOOTH 2, OFF...
-
Page 212: Utility Menu
TEXT: RESOLUTION*, GRADATION, COLOR TONE, HIGH RESOL., ERR DIFFUSION* GRAPHICS: B & W HALFTONES GRADATION*, COLOR TONE, HIGH p. 5-100 RESOL., ERR DIFFUSION* , RESOLUTION IMAGE: GRADATION*, COLOR TONE, HIGH RESOL., ERR DIFFUSION* , RESOLUTION TEXT: RESOLUTION*, GRADATION, COLOR TONE, HIGH RESOL., ERR DIFFUSION* GRAPHICS: COLOR HALFTONES COLOR TONE*, HIGH RESOL., ERR... -
Page 213: Job Menu
PAGE COUNT LIST* p. 5-107 TEST CHART 1 p. 5-107 TEST CHART 2 p. 5-108 May not be displayed depending on the availability of the optional accessories and other settings. Not displayed depending on the printer you are using. JOB Menu Applicable Item Settings... -
Page 214: Select Feeder Menu
SELECT FEEDER Menu Applicable Item Settings Page AUTO*, CASSETTE 1, CASSETTE 2* PAPER SOURCE p. 5-117 CASSETTE 3* , CASSETTE 4* ,TRAY A4*, B4, A3, LTR, LGL, LDR, EXEC, 305 x 457 mm, MIXED SIZES, CUSTOM SIZE, CUSTOM TRAY PAPER SIZE SIZE R, ENV. -
Page 215: Setup Menu Settings
SETUP Menu Settings CONTROL MENU Options POWER SAVE MODE ON*, DEEP SLEEP, OFF, PANEL OFF Specifies whether the printer should use Power Save Mode. There are three types of Power Save Mode, and the type of the mode the printer enters depends on the setting for this item. -
Page 216: Power Save Time
NOTE For details on Power Save Mode, see "Power Saving (Power Save Mode)," on p. • 2-6. You can specify whether the printer should enter Power Save Mode when an error • is occurring in the printer (when the Message indicator is on, or the number in the message blinks). -
Page 217: Panel Language
WARNING STEP CHECK TONER ....CONT.PRINTING*, STOP PRINTING Specifies whether the printer should continue or stop printing when the following message appears. Warning Message Printer Status <16 PREP."color" TNR> The toner cartridge is nearing the end of its life and ("color"... -
Page 218: Show Warnings
SHOW WARNINGS CHECK TONER ....ON*, OFF CHECK FIX.UNIT ....ON*, OFF CHK WST TNR CTN.....ON*, OFF CHECK DRUM......ON*, OFF CASSETTE EMPTY .....ON*, OFF E-MAIL TRAN.ERR* ....ON*, OFF *1 E-MAIL TRAN.ERR is displayed only when an optional hard disk is installed. A Warning status is a status in which the printer requires some remedy although the job is not affected. -
Page 219: Date And Time
DATE AND TIME ■ DATE SETTING 01/01/2001 to 31/12/2089 This printer has a clock function. This clock is used for the printer maintenance and job history management. Specify date in this item when the clock is not keeping correct date. NOTE Date is set before shipment. -
Page 220: Time Zone
NOTE In some countries and regions, time is advanced throughout the summer season. The period in which this is applied is called "Daylight Saving Time". ■ TIME ZONE GMT-12 to GMT+12 Specifies the time zone according to the region where the printer is being used. IMPORTANT After changing the settings for this item, cycle the power of the printer or perform a hard reset to make the settings effective. -
Page 221: Wake Up Time
■ WAKE UP TIME 00:00 to 23:59 If WAKE UP TIMER (See the previous item) is set to ON, Power Save Mode (the Panel Off mode, the Printer Power Save mode, and the Deep Sleep mode) is released when the time specified in this item has elapsed. This item is convenient if you want to release the printer from Power Save Mode (the Panel Off mode, the Printer Power Save mode, and the Deep Sleep mode) on the same time every day. -
Page 222: Hard Disk
■ POWER SAVE TIME 00:00 to 23:59 If POW. SAVE TIMER (See the previous item) is set to ON, the printer enters Power Save Mode 1 (the Panel Off mode) when the time specified in this item has elapsed. This item is convenient if you want to set the printer to Power Save Mode 1 (the Panel Off mode) on the same time everyday. -
Page 223: Interrupt Print
Secured print (See p. 5-110) • Encrypted secured print (See p. 5-109) • RIP Once (See p. 5-27) • Spooler (See p. 5-64) • SMB printing (See p. 5-62) • Using SSL for communication by the Remote UI (See p. 5-64) •... -
Page 224: Secured Type
NOTE As well as secured print data, encrypted secured print data is also deleted when • the time specified in this item has elapsed. Print secured print data using SECURED PRINT (See p. 5-110) in the UTILITY • menu or the Remote UI. Secured print data is deleted by turning the printer OFF or performing a hard reset •... -
Page 225: Quiet Mode
NOTE This function may have little effect on printing relatively simple data such as the one • that contains only text or small amount of copies. This item is displayed only when an optional hard disk is installed, and HARD DISK •... -
Page 226: Feeder Menu Options
PDL SELECT(PnP) UFR II*, PCL5C, PCL6, PS3* PS3 is displayed only when the optional PS ROM or PS/Barcode ROM is installed. ●If you want to connect the printer and computer with a USB cable The printer driver for this printer may be installed automatically when the USB cable is connected. - Page 227 When printing custom size paper from UFR II Printer Driver, you can load the paper • either in portrait or landscape orientation. However, if you want to print custom size paper of its long edges 297.0 mm or less when TRAY PAPER SIZE is set to MIXED SIZES, load the paper in landscape orientation.
-
Page 228: Tray Priority
NOTE Select CUSTOM SIZE or CUSTOM SIZE R when you want to specify custom size • paper using application and print it. If a message that prompts you to change the size of the paper appears during printing, press [Online] to clear the error before printing again. -
Page 229: Invldpaper Tray
Specify the setting for automatic paper selection in PAPER SOURCE (See p. • 5-117) in the SELECT FEEDER menu. This item is effective only when PAPER SOURCE in the SELECT FEEDER menu • is set to AUTO. Even if ON is specified for this item, the printer does not feed paper from the •... -
Page 230: Auto Selection
AUTO SELECTION TRAY........ON*, OFF CASSETTE 1......ON*, OFF CASSETTE 2* .....ON*, OFF CASSETTE 3* .....ON*, OFF CASSETTE 4* .....ON*, OFF *1 CASSETTE 2, CASSETTE 3, and CASSETTE 4 are displayed only when the optional paper feeders are installed. Specifies the paper source to be automatically selected when the automatic paper selection is specified in the SELECT FEEDER menu. - Page 231 IMPORTANT If an item other than PLAIN PAPER and PLAIN PAPER L is specified, you cannot • perform 2-sided printing. When printing from Windows or Macintosh, specify the paper type in the printer • driver. When you want to print from a computer in which an operating system such as MS-DOS and UNIX is used and cannot specify the paper type, specify the paper type in this item.
- Page 232 IMPORTANT This printer applies the optimum print mode for the interior of the printer according • to the type of the paper loaded in the multi-purpose tray. If the type of the paper loaded in the multi-purpose tray and the setting for the print mode do not match, this may result in crucial damage to the engine.
- Page 233 IMPORTANT This printer applies the optimum print mode for the interior of the printer according • to the type of the paper loaded in the paper cassette. If the type of the paper loaded in the paper cassette and the setting for the print mode do not match, this may result in crucial damage to the engine.
- Page 234 IMPORTANT This printer applies the optimum print mode for the interior of the printer according • to the type of the paper loaded in the paper cassette. If the type of the paper loaded in the paper cassette and the setting for the print mode do not match, this may result in crucial damage to the engine.
-
Page 235: Sided Print
2-SIDED PRINT. OFF*, ON Specifies whether the printer should print on one side or both sides of the paper. If ON is specified, the printer prints on both sides of the paper. IMPORTANT When printing from Windows or Macintosh, specify 2-sided printing in the printer driver. -
Page 236: Layout Menu Options
LAYOUT MENU Options COPIES 1 to 9999; 1* Specifies the number of copies to be printed. The printer prints the specified number of copies. OFFSET Y/OFFSET X -50.0 to 50.0; 0.0* (mm) Adjusts the printing position in the vertical direction (Y) or the horizontal direction (X) by the specified value. - Page 237 BIND.LOCATION LONG EDGE*, SHORT EDGE Specifies which edge of the paper, the long edge or short edge, is to be bound. When you want to bind paper on which 2-sided printing is performed, the printer adjusts the binding location automatically according to the paper surface. Specify the binding location (top/bottom/left/right) and its width in GUTTER (See the next item).
- Page 238 GUTTER -50.0 to 50.0; 0.0* (mm) Specifies the gutter width for printing with the binding location created. A gutter is created with the image shifted by the specified value. You can shift the image in the "+" direction with a positive value and in the "–" direction with a negative value. [0 mm] + direction - direction...
- Page 239 ● Settings for BIND.LOCATION and GUTTER Specify BIND.LOCATION and GUTTER referring to the following finishing image. Binding location for when using Binding location for when using paper in portrait orientation paper in landscape orientation Front Back Front Back (2-sided printing) (2-sided printing) BIND.LOCATION : LONG EDGE GUTTER : + direction...
-
Page 240: Quality Menu Options
Specify OFF for this item when you want to match the setting of the orientation or printing side for the last page with those for its previous page, such as when you want to print previously printed paper etc. whose printing orientation or printing side is fixed. -
Page 241: Toner Save
GRADATION LEVEL HIGH 1* * , HIGH 2* , STANDARD* *1 HIGH 1 and HIGH 2 are displayed only when RESOLUTION is set to FINE. *2 STANDARD is displayed only when RESOLUTION is set to SUPER FINE. Specifies the gradation level for data. This item is fixed at STANDARD when RESOLUTION (See the previous item) is set to SUPER FINE. - Page 242 NOTE If ON is specified for this item, you can save toner, but print result may be faint and unclear. Parts to which gradation is applied in very light gray may appear denser in color. - When printing without using the - When printing using the toner save toner save mode mode...
- Page 243 DENSITY: MAGENTA 1 to 16; 9* Adjusts the print density of magenta for the print data. As the value increases, the print density becomes denser. NOTE Normally, you do not need to adjust the print density with this item. • When this printer is connected to a network on which two or more printers are •...
-
Page 244: Color Mode
COLOR MODE AUTO*, COLOR, BLACK & WHITE Specifies whether to print in color or in black and white. If AUTO is specified, the printer automatically switches between color printing and black-and-white printing according to the document type. If COLOR is specified, the printer prints using the four colors of KYMC (Black, Yellow, Magenta, and Cyan). -
Page 245: Color Halftones
■ COLOR HALFTONES TEXT ....RESOLUTION*, GRADATION, COLOR TONE, HIGH RESOL., ERR DIFFUSION* GRAPHICS ..COLOR TONE*, HIGH RESOL., ERR DIFFUSION* RESOLUTION, GRADATION IMAGE....COLOR TONE*, HIGH RESOL., ERR DIFFUSION* RESOLUTION, GRADATION ERR DIFFUSION is displayed only when RESOLUTION is set to FINE. Specifies the display pattern of subtle gradation (medium gradation) for color data for each text part, graphics part such as diagrams and graphs, and image part such as picture images. -
Page 246: Cms Selection
■ CMS SELECTION PRINTER*, HOST Specifies which device the printer or host (the printer driver) is to be used for color processing. If PRINTER is specified, the color processing is performed on the printer. If HOST is specified, the color processing is not performed on the printer. IMPORTANT If the setting for CMS (Matching) on the host (the printer driver) is set to [Driver •... -
Page 247: Rgb Srce Prof
• download procedure, see "NetSpot Resource Downloader User's Guide". Obtain NetSpot Resource Downloader and "NetSpot Resource Downloader User's Guide" from the Canon website. The settings in the control panel and those in the printer driver correspond to each • other as follows. -
Page 248: Output Profile
Printer Driver Setting Control Panel Setting Canon HDTV gamma 1.5 Monitor HDTV_gamma_1.5 Canon HDTV gamma 1.8 Monitor HDTV_gamma_1.8 Canon HDTV gamma 2.4 Monitor HDTV_gamma_2.4 Set CMS/GAMMA (See p. 5-49) to CMS to enable this item. • ■ OUTPUT PROFILE TEXT........Normal*, Photo GRAPHICS ......Normal*, Photo... - Page 249 NOTE The settings in the control panel and those in the printer driver correspond to each • other as follows. Printer Driver Setting Control Panel Setting Perceptual [Monitor Color Specify PERCEPTUAL for this item, Matched] and set OUTPUT PROFILE to Normal. Specify PERCEPTUAL for this item, Perceptual [Photographic] and set OUTPUT PROFILE to Photo.
-
Page 250: Gradation Set
GRADATION SET. GRADATION ......OFF*, SMOOTH 1, SMOOTH 2 GRAPHICS* ......ON*, OFF IMAGE* .......ON*, OFF Displayed only when GRADATION is set to SMOOTH 1 or SMOOTH 2. Specify this item if gradation of image data such as graphics (illustrations created by an application) or images (bitmap data) cannot be printed smoothly (if the color changes stand out). -
Page 251: Line Control
TONER VOLUME NORMAL*, GRADATION, TEXT The toner volume may exceed this printer's restricted value when the parts dense in color are printed. In this case, this printer processes so that the toner volume falls within the restricted values. You can specify the setting for the process in this item. -
Page 252: Interface Menu Options
QUALITY CHANGE CONT.PRINTING*, STOP PRINTING Specifies whether the printer should continue printing with the resolution of the data being lowered or stop printing displaying the following error message when it cannot print with the specified value of resolution. Error Message Setting When the printer receives a large amount of data or complicated data, the memory required for the... -
Page 253: Mode Timeout
IMPORTANT After changing the settings for this item, cycle the power of the printer or perform a hard reset to make the settings effective. MODE TIMEOUT OFF, 5 to 300 seconds; 15 seconds* Specifies the function to finish a job automatically. If you specify the time the printer times out in this item, the printer can finish a job automatically when the specified time has elapsed since no data is entered. -
Page 254: Network Menu
NETWORK MENU ■ TCP/IP SETTINGS IP V. 4 SETTING IP MODE......MANUAL*, AUTO PROTOCOL* DHCP........OFF*, ON BOOTP ......OFF*, ON RARP........OFF*, ON IP SETTINGS IP ADDRESS ....0.0.0.0* SUBNET MASK ....0.0.0.0* GATEWAY ADDRESS ..0.0.0.0* IP ADD.RANGE REJECT RX/PRT....OFF*, ON REJECT ADD.SET.* ..REJ IP 1 to 8 PERMIT RX/PRT ....OFF*, ON PERMIT ADD.SET.* ..PER IP 1 to 8... - Page 255 ON*, OFF PROXY SETTINGS* PROXY....... OFF*, ON SERVER ADDRESS* PORT NUMBER* ....0 to 99999; 80* SAME DOMAIN* ....NO PROXY*, USE PROXY PROXY AUTH.* ....OFF*, ON USER NAME* PASSWORD* SNTP OFF*, ON RESPONSE ON*, OFF MAC ADDRESS SET PERMIT RECEIVE.....
- Page 256 Item Setting Restrict the users who can print or perform the printer settings using IP addresses. - To reject specific users from printing, set REJECT RX/PRT to ON, and then specify the addresses to be rejected in REJECT ADD.SET.. - To permit specific users to print, set PERMIT RX/PRT to ON, and then specify the addresses to be permitted in PERMIT ADD.SET..
- Page 257 Item Setting If you want to use WINS Resolution, specify ON. WINS * Specify the settings for [WINS Server Address] and [Scope ID] from the Remote UI. (See Network Guide) ARP/PING If you want to use the ARP/PING function, specify ON. If you want to use FTP Print, set FTP PRINT to ON.
- Page 258 Item Setting If you want to use the proxy function, set PROXY to ON, and then specify the following settings. - Enter the proxy server address to be used for the proxy function in SERVER ADDRESS. - Enter the port number of the proxy server to be used for the proxy function in PORT NUMBER.
-
Page 259: Netware Setting
IMPORTANT After changing the settings for this item, cycle the power of the printer or perform a hard reset to make the settings effective. NOTE This item is displayed only when all the following conditions are fulfilled. - NETWORK in the I/F CONNECTION options is set to ON. - [Primary Network Setting] is set to [Standard Network]. -
Page 260: Snmp V
■ SNMP V. 1 ON*, OFF Specifies whether the printer should use the SNMP v. 1 protocol. IMPORTANT After changing the settings for this item, cycle the power of the printer or perform a hard reset to make the settings effective. NOTE For more details on SNMP v. -
Page 261: Start Wait Time
NOTE For more details on SNMP v. 3, see "Chapter 3 Using the Printer on a TCP/IP • Network (Windows/UNIX)" in Network Guide. This item is displayed only when NETWORK in the I/F CONNECTION options is • set to ON. ■... -
Page 262: Ethernet Driver
■ ETHERNET DRIVER AUTO DETECT.....ON*, OFF COMM.MODE* ....HALF DUPLEX*, FULL DUPLEX ETHERNET TYPE* .....10 BASE-T*, 100 BASE-TX MAC ADDRESS....(Display only) *1 COMM.MODE and ETHERNET TYPE are displayed only when AUTO DETECT is set to OFF. Configures the Ethernet driver. NOTE For more details on configuring the Ethernet driver, see "Chapter 2 Common •... -
Page 263: Print Mode Options
EXTENSION CARD This is the setting for the interface board installed in the expansion slot of the printer. This item is displayed only when the interface board is installed. For more details, see the instruction manual supplied with the interface board. CONNECT.RECOG. - Page 264 Specifies the mode in which this printer operates when you print without using the printer driver for this printer. You can specify whether the printer automatically switches the print mode according to the data sent from the computer or you use the printer with the print mode fixed at the PCL mode, the PS mode, the IMAGING mode, or the PDF1.5 mode.
-
Page 265: Mode Priority
AUTO SWITCH PCL ....ON*, OFF ....ON*, OFF IMAGING..ON*, OFF PDF1.5* ..ON*, OFF PS is displayed only when the optional PS ROM or PS/Barcode ROM is installed. PDF1.5 is displayed when all the following optional accessories are installed. - Hard Disk - PS ROM or PS/Barcode ROM - RAM (ER-256A, ER-512A) Specifies the print mode to be automatically switched to if the auto-switch mode is... -
Page 266: User Main. Options
USER MAIN. Options ADJ.START POS. OFFSET Y......-5.0 to 5.0; 0.0* (mm) OFFSET X (TRAY)....-10.0 to 10.0; 0.0* (mm) OFFSET X (CASS1) .....-10.0 to 10.0; 0.0* (mm) OFFSET X (CASS2)* ..-10.0 to 10.0; 0.0* (mm) OFFSET X (CASS3)* ..-10.0 to 10.0; 0.0* (mm) OFFSET X (CASS4)* ..-10.0 to 10.0;... -
Page 267: Fixing Unit
RECVRY PRINTING ON*, OFF Specifies whether to print the partially printed page when the printer stops printing due to a paper jam or an error occurring. If ON is specified for this item, the printer prints from the page in which a paper jam or error occurred. -
Page 268: Substitute Size
If OFF is specified, the printer prints without performing a print check even when the paper size specified in the application is different from the size of the paper loaded in the multi-purpose tray or paper cassette. However, the printing speed may drop. -
Page 269: Sp.s-Size Mode
SP.S-SIZE MODE1 -2 to 2; 0* When printing after the paper is changed from narrower one (A5 size etc.) to wider one (A4 size etc.), the printer may stop printing temporarily and cool down the fixing unit so that the print quality is maintained. You can specify the waiting time before the print operation begins for this case. -
Page 270: Hdd Maintenance
HDD MAINTENANCE ■ HDD ALL ERASE OFF*, ON Specifies whether to completely erase the printed or deleted data from the hard disk. By erasing data completely, readout of the data by special software is prevented. If ON is specified, the printer performs the process for completely erasing the data when deleting the data in the hard disk. -
Page 271: Plain Paper
■ STD FORMAT Erases the contents of the hard disk. STD FORMAT performs a standard format of the hard disk. Perform this operation when the problem is not solved by executing QUICK FORMAT. IMPORTANT If the message <CANNOT EXECUTE> appears when STD FORMAT is executed, •... -
Page 272: Pcl Setup Options
UPDATE FIRMWARE ■ USB This item is to be executed only when the firmware of the printer needs to be updated. ■ NETWORK This item is to be executed only when the firmware of the printer needs to be updated. PCL SETUP Options PAPER SAVE OFF*, ON... -
Page 273: Font Number
If LANDSCAPE is selected, the print image is printed in landscape orientation regardless of the orientation of the paper in the paper cassette. When loading paper in When loading paper in landscape orientation portrait orientation A B C D E FONT NUMBER 0 to 89;... -
Page 274: Symbol Set
SYMBOL SET PC8*, ROMAN8, ROMAN9, ISOL1, ISOL2, ISOL5, ISOL6, ISOL9, PC775, PC8DN, PC850, PC852, PC858, PC8TK, PC1004, WINL1, WINL2, WINL5, WINBALT, DESKTOP, PSTEXT, LEGAL, ISO4, ISO6, ISO11, ISO15, ISO17, ISO21, ISO60, ISO69, WIN 30, MCTEXT Enables you to select the symbol set most suited to the needs of the host computer. -
Page 275: Append Cr To Lf
Y DIMENSION 139.7 to 1200.0 mm; 457.2 mm* (5.50 to 47.24 inches; 18.00 inches*) Enables you to specify the Y dimension of the custom paper. The Y dimension can be adjusted between 139.7 mm (5.50") and 1200.0 mm (47.24") in increments of 0.1 mm (0.01"). -
Page 276: Enlrg A4 Width
ENLRG A4 WIDTH OFF*, ON Determines whether to expand the printable area of A4 size paper to that of Letter size in width. If ON is selected, all the area on a page 4.23 mm (1/6") from the top and bottom edges and 3.39 mm (1/8") from the left and right edges is available for printing on A4 paper. -
Page 277: Ufr Ii Setup Options
BARDIMM DISABLE*, ENABLE You can enable or disable the Bar Code Printing function of the printer. If ENABLE is selected, the printer will generate bar codes when it receives bar code commands from the host computer. If DISABLE is selected, bar codes will not be generated, even if bar code commands are sent from the host computer. -
Page 278: Imaging Setup Options
IMAGING SETUP Options ORIENTATION AUTO*, VERTICAL, HORIZONTAL Specifies whether the printer should print an image in portrait (vertical) orientation or in landscape (horizontal) orientation. If AUTO is specified, the printer compares the width and height of the image in TIFF format or JPEG format. If the width is larger, the image is printed in landscape orientation. -
Page 279: Print Position
PRINT POSITION AUTO*, CENTER, TOP LEFT Specifies the printing position for an image. If AUTO is specified, and if the data to be printed is in TIFF format in which the printing position is specified, the image is printed on the specified position. If a printing position is not specified, the image is printed in the center of the paper. -
Page 280: Print Email Txt
NOTE The error messages of which the display settings can be changed with this item are <D9 IMG.DATA ERR> and <D9 IMG.REFER.ERR>. PRINT EMAIL TXT ON*, OFF Specifies whether the printer should print the text on printing e-mails. NOTE This item is displayed only when an optional hard disk is installed. LIMIT EMAIL PRT OFF*, ON Specifies whether to limit the number of the print pages of e-mail text when PRINT... -
Page 281: Pdf1.5 Options
EXIF ADJUSTMENT ON*, OFF Image data shot by a digital camera which supports Exif (Exchangeable Image File Format) includes shooting information such as conditions and scenes. This item allows you to print the data with an appropriate process for the shot, based on the shooting information. -
Page 282: Cmyk Profile
sRGB Industry-standard image quality of the general Windows (PC) monitor is applied. If you are using a monitor that supports sRGB, the printer performs matching for the colors displayed on the monitor and those printed by the printer to print in colors close to those displayed on the monitor. - Page 283 EURO STANDARD This is for obtaining a printout closely matching the printing standard in Europe. IMPORTANT If the printer receives data with a device independent (CIE based) color space definition, its color is processed with the specified settings. Therefore, CMYK PROFILE is not applied by the printer.
-
Page 284: Pure Black Text
If SATURATION is specified, the printer performs matching giving priority to color intensity. If COLORIMETRIC is specified, the printer performs matching so that the difference in color of a logo, etc. between the original print data on screen and the printed paper is minimized. -
Page 285: Black Overprint
BLACK OVERPRINT ON*, OFF Specifies the printing method for when the printer prints black text over a color background or graphics. If ON is specified, the printer prints black text over a color background. If this option is used with PURE BLACK TEXT, the printer prints all the background first, and then prints the text over the color background using only the black (Bk) toner. - Page 286 CMYK OVERPRINT OFF*, ON You can overprint CMYK data in the composite output. All colors used for data are overlaid and printed on one plate so you can check the finishing result without separating the colors. Cyan Magenta Yellow Black NOTE This item is only available for data having the overprint attribute set.
-
Page 287: Fit To Page
GRAY COMPENSATE ON*, OFF Specifies whether to print gray color data with the black (Bk) toner only. If ON is specified, the printer prints gray color data with the black (Bk) toner only. You can prevent the phenomenon of "Out-of-Register Colors". If OFF is specified, the printer prints the gray color of gray color data using the four colors of CMYK. - Page 288 N-UP PRINT OFF*, 2 ON 1, 4 ON 1, 6 ON 1, 8 ON 1, 9 ON 1, 16 ON 1 Prints multiple pages with them arranged on one sheet of paper starting from the upper left. Example: If "Vertical" is specified for the Page Setup setting in the PDF file. 2 ON 1 4 ON 1 6 ON 1...
- Page 289 B & W HALFTONES TEXT ....RESOLUTION*, GRADATION, COLOR TONE, HIGH RESOL., ERR DIFFUSION* GRAPHICS ..GRADATION*, COLOR TONE, HIGH RESOL., ERR DIFFUSION* , RESOLUTION IMAGE....GRADATION*, COLOR TONE, HIGH RESOL., ERR DIFFUSION* , RESOLUTION ERR DIFFUSION is displayed only when RESOLUTION is set to FINE. Specifies the display pattern of subtle gradation (medium gradation) of black-and-white data for each of the following parts in one document.
- Page 290 COLOR HALFTONES TEXT....RESOLUTION*, GRADATION, COLOR TONE, HIGH RESOL., ERR DIFFUSION* GRAPHICS ..COLOR TONE*, HIGH RESOL., ERR DIFFUSION* RESOLUTION, GRADATION IMAGE ... COLOR TONE*, HIGH RESOL., ERR DIFFUSION* RESOLUTION, GRADATION ERR DIFFUSION is displayed only when RESOLUTION is set to FINE. Specifies the display pattern of subtle gradation (medium gradation) for color data for each of the following parts in one document.
-
Page 291: Comment Print
COMMENT PRINT AUTO*, ON, OFF Specifies whether the printer should print comments. If ON is specified, all comments are printed. If OFF is specified, no comment is printed. If AUTO is specified, only the comments specified to be printed in the PDF file are printed. -
Page 292: Ps Options
PS Options JOB TIMEOUT 0 to 3600 seconds; 0 seconds* If the time specified in this item has elapsed since a job process was started, the printer automatically finishes the job and receives the next job. If you do not want to specify the timeout, specify "0 seconds". WAIT TIMEOUT 0 to 3600 seconds;... - Page 293 sRGB Industry-standard image quality of the general Windows (PC) monitor is applied. If you are using a monitor that supports sRGB, the printer performs matching for the colors displayed on the monitor and those printed by the printer to print in colors close to those displayed on the monitor.
- Page 294 OUTPUT PROFILE TR Normal*, TR Photo, NORMAL, PHOTO Specify the output profile. The output profile is applied to all the print data. If TR Normal is specified, the printer prints the colors closely matching the ones displayed on your monitor, and also reduces toner blotting of text and fine lines. If TR Photo is specified, the printer prints colors close to photographic prints, and also reduces toner blotting of text and fine lines.
-
Page 295: Rgb Pure Black
RGB PURE BLACK ON*, OFF Enables you to specify how black and gray data with the equivalent ratio of R to G to B should be processed when device dependent RGB data is converted into device dependent CMYK data using "RGB Source Profile" of the printer. If ON is specified, black and gray data with the equivalent ratio of R to G to B is printed using the black (Bk) toner only, regardless of the selected setting for OUTPUT PROFILE. - Page 296 If OFF is specified, the black text is printed based on the selected setting for OUTPUT PROFILE (See p. 5-97). Depending on the jobs to be printed, it may be preferable to specify OFF for this item. Test Test Test Test PURE BLACK TEXT: OFF BLACK OVERPRINT...
- Page 297 BRIGHTNESS 85 to 115 %; 100 %* Adjusts the brightness of the whole image (in 5 % increments). The smaller the specified value is, the brighter the color is, and the larger, the darker it is. NOTE If TONER SAVE (See p. 5-44) in the common SETUP menu is set to ON, this item cannot be used.
- Page 298 Setting Value Contents Uses an error diffusion method that gives priority to printing fine lines or text. This setting ERR DIFFUSION is appropriate for printing images with small text or very fine lines. COLOR HALFTONES TEXT....RESOLUTION*, GRADATION, COLOR TONE, HIGH RESOL., ERR DIFFUSION* GRAPHICS ..
- Page 299 Setting Value Contents Uses an error diffusion method that gives priority to printing fine lines or text. This setting ERR DIFFUSION is appropriate for printing images with small text or very fine lines. CMYK OVERPRINT OFF*, ON You can overprint CMYK data in the composite output. All colors used for data are overlaid and printed on one plate so you can check the finishing result without separating the colors.
- Page 300 SMOOTHING (AST) SMOOTHING (AST) .....SMOOTH 1*, SMOOTH 2, OFF GRAPHICS* ......OFF*, ON TEXT* ........ON*, OFF Displayed only when SMOOTHING (AST) is set to SMOOTH 1 or SMOOTH 2. Specifies whether to use the smoothing process which can print the outlines of graphics (illustrations created by an application) and text smoothly.
-
Page 301: Utility Menu Settings
UTILITY Menu Settings NOTE For the output samples of CONFIG.PAGE, NW STATUS PRINT, and PRNTPOSNPRINT, see "The Lists Common to All the Settings in the Print Mode," on p. 8-2. For the output sample of the PCL fonts list, PS fonts list, and PS configuration page, see "The Lists Common to Certain Settings in the Print Mode,"... -
Page 302: Ps Utility
PS UTILITY CONFIG.PAGE, FONTS LIST Prints information about the printer settings in the PS mode. CONFIG.PAGE Prints the content specified in the PS SETUP menu. FONTS LIST A list of the fonts that can be used in the PS mode is printed. NOTE Each list is to be printed on A4 size paper. -
Page 303: E-Mail Utility
E-MAIL UTILITY RECEIVE E-MAILS, RX LOG LIST This printer can receive and print e-mails. This item allows you to receive e-mails manually as well as print the e-mail receive log list. RECEIVE E-MAILS Performs manual receiving of e-mails. If there are any e-mails addressed to the printer in the server, the printer receives the e-mails and print the text and attached files. -
Page 304: Test Chart
PRNTPOSNPRINT The printing position adjusted in ADJ.START POS. (See p. 5-69) is printed. Check the printout results to confirm the setting for ADJ.START POS. NOTE For adjusting the printing position, see "Adjusting the Printing Position," on p. 6-62. PAGE COUNT LIST The number of [Print Total]* is printed on a departmental basis. - Page 305 TEST CHART 2 Print Test Chart 2 when checking if the poor print quality is due to any problem in the fixing unit. NOTE Test Chart 2 is printed on a sheet of A4 size paper. Load A4 size paper. •...
-
Page 306: Job Menu Settings
JOB Menu Settings ENCRYPTED PRINT Prints encrypted secured print data. Encrypted secured print is different from secured print in that the data security is reinforced on communication between the computer and printer and when the data is saved on a hard disk. Perform an encrypted secured print job using the following procedure. -
Page 307: Secured Print
You can automatically delete the unprinted encrypted secured print data when a • fixed period of time has elapsed. Specify the setting for the time when the printer delete data in SECURING TIME (See p. 5-26) in the CONTROL MENU options in the SETUP menu. -
Page 308: Storejob List
STOREJOB LIST Prints a list of the jobs stored in a box (the jobs saved on the hard disk). The store job list prints the box name, box number, file name, and others. NOTE If a password is specified for the box, the jobs in the box are not printed on the •... -
Page 309: Job Log List
JOB LOG LIST Prints the job logs printed from the computer. File names, print dates, and other information are printed on the job log list. NOTE If the printer has no job log, nothing is printed. • Up to 60 jobs when an optional hard disk installed and up to 48 jobs without the •... -
Page 310: E-Mail Prt Log
E-MAIL PRT LOG Prints e-mail print logs. File names, print dates, and other information are printed on the e-mail print log list. NOTE If the printer has no job log, nothing is printed. • Up to 60 job logs are printed on the e-mail print log list. •... -
Page 311: Reset Menu Settings
RESET Menu Settings SOFT RESET/HARD RESET Resets the printer when a problem has occurred or you want to cancel printing. If you perform a soft reset, the printer stops the current process and deletes the jobs in the printer memory, received print data, and the job being processed. If you perform a hard reset, the printer cancels all the process and deletes the jobs. -
Page 312: Shut Down
IMPORTANT Data from PCL/PS/UFR II Printer Driver cannot be output. • If you have output data, the data being printed is deleted. Print the data from the • computer again. When you are using an optional hard disk, set MODE TIMEOUT in the SETUP •... -
Page 313: Change Toner
CHANGE TONER K TONER, C TONER, M TONER, Y TONER If you replaced a toner cartridge when the message <1G CHG."color" TNR> was not being displayed, reset the counter in this item. After K TONER, C TONER, M TONER, or Y TONER is selected, a confirmation message <OK?>... -
Page 314: Select Feeder Menu Settings
SELECT FEEDER Menu Settings PAPER SOURCE AUTO*, CASSETTE 1, CASSETTE 2* , CASSETTE 3* , CASSETTE 4* ,TRAY *1 CASSETTE 2, CASSETTE 3, and CASSETTE 4 are displayed only when the optional paper feeders are installed. Selects the paper cassette or multi-purpose tray from which the printer feed paper. -
Page 315: Select Feeder Menu Settings
CASSETTE(n) SIZE (n = 2, 3, 4) CUSTOM SIZE*, CUSTOM SIZE R, 8K, 16K, MIXED SIZES Specifies the size of the paper loaded in the paper cassettes (Cassette 2 to Cassette 4) of the paper feeders. You can specify the same setting in CASSETTE(n) SIZE (n = 2, 3, 4) in the FEEDER MENU options in the SETUP menu. - Page 316 Routine Maintenance CHAPTER This chapter describes the procedures for maintaining the printer such as replacing the cartridges and cleaning the printer. Replacing Toner Cartridges ..........6-2 When <PREP."color"...
-
Page 317: Replacing Toner Cartridges
This section describes how to replace or handle the toner cartridges and precautions on storing them. Contact your local authorized Canon dealer to obtain replacement toner cartridges. When <PREP."color" TNR>/<CHG."color" TNR> Appears Toner cartridges are consumable products. If the toner is running out during printing, a message appears in the display. -
Page 318: Precautions On Replacing A Toner Cartridge
(See p. 6-10). NOTE The lifetime of the toner cartridges (Canon Genuine Cartridges) used in this printer are as follows. The numbers of the pages are estimated when printing in the following conditions. -
Page 319: Replacing A Toner Cartridge
Replacing a Toner Cartridge If any of the following messages appears, replace the toner cartridge of the indicated color with a new one. <1G CHG.K TNR>...Replace the black toner cartridge. • <1G CHG.Y TNR>...Replace the yellow toner cartridge. • <1G CHG.M TNR>...Replace the magenta toner cartridge. •... - Page 320 IMPORTANT The toner cartridges are installed from the bottom in order of Yellow, Magenta, Cyan, and Black. Yellow Magenta Cyan Black Tilt the lock release lever (A) of the toner cartridge to be replaced to the position of " " to lock the toner cartridge. Replacing Toner Cartridges...
- Page 321 Align the circle mark on the lock release lever with that on the toner cartridge. Top View Align at this part Remove the toner cartridge from the printer. IMPORTANT If the toner cartridge cannot be removed, check if the circle mark on the lock release lever is aligned with that on the toner cartridge.
- Page 322 Take the toner cartridge out of the box, and then take it out of the protective bag. While holding the center portion on the top of the protective pack, open it to left and right. IMPORTANT Keep the protective pack for the toner cartridge. It may be required after taking out the toner cartridge for printer maintenance.
- Page 323 While holding the tab, insert the toner cartridge into the printer , and then push it gently until it stops as shown in a a a a b b b b the figures. Insert the toner cartridge so that the orientation of the character on the toner cartridge and that on the toner cover match.
-
Page 324: Toner Cartridge
Tilt the lock release lever (A) to the position of " " to lock the toner cartridge. Align the triangular mark on the lock release lever with that on the toner cartridge. Top View Align at this part Replacing Toner Cartridges... -
Page 325: Resetting The Counter Of A Toner Cartridge
Close the toner cover. IMPORTANT If you cannot close the toner cover, check if the toner cartridges are installed • properly. If you try to close the toner cover forcefully, this may result in damage to the printer or toner cartridges. Do not leave the toner cover open for a long time after installing the toner cartridge. - Page 326 Press [Reset]. Reset RESET SOFT RESET → The RESET menu is displayed. Utility Select CHANGE TONER using [ ] and [ ], then press [OK]. Settings CHANGE TONER → K TONER → The color of the toner cartridge is displayed. Utility Select the toner cartridge of which you want to reset the counter using [...
-
Page 327: Precautions For Handling Toner Cartridges
Precautions for Handling Toner Cartridges A toner cartridge consists of intricate mechanical components. Handling the toner cartridge without due care may lead to damage to the toner cartridge or deterioration in print quality. Be careful of the following points when removing or installing the toner cartridge. - Page 328 Do not hold the lock release lever (B) or shutter (C) of the toner cartridge as shown in the • figure. Be careful not to hold or touch areas that are not specified in this procedure. This may result in damage to the cartridge. Do not attempt to disassemble or modify the toner cartridge.
-
Page 329: Storing Toner Cartridges
Storing Toner Cartridges Be careful of the following points when storing a new toner cartridge or handling a toner cartridge that has been taken out of the printer for maintenance or moving the printer. IMPORTANT Do not take a new toner cartridge out of the protective pack until it is ready to be used. •... -
Page 330: Replacing Drum Cartridges
This section describes how to replace or handle the drum cartridges and precautions on storing them. Contact your local authorized Canon dealer to obtain replacement drum cartridges. When <PREP."color" DRM>/<CHG."color" DRUM> Appears Drum cartridges are consumable products. When any drum cartridge is nearing the end of its life, any of the following messages appears in the display. -
Page 331: Precautions On Replacing A Drum Cartridge
NOTE The lifetime of the drum cartridges (Canon Genuine Drum Cartridges) used by this • printer is as follows. The numbers of the pages are estimated when printing in the following conditions. Paper size: A4; Paper type: Plain paper; Printing ratio: 5 %; Print density: the default;... - Page 332 The fixing unit and its surroundings inside the printer are hot during use. Do not • touch the fixing unit and its surroundings, as doing so may result in burns. IMPORTANT Be sure to use a drum cartridge designed for this printer. •...
- Page 333 When removing or installing the drum cartridges, work from the left side of the printer as • shown in the figure. Be sure not to touch the high-voltage contacts (A) shown in the following figures, as this • may result in damage to the printer. - Right side of the ITB unit;...
- Page 334 - Drum cartridge guides Dispose of the packing materials according to local regulations. • NOTE For details on handling drum cartridges, see "Precautions for Handling Drum • Cartridges," on p. 6-40. The packing materials may be changed in form or position to be placed, or may be added •...
-
Page 335: Replacing A Drum Cartridge
Replacing a Drum Cartridge Removing the Drum Cartridge to Be Replaced If you are using the multi-purpose tray, close it. Open the front cover. While pressing the lever on the right side of the front cover, open the front cover toward you. - Page 336 IMPORTANT Before opening the front cover, make sure that the multi-purpose tray and the paper cassette of the printer are closed. Tilt the fixing unit toward you. While pressing the green lock release buttons (A) on the left and right side of the fixing unit a, hold the tabs (B) and tilt the fixing unit toward you b as shown in the figure.
- Page 337 Open the top cover. Press the blue lock release button of the top cover. While holding the lever of the top cover, open the top cover. 6-22 Replacing Drum Cartridges...
- Page 338 IMPORTANT Do not touch the transfer belt of the ITB unit and the ITB unit cover. If the transfer • belt is damaged, this may result in misfeeds or deterioration in print quality. If the print quality deteriorates due to the transfer belt of the ITB unit being touched, see "Cleaning the Transfer Belt of the ITB Unit"...
-
Page 339: Drum Cartridge
Slide the blue lock release lever (A) of the drum cartridge to be replaced to the position of " " to release the lock of the drum cartridge. Slide the lock release lever until the triangular mark on the lock release lever aligns with the triangular mark on the label. -
Page 340: Installing A New Drum Cartridge
Installing a New Drum Cartridge Take the new drum cartridge out of the box. Take the drum cartridge out of the protective bag. IMPORTANT Keep the protective bag for the drum cartridge. It may be required after taking out the drum cartridge for printer maintenance. There are two types of replacement drum cartridges. - Page 341 Continuation of "If a packing material is Continuation of "If tape is provided" provided" Remove the drying agent attached with Remove the drying agent attached with tape (1 piece) shown in the figure. tape (1 piece) shown in the figure. Remove the tape , and then remove the drying Remove the tape...
- Page 342 Continuation of "If a packing material is Continuation of "If tape is provided" provided" Remove the packing materials (2 pieces) Remove the packing material attached with on the both sides. tape (B) (1 piece) shown in the figure. • Left side Remove the tape and packing material at the same time.
- Page 343 Continuation of "If a packing material is Continuation of "If tape is provided" provided" Turn the drum cartridge over gently to the Remove the packing material attached with original side. tape (C) (1 piece) shown in the figure. Remove the tape , and then pull the packing material out Remove the packing material attached with...
- Page 344 Continuation of "If a packing material is Continuation of "If tape is provided" provided" Remove the tape (1 piece) shown in the Remove the tape (3 pieces) shown in the figure in order of a and b. figure. Remove this tape also. Proceed to Step 4.
- Page 345 Place paper on a flat surface, place the drum cartridge on it, and then fold back the tab (A) of the sealing tape as shown in the figure. IMPORTANT When placing the drum cartridge, be sure to place paper under the drum cartridge •...
- Page 346 Pull the sealing tape (approx. 70 cm long) out gently and horizontally while supporting the drum cartridge. When pulling the sealing tape out, you may feel it to be heavy. However, because this is not printer malfunction, pull the sealing tape out completely. Support this part with your hand.
- Page 347 Do not pull the sealing tape diagonally, upwards, or downwards. If the tape is • severed, it may become difficult to pull out completely. Pull out the sealing tape completely from the drum cartridge. If any tape remains in • the drum cartridge, this may result in poor print quality.
- Page 348 Make sure that the levers (A) near the drum cartridge guides on the both sides are in the proper position as shown in the figure. If the levers are not in the proper position, the drum cartridges cannot be installed. Raise the levers to the proper position as shown in the figure. - Incorrect position - Correct position Replacing Drum Cartridges...
- Page 349 Install the drum cartridge in the printer. Insert the drum cartridge firmly until it touches the back of the printer. Insert the projections (A) on each side of the drum cartridge into the drum cartridge guides as shown in the figure. - Drum cartridge guides (left) Yellow Magenta...
- Page 350 Make sure that the levers near the drum cartridge guides on the both sides are in the proper position as shown in the figure. Make sure that the labels on the projections of the drum cartridge are visible. Make sure that all of the three colors on the label are visible.
- Page 351 Slide the blue lock release lever (A) to the position of " " to lock the drum cartridge. Slide the lock release lever until the triangular mark on the lock release lever aligns with the triangular mark on the label. Align the triangular marks.
- Page 352 By pressing the portion indicated "PUSH", close the top cover firmly until it cannot be pressed down any further as shown in the figure. By holding the lever as shown in the figure, make sure that the top cover does not open. IMPORTANT Close the top cover firmly until it cannot be pressed down any further.
- Page 353 While holding the tabs (A), move the fixing unit back to its original position , and then press the tabs on the both sides a a a a as shown in the figure b b b b 6-38 Replacing Drum Cartridges...
- Page 354 Close the front cover. While supporting the front cover a, push and close the front cover with both hands as shown in the figure b. CAUTION Push the front portion of the front cover to close it as shown in the figure. If closing the front cover by the levers on the both sides, you may catch your fingers, resulting in personal injury.
-
Page 355: Precautions For Handling Drum Cartridges
Precautions for Handling Drum Cartridges A drum cartridge consists of light-sensitive components and intricate mechanical components. Handling the drum cartridge without due care may lead to damage to the drum cartridge or deterioration in print quality. Be careful of the following points when removing or installing the drum cartridge. - Page 356 When handling a drum cartridge, hold the blue tabs (A) properly as shown in the figure. • Do not place it vertically or upside-down. When handling a drum cartridge, make sure that the blue lock release lever (A) is at the •...
-
Page 357: Storing Drum Cartridges
Storing Drum Cartridges Be careful of the following points when storing a new drum cartridge or handling a drum cartridge that has been taken out of the printer for maintenance or moving the printer. IMPORTANT Do not take a new drum cartridge out of the protective bag until it is ready to be used. •... -
Page 358: Replacing The Fixing Unit
fixing unit is a periodical replacement part, you can replace it as needed. NOTE The lifetime of the fixing unit (Canon Genuine Fixing Unit) designed for this printer is approximately 150,000 pages when performing 1-sided printing on A4 size paper. - Page 359 CAUTION The fixing unit and its surroundings inside the printer are hot during use. Make • sure the fixing unit is completely cool before replacing it. Touching the fixing unit when it is still hot may result in burns. The fixing unit weighs approximately 2.9 kg. When carrying the fixing unit, hold •...
-
Page 360: Replacing The Fixing Unit
Replacing the Fixing Unit If you are using the multi-purpose tray, close it. Open the front cover. While pressing the lever on the right side of the front cover, open the front cover toward you. Replacing the Fixing Unit 6-45... - Page 361 IMPORTANT Before opening the front cover, make sure that the multi-purpose tray and the paper cassette of the printer are closed. Tilt the fixing unit toward you. While pressing the green lock release buttons (A) on the left and right side of the fixing unit a, hold the tabs (B) and tilt the fixing unit toward you b as shown in the figure.
- Page 362 Hook your fingers into the tabs on both sides of the fixing unit , tilt them backward a little , and then remove the fixing unit a a a a b b b b Take the new fixing unit out of the protective bag. Remove the tape attached to the fixing unit.
- Page 363 Make sure that the lock release levers (A) located on both sides of the back of the fixing unit are tilted. Install the fixing unit in the printer. Hang the hooks of the fixing unit (A) on the projections on the printer (B) as shown in the figure.
- Page 364 Hang the hooks on the projections at the inner side of the triangular marks (A). Make sure that they are hooked properly. Tilt the lock release levers located on both sides of the back of the fixing unit in the direction of the arrows to lock the fixing unit.
- Page 365 While holding the tabs (A), move the fixing unit back to its original position , and then press the tabs on the both sides a a a a as shown in the figure b b b b 6-50 Replacing the Fixing Unit...
- Page 366 Close the front cover. While supporting the front cover a, push and close the front cover with both hands as shown in the figure b. CAUTION Push the front portion of the front cover to close it as shown in the figure. If closing the front cover by the levers on the both sides, you may catch your fingers, resulting in personal injury.
-
Page 367: Resetting The Counter Of The Fixing Unit
Resetting the Counter of the Fixing Unit After replacing the fixing unit, reset the counter using the following procedure in order to clear the message <E5 PREP.FIX.UNIT> displayed in the control panel. IMPORTANT Perform this operation only after replacing the fixing unit. If you reset the counter without replacing the fixing unit, the counter does not operate properly, resulting in damage to the printer. - Page 368 Utility Press [OK]. Settings FIXING UNIT A confirmation message is displayed. Press [OK]. The printer does not initialize the counter if you press [Online] without pressing [OK]. INITIALIZING DONE Online Press [Online]. The Online indicator comes on, and the message <E5 PREP.FIX.UNIT> displayed in the display disappears.
-
Page 369: Replacing The Waste Toner Container
If you do so, the toner inside the container may spill out. Be sure to replace the waste toner container with a new one. NOTE The waste toner container (Canon Genuine Waste Toner Container) for this printer will be • filled to capacity after printing approximately 6,200 pages. -
Page 370: Precautions On Replacing The Waste Toner Container
Precautions on Replacing the Waste Toner Container WARNING Do not throw a used waste toner container into open flames, as this may cause • the toner remaining inside the waste toner container to ignite, resulting in burns or a fire. There are some areas inside the printer which are subject to high-voltages. -
Page 371: Replacing The Waste Toner Container
Replacing the Waste Toner Container If you are using the multi-purpose tray, close it. Open the front cover. While pressing the lever on the right side of the front cover, open the front cover toward you. 6-56 Replacing the Waste Toner Container... - Page 372 IMPORTANT Before opening the front cover, make sure that the multi-purpose tray and the paper cassette of the printer are closed. Open the waste toner cover while holding it by the tab (A). Remove the used waste toner container , then attach the supplied cap Replacing the Waste Toner Container 6-57...
- Page 373 Take the new waste toner container out of the protective bag. Install the waste toner container in the printer. Make sure that the cap is not attached here. Close the waste toner cover. 6-58 Replacing the Waste Toner Container...
- Page 374 Close the front cover. While supporting the front cover a, push and close the front cover with both hands as shown in the figure b. CAUTION Push the front portion of the front cover to close it as shown in the figure. If closing the front cover by the levers on the both sides, you may catch your fingers, resulting in personal injury.
-
Page 375: Cleaning The Transfer Belt Of The Itb Unit
Cleaning the Transfer Belt of the ITB Unit If the print quality deteriorates due to the transfer belt of the ITB unit being touched, clean the transfer belt of the ITB unit using the following procedure. Online Press [Online]. The Online indicator goes off, allowing you to specify the settings on the control panel. - Page 376 Press [OK]. 01 CLEANING Cleaning the Transfer Belt of the ITB Unit 6-61...
-
Page 377: Adjusting The Printing Position
Adjusting the Printing Position If the printing position is skewed when printing from a certain paper source, you can adjust the position from the control panel. IMPORTANT If any part of the print image lies outside the printable area after adjusting the printing position, the part will be missing in the print result. - Page 378 Utility Select the paper source that you want to check the printing position using [ ] and [ ], then press [OK]. Settings CASSETTE 1 → =CASSETTE 1 → PAPER SOURCE → Online Press [Online]. PAPER SOURCE → 00 READY Online Make sure that the printer is online.
-
Page 379: Adjusting The Printing Position
The Printing Position Adjustment Print is printed as shown in the following. The top of the output paper is the top of the Printing Position Adjustment Print. Feeding direction Next, check the printout results and specify the direction and position to be adjusted in "Adjusting the Printing Position"... - Page 380 In this case, adjust the printing position by -5.0 mm to the left. Feeding direction IMPORTANT Adjust the printing position in the vertical direction using OFFSET Y. Adjust the printing position in the horizontal direction using OFFSET X for each paper source.
- Page 381 Utility Select USER MAIN. using [ ] and [ ], then press [OK]. Settings USER MAIN. → ADJ.START POS. → The options for USER MAIN. are displayed. Utility Select ADJ.START POS. using [ ] and [ ], then press [OK]. Settings ADJ.START POS.
- Page 382 Online Press [Online] to place the printer online. Utility Press [Utility]. UTILITY MENU CONFIG.PAGE → Utility Select PRNTPOSNPRINT using [ ] and [ ], then press [OK]. Settings PRNTPOSNPRINT → EXECUTING (Approx. 1 sec.) PRNTPOSNPRINT → The printing position adjustment print in which the setting is changed is printed. Check the printout results to confirm the printing position.
-
Page 383: Cleaning The Outside Of The Printer
Cleaning the Outside of the Printer Periodically clean the outer surfaces and ventilation slots of the printer to maintain the optimal printing quality. When cleaning the printer, be careful of the following points in order to prevent an electrical shock or printer malfunctions. WARNING When cleaning the printer, turn OFF the main power switch, and then unplug the •... - Page 384 Turn the printer and computer OFF , remove the USB cable a a a a , and then disconnect the power plug from the AC power b b b b outlet c c c c If you are using a hard disk, turn the printer OFF after performing a shutdown using the RESET menu.
- Page 385 Firmly wring a soft cloth dampened with water or a mild detergent diluted with water, and wipe off the dirt. If you use a mild detergent for cleaning, be sure to wipe away the detergent with a soft cloth dampened with water. After wiping off the dirt, wipe the printer with a dry cloth.
-
Page 386: Moving The Printer
Moving the Printer When changing the location of the printer or moving the printer for maintenance, be sure to perform the following procedure. IMPORTANT Make sure that the front cover and multi-purpose tray are closed before carrying the printer. NOTE For details on the installation site, see "Getting Started Guide". - Page 387 WARNING Be sure to turn the printer and computer OFF, unplug the power plug, and then disconnect all the interface cables from the printer before moving the printer. Otherwise, the power cord or interface cables may be damaged, resulting in a fire or electrical shock. Remove all the interface cables and the power cord from the printer.
- Page 388 After lifting the paper cassette up a little b, pull it out while supporting it with the other hand c as shown in the figures. IMPORTANT The paper cassette cannot be pulled out horizontally. If you try to pull it out forcefully, this may result in damage to the paper cassette.
- Page 389 Move the printer unit from the installation site. Carry the printer with 4 or more people by holding the lift handles on the lower portion of the printer and lifting it up at the same time. CAUTION The printer weight is approximately 55.7 kg without the paper cassette •...
- Page 390 Be sure not to hold the printer by the front cover, multi-purpose tray, or any • portions other than the lift handles. If you do so, you may drop the printer, resulting in personal injury. Do not carry the printer with the paper cassette attached. If you do so, the •...
- Page 391 Put the printer down carefully at the new installation site. CAUTION Put the printer down slowly and carefully. Be careful not to hurt your hands. IMPORTANT Secure sufficient space around the printer at the installation site so that you can install the optional accessories and connect cables.
- Page 392 After lifting the front of the paper cassette up a little b, push the paper cassette into the printer firmly until the front side of the paper cassette is flush with the front surface of the printer c. CAUTION When setting the paper cassette in the paper feeder, be careful not to catch your fingers.
-
Page 393: Connect The Usb Cable
Connect the USB cable. ● Transporting the Printer When transporting the printer for reasons such as relocating, remove the toner cartridges and drum cartridges and store the printer and the parts in the package that they came in with the packing materials attached in order to prevent them from being damaged while being transported. -
Page 394: Handling The Printer
If an error should occurred to the hard disk in the printer unit, the received, recorded, and saved data may be deleted. It is recommended not to record or save important data on the hard disk. Canon assumes no responsibility whatsoever for any damages or losses arising from data loss by the customers. - Page 395 Avoid vibration while the printer is printing. This may result in deterioration in print quality. • Be sure not to open the covers on the printer during printing. This may result in damage • to the printer. Handle each cover of the printer such as the front cover and multi-purpose tray gently •...
-
Page 396: Troubleshooting
Troubleshooting CHAPTER This chapter describes the remedies for problems such as a paper jam or an error message appearing. Troubleshooting Flowchart ..........7-2 Paper Jams. -
Page 397: Troubleshooting Flowchart
Troubleshooting Flowchart Printing is impossible. The paper setting is inappropriate. See Help of the printer driver The layout is The print setting in the application is inappropriate. skewed. See the instruction manual supplied with your application The printing position is skewed. See "Adjusting the Printing Position"... - Page 398 A message is being displayed This printer is not selected for the printer destination. on the print monitor. The printer is OFF. See "Turning the Printer ON/OFF" on p. 2-2 The printer is offline. <Unable to get status.> is See "Online and Offline" on p. 2-10 displayed.
-
Page 399: Paper Jams
Paper Jams When a paper jam occurs during printing for some reason, the printer beeps, displaying the message <13 PAPER JAM> in the display. When a paper jam occurs, remove the jammed paper using the following procedure, and then resume the job. If the message that indicates the paper jam does not disappear even after removing the jammed paper following the procedure, there is a possibility that torn pieces of paper are still left inside the printer. - Page 400 • When removing paper jammed inside the printer, remove the jammed paper gently to prevent the toner on the paper from scattering and getting into your eyes or mouth. If the toner gets into your eyes or mouth, wash them immediately with cold water and immediately consult a physician.
-
Page 401: Paper Jam Area
Paper Jam Area The message that appears in the display shows the location where the paper jam occurred. Output Tray Duplex Print Transport Area Multi-purpose Tray Cassette 1 Paper Feeder Unit (Optional) Cassette 2 Cassette 3 Cassette 4 Paper flow for 1-sided printing Paper flow for 2-sided printing Paper Jam Paper Jam Area... -
Page 402: Procedure For Clearing Paper Jams
Paper Jam Paper Jam Area Message Area Mark* Cassette 2 (Only when the paper <CASS.2 AREA> feeder is installed) Cassette 3 (Only when the paper <CASS.3 AREA> feeder is installed) Cassette 4 (Only when the paper <CASS.4 AREA> feeder is installed) * In "Procedure for Clearing Paper Jams"... - Page 403 Check the output tray, then remove all the jammed paper and output paper A B C D E F G IMPORTANT • If the jammed paper cannot be removed easily, do not try to remove it forcefully but proceed to Step 3. •...
- Page 404 If you are using the multi-purpose tray, close it. A B C D E F G Pull out the paper cassette. Pull the paper cassette out until it stops a. A B C D E F G Paper Jams...
- Page 405 After lifting the paper cassette up a little b, pull it out while supporting it with the other hand c as shown in the figures. IMPORTANT The paper cassette cannot be pulled out horizontally. If you try to pull it out forcefully, this may result in damage to the paper cassette.
- Page 406 If the paper feeders are installed, pull all the paper cassettes out from the top. Pull the paper cassette out until it stops a. A B C D E F G Paper Jams 7-11...
- Page 407 After lifting the front of the paper cassette up a little b, pull it out while supporting the cassette with your left hand until the handle (A) on the right side of the paper cassette appears completely c. While holding the paper cassette with both hands, pull it out completely d as shown in the figure.
- Page 408 Remove any jammed paper while pushing it downward to some extent. In case of the printer A B C D E F G In case of the paper feeder IMPORTANT • If the jammed paper cannot be removed easily, do not try to remove it forcefully but proceed to Step 8.
-
Page 409: Open The Front Cover
• Do not touch the paper feed roller (A) or switch (B) on the lower portion of the printer. This may result in damage to the printer or printer error. Open the front cover. While pressing the lever on the right side of the front cover, open the front cover toward you. - Page 410 Tilt the fixing unit toward you. While pressing the green lock release buttons (A) on the left and right side of the fixing unit a, hold the tabs (B) and tilt the fixing unit toward you b as shown in A B C D the figure.
- Page 411 Remove any jammed paper from the rear of the fixing unit. A B C D E F G IMPORTANT Remove the jammed paper slowly and forcefully to prevent the unfixed toner from scattering. While holding the tabs (A), move the fixing unit back to its original position , and then press the tabs on the both sides a a a a...
- Page 412 Remove any paper jammed under the fixing unit. Turn the dial on the left of the fixing unit in the direction of the arrow to send any jammed paper a as shown in the figure. A B C D E F G Remove any jammed paper as shown in the figure b.
- Page 413 If the paper jam occurred when performing 2-sided printing, open the cover of the duplex print transport area while holding it by the tab (A) inside the front cover as shown in the A B C D figure , and then remove any jammed paper a a a a b b b b E F G...
- Page 414 Close the front cover. While supporting the front cover a, push and close the front cover with both hands as shown in the figure b. A B C D E F G CAUTION Push the front portion of the front cover to close it as shown in the figure. If closing the front cover by the levers on the both sides, you may catch your fingers, resulting in personal injury.
- Page 415 Set the paper cassette in the printer. While holding the paper cassette with both hands, insert it until it stops a as shown in the figure. A B C D E F G After lifting the front of the paper cassette up a little b, push the paper cassette into the printer firmly until the front side of the paper cassette is flush with the front surface of the printer c.
- Page 416 If the paper feeders are installed, set all the paper cassettes in the paper feeders from the top. While holding the paper cassette with both hands, push it to the position shown A B C D in the figure a. Then, hold the front of the paper cassette with your right hand E F G and push it until it stops b.
- Page 417 After lifting the front of the paper cassette up a little c, push the paper cassette into the printer firmly until the front side of the paper cassette is flush with the front surface of the paper feeder d. CAUTION When setting the paper cassette in the paper feeder, be careful not to catch your fingers.
-
Page 418: Message List
Message List When the printer cannot continue printing for some reason (an error status), the printer beeps, the Message indicator comes on, and an error message that indicates the description of the error appears in the display. A Warning message appears in the display when the printer requires some remedy (a warning status) although the job is not affected. - Page 419 The connector of any optional paper feeder is disconnected. Remedy Turn the printer OFF, unplug the power plug from the AC power outlet and contact your local authorized Canon dealer. Cause 4 A paper feeder that is not for this printer is installed.
- Page 420 <14 CHK TNR/COVER> Cause 1 The toner cartridge of Y (Yellow), M (Magenta), C (Cyan), or K (Black) is not installed or installed improperly. Remedy Install the toner cartridge properly. (See "Replacing Toner Cartridges," on p. 6-2) Cause 2 The toner cover is open. Remedy Close the toner cover firmly.
- Page 421 Remedy 2 Press [Feeder Selection], select a paper source from which paper of the specified size or type can be fed, then load paper. Remedy 3 Specify the settings for STD PAPER SIZE and STD PAPER TYPE in the FEEDER MENU options in the SETUP menu to the size or type of paper that can be loaded in the paper source.
- Page 422 Cause 2 (When the message is displayed even after the cartridge is replaced with a new one) The toner is harden at the bottom of the toner cartridge. Remedy Remove the replaced toner cartridge, hold the toner cartridge so that its tab is at the bottom, shake the cartridge up and down forcefully again to evenly distribute the toner inside the cartridge, and then install the toner cartridge.
- Page 423 <30 MEMORY FULL> <Auto Error Skip> Cause 1 The work memory has run out while the system is processing the data. Remedy The printer continues printing by pressing [Online]. However, the data with which an error has occurred may not be printed properly. Cause 2 (If this error has occurred while the printer is ON) The amount of memory specified in NVRAM could not be secured because the memory...
- Page 424 IMPORTANT When you continue printing by pressing [Online], be aware that the data of macro that is already registered may be deleted. Remedy 2 Perform a soft reset in the RESET menu, increase the free space of RAM using the following procedure, and then print again. - Perform a hard reset or cycle the power of the printer (Be aware that all the data in the memory that the printer has received will be deleted).
- Page 425 <38 LOW IMGE QLTY> <Auto Error Skip> Cause The printer cannot process the data in the Super Fine mode because it is too complicated. Remedy 1 The printer continues printing by pressing [Online]. However, the printer prints with the resolution level of the data being lowered. Remedy 2 Perform a soft reset in the RESET menu, set RESOLUTION (See p.
- Page 426 <41 CHK PAPER SZE> Cause 1 The size of the paper loaded in the multi-purpose tray or paper cassette is different from the setting for TRAY PAPER SIZE, CASSETTE2 SIZE, CASSETTE3 SIZE, or CASSETTE4 SIZE specified from the computer or control panel.
- Page 427 Cause 3 The number of the jobs exceeded the amount of jobs the printer can save as secured print jobs (You can save up to 8 secured print jobs in the hard disk.) Remedy Press [Online] to cancel printing, delete any unnecessary secured print jobs, and then print again.
- Page 428 Remedy 2 The printer starts up with its settings not using the hard disk by pressing [Online]. However, you cannot print with the functions that require the hard disk. Remedy 3 Contact your local authorized Canon dealer for servicing. <56 HDD ERROR>...
- Page 429 <59 JOB RX ERROR> <Auto Error Skip> Cause The printer received any unanalyzable data while it is receiving a job, or it timed out. Remedy 1 Press [Online] to cancel printing, then print again. Remedy 2 A problem may be occurring in the network you are using. Check the status of the network that you are using.
- Page 430 The clock in this printer has a problem. Remedy Though printing is possible as is, logs such as the print logs cannot be recorded correctly. Contact your local authorized Canon dealer. <D7 nn ERROR> ("nn" represents two-digit alphanumeric characters) Cause A problem has occurred and the printer does not operate properly.
- Page 431 Remedy Cycle the power of the printer. If the message appears even after cycling the power of the printer, note down the message in the display, and contact your local authorized Canon dealer. <D9 IMG.DATA ERR.> Cause Data which this printer cannot process is included in TIFF data or JPEG data.
- Page 432 PDF data. Remedy 1 Perform a soft reset in the RESET menu, then remake the PDF data in a format which this printer supports, and then print again. Remedy 2 Contact your local authorized Canon dealer. <DA DATA PROC.ERR> Cause PDF data which this printer cannot process was sent.
- Page 433 <DA TEMP.FILE ERR> Cause An error has occurred while a temporary file of the PDF data is being processed. Remedy Contact your local authorized Canon dealer. <DA CLR ANALY.ERR> Cause A color space definition which this printer cannot render was sent. Remedy Contact your local authorized Canon dealer.
- Page 434 <DA PDF ACC.ERR 1> Cause An error has occurred when the PDF data was read. Remedy Contact your local authorized Canon dealer. <DA PDF ACC.ERR 2> Cause An error has occurred when the PDF data was read. Remedy Contact your local authorized Canon dealer.
- Page 435 <DA PDF ERROR> Cause PDF data which this printer cannot process was sent. Remedy Press [Online] to continue printing. However, the data with which an error has occurred is not printed properly. <DA TRANSP.ERROR> <Auto Error Skip> Cause Transparent image objects which this printer cannot process are included in the PDF data.
- Page 436 Remedy 2 Cycle the power of the printer. If the message appears even after cycling the power of the printer, note down the message in the display, and contact your local authorized Canon dealer. <E0 PREP."color" DRM> (Warning Message)
- Page 437 <E1 NO WST.T.CTN> Cause The waste toner container is not installed or installed improperly. Remedy Install the waste toner container properly. (See "Replacing the Waste Toner Container," on p. 6-54) <E1 PRE.WST.T.CTN> (Warning Message) Cause The waste toner container needs to be replaced soon. Remedy Although you can continue to print for a while, have ready a new waste toner container.
- Page 438 Remedy Cycle the power of the printer. If the message appears even after cycling the power of the printer, note down the message in the display, and contact your local authorized Canon dealer. <FF FONT FULL> <Auto Error Skip> Cause Because of too many fonts to be registered, the field (font table) for...
- Page 439 <FM SCALE ERROR> <Auto Error Skip> Cause There is a character in which the number of coordinate points on the contour lines exceeds the limitation of a pseudo-scalable font. Remedy Perform "Error Skip", then continue printing. However, the characters with which an error has occurred are not printed properly.
-
Page 440: Service Call Display
Canon dealer. E001-nnnn A problem has Perform the following procedures from the E003-nnnn occurred with the Step 2 to contact your local authorized Canon fixing unit of the dealer. ("n" represents a printer. number) F9-nn PWR OFF>ON A problem has... - Page 441 Turn the printer and the computer OFF, wait for 10 seconds or longer, and then turn it ON again. After 10 seconds If the message does not reappear, the printer can be used as normal. If the error message still appears, proceed to Step 2. Note down the eight-digit alphanumeric characters and message in the display.
- Page 442 , and then disconnect the power plug from the AC power b b b b outlet c c c c Contact your local authorized Canon dealer. When contacting your Canon dealer, please report the problems and code number (eight-digit alphanumeric characters) that you have noted. Service Call Display 7-47...
-
Page 443: When You Cannot Obtain Appropriate Printout Results
• If a symptom that is not indicated in this section occurs, if none of the indicated remedies do not solve the problem, or if you cannot determine the problem, contact your local authorized Canon dealer. Problems with the Power or Printer Operation The printer cannot be turned ON. - Page 444 (See "ETHERNET DRIVER," on p. 5-65) Remedy 3 Replace the hub. Cause 5 The hardware of the print server is in an abnormal condition. Remedy Report the problems to your local authorized Canon dealer. When You Cannot Obtain Appropriate Printout Results 7-49...
- Page 445 The printer stopped printing during a job. Cause There is data remaining in the memory (the Job indicator is on). Remedy Press [Online] to place the printer offline, then select FORM FEED in the RESET menu to output all the data remaining in the memory. (See "Canceling a Job,"...
- Page 446 Cause 4 You are using UFR II Printer Driver, and you loaded custom paper of its long edges 297.0 mm or less and printed when TRAY PAPER SIZE, CASSETTE2 SIZE, CASSETTE3 SIZE, or CASSETTE4 SIZE in the FEEDER MENU options in the SETUP menu was set to MIXED SIZE. Remedy Load the paper in landscape orientation, then print again.
-
Page 447: Problems With The Printout Results
Remedy 2 Delete any unnecessary jobs from among the jobs saved on the hard disk. Cause 3 The amount of the print jobs exceeded the amount of jobs you can save in the hard disk. Remedy 1 The printer is ready to print by pressing [Online], ignoring the print data. The data of 2GB or larger cannot be saved. - Page 448 The last page cannot be printed. Cause The command that notifies of the end of the data is not sent from the computer (the Job indicator is on). Remedy Press [Online] to place the printer offline, then select FORM FEED in the RESET menu (If you print using an application that does not have a printing function, the last page in which data is less than one page remains in the memory).
- Page 449 Remedy 4 If you are using the PS/UFR II printer driver and select the [Print with Upper Left of Sheet as Starting Point] check box in the printer driver, you can extend the printable area to near the edges of the paper. However, data may be printed with the edges missing.
- Page 450 Cause 2 MODE SELECTION in the PRINT MODE options in the SETUP menu is set to AUTO SELECTION, and the set time for MODE TIMEOUT in the INTERFACE MENU options in the SETUP menu is too short. Remedy Set MODE SELECTION in the PRINT MODE options in the SETUP menu to a setting value other than AUTO SELECTION or lengthen the set time for MODE TIMEOUT enough.
-
Page 451: Print Quality Problems
Remedy 2 If the message does not disappear even after applying the Remedy 1, contact your local authorized Canon dealer for servicing. Print Quality Problems Nothing is printed on the paper, but the paper is filled with a certain color. - Page 452 Color streaks appear. Cause A problem has occurred in the printer, or the ITB unit has been deteriorated or is damaged. Remedy See "When Any Print Defect Appears" (p. 7-69) and solve the problem. NOTE The samples are provided in "Print Defect Samples" (See p. 7-91). Printed pages have white specks.
- Page 453 The overall print result is faint. Cause 1 The setting for the toner density is not appropriate. Remedy Adjust DENSITY:"color" (See p. 5-45) in the QUALITY MENU options in the SETUP menu. Cause 2 TONER SAVE in the QUALITY MENU options in the SETUP menu is set to Remedy Set TONER SAVE (See p.
- Page 454 Remedy 2 Perform a soft reset using the RESET menu, then print again with the resolution level being lowered. Remedy 3 If you want to print in the Super Fine mode, perform a soft reset by pressing [Reset], and then increase the free space of RAM using the following procedure.
- Page 455 Remedy 2 If the message does not disappear even after applying the Remedy 1, contact your local authorized Canon dealer for servicing. The printed colors appear different from those printed by another LBP5970 being used at the same time.
- Page 456 IMPORTANT Adjustment of the toner density affects all the color print jobs. Normally, use the printer with the toner density left to the default value (9). Cause 2 Any of the four color toner cartridges is running out, or the drum cartridge has been deteriorated.
- Page 457 Fill-patterns are not printed in the correct color (specified color). Cause The fill-pattern of the print data and the dither pattern of the printer are interfering with one another. Remedy 1 Print again without specifying a fill-pattern in the application. Remedy 2 Set [Halftones] to [Gradation] or [Color Tone] in the printer driver.
- Page 458 Streaks appear in the gradated portions when printing diagrams with gradations. Cause 1 When you are using the PCL/UFR II printer driver, gray compensation is applied to the gray color portions of the "streaks" in the diagrams. Remedy Set [Gray Compensation] to [Off] in the printer driver. In order to specify the setting for [Gray Compensation], display the following dialog box.
- Page 459 When printing from Windows, streaks appear on the printed paper, diagrams are printed with their colors partially different from the data, or diagrams that are not filled in with any color do not appear through another data over them and cannot be printed in correct color.
- Page 460 Thin lines and thin text blot. Cause When you were using the PS printer driver, certain thin lines and text were subject to constraint of an internal process. Remedy 1 Adjust the colors in the application and print again. (See the instruction manual supplied with your application) Remedy 2 Make the lines bold or use a bold font for the text, then print again.
- Page 461 The back of the printed paper has smudge marks. Cause The size of the print data was larger than that of the loaded paper. Remedy Check if the size of the print data matches that of the loaded paper. Square areas that cannot be seen on the display appear around lines or text and are printed in a different color from the other areas.
- Page 462 Remedy 5 If you are using the PS printer driver, set B & W HALFTONES (See p. 5-100) or COLOR HALFTONES (See p. 5-101) in the PS options to ERR DIFFUSION, RESOLUTION, or GRADATION. Also, you can specify the same setting in the PS printer driver. For more details, see Help of the PS printer driver.
- Page 463 Gradation in the black or gray parts of the image does not appear smooth (the color changes stand out). Cause Data in black or gray was printed with the setting for RGB PURE BLACK enabled. Remedy Set RGB PURE BLACK (See p. 5-98) in the PS options to OFF. Also, you can specify the same setting in the PS printer driver.
-
Page 464: When Any Print Defect Appears
When Any Print Defect Appears When any print defects such as those in "Print Defect Samples" (See p. 7-91) appears, perform the following procedures in number order to solve the problem. 1. Clean the inside of the printer, then perform calibration. (See p. 7-69) 2. - Page 465 CAUTION The fixing unit and its surroundings inside the printer are hot during use. Make sure the fixing unit is completely cool before cleaning the inside of the printer. Touching the fixing unit when it is still hot may result in burns. IMPORTANT •...
- Page 466 • When removing or installing the drum cartridges, work from the left side of the printer as shown in the figure. • Be sure not to touch the high-voltage contacts (A) shown in the figure. This may result in damage to the printer. - Right side of the ITB unit;...
- Page 467 - Drum cartridge guides If you are using the multi-purpose tray, close it. 7-72 When Any Print Defect Appears...
- Page 468 Open the front cover. While pressing the lever on the right side of the front cover, open the front cover toward you. IMPORTANT Before opening the front cover, make sure that the multi-purpose tray and the paper cassette of the printer are closed. Tilt the fixing unit toward you.
- Page 469 Open the top cover. Press the blue lock release button of the top cover. While holding the lever of the top cover, open the top cover. 7-74 When Any Print Defect Appears...
- Page 470 IMPORTANT Do not touch the transfer belt of the ITB unit and the ITB unit cover. If the transfer belt is damaged, this may result in misfeeds or deterioration in print quality. If the print quality deteriorates due to the transfer belt of the ITB unit being touched, see "Cleaning the Transfer Belt of the ITB Unit"...
- Page 471 Remove all the drum cartridges. Remove the drum cartridge by holding the blue tab (A) as shown in the figure. IMPORTANT Place the removed drum cartridge into the original protective bag immediately. Remove the cleaning brush on the right side of the inside of the printer.
- Page 472 Insert the cleaning brush into the slot. Insert the cleaning brush so that the triangular mark (A) on the brush aligns with that on the printer. Slide the cleaning brush from side to side along the slot several times. When you slide the cleaning brush a, the cover opens automatically b. When Any Print Defect Appears 7-77...
- Page 473 Pull the cleaning brush out of the slot. Repeat Step 8 to 10 to clean the slots of each color. Put the cleaning brush back to its original position. 7-78 When Any Print Defect Appears...
- Page 474 Before installing the drum cartridge, align the triangular mark on the lock release lever (A) with the triangular mark of " " on the label as shown in the figure. Align the triangular marks. When installing the drum cartridge, hold the blue tabs as shown in the figure. When Any Print Defect Appears 7-79...
- Page 475 Make sure that the levers (A) near the drum cartridge guides on the both sides are in the proper position as shown in the figure. If the levers are not in the proper position, the drum cartridges cannot be installed. Raise the levers to the proper position as shown in the figure. - Incorrect position - Correct position 7-80...
- Page 476 Install the drum cartridge in the printer. Insert the drum cartridge firmly until it touches the back of the printer. Insert the projections (A) on each side of the drum cartridge into the drum cartridge guides as shown in the figure. - Drum cartridge guides (left) Yellow Magenta...
- Page 477 Make sure that the levers near the drum cartridge guides on the both sides are in the proper position as shown in the figure. Make sure that the labels on the projections of the drum cartridge are visible. Make sure that all of the three colors on the label are visible.
- Page 478 Slide the blue lock release lever (A) to the position of " " to lock the drum cartridge. Slide the lock release lever until the triangular mark on the lock release lever aligns with the triangular mark on the label. Align the triangular marks.
- Page 479 By pressing the portion indicated "PUSH", close the top cover firmly until it cannot be pressed down any further as shown in the figure. By holding the lever as shown in the figure, make sure that the top cover does not open. IMPORTANT Close the top cover firmly until it cannot be pressed down any further.
- Page 480 While holding the tabs (A), move the fixing unit back to its original position , and then press the tabs on the both sides a a a a as shown in the figure b b b b When Any Print Defect Appears 7-85...
- Page 481 Close the front cover. While supporting the front cover a, push and close the front cover with both hands as shown in the figure b. After cleaning the inside of the printer, perform calibration using the following procedure. CAUTION Push the front portion of the front cover to close it as shown in the figure. If closing the front cover by the levers on the both sides, you may catch your fingers, resulting in personal injury.
-
Page 482: Printing Test Chart 1
Utility Press [Utility]. UTILITY MENU CONFIG.PAGE → Utility Select CALIBRATION using [ ] and [ ], then press [OK]. Settings CALIBRATION → 02 CALIBRATING Calibration is performed. The Ready indicator and Online indicator blink during the calibration. After completing the calibration, the message <00 READY> appears in the display. - Page 483 Utility Press [Utility]. UTILITY MENU CONFIG.PAGE → Utility Select TEST CHART 1 using [ ] and [ ], then press [OK]. Settings TEST CHART 1 → EXECUTING (Approx. 1 sec.) TEST CHART 1 → Test Chart 1 is printed. Check if any flaws, unevenness, or streaks appear on the printed Test Chart 1.
-
Page 484: Printing Test Chart 2
- If white streaks appear on Test Chart 1: Contact your local authorized Canon dealer. - If white streaks do not appear on Test Chart 1: Replace the drum cartridge of the color in which the print defect (flaws, uneven print, or streaks) appeared. - Page 485 Utility Press [Utility]. UTILITY MENU CONFIG.PAGE → Utility Select TEST CHART 2 using [ ] and [ ], then press [OK]. Settings TEST CHART 2 → EXECUTING (Approx. 1 sec.) TEST CHART 2 → Test Chart 2 is printed. Check if any flaws, unevenness, or streaks appear on the printed Test Chart 2.
-
Page 486: Print Defect Samples
fixing unit. For details on the procedure for replacing the fixing unit, see "Replacing the Fixing Unit," on p. 6-43. If the print defect problem is not solved even after replacing the fixing unit, contact your local authorized Canon dealer. Print Defect Samples ■... - Page 487 ■ White streaks appear. ■ Color streaks appear. 7-92 When Any Print Defect Appears...
- Page 488 ■ Printed pages have white specks. ■ Residual images appear on the non-printed areas. When Any Print Defect Appears 7-93...
- Page 489 ■ The print is uneven. ■ Streaks, flaws, or unevenness of gloss appears in the areas dense in color. 7-94 When Any Print Defect Appears...
-
Page 490: Adjusting The Color Balance
While adjusting the toner density little by little, print the defective print data from the computer and check the printout results. If you cannot adjust the toner density, reset the density to the default value (9), and then contact your local authorized Canon dealer. Settings Press [Settings]. - Page 491 Utility Select the toner density using [ ] and [ ], then press [OK]. Settings The toner density is lightest when 1 is selected and densest when 16 is selected. → → "=" is displayed on the left of the value, and the density is specified. 7-96 Adjusting the Color Balance...
-
Page 492: Appendix
Appendix CHAPTER This chapter describes the contents of the various lists, printer specifications, and index. The Lists Common to All the Settings in the Print Mode ......8-2 The Lists Common to Certain Settings in the Print Mode. -
Page 493: The Lists Common To All The Settings In The Print Mode
The Lists Common to All the Settings in the Print Mode This section describes the lists common to all the settings in the print mode. IMPORTANT The following list is a sample. The contents may partially differ from the lists printed by your printer. - Page 494 Network Status Print Prints the version number and the settings of the print server equipped with this printer. Make sure that the printer is online. Press [Utility] to display the UTILITY menu. Press [ ] to display NW STATUS PRINT. Press [OK] to output the page.
- Page 495 Page Count List (Depending on the printer you are using, it cannot print this list.) The number of [Print Total]* is printed on a departmental basis. * [Print Total] indicates the number of printed surfaces. If you perform 2-sided printing on a sheet of paper, the number of the printed surfaces is two.
-
Page 496: The Lists Common To Certain Settings In The Print Mode
The Lists Common to Certain Settings in the Print Mode This section describes the lists common to certain settings in the print mode. IMPORTANT The following list is a sample. The contents may partially differ from the lists printed by your printer. -
Page 497: Ps Fonts List
PS Configuration Page The settings of the PS menu are printed. Make sure that the printer is online. Press [Utility] to display the UTILITY menu. Press [ ] to display PS UTILITY. Press [OK] to display Exclusive Utilities for PS. Press [ ] to display CONFIG.PAGE. -
Page 498: Typeface Samples
Typeface Samples The fonts lists printed from the UTILITY menu are a comprehensive listing of all fonts currently available. The listing contains the names and print samples of the fonts stored on the printer. Scalable Fonts (PCL) Courier CG Times CG Times Bold CG Times Italic CG Times Bold Italic... - Page 499 Garamond Kursiv Halbfeet Marigold Albertus Medium Albertus Extra Bold Arial Arial Bold Arial Italic Arial Bold Italic Times New Roman Times New Roman Bold Times New Roman Italic Times New Roman Bold Italic Helvetica Helvetica Bold Helvetica Oblique Helvetica Bold Oblique Helvetica Narrow Helvetica Narrow Bold Helvetica Narrow Oblique...
-
Page 500: Bitmapped Fonts (Pcl)
Times Bold Times Italic Times Bold Italic ITC Zapf Chancery Medium Italic Symbol SymbolPS Wingdings ITC Zapf Dingbats Courier Bold Courier Italic Courier Bold Italic Letter Gothic Letter Gothic Bold Letter Gothic Italic CourierPS CourierPS Bold CourierPS Oblique CourierPS Bold Oblique Bitmapped Fonts (PCL) Line Printer (10U) Line Printer (8U) -
Page 501: Ps Fonts
PS Fonts NOTE 127 PS fonts for Macintosh are included in the User Manual CD-ROM. AlbertusMT AlbertusMT Italic AlbertusMT Light AntiqueOlive Bold AntiqueOlive Compact AntiqueOlive Italic AntiqueOlive Roman AntiqueOliveCE Bold AntiqueOliveCE Compact AntiqueOliveCE Italic AntiqueOliveCE Roman Apple Chancery Apple ChanceryCE Arial BoldItalicMT Arial BoldMT Arial ItalicMT... - Page 502 Bodoni Bold Bodoni BoldItalic Bodoni Italic Bodoni Poster Bodoni PosterCompressed BodoniCE BodoniCE Bold BodoniCE BoldItalic BodoniCE Italic BodoniCE Poster BodoniCE PosterCompressed Bookman Demi Bookman DemiItalic Bookman Light Bookman LightItalic BookmanCE Demi BookmanCE DemiItalic BookmanCE Light BookmanCE LightItalic Candid Chicago Chicago CE Clarendon Clarendon Bold Clarendon Light...
- Page 503 Copperplate ThirtyThreeBC Copperplate ThirtyTwoBC Coronet Regular CoronetCE Regular Courier Courier Bold Courier BoldOblique Courier Oblique CourierCE CourierCE Bold CourierCE BoldOblique CourierCE Oblique Eurostile Eurostile Bold Eurostile BoldExtendedTwo Eurostile ExtendedTwo EurostileCE EurostileCE Bold EurostileCE BoldExtendedTwo EurostileCE ExtendedTwo Geneva GenevaCE GillSans GillSans Bold GillSans BoldCondensed GillSans BoldItalic GillSans Condensed...
- Page 504 GillSans LightItalic GillSansCE Bold GillSansCE BoldCondensed GillSansCE BoldItalic GillSansCE Condensed GillSansCE ExtraBold GillSansCE Italic GillSansCE Light GillSansCE LightItalic GillSansCE Roman Goudy Goudy Bold Goudy BoldItalic Goudy ExtraBold Goudy Italic Helvetica Helvetica Bold Helvetica BoldOblique Helvetica Condensed Helvetica Condensed Bold Helvetica Condensed BoldObl Helvetica Condensed Oblique Helvetica Narrow Helvetica Narrow Bold...
- Page 505 HelveticaCE Cond HelveticaCE CondBold HelveticaCE CondBoldObl HelveticaCE CondObl HelveticaCE Narrow HelveticaCE NarrowBold HelveticaCE Narrow BoldOblique HelveticaCE NarrowOblique HelveticaCE Oblique HoeflerText Black HoeflerText BlackItalic HoeflerText Italic HoeflerText Ornaments HoeflerText Regular HoeflerTextCE Black HoeflerTextCE BlackItalic HoeflerTextCE Italic HoeflerTextCE Regular JoannaMT JoannaMT Bold JoannaMT BoldItalic JoannaMT Italic JoannaMTCE...
- Page 506 LetterGothicCE LetterGothicCE Bold LetterGothicCE BoldSlanted LetterGothicCE Slanted LubalinGraph Book LubalinGraph BookOblique LubalinGraph Demi LubalinGraph DemiOblique LubalinGraphCE Book LubalinGraphCE BookOblique LubalinGraphCE Demi LubalinGraphCE DemiOblique Marigold Monaco MonacoCE MonaLisa Recut NewCenturySchlbk Bold NewCenturySchlbk BoldItalic NewCenturySchlbk Italic NewCenturySchlbk Roman NewCenturySchlbkCE Bold NewCenturySchlbkCE BoldItalic NewCenturySchlbkCE Italic NewCenturySchlbkCE Roman NewYork...
- Page 507 OptimaCE Bold OptimaCE BoldItalic OptimaCE Italic OptimaCE Roman Oxford Palatino Bold Palatino BoldItalic Palatino Italic Palatino Roman PalatinoCE Bold PalatinoCE BoldItalic PalatinoCE Italic PalatinoCE Roman StempelGaramond Bold StempelGaramond BoldItalic StempelGaramond Italic StempelGaramond Roman StempelGaramondCE Bold StempelGaramondCE BoldItalic StempelGaramondCE Italic StempelGaramondCE Roman Symbol Taffy Times Bold...
- Page 508 TimesCE Roman TimesNewRomanCE TimesNewRomanCE Bold TimesNewRomanCE BoldItalic TimesNewRomanCE Italic TimesNewRomanPS BoldItalicMT TlmesNewRomanPS BoldMT TimesNewRomanPS ItalicMT TimesNewRomanPSMT Univers Univers Bold Univers BoldExt Univers BoldExtObl Univers BoldOblique Univers Condensed Univers CondensedBold Univers CondensedBoldOblique Univers CondensedOblique Univers Extended Univers ExtendedObl Univers Light Univers LightOblique Univers Oblique UniversCE Bold UniversCE BoldExt...
- Page 509 UniversCE CondensedOblique UniversCE Extended UniversCE ExtendedObl UniversCE Light UniversCE LightOblique UniversCE Medium UniversCE Oblique Wingdings Regular ZapfChancery MediumItalic ZapfChanceryCE MediumItalic ZapfDingbats 8-18 Typeface Samples...
-
Page 510: Symbol Sets Supported
Symbol Sets Supported This section provides a list to the character code tables for the characters in each symbol set. Character Code Tables ■ Desktop (7J: 234) Symbol Sets Supported 8-19... - Page 511 ■ ISO 4: United Kingdom (1E: 37) ■ ISO 6: ASCII (0U: 21) 8-20 Symbol Sets Supported...
- Page 512 ■ ISO 11: Swedish (0S: 19) ■ ISO 15: Italian (0I: 9) Symbol Sets Supported 8-21...
- Page 513 ■ ISO 17: Spanish (2S: 83) ■ ISO 21: German (1G: 39) 8-22 Symbol Sets Supported...
- Page 514 ■ ISO 60: Danish/Norwegian (0D: 4) ■ ISO 69: French (1F: 38) Symbol Sets Supported 8-23...
- Page 515 ■ ISO 8859/1 Latin 1 (0N: 14) ■ ISO 8859/2 Latin 2 (2N: 78) 8-24 Symbol Sets Supported...
- Page 516 ■ ISO 8859/9 Latin 5 (5N: 179) ■ ISO 8859/10 Latin 6 (6N: 206) Symbol Sets Supported 8-25...
- Page 517 ■ ISO 8859/15 Latin 9 (9N: 302) ■ ITC Zapf Dingbats MS (14L: 460) 8-26 Symbol Sets Supported...
- Page 518 ■ Legal (1U: 53) ■ Math-8 (8M: 269) Symbol Sets Supported 8-27...
- Page 519 ■ MC Text (12J: 682) ■ Microsoft Publishing (6J: 202) 8-28 Symbol Sets Supported...
- Page 520 ■ OCR-A (0O: 15) ■ OCR-B (1O: 47) Symbol Sets Supported 8-29...
- Page 521 ■ PC-8 (10U: 341) ■ PC-8 Danish/Norwegian (11U: 373) 8-30 Symbol Sets Supported...
- Page 522 ■ PC-8 Greek (14G: 455) ■ PC-775 (26U: 853) Symbol Sets Supported 8-31...
- Page 523 ■ PC-850 (12U: 405) ■ PC-852 (17U: 565) 8-32 Symbol Sets Supported...
- Page 524 ■ PC-858 (13U: 437) ■ PC-860 (20U: 661) Symbol Sets Supported 8-33...
- Page 525 ■ PC-865 (25U: 821) ■ PC-1004 (9J: 298) 8-34 Symbol Sets Supported...
- Page 526 ■ PC-Turkish (9T: 308) ■ Pi Font (15U: 501) Symbol Sets Supported 8-35...
- Page 527 ■ PS Math (5M: 173) ■ PS Text (10J: 330) 8-36 Symbol Sets Supported...
- Page 528 ■ Roman-8 (8U: 277) ■ Roman-9 (4U: 149) Symbol Sets Supported 8-37...
- Page 529 ■ Symbol (19M: 621) ■ Unicode (18N: 590) 8-38 Symbol Sets Supported...
- Page 530 ■ Ventura International (13J: 426) ■ Ventura Math (6M: 205) Symbol Sets Supported 8-39...
- Page 531 ■ Ventura US (14J: 458) ■ Windows 3.0 Latin 1 (9U: 309) 8-40 Symbol Sets Supported...
- Page 532 ■ Windows 3.1 Latin 1 (19U: 629) ■ Windows 3.1 Latin 2 (9E: 293) Symbol Sets Supported 8-41...
- Page 533 ■ Windows 3.1 Latin 5 (5T: 180) ■ Windows Baltic (19L: 620) 8-42 Symbol Sets Supported...
- Page 534 ■ Wingdings (579L: 18540) Symbol Sets Supported 8-43...
-
Page 535: Specifications
Specifications Hardware Specifications Type Desktop Page Printer Printing method Electrophoto Method (On-demand fixing) Resolution 1200dpi (Super Fine Mode)/600dpi (Fine Mode) When printing A4 continuously Black and white printing: 32 pages/min. Color printing: 30 pages/min. Printing speed * Print speed may drop in stages depending on Plain paper (64 to 105 g/m the paper size, paper type, print copies, and the settings of the fixing mode. - Page 536 A3, B4, A4, B5, A5, Ledger (11 x 17), Legal, Cassette 1 Letter, Executive Paper capacity: approx. 230 sheets (80 g/m Cassette 2 - Standard sizes (Optional) A3, B4, A4, B5, A5, Ledger (11 x 17), Legal, Letter, Executive, 8K, 16K Cassette 3 - Custom sizes (Optional)
- Page 537 Operating environment temperature: 10 to 30 °C Operating environment (50 to 86 °F) (Printer unit only) Humidity: 10 to 80 % RH (no condensation) Power supply 220 -240 V (± 10 %) 50/60 Hz (± 2 Hz) Average during operation: approx. 645 W Average during standby: approx.
- Page 538 - Canon Toner Cartridge (Black) Printable pages: approx. 10,000 pages* * Canon genuine toner cartridges, and for A4 size paper at 5 % page coverage with the default print density setting - Canon Toner Cartridge (Yellow) Toner cartridge - Canon Toner Cartridge (Magenta) - Canon Toner Cartridge (Cyan) Printable pages: approx.
- Page 539 - Canon Waste Toner Container* The waste toner container (Canon Genuine Waste Toner Container) for this printer will be filled to capacity after printing approximately 6,200 pages. The numbers of the pages are estimated when printing in the following conditions.
-
Page 540: Controller Specifications
Controller Specifications R4000 series (400 MHz), MIPS64 series (533 MHz) * The upper limit of the frequency range Standard 256 MB Memory (RAM) Expandable up to 768 MB by installing an optional expansion capacity RAM module USB 2.0 Hi-Speed/USB Full-Speed (USB1.1 equivalent) X 1 Host interface LAN connector (10BASE-T/100BASE-TX) X 1 LCD 16 characters X 1 line... - Page 541 PCL 5c/PCL 6 Data cannot be printed within a 4.23 mm (10 mm for envelopes) margin on all sides of the paper. Data cannot be printed within a 4 mm margin on all sides of the paper. UFR II Data cannot be printed within a 5 mm (10 mm for envelopes) margin on all sides of the paper.
-
Page 542: Dimensions Of Each Part
Dimensions of Each Part ■ Printer Standard state • (mm) Top cover Toner cover Front cover Paper cassette Tray extension Auxiliary tray Multi-purpose tray 636.5 When three paper feeders are installed • (mm) Cassette Protective Cover Paper cassette 691.5 ■ PAPER FEEDER PF-98B (mm) 141.5 Dimensions of Each Part... -
Page 543: Index
Index Numerics PDF1.5, 5-89 PS, 5-100 10 Indicator (Green), 1-8 100 Indicator (Green), 1-8 2-SIDED PRINT., 5-38, 5-118 2-sided Printing, 3-63 Manual 2-sided Printing, 3-65 CALIBRATE TIME, 5-25 CALIBRATE TIMER, 5-25 CALIBRATION, 5-106 Cancel Job, 2-60 [Cancel Job] Key, 1-11, 4-5 CANCEL JOB Menu, 4-14 ACT Indicator (Green), 1-8 Canceling a Job, 2-59... - Page 544 Command Prompt, 2-33 ENLRG A4 WIDTH, 5-79 COMMENT PRINT, 5-94 ENLRG PRT AREA Condensation, 6-14, 6-42 IMAGING, 5-83 CONFIG.PAGE, 5-104, 5-105 PDF1.5, 5-90 Configuration Page, 8-2 Envelopes, 3-5, 3-54 CONNECT.RECOG., 5-66 Error Message, 7-23 CONTROL MENU Options, 5-2 ETHERNET DRIVER, 5-65 Control Panel, 1-11 EXIF ADJUSTMENT, 5-84 Control Panel Power Switch, 1-12, 4-6...
- Page 545 PS, 5-96 JOB TIMEOUT, 5-95 GUTTER, 5-41 Gutter, 3-67 Keys, 4-5 HALFTONES, 5-47 Handling Drum Cartridge, 6-40 Multi-purpose Tray, 3-13 Labels, 3-5 Paper Cassette, 3-13 LAN Connector, 1-8 Printer, 6-79 Laser Beam, xxi Toner Cartridge, 6-12 LAYOUT MENU Options, 5-4 HARD DISK, 5-25 Lift Handles, 1-8 Hard Disk, 1-6, 2-4...
- Page 546 Paper Type Setting, 3-61 Storage, 3-9 Paper Cassette, 1-8, 3-18 Handling, 3-13 Paper Type Setting, 3-46 Paper Feed Roller, 7-14 Paper Feeder, 1-5 NETWARE SETTING, 5-62 Paper Guides, 1-8 NETWORK, 5-75 Paper Jams, 7-4 NETWORK MENU, 5-57 PAPER SAVE (PCL SETUP), 5-75 Network Status Print, 8-3 PAPER SAVE (UFR II SETUP), 5-80 N-UP PRINT, 5-91...
- Page 547 PRINT GUARANTEE, 5-82 Ready Indicator, 1-12 [Print] Mode, 2-50 Rear Cover, 1-9 Print Mode, 2-57 RECEIVE E-MAILS, 5-106 PRINT MODE Options, 5-10 RECVRY PRINTING, 5-70 PRINT POSITION, 5-82 REMOTE UI SET., 5-64 PRINT PS ERRORS, 5-95 RENDER CL SPACE, 5-84 Print Quality, 7-69 REPORTLOG LST, 5-112 Print Quality Problems, 7-56...
- Page 548 SOFT RESET, 5-114 TRAY PAPER TYPE, 5-34, 5-118 Soft Reset, 2-61 TRAY PRIORITY, 5-31 SP.IMAGE MODE, 5-71 Typeface Samples, 8-7 SP.PRINT MODE, 5-74 SP.S-SIZE MODE1, 5-72 SP.S-SIZE MODE2, 5-72 Specifications, 8-44 SPOOLER, 5-64 UFR II SETUP Options, 5-12 START WAIT TIME, 5-64 UNIT OF MEASURE, 5-77 STD FORMAT, 5-74 Unusable Paper, 3-8...
- Page 549 Y DIMENSION, 5-78 ZOOM, 5-81 8-58 Index...
- Page 550 USRM1-2636 (06) © CANON INC. 2010...