Table of Contents
Advertisement
FREESTANDING
AND INSERT
PELLET FIRED
STOVES
RETAIN THESE
INSTRUCTIONS
FOR FUTURE
REFERENCE
INSTALLATION AND OPERATION
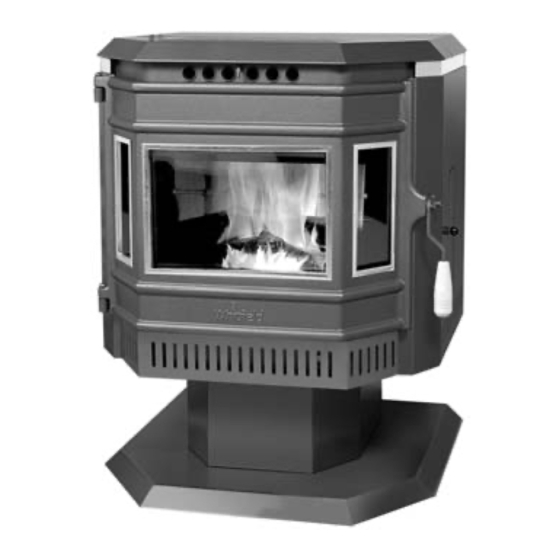
Freestanding Model
Advantage II-T C FS
These appliances must be properly installed and operated in order
to prevent the possibility of a house fire. Please read this entire
owner's manual before installing and using your pellet stove. Fail-
ure to follow these instructions could result in property damage,
bodily injury or even death. Contact your local building or fire offi-
cials to obtain a permit and information on any installation require-
ments and inspection requirements in your area.
P/N 775096M, Rev. E, 11/03
www.PelletKing.com
MANUAL
Freestanding Model
Advantage II-T C INS
Advertisement
Table of Contents
Troubleshooting

Related Manuals for Whitfield II-T C FS


Summary of Contents for Whitfield II-T C FS
-
Page 1: Installation And Operation
These appliances must be properly installed and operated in order to prevent the possibility of a house fire. Please read this entire owner's manual before installing and using your pellet stove. Fail- ure to follow these instructions could result in property damage, bodily injury or even death. -
Page 2: Important Warnings
(air tight, sealed connection) and in- stalled correctly. Since Lennox Hearth Products has no control over the installation of your stove, Lennox Hearth Products grants no warranty, im- plied or stated for the installation or maintenance of your stove, and assumes no responsibility for any consequential damage(s). -
Page 3: Table Of Contents
Sincerely, All of us at Lennox Hearth Products PACKAGING LIST The assembled pellet stove model Advantage II-T C FS and Advantage II-T C INS are packaged with an accessory pack- age, which contains the following: One - Installation and operation instructions manual. -
Page 4: Planning Your Installation
SELECTING A LOCATION The design of your home and where you place your stove will determine its value as a source of heat. A pel- let stove depends primarily on air circulation (convec- tion) to disperse its heat, and therefore, a central loca- tion is often best. - Page 5 PLANNING YOUR INSTALLATION FLOOR PROTECTION – Advantage II-T C FS (For USA and Can- Top View ada) This appliance requires 3/8" mm) minimum non- combustible floor protection designed for solid fuel burning appliances having a thermal conductivity 6” of k = .84 BTU in/ft (153mm) or equivalent.
- Page 6 . CLEARANCES Advantage II-T C FS - Standard residential or manufac- tured (mobile) home installation. These appliances re-...
- Page 7 PLANNING YOUR INSTALLATION MASONRY AND FACTORY BUILT FIREPLACES The model Advantage II-T C INS is approved for installa- tion into a solid fuel burning fireplace, either a masonry fireplace (built to UBC 37 or ULC S628 standards) or an approved factory-built / zero clearance fireplace (built to UL 127 or ULC S610 standards).
-
Page 8: Manufactured (Mobile) Home Installation
PLANNING YOUR INSTALLATION MANUFACTURED (MOBILE) HOME INSTAL- LATION Freestanding Model – Advantage II-T C FS In addition to the standard installation instructions, the following instructions may be required by lo- cal, state or federal building codes: • Stove must be permanently bolted to the floor. -
Page 9: Installation
INSTALLATION REMOVING APPLIANCE FROM PALLET 1. After removing the packaging from the stove, lift the hopper lid, and remove all pre-packaged items that were shipped in the hopper. Next, open the stove door and remove all pre-packaged items. 2. Using a 9/16” socket or open end wrench, remove the bolts which secure stove to pallet. - Page 10 INSTALLATION INSTALLATION CHECK LIST It is strongly recommended that you have an authorized Lennox Hearth Products dealer install your stove. If you install your stove yourself, you should review your instal- lation plan with an authorized Lennox Hearth Products dealer. Improper installation may void your warranty.
- Page 11 “pop” rivet tool, you should arrange to buy or borrow one for this installation. 3. Set the stove on the hearth so that the rear of the stove is accessible to complete all pipe connections. 4. Verify that the hopper cover is all the way to the front and open as high as your fireplace opening will allow.
- Page 12 A 24 volt wall thermostat and 20 feet of 18-gage thermo- stat wire is included in your stove’s accessory package. It is recommended that the thermostat and thermostat wire be installed by an authorized Lennox Hearth Prod- ucts dealer. Installation Steps: 1.
- Page 13 Type of Pipe - This stove requires type “PL” vent pipe (pellet vent pipe, sometimes referred to as “L-Vent pellet vent”), listed to UL 641 or ULC S609. Connect the pellet vent pipe or the “tee”...
- Page 14 Vent surfaces can get hot enough to cause burns if touched. Adults should supervise children when they are in the area of a hot stove. Non-combustible shielding or guards may be required. Termination Cap: The termination of the outside chim-...
- Page 15 INSTALLATION DETERMINING SIZE OF PIPE TO INSTALL To determine what diameter pipe to use in an installation (3” or 4”), first find the “equivalent pipe length” using the follow- ing guidelines, then plot this figure and the altitude on the chart. Fill out the installation chart, and calculate your total equivalent pipe length.
- Page 16 Greater back wall clearance will improve the ease of serviceability of the stove. Note: Greater back clearance will improve the ease of serviceability of the stove. 4. Install listed type “PL” 45 degree elbow with optional rodent screen or cap (recommended) on outside end of pipe.
- Page 17 INSTALLATION Standard Horizontal Installation Configurations Advantage II-T C FS* Corner Through the Wall 3” (75 mm) Minimum clearance between wall and pipe. If you vent to the furthest wall, the vent pipe must maintain a 3” clearance par- allel to the other wall.
- Page 18 INSTALLATION Standard Vertical Installation Configurations - Model: Advantage II-T C FS - These freestanding models may be con- nected to an existing unused flue or by installing type “PL” vent pipe (listed to UL 641 & ULC S609). If a liner is run all the way to the top of the existing chimney, the existing flue should be sealed with a steel plate.
- Page 19 INSTALLATION - ADVANTAGE II-T C INS IMPORTANT- Make sure the chimney and firebox are clean and free of soot and ashes before installation begins. Fail- ure to do so may result in the transfer of soot into the room by way of the Room Air Blower. Positive Flue Connection without a Full Reline (not allowed in Canada) vent pipe must...
- Page 20 INSTALLATION INSTALLING ADVANTAGE II-T C INS (CONTINUED) Full Chimney Reline Recommended for All Chimney Installations Seal Chimney top with steel plate and/or pipe support Approved Liner for Factory Built (ZC) Fireplaces Masonry Fireplaces 2100HT (degree liner listed to UL 1777 or ULC S635.
-
Page 21: Care And Operation
Room Air Blower. Pressing this button will increase or decrease the amount of heat exit- ing the stove. THE BLOWER SPEED MUST BE AT THE MAXIMUM #5 SETTING WHEN THE HEAT OUTPUT BUTTON IS ON THE #5 POSITION. - Page 22 If this happens, adjust the damper rod (on the side of the stove) in or out to achieve a proper burn. Pellet Size: You may notice a difference in the burn if you change pellet fuel sizes.
- Page 23 All adjustments to compensate for burn characteris- tics should be done with the damper on the left-hand side of the stove by moving it in or out slightly 1/4” at a time. When your new stove is installed; the exhaust should be hooked up, the stove plugged in and the fire started.
- Page 24 Overheating: A high temperature switch will automatically shut down the stove if it overheats. The stove will need to be manu- ally re-lit. Allow up to 45 minutes cooling time before re- lighting. Keep enough convection air (room air blower) going through stove to keep it cooling properly, this will ensure long life of the stove.
- Page 25 PLEASE NOTE: Lennox Hearth Products has no control over the manufacturing of pellet fuel and will not be held responsible for poor stove performance or any damage caused by poor quality pellet fuels.
-
Page 26: Routine Maintenance
ROUTINE MAINTENANCE Inspect your stove or insert at minimum frequency stated until you establish a minimum frequency required for your installation (frequency will vary depending upon fuel BTU value / ash content, usage, and misc. installation vari- ables). ROUTINE CLEANING Stove will need to be shut off and cooled enough to han- dle before routine cleaning is performed. - Page 27 Handy Hint: After the first 10-20 bags of fuel, you may want to remove the firebrick and determine the rate at which the fly ash is building build up within the Stove. Contact your dealer for more information. Fly Ash...
- Page 28 The door gasket does not need to be “tight” in all areas, since a small amount of leakage is not hazardous or detrimental to the perform- ance of your stove. Rain Cap (check seal at points indicated by arrows) Minimum Frequency of 3 months to 1 year Visually inspect gasket often.
- Page 29 OPENING SIDE PANELS Advantage II-T C FS – For right hand side panel open the glass door, locate the 2 screws at front edge and re- move using a 5/16” nut driver. Repeat procedure for left hand side panel with door closed.
- Page 30 The stove body is painted with a quality high- temperature stove paint. Use only Stove Paint, Part # 70K99. Do not touch-up your stove with any other paint. Using one small piece of 320 grit sand paper and lightly sand the blemish so that the edges are “feathered” or smooth to the touch between the painted and bare sur- faces.
-
Page 31: Specifications
SPECIFICATIONS - Advantage II-T C FS Flue Size 3” Standard Width, Overall 24 3/4” Depth, Overall 25” (26" to flue outlet) Depth, Overall w / 3” tee 30 7/8” Height 31 3/8” Floor to Rear Flue Center 17 1/2” Facing Back of Unit,... -
Page 32: Specifications
SPECIFICATIONS - Advantage II-T C INS Flue Size 3” Standard Width, Overall front (w/o surround) 25” Width, Overall back (w/o surround) 24 1/4” Depth, Overall (w/o surround) 24 3/4” Height, rear (w/o surround) 19 3/4” Height, front (w/o surround) 22 3/4” Floor to Rear Flue Center 8 1/2”... -
Page 33: Definitions
DISC, LOW LIMIT (Ceramic, F140-30F, N / O*) This disc is designed to shut down the stove (auger mo- tor and both blowers) if it does not sense the heat of a fire. -
Page 34: Wiring Diagram
WIRING DIAGRAM PAGE 34 www.PelletKing.com... -
Page 35: Troubleshooting
Clean as necessary. Have your authorized Lennox Hearth Products dealer check your combustion blower. Have your authorized Lennox Hearth Products dealer adjust the fuel feed rate on the control board. Refill hopper. See Pellets will not feed on following page. - Page 36 Refill hopper. Check to be sure that there is no blockage in the pressure tap or hose. Have your authorized Lennox Hearth Products dealer diag- nose the problem and clean or replace any necessary parts. If new installation check for excessive 90˚ bends, long horizontal runs or excessive vertical run of 3”...
-
Page 37: Troubleshooting
DO NOT use a standard household vacuum or “shop vac” as the filters will leak the fine particles of ash. Clean the stove with an ap- proved ash vacuum ONLY. If a wall thermostat is not installed, a jumper is required between the 2 thermostat terminals (see page 12). -
Page 38: Replacement Parts List / Diagrams
REPLACEMENT PARTS LIST Door Parts 12140510 Bracket, Door Hinge 12151505 Bracket Kit, Window Wash 12150500 Door Assembly, Complete, Advantage II-T C- Black (3 pc) 61057100 Gasket Kit, Door Rope (WP2/WP4; 1/2" round; 7 ft.; firm) 61057201 Gasket Kit, Glass (WP2; 10 feet; 5/8", black with adhesive) 12146400 Glass, Center (13"... - Page 39 REPLACEMENT PARTS LIST Freestanding Only Parts 12251405 Lid with Hinge, Hopper (Freestanding) - Black 12254000 Panel, EZ Open, Left Side - Black 12256000 Panel, EZ Open, Right Side – Black 12255001 Panel, Top, F|S, Black 12252900 Trim Kit, Brass (for Side Panel, WP2 – Freestanding) – 2 per pkg. Insert Only Parts 12351405 Lid with Hinge, Hopper (Insert) –...
- Page 40 REPLACEMENT PART DIAGRAMS Wall Thermostat Kit Firebrick Kit 3 Piece Set UltraGrate Door Assembly Power Cord Kit Glass (Order each pc. separately. Gasket Included) PAGE 40 www.PelletKing.com...
- Page 41 REPLACEMENT PART DIAGRAMS Pressure Switch Kit Auger Motor (hose not included) Room Air Blower Auger Set Collar Exhaust Blower Auger End Plate Gasket Control Board Damper Rod PAGE 41 www.PelletKing.com...
-
Page 42: Optional Accessories
44” (111.75cm) width Small: (Cat. #H0424) 28 ½” (72.4cm) height 40 ¾” (103.5cm) width 3 1/2" – 9" Adjustable 36" 32" Med. 28 ½" PAGE 42 www.PelletKing.com Stove Model Insert Insert Insert Insert Insert Insert Insert Hearth Support Base w/ Trim Skirt Log Set (Cat. -
Page 43: Safety / Listing Label
ADVANTAGE II-T C PELLET STOVE SAFETY LABEL Note that your stove’s serial number is printed on the safety label, which is located near the inside of the hopper. Your stove’s serial number is preceded by a “WH-”(Example WH-0000000). PAGE 43... -
Page 44: Epa And Colorado Compliance Label
ADVANTAGE II-T C: EPA LABEL & COLORADO COMPLIANCE LABEL PAGE 44 www.PelletKing.com... -
Page 45: Simple Operating Instructions Label
SIMPLE OPERATING INSTRUCTIONS LABEL PAGE 45 www.PelletKing.com... -
Page 46: Installation Tips Label
INSTALLATION TIPS PAGE 46 www.PelletKing.com... -
Page 47: Ownership Records
OWNERSHIP RECORDS Dealer’s Name: Dealer’s Address: City: Serial Number: Notes: SERVICE AND MAINTENANCE LOG Service Service Service Date Technician Description State: Date of Purchase: PAGE 47 www.PelletKing.com Zip Code: Date Installed:... - Page 48 1110 West Taft Avenue Orange, CA 92865 www.PelletKing.com...