Advertisement
Quick Links
OPERATING INSTRUCTIONS
Attach drive board and pad:
1)
•
Tilt the machine back on its wheels until the machine is resting on the floor
exposing the drive mechanism.
•
The brush or drive board should now be placed on the drive
mechanism and locked in place by turning the brush or board anti clockwise.
•
If a drive board is used, you must select the appropriate size and grade of pad
and fit to the drive board.
•
With the brush or drive board fitted, the machine can be returned to the upright
position.
•
Reverse process to remove brush or drive board.
Attach drive pad (LYNX / EXCEL Models):
•
Tilt the machine back on its wheels until the machine is resting on the floor
exposing the drive mechanism.
•
Unscrew the central pad retainer by pushing it inwards and rotating it anti-
clockwise.
•
Select grade and size of pad: Excel 16 = 16" pad, Lynx 17 = 17" pad, Lynx
/Excel 20 = 20" pad.
•
Screw the central pad retainer clockwise through the pad and into the threaded
location in the drive mechanism. The pad retainer should click when fully
tightened.
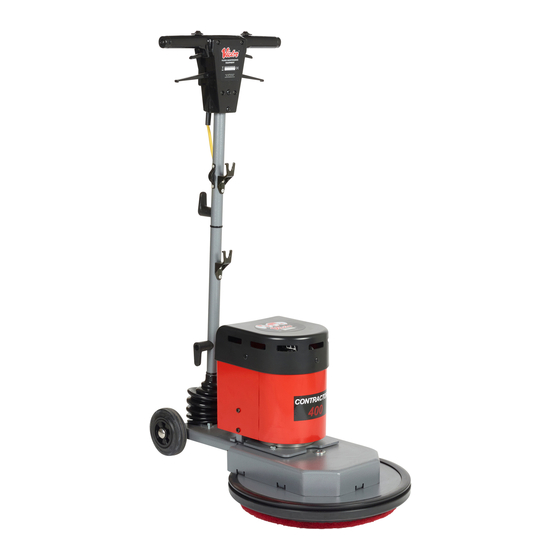
Operate the machine: (See graphic)
2)
•
Plug into power supply and check that the green power on light is on. (fig 2)
•
The handle should be adjusted to a comfortable working height, when the pad
or brush is flat on the floor.
•
The handle is adjusted by pulling the height adjustment lever (fig 4). This allows
the handle to be adjusted. The handle will lock into position when this lever is
released.
EXCEL Models: Once lock is released, the handle is 'free floating' enabling the
operator to work at a preferred handle height.
•
Lift the handle so that the machine base is parallel to the floor.
•
Operate the machine by sliding one of the safety switches (fig 1) outwards and
lifting the corresponding on/off lever (fig 3). Once in operation, the safety
switch can be released.
•
To start vacuum option, ensure exhauster power cable is connected to the inlet
socket (fig 6), press switch located at the top of the exhauster unit (fig 7) to the
on position.
•
Apply solution by lifting solution dispenser lever (fig 5 ). (If Applicable)
Control machine movement:
3)
•
When the brush or pad is flat on the floor, the machine will stay in the central
position.
•
To move to the Right – slightly Raise the handle.
•
To move to the Left – slightly Lower the handle.
Control machine movement (LYNX / EXCEL Models):
•
The machine is operated in a forward motion, do not use the machine in a
stationary position.
1.
Safety Switch
1
2
2.
Power On Ligh t
3.
On/Off Lever
4.
Height Adjustment Control
3
5.
Solution Dispenser Control / Bottle
3
6.
Inlet Socket
7.
Exhauster On/Off Switch
4
5
8.
Exhauster
9.
Bag Full Indicator Light
10. Socket Box
11. Cable Inlet Moulding
12. Dust Bag Cover (Lynx models)
7
9
10
8
12
6
11
MULTISPEED Control Dial:
4)
The VR-MSI450 and VR-MSI400 multispeed rotary machines have 3 speed settings,
each speed setting (used with the correct pad) is suited to a different cleaning
application. When setting the speed it is recommended that the following guidelines
are used
200 RPM – Scrubbing, Carpet Cleaning, Stripping.
400 RPM – Spray Cleaning
600 RPM – Burnishing
To select the required speed, rotate the speed selector knob until it points at the
appropriate RPM.
NOTE:
To protect the motor from overload, the machine has a built in safety feature that will
slow the motor down if the machine is being used for an application that it is not
designed for. If this occurs, check that the speed setting, pad type and condition are
suitable for the application that the machine is being used for.
CAUTION:
Operating the machine at either an incorrect speed for an application or the
incorrect pad type can result in damage to floor covering.
ROUTINE MAINTENANCE
Always remove plug from socket outlet before carrying out any routine
maintenance.
1)
Wipe all surfaces of the machine after use, particularly after scrubbing or spray
cleaning.
2)
Always wind the cable around the bottom cable hook and the handle.
3)
Wipe power cable clean after use, using a cloth. Check cable visually for signs
of wear and damage. If any is detected, ensure that it is replaced immediately.
This operation need not require a service call, as a new cable can be
plugged in by unqualified Personnel.
4)
(Lynx Models) It is important that the dust collection bag is changed regularly.
5)
(Exhauster Models) Change dust bag when bag full indicator light comes on.
6)
(Lynx / Excel Models) The seal on the skirt can be removed and refitted the
other way around to double the life.
High Visibility Cable Pack Replacement :
1)
Disconnect machine from mains supply.
2)
Unscrew 2 x 4mm screws (fig 11) that attach the cable inlet moulding to the
socket box.
3)
Disconnect the straight connector (attached to the cable) from the inlet
socket (attached to the socket box).
4)
To connect new Victor cable pack (Part No D1000), reverse the process.
NOTE: In the interests of operator safety and to prevent the use of inferior
replacement cables,VICTOR machines are fitted with Anti-Tamper(screw),
High Visibility cable packs comprising of Cable Inlet Moulding, Straight
Connector, High Visibility Cable and Moulded Plug. Replacement packs
(Part No:D1000) are available from Victor direct or their agents.
SAFETY INFORMATION
a)
This machine should only be used by trained operators.
b)
Do not use this machine unless it is in a safe condition. Check the
cable and plug for damage before use, and if necessary, replace
with a new cable pack.
c)
To stop the machine, release the on/off switches whilst holding on to
the handle.
d)
Always pay attention to the cable and keep it away from the brush, drive
board and pad. Hazard may occur if machine runs over power supply cord.
e)
Always work within the cable length to avoid cable stress or damage.
f)
When using a solution tank, always empty the tank after use into a safe,
suitable, approved location.
g)
Never use dirty pads or allow pads to become over soiled before changing.
h)
This machine has been designed for use with the boards supplied by the
manufacturer. The fitting of other Boards may effect its safety. For a guide
to different Board types and their intended use, refer to the VICTOR Rotary
Floor Machines brochure, available on request.
i)
Check that the voltage shown on the serial number plate is suitable for the
supply available.
j)
Only use the outlet socket for its intended purpose.(Exhauster Attachment)
k)
Machine ingress rating : IPX4
l)
The VICTOR Rotary Floor Machines maximum A-Weighted sound pressure
level Lpa measured in dB(A) is less than 85dB(A).
m)
The maximum r.m.s. acceleration value of a VICTOR Rotary Floor Machine
which operators arms are subjected to =1.5m/s².
n)
Always remove plug from mains socket outlet before carrying out any
cleaning, routine maintenance, drive board or pad attachment.
O)
Always remove Drive Board or Brush from machine when not in use.
CIRCUIT BREAKER (except Multispeed)
If the machine is overloaded, the circuit breaker will trip out. The reset button
can be depressed after 30 seconds to restart the machine.
NOTE: BEFORE RE-SETTING CHECK:-
1)
The pad, if a drive board is used , is clean. (if not, turn or change)
2)
There are no cable or supply faults.
For an exploded parts listing for this
machine visit our web site:
www.victorfloorcare.com
© Dowding & Plummer Ltd. Issue Level 4, Mar 2010
Advertisement

Related Manuals for Victor Europa Range

Summary of Contents for Victor Europa Range
- Page 1 The handle should be adjusted to a comfortable working height, when the pad To select the required speed, rotate the speed selector knob until it points at the to different Board types and their intended use, refer to the VICTOR Rotary or brush is flat on the floor.
- Page 2 The Distributor will co-operate with the purchaser throughout the warranty claims MANUAL procedure and will arrange any necessary repairs using genuine Victor parts. If the original Distributor is no longer available to fulfil his obligations, or if you did not...