Table of Contents
Troubleshooting

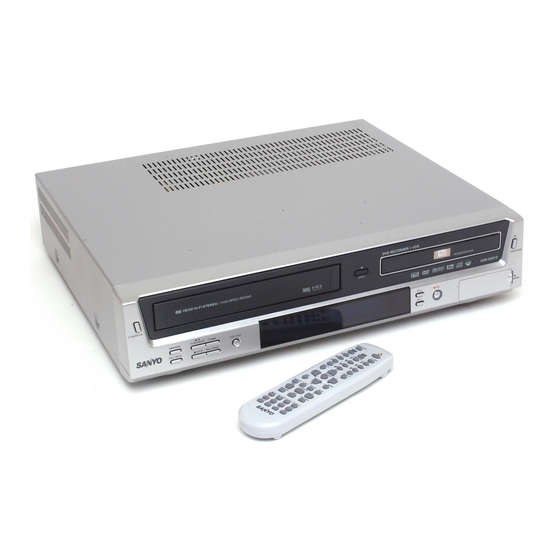
Related Manuals for Sanyo HVR-DX610


Summary of Contents for Sanyo HVR-DX610
- Page 1 HVR-DX610/DX620 INSTRUCTION MANUAL DVD Recorder+VCR Please read this manual carefully before connecting your DVD Recorder+VCR and operating it for the first time. Keep the manual in a safe place for future reference.
-
Page 3: Safety Instructions
Safety Instructions Safety Instructions Please keep the DVD Recorder+VCR’s guarantee sheet and receipt in a safe place. Precautions • Read this booklet carefully. • Make sure the rating of your household electricity supply matches that shown on the back of your DVD Recorder+VCR. •... -
Page 4: Important Safeguards
Important Safeguards Important Safeguards The lightning flash with arrowhead symbol, CAUTION within an equilateral triangle, is intended to RISK OF ELECTRIC SHOCK alert the user to the presence of uninsulated DO NOT OPEN ‘dangerous voltage‘ within the product’s enclosure that may be of sufficient magnitude CAUTION: TO REDUCE THE RISK OF ELECTRIC to constitute a risk of electric shock. - Page 5 Important Safeguards This set has been designed and manufactured to ventilation to ensure reliable operation of the unit assure personal safety. Improper use can result in and to protect it from overheating. These electric shock or fire hazard. The safeguards openings must not be blocked or covered.
- Page 6 25 WEEE (Waste Electrical and Electronic Equipment) 19 SERVICING Your SANYO product is Do not attempt to service this unit yourself as designed and manufactured opening or removing covers may expose you to with high quality materials and dangerous voltage or other hazards.
-
Page 7: Table Of Contents
Table of Contents Table of Contents Introduction Recording Safety Instructions ____________________________1 Basic Recording________________________________42 Recording from TV Important Safeguards _________________________2 One Touch Record (OTR) Table of Contents ______________________________5 Checking the Recording Time Overview ______________________________________6 To Pause the Recording Identification of Controls_______________________10 One Touch Copy - DVD to VHS Copy Edit (DVD VCR) -
Page 8: Overview
Overview Overview DVD, DVD+R, DVD+RW? What is a DVD? DVD (Digital Versatile Disc) is a storage medium that combines the convenience of the compact disc with the latest digital video technology. DVD video uses modern MPEG2 data compression technology that enables an entire feature film to be stored on a single five inch disc. -
Page 9: About Dvd Recording
Overview Playback only DVD Video (Digital Versatile Disc) DVD-R (DVD-Recordable): These discs can only be played back if the recording was made in ‘Video mode‘ and the recording was finalized. DVD-RW (DVD-Rerecordable): These discs can only be played back if the recording was made in ‘Video mode‘ and the recording was finalized. - Page 10 Overview Restrictions on Video Recording • You cannot record copy-protected video using this DVD Recorder+VCR. Copy-protected video includes DVD- Video discs and some satellite broadcasts. If copy-protected material is encountered during a recording, recording will pause or stop automatically and an error message will be displayed on-screen. •...
-
Page 11: Notes On Discs
Overview Remote Control Battery Installation Detach the battery cover on the rear of the remote control, and insert two AAA batteries. Make sure the polarities (+ and -) are aligned correctly. Caution Do not mix old and new batteries. Never mix different types of batteries (standard, alkaline, etc.). -
Page 12: Identification Of Controls
Identification of Controls Identification of Controls Front Panel & STANDBY/ON REC SPEED SELECT DVD/VCR Turns the DVD Recorder+VCR on and off. Lock/Unlock the front panel and Remote control Toggles control between the DVD deck and the by pressing and holding it over 5 seconds. VCR deck. -
Page 13: Front Panel Display
Identification of Controls Front Panel Display & * ! Indicates a VHS tape is inserted in the VCR deck. ) Circle : Indicates a DVD+R(+RW) is recording. @ Circle : Indicates the VCR is recording. Clock : Indicates a DVD Timer recording is set. 1 Indicates a disc is inserted in the DVD deck. -
Page 14: Remote Control
Identification of Controls Remote Control - Turns the DVD Recorder+VCR on and off. - Lock/Unlock the front panel by pressing and holding it over 5 seconds. - Opens and closes the disc tray in DVD mode. - Ejects the tape in the VCR deck in VCR mode. Selects VCR mode. - Page 15 Identification of Controls Skips to the next or previous chapter/track. Stops playback or recording. Starts recording. Press repeatedly to set the recording time. For more details, Refer to One Touch Record (OTR) on page 42. Selects Recording mode: - DVD : HQ (1hr), SP (2hrs), EP (4hrs) or SLP (6hrs). - VCR : SP or LP.
-
Page 16: Rear Panel
Identification of Controls Rear panel @ # $% & AC Power Cord RF IN (FROM ANT.) Plug into a power outlet. Connect to your antenna or cable TV outlet. & AUDIO OUT (L, R) RF OUT (TO TV) Connect to a TV or other equipment with audio Connect to a TV with an RF coaxial input. -
Page 17: Connections
Connections Connections • There are a variety of ways to connect the DVD Recorder+VCR to your TV and other equipment. Use only one of the connections described below. Whichever TV connection you use will work with all input sources. • Please refer to the manuals for your TV, VCR, stereo system, or other devices as necessary to make the best connections. -
Page 18: Connecting A Tv
Connections Connecting a TV Choose one of the following TV connections, depending on the capabilities of your equipment. RF Connection Connect the RF OUT (TO TV) jack on the DVD Recorder+VCR to the antenna in jack on your TV using the supplied 75-ohm RF cable (R). -
Page 19: Connecting An Amplifier/Receiver
Connections Connecting an Amplifier/Receiver Connecting to an amplifier equipped with two channel analog stereo or Dolby Pro Logic ll/Pro Logic Connect the Left and Right AUDIO OUT jacks on the DVD Recorder+VCR to the left and right audio in jacks on your amplifier, receiver, or stereo system, using the supplied audio cables (A). -
Page 20: Connecting Optional Equipment
Connections Connecting Optional Equipment To receive audio/video signals from other equipment, Jack Panel of Accessory Component connect the AVF jacks on the DVD Recorder+VCR to the (VCR, Camcorder, etc.) audio/video out jacks on your external component, using optional audio/video cables. Front of DVD Recorder+VCR Connecting a Digital Camcorder Using the front panel DV IN jack, it is possible to connect a... -
Page 21: Initial Installation
Initial Installation Initial Installation Initial Installation After successfully connecting your DVD Recorder+VCR to your TV and other Installation devices, this chapter will show you how to complete the initial installation. • You must follow the initial installation process to set the time, date, Welcome. - Page 22 Initial Installation Select the desired disc playback subtitle language using […/†]. Press Installation [ENTER] to confirm. Please select disc subtitle language: Default English Spanish French Czech Danish German Instructions Enter-Confirm Setup-Exit Move …† The DVD Recorder+VCR detects channels automatically and stores them Installation in memory.
-
Page 23: Initial Setup
Initial Setup Initial Setup Setup Menu Overview The DVD Recorder+VCR Setup menu includes six categories, including: Installation, Recording Options, Languages, Preferences, System Info, and Restore Defaults. Press [SETUP] and [œ/√] on the remote control to view the first and second levels of the Setup menu. Menu Navigation Press [SETUP]. - Page 24 Initial Setup Use […/†] to select ‘Auto Search‘. Manual Setup Standard PAL-BG Search the real channel number by pressing [œ/√]. Reception Aerial Auto Search CH-02 Fine Tune Decoder Store Channel PR-01 Program Name P-01 Instructions Enter-Confirm Setup-Exit Move …† Select ‘Fine Tune’. You can adjust the fine tuning. Manual Setup Standard PAL-BG...
- Page 25 Initial Setup Auto Set The DVD Recorder+VCR has a frequency synthesized tuner capable of receiving up to 99 channels. These include VHF channels 00-14, UHF channels 27-69 and CATV channels 1-41 for Australia. (for New Zealand, VHF channels 1-11 and Installation UHF channels 21-69) Manual Set...
-
Page 26: Recording Options Settings
Initial Setup Adjust Channels Follow steps 1-2 as shown under ‘Manual Set’. Use […/†] to select ‘Adjust Channels‘. Installation Manual Set Press [ENTER]. The Adjust Channels menu appears. Auto Set Set Clock Use […/†] to select the PR number you want to adjust. Then press Adjust Channels [ENTER]. -
Page 27: Language Settings
Initial Setup VCR Record Quality You can set the default VCR recording quality to SP (Standard Play) or LP Recording Options (Long Play). SP is higher quality, but LP provides 2 times the recording time; e.g., a 2 hour tape will record for 4 hours in LP mode. DVD Record Quality Follow the same procedure as the ‘DVD Record Quality’. - Page 28 Initial Setup Menu/Subtitle/Audio Language Select your preferred language for Disc Menus, Subtitles, and Audio Language soundtracks. OSD Language English Follow the same procedure as the OSD Language. Select Menu Menu Language Default … Language Default : Subtitle Language Default The disc’s default language is selected. Audio Language Default Default...
-
Page 29: Preferences / Video Settings
Initial Setup PREFERENCES / Video Settings Press [SETUP]. Use [œ/√] to select ‘Preferences‘. Preferences Video While ‘Preferences‘ is selected, press [†] to select ‘Video‘. Audio Parental Controls Press [ENTER]. The ‘Video‘ submenu is displayed. Auto Settings Instructions Enter-Confirm Setup-Exit Move …† TV Aspect Ratio Use […/†] to select ‘TV Aspect‘... -
Page 30: Preferences / Audio Settings
Initial Setup PREFERENCES / Audio Settings Follow the same procedure as ‘Video’ Settings to select ‘Audio’ Settings. Preferences Video Audio Parental Controls Digital Output Auto Settings Use […/†] to select ‘Digital Output‘ while the ‘Audio’ submenu is displayed. Instructions Enter-Confirm Setup-Exit Press [ENTER] or [√] to go to the second level. -
Page 31: Preferences / Parental Controls
Initial Setup PREFERENCES / Parental Controls Set Parental Level The Parental Controls feature allows you to prevent DVDs from being played Preferences based on their ratings or to have certain discs played with alternative scenes. Video You can set the parental level from ‘ADULT’ to ‘KIDS’. Audio Press [SETUP]. - Page 32 Initial Setup Press [ENTER] to confirm your rating selection, then press [SETUP] to exit Parental Control the menu. Set Parental Level ADULT Change Password Set Parental Country Code Instructions Enter-Confirm Setup-Exit Move …† Change Password While ‘Preferences‘ is selected, press [†] to select ‘Parental Controls‘. Parental Control Press [ENTER].
-
Page 33: Preferences / Vcr
Initial Setup PREFERENCES / VCR This feature enables you to search for Index marks or specific times on your VHS Preferences tapes. Video While ‘Preferences‘ is selected, press [†] to move to the second level. Audio Parental Controls Use […/†] to select ‘VCR‘. Auto Settings Press [ENTER] to display the submenu. -
Page 34: Restore Defaults
Initial Setup Restore Defaults If you wish, you can reset the DVD Recorder+VCR to its original factory settings. Restore Defaults Press [SETUP]. If you select this function all settings will be removed and Use [œ/√] to select ‘Restore Defaults‘. Are you sure you want to restore the product will be set into default settings? Press [ENTER]. -
Page 35: On-Screen Display Overview
On-Screen Display Overview On-Screen Display Overview The On-Screen Display provides feedback on the status of the DVD Recorder+VCR and/or the currently loaded disc or tape. To access the On-Screen Display (or OSD), press [DISPLAY]. Displaying Disc Information To display information about the currently loaded disc or tape: On-screen display operation Press [DISPLAY] repeatedly to display/change the information displayed on-screen. -
Page 36: Playback
On-Screen Display Overview OSD Menu Options for DVD During DVD playback, press [DISPLAY] to show information about the current disc. While the disc information is displayed, press [DISPLAY] again to show the disc remaining time. Title Shows the current title number and total number of titles, and skips to the desired title number. -
Page 37: Dvd Playback
DVD Playback DVD Playback Playing a DVD Press [DVD] to set the remote control to operate the DVD deck. Turn the TV on and select the video input source connected to the DVD Recorder+VCR. Audio system: Turn the audio system on and select the input source connected to the DVD Recorder+VCR. Press [OPEN/CLOSE] to open the disc tray. - Page 38 DVD Playback Changing the Audio Language Press [AUDIO] and then press [AUDIO] repeatedly during playback to hear a different audio language or audio track. Subtitles Press [SUBTITLE] and then press [SUBTITLE] repeatedly during playback to select among all available subtitle languages.
- Page 39 DVD Playback Search Press [SEARCH] to display the Search menu. … T/ C Use [œ √] to move to Title (T) or Chapter (C) and use […†] to set the title or chapter † number. œ √ Selecting Titles When a disc has more than one title, you can select among all available titles as follows: Press [DISPLAY] and use […†] to select the Title icon.
-
Page 40: Vcr Playback
VCR Playback VCR Playback Before You Begin Press the VCR button to set the remote control to operate the VCR deck. Turn the TV on and select the video input source connected to the DVD Recorder+VCR. Audio system: Turn the audio system on and select the input source connected to the DVD Recorder+VCR. Playing a VHS Tape Insert a prerecorded video cassette. -
Page 41: Special Playback Features
VCR Playback Special Playback Features Notes on special playback features Horizontal lines (noise bars) will appear on the TV screen. This is normal. The audio is automatically muted during special playback modes, so there is no sound during search, slow motion, etc. During high-speed picture search, a short time is needed to stabilize tape speed when re-entering Play mode. -
Page 42: Other Disc Playback
Other Disc Playback Other Disc Playback Audio CD/MP3 PLAYBACK The DVD Recorder+VCR can play audio CDs and MP3 files on CD-ROM, CD-R or CD-RW discs. Insert the CD disc and close the tray. The Audio CD or MP3 CD menu •••... - Page 43 Other Disc Playback Select the thumbnail you want to display using […†œ √] and press [ENTER]. The full size image will be displayed and a slide show starts automatically with a time interval of 10 seconds. Press [NEXT] or [PREV] to manually skip to the next or previous image. Press [√] (or [œ]) to rotate the image (counter) clockwise.
-
Page 44: Basic Recording
Basic Recording Basic Recording Recording from TV Follow the instructions below to record a TV program. Turn on the DVD Recorder+VCR and load a recordable disc or tape. Make sure your TV input is set to view the DVD Recorder+VCR. Set the desired Recording mode by pressing [REC MODE] repeatedly. -
Page 45: Checking The Recording Time
Basic Recording Checking the Recording Time Total time and recorded time are displayed on the TV screen after pressing [DISPLAY]. Recorded time is displayed on the front panel display. To Pause the Recording Press [PLAY/PAUSE] to pause the disc or tape during recording. When you want to continue recording, press [PLAY/PAUSE] or [REC ( )] in DVD mode and press [REC ( )] in VCR mode. -
Page 46: Copy Edit (Dvd Vcr)
Basic Recording Copy Edit (DVD VCR) During one touch copy you can search or change REC SPEED and resume copy. During One Touch Copy press [PLAY/PAUSE] to enter COPY EDIT mode. Search with [FF/REW] or [NEXT/PREV] button. Press [COPY] and you can change REC SPEED. Press [COPY] again to resume copy. -
Page 47: Timer Recording
Timer Recording Timer Recording Timer Recording using Manual Set Record Screen The Timer Recording function allows you to record up to 8 programs within a period of one month. Insert recordable media such as DVD+R ,DVD+RW, recordable VHS tape. Press [TIMER]. The ‘Select Record Method’... -
Page 48: Timer Recording Using G-Code System
Timer Recording Timer Recording using G-Code system Thanks to this programming system, you no longer need to tediously enter the date, programme number, start and end time. All the information needed by the DVD recorder for programming is contained in the G-Code programming number. -
Page 49: Canceling A Timer Recording
Timer Recording Canceling a Timer Recording You can clear a Timer Recording any time before the recording actually starts. • Use […†] to select the program you want to erase on the Timer Recorder List, then press [ENTER] to modify it. Use [œ √] to select 'Delete' then press [ENTER]. Stopping a Timer Recording in Progress After a Timer Recording has started, you can still cancel the program by pressing and holding [STOP] for 3 seconds. -
Page 50: Recording From An External Input
Recording from an External Input Recording from an External Input Recording from External Components You can record from an external component, such as a camcorder or VCR, connected to any of the DVD Recorder+VCR’s external inputs. Make sure the component you want to record from is connected properly to the DVD Recorder+VCR; see pages 15~18. - Page 51 Recording from an External Input What is DV? Using DV, also known as i.LINK, you can connect a DV-equipped camcorder to the DVD Recorder+VCR using a single DV cable for input and output of audio, video, data and control signals. The i.LINK interface is also known as IEEE 1394-1995.
-
Page 52: Editing
Editing Editing DISC Initialize • If you load a blank DVD+R(+RW) disc, it will be initialized (formatted to enable recording). • Do not start recording until disc initialization is complete. • If you load a DVD+RW that has already been used you can record a program immediately. Disc Menu For recordable DVD media, such as DVD+R and DVD+RW discs, you can manage the disc using the Disc Menu. - Page 53 Editing Finalize (Make Compatible) Finalizing a DVD+R ‘locks’ its recordings in place so the disc can be played on most standard DVD players or computers equipped with DVD-ROM drives. 'Make Compatible' for a DVD+RW will automatically create a menu screen for navigating the disc. This menu screen is accessible by pressing [MENU] or [TITLE].
- Page 54 Editing Change Disc Name You can rename your disc to any name you choose. The default disc name is ‘MY DVD‘. Use […] to go to the top menu. Change Disc Name Press [Enter] to change Press [√] to display the Disc Information Menu. the disc name.
-
Page 55: Title Menu
Editing Title Menu You can manage the titles on your DVD+R/RW discs using the Title menu. Play a Title To play a title: Press [MENU] to display the disc menu. Play Title Select the desired title you want to manage using […†]. …... - Page 56 Editing Change Name To change the name of a title: Follow steps 1 to 3 under ‘Play Title‘. Change Name Select ‘Change Name’ using [œ √] . … Press [Enter] to change the title name. Press [ENTER] to change the title name. √...
-
Page 57: Editing
Editing Editing When you insert a DVD+R or DVD+RW disc already recorded by your DVD Recorder+VCR, you can edit the titles and chapters in a variety of ways. To edit a recorded title, select the title on the disc menu and press [EDIT]. The selected title will begin playing automatically. - Page 58 Editing Hide Chapters This feature allows you to hide or unhide a chapter. After hiding a chapter, the DVD Edit chapter is not deleted but only hidden. If a chapter is hidden then it shows Title 1 of 2 ‘Unhide Chapter‘ and vice versa. Chapter 1 of 11 Edit Chapters...
-
Page 59: Troubleshooting
Troubleshooting Troubleshooting Check the following guide for the possible cause of a problem before contacting customer support. Symptom Cause Solution No power. The power cord is disconnected. Plug the power cord into the wall outlet securely. No picture. The TV is not set to receive DVD Select the appropriate video input on the Recorder+VCR signal output. -
Page 60: Moisture Condensation
Troubleshooting Symptom Cause Solution Discs recorded with copy-once No solution. material cannot be played on other players. Cannot record or did not The remaining blank space on the Use another disc. record successfully. disc is insufficient. The source you are trying to record is You cannot record the source. -
Page 61: Technical Specifications
Technical Specifications Technical Specifications General Power requirements 200–240V~, 50/60 Hz Power consumption Dimensions (approx.) 16.9 x 3.54 x 14.0 inches (430 x 91 x 354 mm) (w x h x d) Mass (approx.) 13.5 lbs (6.18 kg) Operating temperature 41°F to 95°F (5°C to 35°C) Operating humidity 5% to 90% Signal system... - Page 62 Technical Specifications Outputs Video output (DVD/VCR) Video output terminal, 1.0 Vp-p, unbalanced, RCA jack Video output (DVD) Component output (75Ω in load, R : 0.7Vp-p, G : 0.7Vp-p, B : 0.7Vp-p) Audio output (DVD/VCR) Audio output terminal (2 kinds), -5.8dBm (VCR), 2Vrms (DVD) Audio output (DVD) Analog audio output : 2.0Vrms, Digital audio output : coaxial S-Video output (Y)
- Page 66 SANYO Electronics Co.Ltd Code No., 0000000 Printed in Japan...