Table of Contents
Advertisement
Konica Minolta Customer Support:
www.konicaminoltasupport.com
Konica Minolta Photo World:
www.konicaminoltaphotoworld.com
Become a member of Konica Minolta Photo World today,
free of charge, and enter the fascinating world of Konica Minolta photography.
Register now, save 29.99 EUR,
get DiMAGE Messenger for free!
INSTRUCTION MANUAL
© 2005 Konica Minolta Photo Imaging, Inc. under the Berne Convention
and the Universal Copyright Convention.
9979 2892 50/12984
Printed in Germany
Advertisement
Table of Contents

Related Manuals for Konica Minolta 5400 II


Summary of Contents for Konica Minolta 5400 II
- Page 1 Konica Minolta Photo World: www.konicaminoltaphotoworld.com Become a member of Konica Minolta Photo World today, free of charge, and enter the fascinating world of Konica Minolta photography. Register now, save 29.99 EUR, get DiMAGE Messenger for free! INSTRUCTION MANUAL © 2005 Konica Minolta Photo Imaging, Inc. under the Berne Convention and the Universal Copyright Convention.
-
Page 3: For Proper And Safe Use
• Do not disassemble this product. Electric shock may cause injury if a high-voltage circuit inside the product is touched. Take the product to a Konica Minolta service facility when repairs are required. -
Page 4: Table Of Contents
Before connecting the scanner ........ -
Page 5: Before You Begin
Scanner color preferences ........ -
Page 6: Installation
Apple USB port scanner utility. PCI Card Check the Konica Minolta web site for the latest compatibility information: Plug-in compatible with Photoshop Elements 2.0, Memory When scanning with: 128MB of RAM. -
Page 7: Windows
In the example below, the hard disk is drive E. The letters des- ignating the drives vary between computers. Insert the DiMAGE Scan Elite 5400 II Utility CD- ROM into the CD-ROM drive. The DiMAGE Scan Elite 5400 II setup screen opens. -
Page 8: Macintosh
Macintosh For Mac OS X, log on as an administrator.. Insert the DiMAGE Scan Elite 5400 II Utility CD-ROM into the CD-ROM drive; the CD-ROM icon appears on the desktop. Double click on the icon to display the contents of the CD-ROM. -
Page 9: Scanner Setup
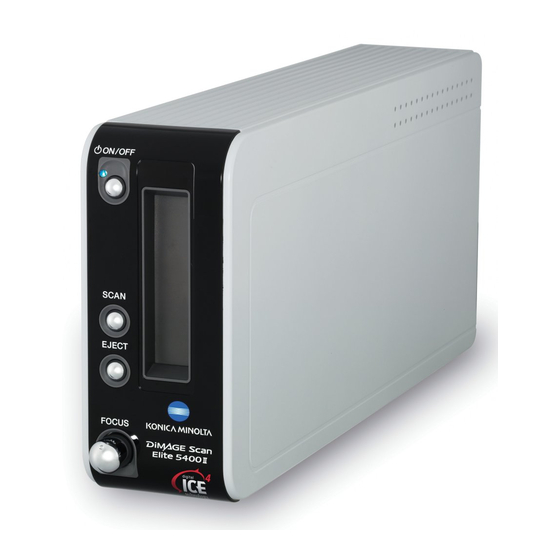
Focus dial Connecting the scanner Securely plug the A connector of the USB cable into the scanner’s USB port (1) and the B con- nector into the computer’s USB port. The scanner should be connected directly to the computer. Attaching the scanner to a USB hub may prevent proper operation. -
Page 10: Loading The Film Holders
Before using the scanner, install the DiMAGE Scan Utility. Launch one of the DiMAGE Scan Utility drivers before inserting the film holder. Do not insert the film holder into the scanner while the utility software is launching or the scanner is initializing; the indicator lamp blinks during this peri-... -
Page 11: Dimage Scan Launcher
Scanner Notes The launcher can be opened from the programs option of the start menu (Windows) or by double clicking on the icon in the DS Elite 5400 II folder (Macintosh). -
Page 12: Easy Scan Utility
Utility button to open the application. Scanner Notes The launcher can be opened from the programs option of the start menu (Windows) or by double clicking on the icon in the DS Elite 5400 II folder (Macintosh). Easy scan utility Using the Easy Scan Utility When the Easy Scan Utility is launched, the Easy Scan Wizard opens. - Page 13 Click the save button to begin the final scan. Scan-all-images check box When using a USB storage device on the same bus as the scanner, save the data on the com- puter’s hard disk first before transferring it to the storage device. Saving the scanned data direct- ly to the device may corrupt the image data.
-
Page 14: Basic Scanning
Scanner Notes The utility can be opened from the programs option of the start menu (Windows) or by double clicking on the icon in the DS Elite 5400 II folder (Macintosh). Scanning basics Please read the basic scanning section in its entirety before moving on. Before any scan is made, the film holder must be loaded and inserted into the scanner;... -
Page 15: Film Type Setup
Film type is selected from the list box in the main window. Index scans When a film holder is inserted into the scanner, an index scan starts automatically; this func- tion can be turned off in the preferences dialog box (p. -
Page 16: Flip And Rotate
Original image Crop prescan button To view the results of cropping, click the crop prescan button. The scanner makes a prescan and shows the cropped area in the prescan display. Scanner Notes The arrow buttons display the next or previous image in the film holder. -
Page 17: Making The Final Scan
Making the final scan Before making the final scan, the input and output parameters must be specified. While it’s pos- sible to input the scan settings yourself, DiMAGE Scan Utility gives you an easier choice - Jobs. Jobs are preset scan settings based on image use. The DiMAGE Scan Utility contains over 60 Job files. -
Page 18: Basic Image Processing
(Windows) or an asterisk is displayed (Macintosh). Scanner Notes The RGB display shows the color values for any point in the image; place the mouse point- er over a point. -
Page 19: Pixel Polish
Pixel Polish Pixel Polish makes automatic or custom image corrections. See page 11 for memory require- ments. Pixel Polish cannot be used with black and white film, 16-bit or 16-bit linear color depth (p. 40). Scanning time increases. The effect of Pixel Polish is based on the prescan image area. If the image is cropped after applying Pixel Polish, click the crop-prescan button (p. -
Page 20: Brightness, Contrast, And Color-Balance Palette
Brightness, contrast, and color balance palette Click the brightness, contrast, color-balance button in the image-correction tab to display the palette. Drag the brightness, contrast, or color sliders, or enter specific values in the corresponding text box to make corrections. Dragging each slider to the right or inputting a positive number in the text box increases the brightness, contrast, and color. -
Page 21: Advanced Scanning
This normally results in an excellent scan when the film plane is flat. However, if the film is warped or curled, the scanner can be focused using point AF or manual focus (p. 44). -
Page 22: Exposure-Control Tab
The index images can be saved in one image file. The film holder does not have to be in the scanner to save the images, but all the frames in the film holder, including empty frames, must have been scanned. -
Page 23: Point Af (Autofocus)
Advanced scanning AE lock The AE lock fixes the scanner exposure based on a specific prescan and applies it to other scans. Use this function when scanning a series of high and low-key images that have consis- tent exposures or a bracket series to show the exposure difference in each frame. When used with slides, the auto-expose-for-slides option must be checked in the preferences dialog box. -
Page 24: Manual Cropping
Reset button: to initialize all settings. Example 1: setting the scanner output by pixels. This example creates an image with the pixel dimension of 640 X 480 to be displayed on a monitor. -
Page 25: Saving Scan Settings As A Job
Scan settings remain in effect until changed. Scanner Notes When scanning for a particular purpose, image resolution should be matched to the resolu- tion of the output device. A 150dpi printer cannot take advantage of files with a greater reso- lution. -
Page 26: Master Setup
Digital ROC cannot be used with 16-bit linear color depth (p. 40) or silver-halide black and white films; see scanner notes on page 52. When Digital ROC is activated, the autoexposure functions for slides and negatives in the preferences box, color matching, and the AE lock, AE-area-selec- tion, and exposure-control functions are disabled. -
Page 27: Digital Gem
Any adjustments are only applied to the selected image(s). Digital SHO can only be used with 8-bit color depth (p. 40). The exposure-co trol tab is disabled. This function cannot be used with silver-halide black and white films; see scanner notes on page 52. -
Page 28: Image-Correction Palettes
Image-correction palettes Six palettes in the image-correction tab can be used for image processing. Simply click the appropriate button to open the palette. Variation (p. 37) Hue, saturation, and lightness (p. 63) Brightness, contrast, and color balance (p. 38) Tone curve and histogram (p. 56) Changes made on the palettes are reflected in the displayed image;... -
Page 29: Tone Curve And Histogram
Reset button Click the auto-setting button to maximize contrast and color balance automatically. The change is reflected in the prescan image. Scanner Notes When cursor is placed over the image, the RGB display and tone curve show the value of that point. -
Page 30: Tone-Curve Processing Guide
The highlight level, shadow level, and gamma Input shadow slider are set with the sliders under the histogram. These levels are displayed numerically in the text boxes to the right of the sliders and can be changed with the keyboard. Gamma defines the mid-tones of the image. -
Page 31: Histogram Processing Guide
Histogram processing guide This guide shows simple corrections that can be made with a histogram. Unlike the tone curve, the histogram provides information on a specific image. This can used to evaluate the image and make adjustments accordingly. The pixel distribution in the histogram shows the entire tonal range of the image is not used. -
Page 32: White And Black-Point Setup
The auto-setting button adjusts the saturation automatically without affecting the hue or light- ness. Click the reset button to cancel any changes. Scanner Notes The hue control is not a color balancing tool. When changing hue, each color is assigned a new hue depending on the degree of rotation through the color space. -
Page 33: Snapshot Button
Click the OK button in the preferences dialog box to complete the operation. Scanner Notes sRGB - multi-media and internet standard. Adobe RGB - graphic arts standard. Apple RGB - Apple display standard. -
Page 34: Batch Scan Utility
Quick Scan button with the drop-down menu at the bottom of the launcher, the first time the Quick Scan button is pressed the scanner initial- izes and then the message to insert the holder is displayed. To scan subsequent holders, simply... -
Page 35: Appendix
Troubleshooting This section covers minor problems with scanner operation. For major problems or damage, or if a problem continues to reoccur frequently, contact your dealer or a Konica Minolta service facility. SYMPTOM or MESSAGE Confirm the cable is securely connected between the com- When starting up the utility software, could-not- puter and scanner. -
Page 36: Technical Support
Please contact your dealer for information regarding installation, USB interface recommenda- tions, or application compatibility. If your dealer is unable to help you, contact an authorized Konica Minolta service facility. Please have the following information ready when calling Konica Minolta technical support: 1. -
Page 37: Checking Software Installation - Windows
Checking software installation - Windows If the scanner was connected to the computer before the DiMAGE Scan Utility was installed, the computer may not recognize the scanner unit. Use the following instructions to confirm the driver was installed correctly: 1. Right click on the My-computer icon. Select “properties” from the drop-down menu. -
Page 38: Job File List
Job file list Jobs can be used to make scan settings based on the final use of the image. See page 32 for more information. The following charts list the parameters of the scanner’s Job files: CATEGORY J OB NAME...