Table of Contents
Advertisement
USE AND CARE GUIDE
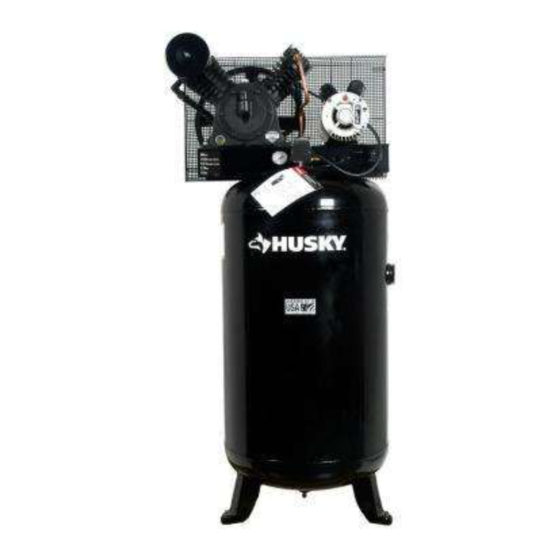
80-GALLON STATIONARY AIR COMPRESSOR
Questions, problems, missing parts?
Before returning to the store, call
Husky Customer Service
8 a.m. - 6 p.m., EST, Monday - Friday
1-888-43-HUSKY
HUSKYTOOLS.COM
We appreciate the trust and confi dence you have placed in Husky through the purchase of this air compressor. We strive to continually create
quality products designed to enhance your home. Visit us online to see our full line of products available for your home improvement needs.
THANK YOU
Thank you for choosing Husky!
Item # 1000 746 892
Model # HS518102
Advertisement
Table of Contents

Related Manuals for Husky HS518102


Summary of Contents for Husky HS518102
- Page 1 THANK YOU We appreciate the trust and confi dence you have placed in Husky through the purchase of this air compressor. We strive to continually create quality products designed to enhance your home. Visit us online to see our full line of products available for your home improvement needs.
-
Page 2: Table Of Contents
Table of Contents Safety Information ........2 Installation - Mounting . -
Page 3: General Safety
3. Tanks rust from moisture build-up, which weakens the tank. Make sure to drain the tank regularly and inspect periodically for unsafe conditions, such as rust formation and corrosion. 4. Fast moving air will stir up dust and debris which may be harmful. Release air slowly when draining moisture or depressurizing the compressor system. HUSKYTOOLS.COM Please contact 1-888-43-HUSKY for further assistance. -
Page 4: Work Area Safety
Safety Information (continued) WORK AREA SAFETY WARNING: Motors, electrical equipment, and controls can cause electrical arcs that will ignite a fl ammable gas or vapor. Never operate or repair in or near a fl ammable gas or vapor. Never store fl ammable liquids or gases in the vicinity of the compressor. -
Page 5: Personal Safety
3. Do not direct paint or other sprayed material at the compressor. Locate the compressor as far away from the spraying area as possible to minimize overspray accumulation on the compressor. 4. When spraying or cleaning with solvents or toxic chemicals, follow the instructions provided by the chemical manufacturer. HUSKYTOOLS.COM Please contact 1-888-43-HUSKY for further assistance. -
Page 6: Warranty
Expendable materials, such as motor brushes, seals, etc. are not covered by this warranty. This warranty does not apply to this compressor used in industrial applications or for rental purposes. Husky makes no warranties, representations, or promises as to the quality or performance of its air compressors other than those specifi... -
Page 7: Pre-Installation
9/16 in. socket Hammer drill and masonry Voltage meter Work gloves HARDWARE REQUIRED NOTE: Hardware not shown to actual size. Concrete wedge Vibration isolation Strain relief anchors set (3 metal plates and 6 rubber pads) HUSKYTOOLS.COM Please contact 1-888-43-HUSKY for further assistance. -
Page 8: Package Contents
Pre-Installation PACKAGE CONTENTS Part Description Quantity Air Compressor Unit Air Filter Assembly... -
Page 9: Compressor Components
Tank Pressure Gauge - Indicates the amount of air pressure stored in the tank. Air Filter - Keeps large particulates out of the air flowing into the compressor. Tank Outlet / Discharge Port - Air delivery port for transfer of compressed air. HUSKYTOOLS.COM Please contact 1-888-43-HUSKY for further assistance. -
Page 10: Specifi Cations
Pre-Installation (continued) SPECIFICATIONS Horsepower (HP) Tank Outlet Size 3/4 NPT Number of Cylinders Oil Capacity approximately 2 quarts Voltage 230 / 240 Volts, 22 Amps Length 27 in. 60 Hz, 1 Phase Width 35 in. Air Delivery @ 90 psi 14.0 SCFM Height 70 in. -
Page 11: Installation - Mounting
Place the air compressor unit (A) where you plan to install it (at least 18 in. from any wall or surface). HUSKYTOOLS.COM Please contact 1-888-43-HUSKY for further assistance. - Page 12 Installation - Mounting (continued) Drilling the mounting holes Inserting the mounting bolts □ Insert the mounting bolts into the drilled holes. WARNING: This compressor is extremely top heavy. The unit must be bolted to the fl oor with isolation pads before □...
-
Page 13: Installation - Electrical
□ Confi rm the voltage of the incoming mains (5) and ground wire (6) using a voltage meter (7). □ The voltage meter should read 120 Volts. Do not proceed with installation if the voltage meter gives a different reading. HUSKYTOOLS.COM Please contact 1-888-43-HUSKY for further assistance. - Page 14 Installation - Electrical (continued) Preparing the pressure switch □ Remove the pressure switch cover by loosening the screw (1), as shown. Use a Phillips screwdriver. □ Set the cover aside until wiring is completed. □ Familiarize yourself with these internal components of the pressure switch.
- Page 15 □ Tighten the strain relief screws (2) to hold the power cord securely. Reinstalling the pressure switch cover □ Replace the pressure switch cover. □ Tighten the pressure switch screw (1) with a Phillips screwdriver. Follow the break-in procedure from the owner’s manual. HUSKYTOOLS.COM Please contact 1-888-43-HUSKY for further assistance.
-
Page 16: Assembly
Assembly Assembling the air compressor unit WARNING: Never use plastic (PVC) pipe for compressed air. Serious injury or death could result. WARNING: Never install a shut-off valve between the compressor pump and the tank. Personal injury and / or equipment damage may occur. Never use reducers in discharge piping. -
Page 17: Operation
(0) psi (under no load) to break-in the pump parts. □ Shut power off to the air compressor unit (A), and turn the tank drain valve to shut off air flow. The air compressor unit (A) is now ready for use. HUSKYTOOLS.COM Please contact 1-888-43-HUSKY for further assistance. -
Page 18: Moisture In Compressed Air
Operation (continued) ON/OFF CYCLING OF THE COMPRESSOR The air compressor unit (A) is designed to cycle on and off. When the shut-off (preset “cut-out”) pressure is reached, the compressor automatically shuts off. When air is depleted from the tank by use of a tire chuck, tool, etc., the compressor will restart automatically at its preset “cut-in” pressure. When a tool is in use, the compressor will cycle on and off automatically as needed to maintain air pressure in the tank. -
Page 19: Maintenance
If the safety valve does not allow air to be released when you pull on the ring, or if it does not close automatically, it MUST be replaced. HUSKYTOOLS.COM Please contact 1-888-43-HUSKY for further assistance. - Page 20 Maintenance (continued) Checking the belt Removing the belt □ Remove the four caps (1) and four fl ange nuts (2). □ Loosen (but do not remove) the four bolts (1) holding the motor in place. □ Remove the front beltguard (3). □...
-
Page 21: Care And Cleaning
□ Check the air fi lter weekly to see if it needs to be cleaned. Remove the fi lter element. Use hot, soapy water to clean the fi lter and allow the fi lter to dry before reinstalling and returning the unit to active duty. Replace a fi lter that cannot be cleaned. HUSKYTOOLS.COM Please contact 1-888-43-HUSKY for further assistance. -
Page 22: Troubleshooting
Troubleshooting Problem Possible Cause Solution □ The air demand exceeds the pump □ Reduce the air demand or use a compressor with more capacity. The discharge pressure is low. capacity. □ The air intake is restricted. □ Clean or replace the air fi lter element. □... - Page 23 □ The belt needs to be replaced. □ Replace the belt. Make sure to use the correct size. □ The belt needs to be aligned. □ Align the fl ywheel and the pulley. HUSKYTOOLS.COM Please contact 1-888-43-HUSKY for further assistance.
-
Page 24: Service Parts
Service Parts - Compressor MODEL HS518102 13 14... - Page 25 Air filter element (not shown) HS050071AV Strain relief (not shown) ST073108AV Strain relief screw (not shown) ST074407AV General warning decal set (not shown) DK747600AV Moving and mounting warning decal (not shown) DK364602AV Not available HUSKYTOOLS.COM Please contact 1-888-43-HUSKY for further assistance.
- Page 26 Service Parts - Pump MODEL HS050000AV...
- Page 27 Compression ring Piston set (LP) HS050061AV ▼ ✖ Oil ring Valve plate kit (LP) HS050064AV ★ ✤ Piston Assembly fastener set HS050069AV ★ Wrist pin Not available ★ ✖ Retainer clip ● Ball bearing HUSKYTOOLS.COM Please contact 1-888-43-HUSKY for further assistance.
- Page 28 Questions, problems, missing parts? Before returning to the store, call Husky Customer Service 8 a.m.-6 p.m., EST, Monday-Friday 1-888-43-HUSKY HUSKYTOOLS.COM Retain this manual for future use. Document Number IN564800AV 7/13...