Gigaset SX763 First Steps
Wlan dsl
Hide thumbs
Also See for Gigaset SX763:
- User manual (156 pages) ,
- Manual (192 pages) ,
- Installation manual (49 pages)
Table of Contents
Advertisement
Quick Links
Advertisement
Table of Contents

Related Manuals for Gigaset Gigaset SX763


Summary of Contents for Gigaset Gigaset SX763
- Page 1 First steps...
-
Page 3: Table Of Contents
Setting up the Gigaset SX763 WLAN dsl ........ - Page 4 Contents Security Setup Wizard ..... . . 52 Assigning a password ..........53 SSID .
- Page 5 Contents Call guide ....... . 120 Advanced options ........... 121 Toggling telephone calls .
- Page 6 Contents Appendix ....... . . 164 Troubleshooting ........... . . 164 Deactivating HTTP proxy and configuring a pop-up blocker .
-
Page 7: The Gigaset Sx763 Wlan Dsl
(ADSL /ADSL2+) enabling you to access the Internet easily. You can connect your PC wirelessly to the Gigaset SX763 WLAN dsl and create a wireless local area network (WLAN). The device supports Super G technology. The transmission rate in the wireless local area network can be increased to 108 Mbps thanks to channel bundling. -
Page 8: Do Your Part For The Environment (Eco)
The Gigaset SX763 WLAN dsl The Gigaset SX763 WLAN dsl has an extensive range of functions but remains simple to use. It can be configured and operational within a few minutes. Note: This user guide is based on the software release 2.3. -
Page 9: Local Area Networks With Gigaset Products
The Gigaset SX763 WLAN dsl Local area networks with Gigaset products You can use the Gigaset SX763 WLAN dsl to set up a local area network, for example a home network. All PCs in this network can communicate with each other and have access to the Internet. -
Page 10: Wired Local Area Network (Ethernet)
In a wired local area network, PCs communicate with one another via an Ethernet cable. When the Gigaset SX763 WLAN dsl is used, it establishes the connection between the PCs. For this it has four Ethernet LAN ports for connecting four PCs. The PCs have to be equipped with a network port (Ethernet). -
Page 11: Wireless Local Area Network (Wlan)
Gigaset SX763 WLAN dsl. In infrastructure mode, the stations in the network always communicate via this access point. The access point sets up the wireless network on a permanent basis. - Page 12 The Gigaset SX763 WLAN dsl Linking wireless networks with the Internet The Gigaset SX763 WLAN dsl has an ADSL interface that permits all stations within its local area network to access the Internet simultaneously. To be able to use this function- ality, you need a DSL connection obtainable from an Internet service provider.
-
Page 13: Linking A Wireless Network To An Ethernet
Access Point Ethernet (wired) The Gigaset SX763 WLAN dsl has four Ethernet interfaces (LAN ports). Up to four PCs can be connected directly to these LAN ports. All PCs can access the Internet via the Gigaset SX763 WLAN dsl. Please remember: You can also connect an Ethernet router or switch to a LAN port to access a larger Ethernet. -
Page 14: Extending The Wireless Network Coverage With A Repeater
The repeater will now transmit data traffic into its own wireless area. This technology allows you to set up wireless networks that cover a much larger area than is possible with a single Gigaset SX763 WLAN dsl. WLAN... -
Page 15: Internet Telephony And Connecting Analogue Phones
The type of calls that are cheaper for you will depend on what calls you make and when you make them, and the rates offered by your service provider. The Gigaset SX763 WLAN dsl gives you complete freedom of choice at any time. -
Page 16: Wps
WPS provides two possibilities for registration: Via registration button The access point (e.g. the Gigaset SX763 WLAN dsl) has a registration button. The registration button is available either: – as hardware: a specific button (labelled Scan) is provided on the device’s back panel. - Page 17 The Gigaset SX763 WLAN dsl The first time this button is pressed, the device automatically creates a SSID and a pre-shared key, if these had not been already set on delivery or has been configured before manually. If a client activates WPS registration within the two-minute inter- val, the security data is exchanged and a connection is established.
-
Page 18: Features And Applications
Standard IEEE 802.11b or 802.11g. Use of Super G technology allows for high transmission speed. – Using the Gigaset SX763 WLAN dsl makes it easy to set up a network at home or in small offices. For example, users can exchange data or share resources in the network, such as a file server or printer. - Page 19 – You can easily establish an FTP or an HTTP server for Internet access with the Gigaset SX763 WLAN dsl. – You can connect a USB hub to the USB port on your Gigaset SX763 WLAN dsl and thereby at the same time provide a printer and a storage medium for all clients in...
-
Page 20: First Steps
Internet service provider. For Internet telephony you also require – the access data for your VoIP service provider and – a phone for connecting to the Gigaset SX763 WLAN dsl or a PC with a SIP client or a VoIP telephone. - Page 21 – Subnet mask: 255.255.255.0 – SSID: ConnectionPoint – Radio channel: 6 Caution: The Gigaset SX763 WLAN dsl is delivered with a preset individual encryption (WPA2-PSK/ WPA-PSK with pre-shared key). You will find the key at the label on the devices bottom.
-
Page 22: Overview Of The Installation Steps
1. First install an Ethernet network card or a wireless Network adapter such as the Gigaset PC Card 108 in the PCs you want to connect to the Gigaset SX763 WLAN dsl. The installation is described in the user guides for these products. Please remember:... -
Page 23: Setting Up The Gigaset Sx763 Wlan Dsl
The LEDs (from left to right) have the following functions: State Status On (green) The Gigaset SX763 WLAN dsl is connected to the mains. Power The Gigaset SX763 WLAN dsl is disconnected from the mains. A DSL connection is established. - Page 24 First steps State Status A device is connected to the Gigaset SX763 WLAN dsl via the On (green) USB port. The device connected on the USB port is using too much Flashing power (see (page 169)). There is no device connected.
- Page 25 First steps The Gigaset SX763 WLAN dsl can be set up in any suitable location in the home or office. You do not need any special wiring. However, you should comply with the following guidelines: Operate the Gigaset SX763 WLAN dsl only indoors within a temperature range of 0 to +40 °C.
-
Page 26: Connecting And Activating The Gigaset Sx763 Wlan Dsl
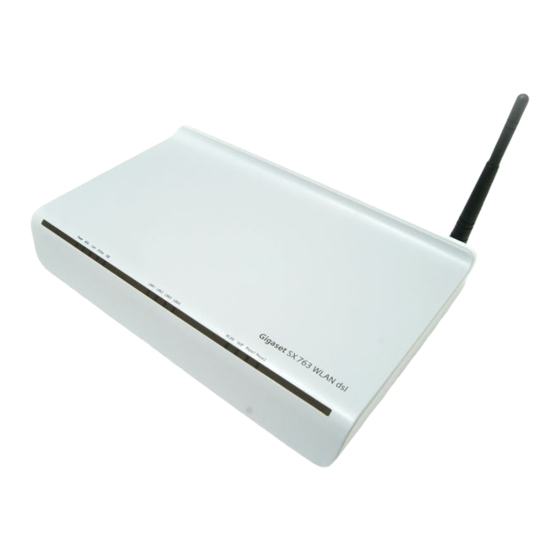
First steps Connecting and activating the Gigaset SX763 WLAN dsl Ports on the rear panel The rear panel of the Gigaset SX763 WLAN dsl houses the ports. Element Description Socket for the mains adapter supplied Warning: Using the wrong power supply unit may damage the Gigaset SX763 WLAN dsl. - Page 27 Phone1/2 Sockets for connecting two phones, fax or answering machine Reset button The underside of the Gigaset SX763 WLAN dsl houses the reset button. Reset button Label with WPA key „SX76xxx“ Reboot function: Press and hold the right end of the button for more than 1 second but less than 5 seconds to reboot the device.
-
Page 28: Connecting To The Splitter Data Port
First steps Connecting to the splitter data port You can operate the Gigaset SX763 WLAN dsl in two different operating modes in order to set up an Internet connection: – with an integrated ADSL modem – with an external modem, such as a VDSL or cable modem Using the integrated ADSL modem ì... - Page 29 First steps Using an external modem ì Connect the LAN4/WAN port on the Gigaset SX763 WLAN dsl with an external modem. To do this, use the cable supplied (black). ì Then connect this modem to the relevant communications port (e.g. splitter).
-
Page 30: Connecting To The Phone Port
First steps Connecting to the phone port To make conventional calls via the fixed network, you must connect your Gigaset SX763 WLAN dsl with the phone port of the splitter. Analogue phone port ì Connect the Gigaset SX763 WLAN dsl with the splitter as follows: –... -
Page 31: Connecting To The Phone
First steps Connecting to the phone ì Connect the Gigaset SX763 WLAN dsl with the analogue phone as follows: – Insert the plug of the telephone into the Phone 1 or Phone 2 port on the Gigaset SX763 WLAN dsl. -
Page 32: Connecting Wired To The Pc
First steps Connecting wired to the PC You can connect wired or wireless PCs to your Gigaset SX763 WLAN dsl to create a local area network (LAN). Wireless connection is possible after connecting the Gigaset SX763 WLAN dsl to the power supply (see page 33). -
Page 33: Connecting To The Mains Power Supply
Please remember: Only use the mains adapter supplied with the device (12V 1.5A DC). ì Connect the mains adapter cable to the PWR socket on the Gigaset SX763 WLAN dsl. ì Plug the mains adapter into a mains socket. ì... -
Page 34: Connecting Wireless To The Pc
ì During the two-minute interval, activate WPS registration of the wireless network adapter on the PC. The client receives the security data for the Gigaset SX763 WLAN dsl (SSID and pre-shared key) and is thereby registered. WLAN LED display during WPS registration: On (300 sec) WPS registration was successful. - Page 35 A wireless network is defined by assigning an identical SSID to all the devices. ì You should therefore enter the SSID for the Gigaset SX763 WLAN dsl in your network adapter configuration. The default SSID for the Gigaset SX763 WLAN dsl is ConnectionPoint.
-
Page 36: Checking The Operating State
First steps Checking the operating state Your Gigaset SX763 WLAN dsl is now ready for use. The LED displays on the front panel of the Gigaset SX763 WLAN dsl provide information about the operating state (see page 23). When the device is ready for use, the LEDs light up as follows: The Power LED on the front lights up. -
Page 37: Network Configuration Of The Pcs
You can now make the basic settings for Internet access using the user interface of the Gigaset SX763 WLAN dsl (page 39). If you want to connect additional PCs to the Gigaset SX763 WLAN dsl, please read the next section. -
Page 38: Connecting And Configuring Additional Pcs (Optional)
Once you have configured one PC as described above you can connect additional PCs to the Gigaset SX763 WLAN dsl. You will need an additional cable for each PC you want to connect via cable. For the wireless connection of additional PCs, you will need a wireless network adapter. -
Page 39: The User Interface
The user interface The user interface You have connected a PC to the Gigaset SX763 WLAN dsl and possibly made the settings in the local area network. You can now configure the Gigaset SX763 WLAN dsl using this PC from the user interface of the Gigaset SX763 WLAN dsl. We recommend for initial configuration that you connect the PC in wired mode. -
Page 40: The Start Screen
The user interface For your security, the configuration program is protected with a password. The default password generally required is admin. ì Enter the password. ì Click OK. Note: For security reasons you should change this password at a later stage (page 53). A page with security information will appear. - Page 41 The user interface Open the Status menu to obtain status information about the Gigaset SX763 WLAN dsl (page 137). Call up the wizard for the basic configuration (Basic Setup Wizard see page 44), Call up the Security Setup Wizard (page 52).
-
Page 42: Selecting A Language
To establish or end an Internet connection manually: ì Open the start screen of the Gigaset SX763 WLAN dsl as described on page 39. If you have already started the user interface, click the Home tab at the top left of the window. -
Page 43: Elements In The User Interface
Buttons in the Advanced Settings menu Transfers the settings you have made to the Gigaset SX763 WLAN dsl configuration. Cancel Deletes all the entries on a screen since the last time you clicked OK. Other buttons may be displayed depending on the function in question. These are... -
Page 44: Basic Setup Wizard
Basic Setup Wizard Basic Setup Wizard The Basic Setup Wizard wizard guides you step by step through the general configura- tion of the Gigaset SX763 WLAN dsl. This includes settings for your region and your Internet access. Connection to the... -
Page 45: Regional Options
Basic Setup Wizard Regional Options You can select your present location for the regional settings on this screen. ì Select the country in which you are currently located from the list. You can set the time so that it automatically switches to summer time and/or another time zone of your choice. -
Page 46: Configuring Internet Connections
Basic Setup Wizard Configuring Internet connections You will find the access data you require for configuring the Internet connection in the documentation you received from your Internet service provider (ISP). You can perform the initial configuration of your Internet connection on this screen. If you want to change the data later on, you can do this in the Advanced Settings (page 63) menu. - Page 47 ì Specify how Internet sessions are to be established via Connection mode: – Select Always on if the connection is to exist at all times when the Gigaset SX763 WLAN dsl is turned on. Notes: This option can result in high connection charges if you are on a time-based tariff.
- Page 48 Basic Setup Wizard PPPoE pass-through This option is only available if you have chosen another Protocol than PPPoE. PPPoE pass-through allows you to use an additional Internet connection (through another service provider) on one PC. Further information about this can be found on page 68. ì...
-
Page 49: Telephony
Basic Setup Wizard Telephony You will find the access data you require for configuring Internet telephony (VoIP) in the documentation you received from your service provider. ì Select the option On for VoIP account if you wish to use Internet telephony (default setting). -
Page 50: Wps Registration
Basic Setup Wizard ì Select Other from the Service provider selection menu (default setting) or, if required, use one of the suggested providers from the list. Enter the data you have received from your service provider: User name, Displayed name, Authorization user name, Password, SIP domain, SIP realm, Proxy server address and Registrar server address. -
Page 51: Summary
If you want to confirm the settings, click Finish to close the Basic Setup Wizard. The Gigaset SX763 WLAN dsl is now configured and ready to connect to the Internet. The Security Setup Wizard then opens automatically. We strongly recommend using the Security Setup Wizard to protect your Gigaset SX763 WLAN dsl against attacks. -
Page 52: Security Setup Wizard
Limit access to the wireless network to certain PCs (page 59). The user interface of the Gigaset SX763 WLAN dsl guides you step by step through the security configuration. Once you have completed a screen, click Next >. If you want to make any changes or check your entries again, click <... -
Page 53: Assigning A Password
Note: If you ever forget your password you will have to return the Gigaset SX763 WLAN dsl to its factory settings (page 132). Please bear in mind that this will restore all settings to the factory configuration. The password will again be admin. -
Page 54: Ssid
SSID and deactivate SSID broadcast. If this option is ena- bled, the Gigaset SX763 WLAN dsl will send the SSID in all data transfers and the SSID of the Gigaset SX763 WLAN dsl will be displayed on PCs that have a wireless network adapter. -
Page 55: Setting Up Security Functions For The Wireless Network
LAN. The Gigaset SX763 WLAN dsl makes use of effective encryption methods to prevent unauthorised eavesdropping as far as possible. The Gigaset SX763 WLAN dsl is delivered with preset individual encryption (WPA2-PSK/ WPA-PSK with pre-shared Key). -
Page 56: Wpa2/Wpa With Pre-Shared Key (Psk)
Security Setup Wizard WPA2/WPA with pre-shared key (PSK) is a more advanced procedure than WEP for protecting wireless networks. Dynamic keys, based on TKIP (Temporal Key Integrity Protocol), offer increased security. The new standard WPA2 uses (Advanced Encryption Standard) for encryption. WPA-PSK is a special WPA mode for private users and users in small companies without their own authentication server. -
Page 57: Wep Encryption
You can choose either the standard 64-bit key or the more robust 128-bit key. The keys are generated in hexadecimal or in ASCII format. You must use the same keys for encryp- tion and decryption for the Gigaset SX763 WLAN dsl and all your wireless network adapters. - Page 58 You have to change the WEP encryption in the wireless network adapters for the connected PCs in the same way, otherwise they will not be given access to the Gigaset SX763 WLAN dsl wireless network. ì To go to the next step, click Next >...
-
Page 59: Access Control Within The Wireless Network
Security Setup Wizard Access control within the wireless network In this step you can specify which PCs will have wireless access to the Gigaset SX763 WLAN dsl and hence to the LAN. Access control is based on the MAC address of the PC network adapters. - Page 60 You can completely reset the Gigaset SX763 WLAN dsl (page 27). You can connect a PC to the Gigaset SX763 WLAN dsl using one of the LAN con- nections (by cable). As MAC access control only affects PCs that are connected wirelessly, you can use this PC to change the configuration.
-
Page 61: Saving Settings
If you have changes the encyption setting, you must now configure the WEP or WPA key for the wireless network adapter of the PC that has been configured with other values. After this you can again wirelessly log on to the Gigaset SX763 WLAN dsl. -
Page 62: Configuring Advanced Settings
You can make or change various system settings here, for example change the password (page 127), set the time (page 126) or activate remote management (page 128). In addition, you can also back up the data on the Gigaset SX763 WLAN dsl or configure firmware update (page 131). -
Page 63: Internet
Configuring Advanced Settings Internet If you have configured the Gigaset SX763 WLAN dsl using the two wizards, you have also configured the connection (Internet access). You can check or change these settings in the Internet menu. This menu also offers you a wide range of possibilities for setting up security settings and limiting access to the Internet as well as for providing your own services on the Internet. -
Page 64: Internet Selection
Configuring Advanced Settings Internet selection You can activate or deactivate the Internet connection for the Gigaset SX763 WLAN dsl on this screen. You can choose the connection type and set up and edit a number of con- nection services. ì... - Page 65 Configuring Advanced Settings ì For an ADSL connection, make the following settings: – Enter the values for VPI / VCI for each connection service that you have received from your Internet service provider. – Enter a description to identify the respective connection service. –...
-
Page 66: Internet Connection
Configuring Advanced Settings Internet Connection You can set up or change the configuration of your Internet connection on this screen. All the settings you make here must coincide with the features your Internet service pro- vider makes available to you. False information can lead to problems with your Internet connection. - Page 67 ì Specify how Internet sessions are to be established via Connection mode: – Select Always on if the connection is to exist at all times when the Gigaset SX763 WLAN dsl is turned on. Notes: You must set up the Always on option if you wish to use Internet telephony.
- Page 68 Configuring Advanced Settings – In the Idle time before disconnect field, enter a period after which the Internet connection is to end automatically if no data is transmitted (the default setting is 3 minutes). This time setting only applies to the Connect on demand and Connect manu- ally options.
- Page 69 Configuring Advanced Settings The task bar on the PC on which UPnP is installed contains an icon for the Gigaset SX763 WLAN dsl. Click this icon to open the user interface. On Windows XP system, this icon is also shown under network connections.
-
Page 70: Dns Server
Configuring Advanced Settings DNS server DNS is a decentralised service that assigns PC names or Internet addresses (Domain names) and IP addresses to one another. A DNS server has to administer this information for each server or each LAN with an Internet connection. Your Internet service provider will usually provide you with a DNS server that makes this... -
Page 71: Mac Address
If you already had Internet access through the same Internet service provider before connecting the Gigaset SX763 WLAN dsl, it is possible that the MAC address of one of your PCs was used for registration when the connection was being set up. In this case,... -
Page 72: Firewall
Protect the network against hacker attacks (for information see below), Block access by individual PCs to selected services (page 74). The firewall functions for the Gigaset SX763 WLAN dsl are activated and configured in the factory. If you want to deactivate the firewall, carry out the following steps: ì... -
Page 73: Attack Detection
Configuring Advanced Settings Attack Detection If the firewall functions of the Gigaset SX763 WLAN dsl are activated, the device moni- tors and limits access to incoming data traffic via the DSL connection with a function called "Stateful Packet Inspection" (SPI). This allows the Gigaset SX763 WLAN dsl to detect and prevent certain types of attack from the Internet, such as Denial-of-Service (DoS). -
Page 74: Setting Up Access Control To The Internet
Configuring Advanced Settings Setting up access control to the Internet The Access Control function allows you to block access to various services for one or more PCs. You can permit or block access to services at certain times. ì In the Advanced Settings menu, select: Internet – Firewall – Access Control ì... - Page 75 Configuring Advanced Settings ì Select the Access rule type from the list: – Apply to all clients: The rule applies to all PCs in the network. – Specify IP address or Specify MAC address: The rule applies to a PC you have selected via the IP address or MAC address.
-
Page 76: Setting Up The Nat Function
Port triggering is a special variant of port forwarding. Unlike port forwarding, the Gigaset SX763 WLAN dsl forwards the data from the port block to the PC which has pre- viously sent data to the Internet via a certain port (trigger port). This means that approval for the data transfer is not tied to one specific PC in the network, rather to the port numbers of the required Internet service. - Page 77 Translation) is activated, i.e. all IP addresses of PCs in the local network are converted to the router's public IP address when accessing the Internet. You can use the NAT settings to configure the Gigaset SX763 WLAN dsl to carry out the following tasks:...
-
Page 78: Port Triggering
Configuring Advanced Settings Port Triggering If you configure port triggering for a certain application, you must identify a trigger port and the protocol (TCP or UDP) this port uses. You can then assign the public ports that must be opened for the application and this trigger port. You can select known Internet services for this purpose or assign ports or blocks of ports manually. -
Page 79: Port Forwarding
Apply the settings by clicking OK. Port Forwarding If you configure Port Forwarding, the Gigaset SX763 WLAN dsl outwardly assumes the role of the server. It receives requests from remote users under its public IP address and automatically redirects them to local PCs. The private IP addresses of the servers on the local network remain protected. -
Page 80: Opening The Firewall For A Selected Pc (Exposed Host)
Configuring Advanced Settings You can use – a single port number, – several port numbers separated by commas, – port blocks consisting of two port numbers separated by a dash, or – any combination of these (for example 80,90-140,180). ì In the Local port field, enter the internal port number to which service requests are to be forwarded. -
Page 81: Dynamic Dns
This task is performed by the dynamic DNS service (DynDNS). You can use the DynDNS service to assign the Gigaset SX763 WLAN dsl an individual fixed domain name on the Internet even if it does not have a static IP address. - Page 82 Configuring Advanced Settings One possible service is DynDNS.org (http://www.DynDNS.org). If you have activated the device's DynDNS function, it will monitor its public IP address. When this changes, the device will open a connection to DynDNS.org and update its IP address there. Note: You must have an account with the service you have chosen (e.g.
-
Page 83: Routing
Configuring Advanced Settings Routing Your Internet service provider can permit you to set up a number of connection services. The entire data traffic between your local network and the Internet uses the first con- nection service (route) by default. After setting up various connection services (page 64), you can change this default route and set up additional routes by assigning data traffic to other connection services. -
Page 84: Lan Configuration
Configuring Advanced Settings LAN configuration You can use the LAN configuration to define an IP address for the Gigaset SX763 WLAN dsl and configure the DHCP server. ì In the Advanced Settings menu, select: Local Network... - Page 85 WLAN dsl is 255.255.255.0. ì If you want to assign a different IP address to the Gigaset SX763 WLAN dsl, enter your chosen IP address in the boxes next to IP address. Please make sure to note which subnet mask is set when assigning the IP address.
-
Page 86: Assigning Static Ip Addresses To Individual Pcs
Last issued IP address. ì If you want to define a different Default gateway in your local area network instead of the Gigaset SX763 WLAN dsl, enter the IP address of this default gateways in the relevant boxes. Entering the DNS server... -
Page 87: Configuring Wireless Connections
In the Advanced Settings menu, select: Wireless Network ì Select On for the Wireless Network (default setting). Devices can only log in wirelessly if the WLAN module of the Gigaset SX763 WLAN dsl is activated. You can now make the settings for the wireless network. - Page 88 If this option is enabled (default setting), the Gigaset SX763 WLAN dsl will send the SSID in all data transfers and the SSID of the Gigaset SX763 WLAN dsl will be displayed on PCs that have a wireless network adapter. In this case, hackers could use the SSID to detect your network.
- Page 89 Configuring Advanced Settings Transmission mode This function is only shown in the window if the Super G transmission mode is deacti- vated (page 89). The IEEE 802.11g standard permits data transfer up to 54 Mbit/s, and the IEEE 802.11b standard up to 11 Mbit/s. Choose IEEE 802.11g only to ensure the best possible data transfer rates in your network.
-
Page 90: Starting Wps Registration And Configuring Wps
The most simple method to establish a secure wireless connection is press the registra- tion (Scan) button or click once in the user interface of the Gigaset SX763 WLAN dsl and do the same with the client. For further information, see "WPS" on page 16. - Page 91 If an external client succeeds in registering, the LED (see page 34) displays a suc- cessful WPS registration. The desired client in you network, however, has no con- nection to the Gigaset SX763 WLAN dsl and displays a registration failure. In this case you should change the pre-shared key (WPA2-PSK/WPA-PSK) as soon as pos- sible and then perform WPS registration via PIN (see below).
-
Page 92: Setting Encryption
WPA2-PSK, WPA-PSK and WPA2-PSK/WPA-PSK (page 93) WPA2 and WPA2/WPA with authentication server (page 94) WEP encryption (Wired Equivalent Privacy, see page 95) Note: If you want to use the repeater function of your Gigaset SX763 WLAN dsl (page 99) you can only use WEP encryption. -
Page 93: Wpa2-Psk And Wpa2-Psk / Wpa-Psk
Configuring Advanced Settings WPA2-PSK and WPA2-PSK / WPA-PSK Note: This screen allows you to display the pre-shared key. You can change the encryption here. In this case, you also have to configure all wireless network adapters manually or perform WPS registration once again. WPA with a pre-shared key (WPA-PSK) WPA-PSK is a special WPA mode for private users and users in small companies without... - Page 94 Configuring Advanced Settings ì Enter a key in the Pre-shared key field (up to 32 characters) and confirm it by enter- ing it again. Use a combination of letters, digits and special characters. ì By clicking the Unmask button, a message showing the pre-shared key is output in readable characters.
-
Page 95: Wep Encryption
Configuring Advanced Settings WEP encryption If WPA is not supported by all components in your wireless network, we recommend that you activate WEP Encryption on the components. Note: You cannot use WEP together with WPS. ì Choose the WEP option in the Security field. - Page 96 You can choose either the standard 64-bit key or the more robust 128-bit key. The keys are generated in hexadecimal or in ASCII format. You must use the same keys for encryp- tion and decryption for the Gigaset SX763 WLAN dsl and all your wireless network adapters.
- Page 97 Configuring Advanced Settings Generating a key by means of a Passphrase ì Enter a Passphrase (up to 32 characters) and confirm it by entering it again. The key is generated automatically. ì Click OK to apply the settings.
-
Page 98: Permitted Clients
On this screen you can specify the PCs that are to have wireless access to the Gigaset SX763 WLAN dsl and hence to your LAN and WLAN. The default setting for access control is deactivated. This means that all PCs that use... -
Page 99: Repeater Function (Wds)
You can completely reset the Gigaset SX763 WLAN dsl (page 27). You can connect a PC to the Gigaset SX763 WLAN dsl using one of the LAN con- nections. As MAC access control only affects PCs that are connected wirelessly, you can use this PC to change the configuration. - Page 100 The encryption settings on the repeater have to correspond to the settings on your Gigaset SX763 WLAN dsl. The Gigaset SX763 WLAN dsl and the repeaters must use the same channel. Further information can be found in the user manual for the repeater.
-
Page 101: Setting Up Internet Telephony (Voip)
Configuring Advanced Settings Setting up Internet telephony (VoIP) The Gigaset SX763 WLAN dsl allows you to make telephone calls via the Internet using an analogue telephone and also via the fixed network as usual. For Internet telephony (VoIP), you require access authorisation from your service provider and the relevant access data. -
Page 102: Voip Settings
Configuring Advanced Settings VoIP settings You will receive the access and configuration data for Internet telephony from your serv- ice provider. ì In the Advanced Settings menu, select: Telephony – VoIP ì Select On if you wish to use Internet telephony (default setting). ì... - Page 103 Configuring Advanced Settings ì If you want to configure additional VoIP accounts, click Add (page 104). If you have configured VoIP settings in the Basic Setup Wizard the data for your VoIP account is shown in this line. You can edit this data or add new data for additional accounts.
-
Page 104: Setting Up Or Modifying A Voip Account
Configuring Advanced Settings Setting up or modifying a VoIP account ì To set up a new account, select On. ì In the Service provider menu, select the Other option or otherwise select one of the preconfigured providers. -
Page 105: Extensions
VoIP. Two of these extensions are connected to your Gigaset SX763 WLAN dsl via the Phone 1 and Phone 2 ports, while the remaining extensions are connections for SIP clients. You can assign each extension the relevant line (fixed network or VoIP account) for incoming and outgoing calls and make other settings for each extension (e.g. - Page 106 ì In the Advanced Settings menu, select: Telephony – Extensions Phone connectors The two telephone ports Phone 1 and Phone 2 of the Gigaset SX763 WLAN dsl have the internal phone number *1 or *2. ì Click Edit to adapt the settings for an entry (page 107).
- Page 107 Click Delete to delete an entry. Configuring extensions The Extension shows either the selected port of the Gigaset SX763 WLAN dsl (Phone 1 or Phone 2) or the SIP client. The Extension number for the extension is preset and is displayed as a call number.
- Page 108 Configuring Advanced Settings ì You can configure Divert calls with the following options for the Phone 1 and Phone 2 ports: – Divert always: Each call for the extension is forwarded to the extension selected in the Divert calls to field. –...
-
Page 109: Dialing Plans
Wait for dial tone on fixed line Only activate this function if it is necessary for the smooth functioning of your Gigaset SX763 WLAN dsl within the telephone network. ì If you wish to make all fixed network calls via a call-by-call provider, activate the Preselection function. - Page 110 Configuring Advanced Settings ì Choose whether you want to use Dialing Plans. ì In the Phone number field, enter an individual number or also the first digits of phone numbers (e. g. 0800 or a specific area code) for which the dialling plan is to apply.
-
Page 111: Quick Dial
Configuring Advanced Settings Quick dial Quick dial numbers or names enable you to dial frequently used phone numbers quickly and easily. The quick dial number is a two-digit number (01 to 20). A vanity number is a combina- tion of letters you can enter instead of a phone number. You can specify a quick dial number and/or a vanity number for a phone number. -
Page 112: Usb
Web server (page 119) Notes: If you connect a USB hub to the USB port of the Gigaset SX763 WLAN dsl, you can connect and use a USB memory and a USB printer at the same time. -
Page 113: File Server
USB mass storage device (for example a USB flash drive or external USB drive) and make them available to all users in the local network and on the Internet. Connect a USB data carrier to the Gigaset SX763 WLAN dsl via the USB port. ì... - Page 114 Configuring Advanced Settings ì Click Add to define Users who should have access to the File Server. You have to define at least one use to define shares on the File Server. ì Enter a User name, a Password, and confirm it in the next line. ì...
- Page 115 Configuring Advanced Settings ì Enter a comment in the next line. ì Click OK. Now the users you have defined are displayed. ì Choose the Access Rights for each user: no access, read-write access, or read- only access. ì Click OK. The File Server start page is shown again.
-
Page 116: Web Server
Configuring Advanced Settings Web Server Your devices integrated Web server allows you to publish data stored on a connected USB mass storage device (for example a USB flash drive or external USB drive) on the Internet. Internet users can access your Web server by entering the public IP address in their Inter- net browser. - Page 117 Configuring Advanced Settings The IP address (see page 84) of the Gigaset SX763 WLAN dsl is displayed, as well as information as to whether Dynamic DNS (see page 81) is activated. HTTP HTTP (Hypertext Transfer Protocol) is the standard protocol for transferring data on the Internet.
- Page 118 Configuring Advanced Settings ì Choose the Directory in which the data is stored on the USB mass storage device using the Browse button. You can allow general access for both FTP services, or only for selected users with a user name and password.
-
Page 119: Print Server
SX763 WLAN dsl shown here when configuring the printer. ì Click OK to accept the changes. You will find information on setting up the printer connected to the Gigaset SX763 WLAN dsl in the section entitled "Using the USB port" on page 144. -
Page 120: Call Guide
Call guide Call guide Your Gigaset SX763 WLAN dsl allows you to make calls via the Internet (VoIP) and your fixed line. A description of how to configure your Gigaset SX763 WLAN dsl for using the telephone functions is provided under "Telephony" on page 49 and "Setting up Internet telephony (VoIP)"... -
Page 121: Advanced Options
The functions described in this section, which are available to you when making calls via your Gigaset SX763 WLAN dsl, apply both for external calls and for internal calls. The functions described below are dependent on the connected terminal in the case of VoIP extensions. -
Page 122: Conference Call Between Three Participants
Call guide Key combination Effect Description Press R2 to accept an incoming call during a call. The connection to the first call is put on hold. Accept call waiting/ If you terminate the first call before- toggle between two hand, your phone rings and you can calls take the second call as usual. -
Page 123: Call Answering And Forwarding
Call guide Call answering and forwarding Key combination Effect Description Dial *21*, the desired internal phone number to which all calls are to be forwarded that are received on this extension, and then press the # key. Forward to internal *21*[number]# phone number Example: You want to set up call for-... -
Page 124: Call Waiting And Call Reject If Busy
Special functions Key combination Effect Description This shortcut key allows the WLAN Enable function of your Gigaset SX763 WLAN *52# WLAN function dsl to be enabled without you having to open the configuration program. This shortcut key allows the WLAN... -
Page 125: Administration
Administration Administration The Gigaset SX763 WLAN dsl user interface includes several helpful functions for administration. Regional Options Enables regional settings (page 126) System Password Changes the system password (page 127) System Management Configures system management (page 128) Save & Restore... -
Page 126: Regional Options
Administration Regional Options For operating your Gigaset SX763 WLAN dsl, you can select the location, time zone and format for entering the time and date, and you can also configure a time server for the Internet time (system time). ì... -
Page 127: Internet Time
Click OK to apply the settings. System Password You can assign a System Password to the Gigaset SX763 WLAN dsl user interface and specify the period after which a session is to be automatically ended if no further entry is made. -
Page 128: System Management
Note If you forget your System Password, you have to reset the Gigaset SX763 WLAN dsl (page 27). This returns all your settings to the factory configuration. This means the system password is changed back to admin. - Page 129 Internet always has the same IP address. For access to the configuration environment via Remote Management, you must enter the address of the Gigaset SX763 WLAN dsl to be managed in the browser using the following format: http://X.X.X.X:8080 (x.x.x.x represents the IP address of the Gigaset SX763 WLAN dsl).
- Page 130 Administration Phone-based Management ì Click On to activate Phone-based Management. You can activate or deactivate the WLAN function (page 124) via phone. ì Click OK to accept the settings. Registration button If your device is equipped with a hardware registration button (Scan button) for WPS registration (see page 26), you can deactivate this button for security reasons.
-
Page 131: Backing Up And Restoring A Configuration
Administration Backing up and restoring a configuration When the Gigaset SX763 WLAN dsl has been configured, it is recommended that you back up the settings. This means you can restore the settings at any time if they are acci- dentally deleted or overwritten. -
Page 132: Restoring The Saved Data
Click OK. The configuration will now be updated. Restoring factory settings You can reset the Gigaset SX763 WLAN dsl to the factory settings. You should do this before making the device available to others or exchanging it through the dealer. Oth- erwise unauthorised persons may use the Internet access data at your expense. -
Page 133: Updating Firmware
If Gigaset Communications GmbH or your Internet service provider releases a new ver- sion of the firmware, you can update the firmware of the Gigaset SX763 WLAN dsl. You can perform the update manually or you can configure an automatic periodical check for firmware update. -
Page 134: Configuring An Automatic Update
If you have configured the option Check periodically and a new firmware version of your Gigaset SX763 WLAN dsl is detected while you are surfing the Internet an informa- tion page is opened. On this page you can choose whether the update should be started. -
Page 135: Local Firmware Update
Click Start firmware update. The firmware will now be updated. Warning: Do not turn off the Gigaset SX763 WLAN dsl during the updating procedure and do not interrupt the power supply. Turning off the device can make it unusable. The update can take several minutes. -
Page 136: System Log
Administration System Log The System Log is displayed in the Status – Device menu. It contains important infor- mation about how the device functions and possible problems. This information can also be automatically transferred to a system log server. ì In the Advanced Settings menu, select: Administration –... -
Page 137: Status Information
Information about configuration and the status of the Gigaset SX763 WLAN dsl is dis- played in the Status menu of the Gigaset SX763 WLAN dsl. On the first screen you will find an overview of the status of the Internet connection, the local and wireless net- work, the telephony, the USB interface and the device. -
Page 138: Security
Status information Registration Button Shows if the registration button (Scan button) on the device’s back panel is enabled or disabled. Telephony VoIP accounts Shows the number of VoIP accounts and the connection status. Status Status of the USB connection of the device. It can be enabled (On) or disabled (Off). Additionally, the occurrence of the following problems is displayed: USB device not supported or not recognized. -
Page 139: Internet
Status information Access to your wireless network not restricted to allowed clients Users can access the wireless network from any PC. Information on how to avoid this security risk is given in the section "Permitted clients" on page 98. Firewall for your Internet connection turned off The network is not protected against hackers who gain unauthorised access via the Internet. - Page 140 Status information Default gateway Shows the IP address of the assigned default gateway. Preferred DNS server Shows the IP address of the assigned DNS server. Alternate DNS server Shows the IP address of the alternate DNS server, if available. Downstream rate Shows the current transmission rate for incoming traffic.
-
Page 141: Local Network
Status information Local Network You will find information about the local network settings on the Local Network screen in the Status menu. In the Status menu, select Local Network: IP address Shows the local IP address of the device. Subnet mask Shows the subnet mask used in the local network. -
Page 142: Telephony
Status information Wireless clients Shows all clients in the wireless network that are currently connected to the device. The Host name, MAC address and IP address are specified for identifying each cli- ent. You will also see information about the Uptime to date of the current connec- tion for each client in the wireless network. -
Page 143: Device
Status information Device You will find the most important device data on the Device screen in the Status menu. In the Status menu, select Device: System uptime Show's your device's operating time since the last time the system was started. System time Shows the system time for your device. -
Page 144: Using The Usb Port
The print job you send to the PC to which the printer is connected reduces the per- formance (resources) of this PC. If you use the USB port on the Gigaset SX763 WLAN dsl for your printer, you have all the advantages of a network printer without the disadvantages referred to above: The network, and consequently also the printer, is always ready (the Gigaset SX763 WLAN dsl and the printer itself must be switched on, of course). -
Page 145: Installing A Standard Tcp/Ip Printer Port Under Windows Vista
You can use the standard TCP/IP port driver available with this operating system. Make sure that the Gigaset SX763 WLAN dsl is connected and is available in the network. A printer does not have to be connected to the USB port on your Gigaset SX763 WLAN dsl at this point. - Page 146 Using the USB port ì Click Add a printer. ì In the Add Printer Wizard, click the option Add a local printer. ì Select the Create a new port option button. ì Then select Standard TCP/IP Port from the selection menu in the field Type of Port.
- Page 147 In the Host Name or IP Address input field, enter the IP address of the printer server (Gigaset SX763 WLAN dsl): e.g. 192.168.2.1. This entry is transferred into the Port Name field. This name will later appear in the list of printer ports.
- Page 148 Using the USB port As Windows Vista usually first looks for a network card when a printer port is installed, the Additional Port Information Required window is displayed. ì Select the Custom option and click on Settings. ì Select the LPR option box. ì...
- Page 149 Using the USB port ì LPR Byte Counting Enabled should not be selected. ì Click on OK and then on Next. Windows is searching for the appropriate driver model. ì Choose the appropriate driver for your printer and click on Next. After successfully installing the driver you can now define a name for your printer.
- Page 150 Click Finish. Note: The printer server of the Gigaset SX763 WLAN dsl does not work bi-directionally. It does not evaluate any of the printer's response messages. For this reason please make sure that your printer is also only configured uni-directionally. You can configure the...
-
Page 151: Installing A Standard Tcp/Ip Printer Port Under Windows Xp/2000
Gigaset SX763 WLAN dsl is connected and can be reached in the network. A printer need not be connected to the USB port on your Gigaset SX763 WLAN dsl at this point. The following illustrations show installation on Windows XP. Installation on Win- dows 2000 is essentially the same. - Page 152 Using the USB port ì In the window that opens, double-click Add a printer. The wizard for installing a printer is opened. ì In the Add Printer Wizard, click Next. The printer port you are installing will behave like an additional parallel port on the PC.
- Page 153 Using the USB port The Automatically detect and install my Plug and Play printer check box must not be selected. ì Click Next. ì Click the Create a new port option button. ì Then select Standard TCP/IP Port from the selection menu in the field next to this option.
- Page 154 In the wizard for setting up a standard TCPI/IP port, click Next. ì In the Printer Name or IP Address input field, enter the IP address of the print server (Gigaset SX763 WLAN dsl): e.g. 192.168.2.1. A copy of your entry is displayed in the second field. ì...
- Page 155 Using the USB port ì Choose the option Custom and click Settings. ì Enter the following data in the relevant fields: – Printer name or IP address: Enter the IP address of the print server. – Protocol Choose the option LPR. –...
- Page 156 Using the USB port ì Click Next. The window for finishing the wizard is opened and shows you all the settings you have made. ì Click Finish. Once the wizard for installing the printer port is finished, the Add Printer Wizard is opened.
-
Page 157: Installing A Printer On The Tcp/Ip Port Retrospectively
If you do not wish to install a printer until later, click Cancel. Note: The printer server of the Gigaset SX763 WLAN dsl does not work bi-directionally. It does not evaluate any of the printer's response messages. For this reason please make sure that your printer is also only configured uni-directionally. -
Page 158: Instructions For Setting Up A Printer On The Pc
Then continue to install the printer and finish the installation. Note: The printer server of the Gigaset SX763 WLAN dsl does not work bi-directionally. It does not evaluate any of the printer's response messages. For this reason please make sure that your printer is also only configured uni-directionally. -
Page 159: Using The Data On A Usb Mass Storage Device
Using the data on a USB mass storage device To view directories and files which are shared via the Gigaset SX763 WLAN dsl file server on the USB port within the Windows network, some parameters on your PC must be set correctly. - Page 160 Using the USB port The check boxes next to the entries Internet Protocol Version 4 (TCP/IPv4) File and Printer Sharing for Microsoft Networks must be marked. ì If one of these components is not installed it will have to be installed subsequently. You may need your Windows installation CD.
-
Page 161: Share Inter Process Communication For The Network
To be able to share data on the USB mass storage device on the Gigaset SX763 WLAN dsl, the IPC must be set to access resources shared in the network (network share). -
Page 162: Starting The Computer Browser
Using the USB port Starting the computer browser To access resources in the network, the Windows service computerbrowser must be started. You can check it as follows: ì Open the Control Panel by selecting Control Panel from the start menu of the Win- dows taskbar. -
Page 163: Enabling File And Printer Sharing In The Windows Firewall
Using the USB port Enabling file and printer sharing in the Windows firewall The Windows firewall must be set to allow file and printer sharing. You can check it as follows: ì Open the Control Panel. For that purpose choose Control Panel from the start menu of the Windows taskbar. -
Page 164: Appendix
If the mains adapter is not working properly, contact our customer serv- ice unit (see Quick Start Guide). ì If your Gigaset SX763 WLAN dsl has an On button at the rear: Check whether the device is plugged in. ì ADSL LED flashes Wait until the integrated DSL modem has com- pleted its synchronisation. - Page 165 The connection may have been terminated manu- ally with the Connect on demand option selected. – Restore the connection again manually using the Connect button or – Restart the Gigaset SX763 WLAN dsl. In both cases, the Connect on demand setting will be active again. ì...
- Page 166 You defined a PIN for WPS registration at the net- work adapter but you didn’t enter this PIN at the Gigaset SX763 WLAN dsl PIN or not the right one. ì Find out the PIN that is used by the network adapter.
- Page 167 If you do not know the key, repeat key entry (page 90) via a PC connected via cable to the Gigaset SX763 WLAN dsl and enter the new key on the network adapter. Otherwise, you can use the WPS function.
- Page 168 PC must be authorised for remote management. ì You cannot conduct VoIP tel- The phone or the Gigaset SX763 WLAN dsl is not ephone calls. connected properly to the DSL port. Check the cabling and the ports.
- Page 169 Appendix Gigaset SX763 WLAN dsl functions and their interdependency The following table shows which functions of your device are possible in which combination. In the case of error, check that the following conditions are fulfilled: Function Possible in combination with...
-
Page 170: Deactivating Http Proxy And Configuring A Pop-Up Blocker
Appendix Deactivating HTTP proxy and configuring a pop-up blocker Before you can start the configuration program of the Gigaset SX763 WLAN dsl, you might need to adjust the settings described below for your Web browser. Deactivating the HTTP proxy Make sure that the HTTP proxy in your web browser is deactivated. -
Page 171: Specifications
Appendix ì Click on the Content icon. ì Deactivate the Block Popup window option. ì Click OK to finish. Please note: Should you use a different pop-up blocker, you must configure this accordingly. Specifications Interfaces 1 DSL RJ11, RJ-45 4 LAN RJ45, 10Base-T/100Base-TX, Auto-sensing 1 USB USB 2.0, for printer server or file server (max. -
Page 172: Authorisation
Appendix Power (on/off) LED displays ADSL (operation, synchronisation) Online (activity, Internet) WLAN (activity, wireless) LAN1... LAN4 (connection to PC, activity, wired) USB (device connection) VoIP (connection, activity, Internet telephony) Phone1/Phone2 (FXS activity) Line (FXO activity, fixed network) Compliance with security conditions and regulations CE, EN60950 Browser-based configuration environment Software... -
Page 173: Open Source Software Used In The Product
Appendix Open Source Software used in the product The product contains, among other things, embedded Open Source Software, licensed under an Open Source Software License and developed by third parties. These embed- ded Open Source Software files are protected by copyright. Your rights to use the Open Source Software beyond the mere execution of the program of Gigaset Communica- tions GmbH are governed by the relevant Open Source Software license conditions. - Page 174 Appendix Open Source Software Used This product includes software developed by the University of California, Berkeley and its contributors.
-
Page 175: Glossary
Glossary Access point An access point, such as the Gigaset SX763 WLAN dsl, is the centre of a wireless local network (WLAN). It handles the connection of the wireless linked network components and regulates the data traffic in the wireless network. The access point also serves as an... - Page 176 The Gigaset SX763 WLAN dsl includes a DHCP server and uses it to assign automatic IP addresses to PCs in the local network. You can specify that the IP addresses for certain PCs are never changed.
- Page 177 Glossary obtains the corresponding IP address from the DNS server so that it can establish the connection. On the Internet, the assignment of domain names to IP addresses follows a hierarchical system. A local PC only knows the address of the local name server. This in turn knows all the addresses of the PCs in the local network and the superordinate name servers, which again know addresses or the next superordinate name servers.
- Page 178 Glossary Encryption Encryption protects confidential information against unauthorised access. With an encryption system, data packets can be sent securely over a network. The Gigaset SX763 WLAN dsl offers encryption and for secure data transfer over wireless networks. Ethernet Ethernet is a network technology for local networks (LANs) defined by the IEEE as stand- ard IEEE 802.3.
- Page 179 Glossary HTTP proxy An HTTP proxy is a Server that network components use for their Internet traffic. All requests are sent via the proxy. A hub connects several network components in a star-topology network by sending all the data it receives from one network component to all the other network components. See also: Switch, Bridge, Router, Gateway IEEE...
- Page 180 Private IP address and a Public IP address. IPoA IP over ATM IP pool range The Gigaset SX763 WLAN dsl's IP address pool defines a range of IP addresses that the router's DHCP server can use to assign Dynamic IP addresses.
- Page 181 Internet. Because of this security function, NAT is frequently used as part of the Firewall of a network. If you want to make services on a PC in the local network available on the Internet despite NAT, you can configure the Gigaset SX763 WLAN dsl as Virtual server.
- Page 182 (also known as the global IP address) is a network component's address on the Internet. It is assigned by the Internet service provider. Devices that cre- ate a link from a LAN to the Internet, such as the Gigaset SX763 WLAN dsl, have a public and a Private IP address.
- Page 183 Glossary PPPoE Point-to-Point Protocol over Ethernet PPPoE is a Protocol for connecting network components in a local Ethernet network to Internet via a modem. Print server Server Private IP address The private IP address (also known as the local IP address) is a network component's address within the local network (LAN).
- Page 184 Glossary Roaming Roaming extends the range of a wireless LAN by using several Access points that use the same SSID and the same radio channel and are linked via Ethernet. The PCs in the net- work can switch dynamically between several access points without losing the existing network connection.
- Page 185 If the subnet mask is in a network that is administered by the Gigaset SX763 WLAN dsl, for example 255.255.255.0, that means the first three parts of the IP address form the network number and only the final part can be used for assigning host numbers.
- Page 186 Glossary Transmission Control Protocol The TCP Protocol is part of the TCP/IP protocol family. TCP handles data transport between communication partners (applications). TCP is a session-based transfer proto- col, i.e. it sets up, monitors and terminates a connection for transferring data. See also: TCP/IP Protocol...
- Page 187 Internet that runs not on itself, but on another network component. The Gigaset SX763 WLAN dsl can be configured as a virtual server. It will then direct incoming calls for a service via Port forwarding...
- Page 188 WLAN is currently specified in Standard IEEE 802.11. The Gigaset SX763 WLAN dsl com- plies with Standard 802.11g. WPA is a new standard-conformant solution for greater security in wireless networks. WPA is meant to replace the existing WEP standard (Wired Equivalent Privacy) and offers more reliable encryption and authentication methods.
-
Page 189: Index
Index Index Numerics ....Basic settings ....configuration . - Page 190 Index ..........DNS server .
- Page 191 Index Internet ..... . . menu ..... . .
- Page 192 Index ........Network adapter Print server .
- Page 193 Index ... . System management ....phone-based ....Scan button System password .
- Page 194 Index ....... UPnP ..... .
- Page 196 Issued by Gigaset Communications GmbH Schlavenhorst 66, D-46395 Bocholt Gigaset Communications GmbH is a trademark licensee of Siemens AG. © Gigaset Communications GmbH 2008 All rights reserved. Subject to availability. Rights of modification reserved. www.gigaset.com A31008-M707-R131-6x-7619_24-10-2008...