Advertisement
Table of Contents
- 1 Table of Contents
- 2 Before You Call
- 3 General Warnings
- 4 Refrigerator Integration Kit Items
- 5 Cupboard Dimensions
- 6 Installation of 120˚ Hinge
- 7 Preparation
- 8 Attaching Top Hinge Bracket
- 9 Attaching Slide-Housing to Refrigerator Doors
- 10 Placing Refrigerator in Cupboard
- 11 Refrigerator Alignment
- 12 Attaching Slide-Bar to Cupboard Door
- Download this manual
IK007 Integration kit
Installation manual
Refrigeration
STM3900, STM4200, SBM3800, SBM4300,
WTM2800, WTM3000, WTM3300, WTM3900,
WTM4200, WTM4400, WTM5200, WTE4200,
WTE5200, WTB2300, WTB2500, WTB2800,
WTB3400, WTB3700, WBM3700, WBM3800,
WBM4000, WBM4300, WBM5100, WBE4300,
WBE5100, WRM3700, WRM4300,WFM3000,
WFM3600, KTM2800, KTM3000, KTM3300,
KTM3600, KTM3900, KTM4200, KTM4400,
KTM5200, KBM3800, KBM4300, KBM5100.
Advertisement
Table of Contents

Related Manuals for Electrolux STM3900


Summary of Contents for Electrolux STM3900
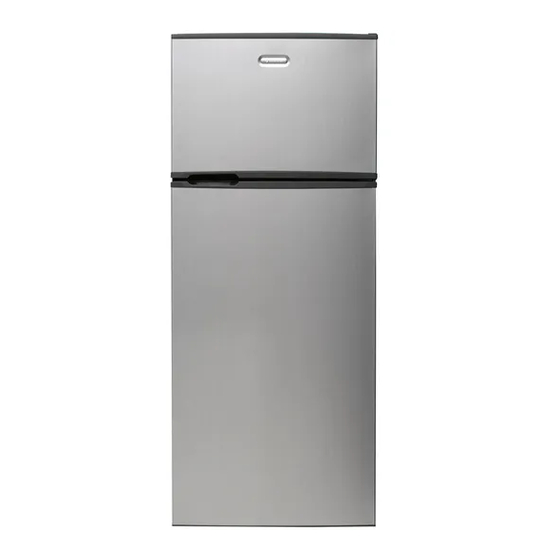
- Page 1 IK007 Integration kit Refrigeration STM3900, STM4200, SBM3800, SBM4300, WTM2800, WTM3000, WTM3300, WTM3900, Installation manual WTM4200, WTM4400, WTM5200, WTE4200, WTE5200, WTB2300, WTB2500, WTB2800, WTB3400, WTB3700, WBM3700, WBM3800, WBM4000, WBM4300, WBM5100, WBE4300, WBE5100, WRM3700, WRM4300,WFM3000, WFM3600, KTM2800, KTM3000, KTM3300, KTM3600, KTM3900, KTM4200, KTM4400,...
-
Page 2: Table Of Contents
Securing refrigerator in cupboard damaged. If in doubt, do not use the integration kit but Attaching slide-bar to cupboard door contact your local Electrolux Customer Care Centre. BEFoRE You Call Please ensure you read the instruction manual fully before you call for service, or a full service fee could be applicable. -
Page 3: General Warnings
NOTE: We strongly recommend that a professional builder/cabinetmaker builds this unit into required cabinetry prior to finished installation in customer’s kitchen. Electrolux cannot take responsibility for any installation issues when customer retrofits this product into cabinetry. Cabinet door height built in excess of refrigerator door height will be unsupported and risk bowing. -
Page 4: Refrigerator Integration Kit Items
REFRIgERaToR InTEgRaTIon KIT ITEMS Because this kit is common to a variety of models, you need to select the items required to suit your model. The items required for the models covered in this instruction booklet are shown below. Those items not required on your particular model should be discarded. -
Page 5: Cupboard Dimensions
1217 WTM3300, KTM3300 1690 1110 WTB3400 1730 1137 KTM3600 1800 1220 WTB3700 Please 1810 1217 WTM3900, KTM3900, STM3900 use the WTM4200, WTE4200, KTM4200, STM4200 1730 1137 calculation WTM4400, KTM4400 1810 1217 below to WTM5200, WTE5200, KTM5200 1810 1217 measure Dimension 2 door bottom freezer models ‘I’... - Page 6 CuPBoaRd dIMEnSIonS NOTE: All sizes are internal and measured in millimetres. For ‘lettered’ dimensions refer to the table on page 5. Dim B Dim C + 2x Board thickness Panel A Panel B (sides) (back) 100mm Dim E Dim H Panel C Panel D (top)
- Page 7 CuPBoaRd dIMEnSIonS Clearances Airflow When installed the refrigerator needs to have adequate air ventilation. It is important to ensure there is good airflow from the front to underneath and up the rear to the top of the cabinet (see diagrams). Front airflow cut-out 50mm Dim E...
-
Page 8: Installation Of 120˚ Hinge
120° hinge CuPBoaRd dIMEnSIonS InSTallaTIon oF 120˚ hIngE When positioned in a corner the clearance of dim g on the Please follow the instructions below to install the hinge side of the cabinet will allow the doors to be opened 120º... -
Page 9: Preparation
PREPaRaTIon aTTaChIng ThE ToP hIngE BRaCKET 1. unpack refrigerator, removing foam packing. 1. Remove top hinge cover (Figure 3), cover clips off. 2. lay the refrigerator down on its back on a piece of 2. Remove the three (3) top hinge screws. soft packing material. -
Page 10: Attaching Slide-Housing To Refrigerator Doors
aTTaChIng SlIdE-houSIng To REFRIgERaToR dooRS 1. Ensure slide-housing is positioned squarely as shown. slide housing 2. Ensure that the slide-housing is positioned on the door as shown in the diagrams. protruding edge Note: The slide-housing ‘protruding edge’ side must always 70mm be closest to the door handle side (diagram right). - Page 11 NOTE: For single door models, the door handle must be completely removed to provide clearance to the cupboard door and the resulting handle mounting holes hidden with a cover. Installer must use a tape or plastic cover that suits the installation appearance (not supplied).
-
Page 12: Placing Refrigerator In Cupboard
PlaCIng REFRIgERaToR In CuPBoaRd REFRIgERaToR alIgnMEnT 1. Ensure cupboard is level and square. 2. Put refrigerator into cupboard. use caution and Position the refrigerator in the cupboard so that: two people if necessary. 1. Top hinge bracket is against cupboard wall (Figure 8). 3. - Page 13 SECuRIng ThE REFRIgERaToR In ThE CuPBoaRd NOTE: When attaching all screws to cupboard, first drill 4. Slowly close the cupboard door (pushing the refrigerator back) until it is slightly ajar, i.e. with a gap a 2mm pilot hole in the correct position. This will allow of about 4mm (Figure 11).
-
Page 14: Attaching Slide-Bar To Cupboard Door
aTTaChIng SlIdE-BaR To ThE CuPBoaRd dooR 1. Fully open cupboard door (120°). Whilst slide-bar is still in housing: 2. open refrigerator door until it rests against the 4. Rotate slide-bar to uppermost alignment, mark a line cupboard door. on cupboard door (Figure 15). 3. - Page 15 Figure 19 Figure 20 Figure 21 REPEAT THIS PROCEDURE FOR THE SECOND SLIDE BAR IF NECESSARY. THIS COMPLETES THE INSTALLATION PROCEDURE. CUSTOMERS PLEASE NOTE: In the unlikely event service is required on an integrated refrigerator during the warranty period, it is the customer’s responsibility to remove the refrigerator from the cupboard.
- Page 16 “oh! how did you know? That’s exactly what I wanted!” That’s the kind of feeling that the designers at Electrolux seek to evoke in everyone who chooses or uses one of our products. We devote time, knowledge, and a great deal of thought to anticipating and creating the kind of appliances that our customers really need and want.