Table of Contents
Advertisement
Available languages
Available languages
®
SUPERBA
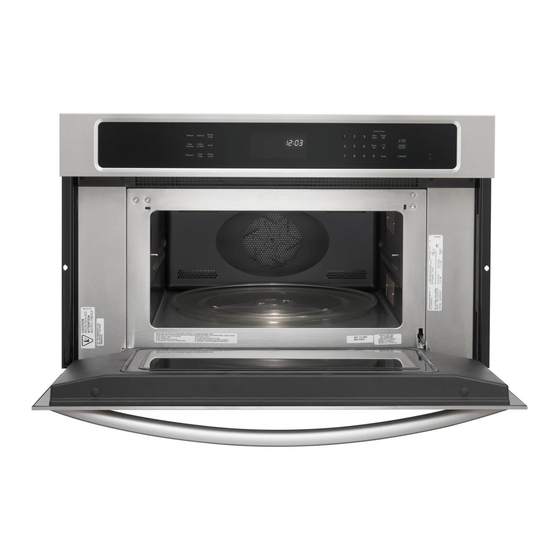
BUILT-IN CONVECTION
MICROWAVE OVEN
Use & Care Guide
For questions about features, operation/performance, parts accessories or service, call: 1-800-422-1230
or visit our website at www.kitchenaid.com
In Canada, call for assistance, installation and service, call: 1-800-807-6777
or visit our website at www.KitchenAid.ca
®
FOUR À MICRO-ONDES ENCASTRÉ SUPERBA
-
CUISSON PAR CONVECTION
Guide d'utilisation et d'entretien
Au Canada, pour assistance, installation ou service composez le 1-800-807-6777 ou visitez notre site web à...
www.KitchenAid.ca
Table of Contents/Table des matières............................................................................. 2
Models/Modèles
KBHS179 KBHS109 KEMS378 KEMS308
8304369
Advertisement
Table of Contents

Related Manuals for KitchenAid Superba KBHS109


Summary of Contents for KitchenAid Superba KBHS109
-
Page 1: Microwave Oven
MICROWAVE OVEN Use & Care Guide For questions about features, operation/performance, parts accessories or service, call: 1-800-422-1230 or visit our website at www.kitchenaid.com In Canada, call for assistance, installation and service, call: 1-800-807-6777 or visit our website at www.KitchenAid.ca ®... -
Page 2: Table Of Contents
BUILT-IN MICROWAVE OVEN SAFETY...3 Electrical Requirements ...4 PARTS AND FEATURES...5 Turntable ...5 Convection Grid ...5 Crisper Pan and Handle...5 Baking Tray ...6 KITCHENAID™ Steamer Vessel ...6 ELECTRONIC OVEN CONTROL ...7 Display(s) ...8 Number Codes...8 Start/Add a Minute ...8 Control Lock...8 Off ...9 Clock ...9... -
Page 3: Built-In Microwave Oven Safety
BUILT-IN MICROWAVE OVEN SAFETY Your safety and the safety of others are very important. We have provided many important safety messages in this manual and on your appliance. Always read and obey all safety messages. This is the safety alert symbol. This symbol alerts you to potential hazards that can kill or hurt you and others. -
Page 4: Electrical Requirements
IMPORTANT SAFETY INSTRUCTIONS Liquids, such as water, coffee, or tea are able to be overheated beyond the boiling point without appearing to be boiling. Visible bubbling or boiling when the container is removed from the microwave oven is not always present. THIS COULD RESULT IN VERY HOT LIQUIDS SUDDENLY BOILING OVER WHEN THE CONTAINER IS DISTURBED OR A SPOON OR OTHER UTENSIL IS... -
Page 5: Parts And Features
This manual covers different models. The microwave oven you have purchased may have some or all of the parts and features listed. The location and appearance of the features shown here may not match those of your model. A. Electronic oven control I. -
Page 6: Baking Tray
Baking Tray will become hot. Always use oven mitts or pot holders when handling. See “Positioning Baking Tray” section before using. See “Assistance or Service” section to reorder. KITCHENAID™ Steamer Vessel Use the KITCHENAID™ Steamer Vessel with the Steam Cook feature to steam foods. A. Lid B. Insert C. Base The steamer vessel will become hot. -
Page 7: Electronic Oven Control
ELECTRONIC OVEN CONTROL This manual covers different models. The oven you have purchased may have some or all of the items listed. The locations and appearances of the items shown here may not match those of your model. Combination Oven Models A. -
Page 8: Display(S)
Lower Oven Display (combination oven models) A. Oven cavity symbol B. Time of day/timer display Display(s) When power is first supplied to the oven, the clock will be flashing the message “clock-enter time.” Time can be entered by touching either CLOCK SET/START or START to allow operation. To allow operation without setting a time, touch CLOCK SET/ START, START or OFF. -
Page 9: Off
The OFF key stops any upper or single oven function except for the Clock, Timer and Control Lock. The oven will also turn off when the door is opened. When the door is opened, the element(s) and fan will turn off, but the oven light will remain on. -
Page 10: Built-In Microwave Oven Use
BUILT-IN MICROWAVE OVEN USE A magnetron in the oven produces microwaves which reflect off the metal floor, walls and ceiling and pass through the turntable and appropriate cookware to the food. Microwaves are attracted to and absorbed by fat, sugar and water molecules in the food, causing them to move, producing friction and heat which cooks the food. -
Page 11: Cookware And Dinnerware
Cookware and Dinnerware Cookware and dinnerware must fit on the turntable. Always use oven mitts or pot holders when handling because any dish may become hot from heat transferred from the food. Do not use cookware and dinnerware with gold or silver trim. Use the following chart as a guide, then test before using. -
Page 12: Doneness
PERCENT/NAME NUMBER Cooking sensitive foods such as cheese and egg dishes, pudding and custards. Cooking non-stirrable casseroles, such as lasagna. 50%, Medium Cooking ham, whole poultry and pot roasts. Simmering stews. Melting chocolate. Heating bread, rolls and pastries. 30%, Medium- Defrosting bread, fish, meats, Low, Defrost poultry and precooked foods. -
Page 13: Custom Reheat
3. Touch OFF or open the door to clear the display and/or stop reminder tones. Use the following chart as a guide. CRISPER PAN FRYING CHART FOOD COOKTIME* Eggs, Fried 2 eggs Side 1: 30-45 sec Side 2: 30-45 sec 4 eggs Side 1: 1 min Side 2: 45 sec... -
Page 14: Custom Defrost
To Reheat Beverage: 1. Touch CUSTOM REHEAT. 2. Touch number key “6” Touch CUSTOM REHEAT repeatedly to scan and select the Beverage setting. 3. Touch number key to enter cups quantity. 4. Touch number keys 1 to 3 to select Warm, Hot, Very Hot, Touch CUSTOM REHEAT repeatedly to scan and select temperature setting. -
Page 15: Steam Cooking
Steam Cook is a sensor cooking function that uses microwaves to steam food. Always use steamer vessel. See the “KitchenAid™ Steamer Vessel” section before using. Use Steam Cook for foods such as vegetables, fish and potatoes. Times and cooking powers have been preset for steaming a number of food types. -
Page 16: Keeping Food Warm
3. Touch START. The upper oven display will count down the popping time. When the stop time is reached, the oven will shut off automatically and “cooking complete” will appear in the display. If enabled end-of-cycle tones will sound, then reminder tones will sound every minute. -
Page 17: Soften/Melt
Soften/Melt Soften and Melt functions may be used to soften or melt your food. Times and cooking powers have been preset for a number of food types. Use the following chart as a guide. SOFTEN CHART FOOD CODE QUANTITY Butter ½-2 sticks Margarine ½-2 sticks... -
Page 18: Built-In Microwave Oven Care
Damage may occur, even with one-time or limited use. Rub in direction of grain to avoid damaging. Cleaning Method: KitchenAid ® Stainless Steel Cleaner and Polish Part Number 4396920 (not included): See “Assistance or Service” section to order. - Page 19 Cleaning Method: Average soil Mild, nonabrasive soaps and detergents: Rinse with clean water and dry with soft, lint-free cloth. Heavy soil Mild, nonabrasive soaps and detergents: Heat 1 cup (250 mL) of water for 2 to 5 minutes in oven. Steam will soften soil.
-
Page 20: Troubleshooting
Try the solutions suggested here first in order to avoid the cost of an unnecessary service call. Nothing will operate Has a household fuse blown, or has the circuit breaker tripped? Replace the fuse or reset the circuit breaker. If the problem continues, call an electrician. -
Page 21: Assistance Or Service
To locate the KitchenAid designated service company in your area, you can also look in your telephone directory Yellow Pages. For further assistance If you need further assistance, you can write to KitchenAid with any questions or concerns at: KitchenAid Brand Home Appliances Customer eXperience Center... -
Page 22: Warranty
If you need service, first see the “Troubleshooting” section of the Use & Care Guide. After checking “Troubleshooting,” additional help can be found by checking the “Assistance or Service” section or by calling KitchenAid. In the U.S.A., call 1-800-422-1230. In Canada, call 1-800-807-6777. -
Page 23: Sécurité Du Four À Micro-Ondes Encastré
SÉCURITÉ DU FOUR À MICRO-ONDES ENCASTRÉ Votre sécurité et celle des autres est très importante. Nous donnons de nombreux messages de sécurité importants dans ce manuel et sur votre appareil ménager. Assurez-vous de toujours lire tous les messages de sécurité et de vous y conformer. Voici le symbole d’alerte de sécurité. -
Page 24: Spécifications Électriques
IMPORTANTES INSTRUCTIONS DE SÉCURITÉ Les liquides tels que l’eau, le café ou le thé peuvent trop chauffer – au-delà du point d’ébullition – sans sembler bouillir. Il n’y a pas toujours des bulles ou une ébullition lorsqu’on retire le récipient du four à microondes. -
Page 25: Pièces Et Caractéristiques
PIÈCES ET CARACTÉRISTIQUES Ce manuel couvre différents modèles. Le four à micro-ondes que vous avez acheté peut comporter l'ensemble des pièces et caractéristiques énumérées ou seulement certaines d'entre elles. L'emplacement et l'apparence des caractéristiques illustrées peuvent ne pas correspondre à ceux de votre modèle. A. -
Page 26: Poêle À Croustiller Et Poignée
Voir la section “Positionnement de la plaque de cuisson” avant l'utilisation. Voir la section “Assistance ou service” pour une nouvelle commande. Cuiseur-vapeur KITCHENAID™ Utiliser le cuiseur-vapeur KITCHENAID™ avec la caractéristique de cuisson à la vapeur pour cuire les aliments à la vapeur. A. Couvercle B. Insert C. Base Le cuiseur-vapeur deviendra chaud. -
Page 27: Commande Électronique Du Four
COMMANDE ÉLECTRONIQUE DU FOUR Ce manuel couvre différents modèles. Le four que vous avez acheté peut comporter tous les articles énumérés ou seulement certains d'entre eux. Les emplacements et aspects des articles illustrés ci-dessous peuvent ne pas correspondre à ceux de votre modèle. Modèles de fours combinés A. -
Page 28: Afficheur(S)
Afficheur du four inférieur (modèles de fours combinés) A. Symbole de la cavité du four B. Afficheur de l'heure/minuterie Afficheur(s) Lors de la première mise en marche du four, l'horloge clignote et affiche le message “clock-enter time” (horloge-régler l'heure). L'heure peut être réglée en appuyant soit sur CLOCK SET/START (réglage de l'horloge/mise en marche) ou sur START (mise en marche). -
Page 29: Verrouillage Des Commandes
Verrouillage des commandes Le verrouillage des commandes désactive les touches du tableau de commande pour éviter l'utilisation involontaire du four. Si le verrouillage des commandes a été réglé, la fonction reste activée après une panne de courant. Lorsque les commandes sont verrouillées, seules les touches TIMER SET/START (réglage minuterie/mise en marche) et TIMER OFF (arrêt minuterie) fonctionnent. -
Page 30: Fahrenheit Et Celsius
Fahrenheit et Celsius La température est préréglée en Fahrenheit, mais elle peut être modifiée et affichée en Celsius. Modification : Appuyer sur OPTIONS, puis sur “1” pour passer de Fahrenheit à Celsius. En mode Fahrenheit, “°F” apparaît après la température du four. En mode Celsius, “°C”... -
Page 31: Ustensiles De Cuisson Et Vaisselle
Remuer et tourner Remuer et tourner les aliments redistribue la chaleur de manière uniforme pour éviter la cuisson excessive des bords externes des aliments. Mélanger de l'extérieur vers le centre. Si possible, retourner les aliments. Disposition S'il s'agit d'aliments de formes irrégulières ou de dimensions différentes, les parties plus minces et les morceaux plus petits doivent être disposés près du centre. -
Page 32: Papier D'aluminium Et Métal
Papier d'aluminium et métal Toujours utiliser des mitaines de four ou des maniques lors de l'enlèvement des contenants du four à micro-ondes. Le papier d'aluminium et certains métaux peuvent être utilisés dans le four à micro-ondes. Si ces articles ne sont pas correctement utilisés, des arcs (un éclair bleu) peuvent survenir et causer des dommages au four à... -
Page 33: Degré De Cuisson
Réglage d'une puissance de cuisson autre que 100 % : 1. Appuyer sur les touches numériques pour régler la durée de cuisson. 2. Appuyer sur POWER (puissance). 3. Appuyer sur la touche numérique en utilisant le tableau de puissance de cuisson aux micro-ondes. 4. -
Page 34: Réchauffage Personnalisé
2. Appuyer sur START (mise en marche). Le compte à rebours de la durée de cuisson s'affiche. Lorsque l'heure d'arrêt est atteinte, le four s'arrête automatiquement et “cooking complete” (cuisson terminée) apparaît sur l'afficheur du four. Les signaux sonores de fin de programme se font entendre (si activés), suivis des signaux de rappel à... -
Page 35: Décongélation Personnalisée
Réchauffage manuel : 1. Appuyer sur CUSTOM REHEAT. 2. Appuyer sur la touche “7” Appuyer sur CUSTOM REHEAT de façon répétée pour parcourir le réglage manuel. En cas d'utilisation d'une puissance de cuisson à 70 %, passer directement à l'étape 4. 3. -
Page 36: Cuisson À La Vapeur
à la vapeur. Toujours utiliser un cuiseur-vapeur. Voir la section “Cuiseur- vapeur KitchenAid™” avant l'utilisation. Utiliser la cuisson à la vapeur pour les aliments tels que les légumes, le poisson et les pommes de terre. -
Page 37: Popcorn (Maïs Éclaté)
3. Appuyer sur START (mise en marche). L'afficheur du four supérieur démarre le compte à rebours de la cuisson à la vapeur une fois que le détecteur a identifié la durée de cuisson. Lorsque l'heure d'arrêt est atteinte, le four s'arrête automatiquement et “steam complete”... -
Page 38: Consistance Croustillante
Consistance croustillante La caractéristique de consistance croustillante utilise l'élément de cuisson au gril et les micro-ondes pour brunir et rendre croustillants les aliments. La fonction de consistance croustillante peut être utilisée pour saisir les viandes et les légumes, frire le bacon et les œufs et pour rendre croustillantes et brunes les pizzas et les frites. -
Page 39: Conversion Easyconvect
5. Appuyer sur START (mise en marche). L'affichage du four supérieur procède à un compte à rebours de la durée de ramollissement. Lorsque l'heure d'arrêt est atteinte, le four s'arrête automatiquement et “soften complete” (ramollissement terminé) apparaît sur l'afficheur. Les signaux sonores de fin de programme se font entendre (si activés), suivis des signaux de rappel à... -
Page 40: Entretien Du Four À Micro-Ondes Encastré
Frotter dans la direction du grain pour éviter les dommages. Méthode de nettoyage : Nettoyant et poli pour acier inoxydable KitchenAid Pièce numéro 4396920 (non incluse) : Voir la section “Assistance ou service” pour placer une commande. - Page 41 CAVITÉ DU FOUR À MICRO-ONDES Ne pas utiliser de tampons à récurer savonneux, de nettoyants abrasifs, de tampons en laine d'acier, de chiffons de lavage rugueux ou certains essuie-tout recyclés. Des dommages peuvent survenir. Sur les modèles en acier inoxydable, frotter dans le sens du grain pour éviter d'endommager le fini.
-
Page 42: Dépannage
Essayer les solutions suggérées ici d'abord afin d'éviter le coût d'une visite de service inutile. Rien ne fonctionne Un fusible est-il grillé ou le disjoncteur s'est-il déclenché? Remplacer le fusible ou réenclencher le disjoncteur. Si le problème persiste, appeler un électricien. L'appareil est-il correctement raccordé? Voir les Instructions d'installation. -
Page 43: Assistance Ou Service
Références aux marchands locaux, aux distributeurs de pièces de rechange et aux compagnies de service. Les techniciens de service désignés par KitchenAid Canada sont formés pour remplir la garantie des produits et fournir un service après la garantie, partout au Canada. -
Page 44: Garantie
CONFÈRE DES DROITS JURIDIQUES SPÉCIFIQUES ET VOUS POUVEZ ÉGALEMENT JOUIR D'AUTRES DROITS QUI PEUVENT VARIER D'UNE JURIDICTION À UNE AUTRE. À l'extérieur du Canada et des 50 États des États-Unis, cette garantie ne s'applique pas. Contacter votre marchand KitchenAid autorisé pour déterminer si une autre garantie s'applique.