Table of Contents
Advertisement
Quick Links
CAUTION
RISK OF ELECTRIC SHOCK
DO NOT OPEN
CAUTION: TO REDUCE THE RISK OF ELECTRIC SHOCK,
DO NOT REMOVE COVER (OR BACK). NO USER-
SERVICEABLE PARTS INSIDE. REFER SERVICING TO
QUALIFIED SERVICE PERSONNEL.
IMPORTANT SAFETY INSTRUCTIONS
INSTRUCTIONS PERTAINING TO A RISK OF FIRE, ELECTRIC SHOCK
1.
Read all the instructions (Safety, Installation and FCC if applicable) before using the product.
2.
Do not use this product near water (example, near a swimming pool, spa, tub, sink or wet basement) and do not expose to rain.
3.
This product should be used only with a cart or stand that is recommended by the manufacturer, or should be used with the components supplied.
If this product requires assembly before being played, take special care to follow the assembly instructions found at the back of the manual.
4.
This product, whether alone or in combination with an amplifier and headphones or speakers, may be capable of producing sound levels that
could cause permanent hearing loss. Do not operate for long periods of time at a high volume level or at a level that is uncomfortable. If you
experience any hearing loss or ringing in the ears, you should consult an audiologist.
5.
WARNING: Do not place this product or any other objects on the power cord, or place it in a position where one could walk on, trip over or roll
anything over power or connecting cords of any kind.
6.
This product should be located so that its location does not interfere with its proper ventilation.
7.
This product should be located away from heat sources such as radiators, heat registers, or other products that produce heat.
8.
This product should be connected to a power supply only of the type described in the operating instructions or as marked on the product.
9.
This product may be equipped with a polarised line plug (one blade wider than the other). This is a safety feature. If you are unable to insert
the plug into the wall outlet, contact an electrician to replace your obsolete outlet. Do not defeat the safety purpose of the plug.
10.
The power supply cord of the product should be unplugged from the outlet when left unused for long periods of time.
11.
Care should be taken so that objects do not fall and liquids are not spilled into the enclosure through openings.
12.
This product should be serviced by qualified service personnel when:
a)
the power supply cord or the plug has been damaged; or
b)
objects have fallen, or liquid has been spilled into the product; or
c)
the product has been exposed to rain; or
d)
the product does not appear to operate normally or exhibits marked changes in performance; or
e)
the product has been dropped, or the enclosure damaged.
13.
Do not attempt to service the product beyond that described in the user-maintenance instructions. All servicing should be referred to qualified
service personnel.
14.
Some products may have benches and/or accessory mounting fixtures that are either supplied as part of the product or as optional accessories.
Please ensure that benches are correctly assembled and stable and any optional fixtures (where applicable) are well secured before use.
15.
Electromagnetic Interference (RFI) This electronic product utilises digital sample wave processing technology (S.W.P.) that may adversely
affect radio/TV reception. Read the FCC note on the inside back cover of the owner's manual for additional information.
General user maintenance
• Clean the outer surface of your instrument using a soft, clean, slightly damp cloth and polish with a soft, dry cloth.
• Never use industrial cleaners, detergents, abrasive cleansers, waxes, solvents or polishes as they may damage the instrument finish.
• Always turn off the power supply after use and never turn the unit on and off repeatedly in quick succession as this places an undue
load on the electronic components.
OR INJURY TO PERSONS
SAVE THESE INSTRUCTIONS
The lightning flash with arrowhead symbol, within an equi-
lateral triangle, is intended to alert the user to the presence
of uninsulated "dangerous voltage" within the product's
enclosure that may be of sufficient magnitude to constitute
a risk of electric shock to persons.
The exclamation mark within an equilateral triangle is in-
tended to alert the user to the presence of important
operating and maintenance (servicing) instructions in the
literature accompanying the product.
Advertisement
Table of Contents

Related Manuals for GEM WK1

Summary of Contents for GEM WK1
-
Page 1: Important Safety Instructions
The lightning flash with arrowhead symbol, within an equi- lateral triangle, is intended to alert the user to the presence CAUTION of uninsulated “dangerous voltage” within the product’s RISK OF ELECTRIC SHOCK enclosure that may be of sufficient magnitude to constitute DO NOT OPEN a risk of electric shock to persons. - Page 2 OWNER’S MANUAL ENGLISH...
-
Page 3: Power Supply
General safety instructions Power supply • This keyboard is powered by current from a standard household wall outlet (using the supplied AC adaptor). About the AC adaptor • Use only the supplied AC adaptor. Use of another type of adaptor creates the danger of fire and electric shock. -
Page 4: Table Of Contents
How to update your instrument ..........3 General Reset ................. 3 Front Panel WK1 ..............4 Rear Panel WK1 (Connections) ..........6 • 1 Get Started ..............8 Power On/Off ................8 Play on the keyboard and change the sounds ......8 Select Performances and listen to the sounds...... -
Page 5: Ii Index
How to name a Performance ..........29 How to restore the original Performance Settings ....29 • 4 Styles ..............30 WK1 Styles ................30 Selecting a Style..............30 Recalling a Style from a Performance ....... 31 Total Clear of the User Style ..........31 The Style controls .............. - Page 6 Handling Floppy Disks ............48 Back-up copies ..............49 Cleaning the disk drive head ..........49 Precautions to observe when using WK1 disks with a PC ... 49 • 6 Songs ..............50 What is a Song ..............50 The Song Performance ............50 Selecting a Song ..............
- Page 7 The main MIDI applications ..........71 Controlling and expander or other keyboards with WK1 ..71 Controlling WK1 from a MIDI accordion ........ 72 Using WK1 in Song con un computer or external sequencer . 73 Sistema Esclusivo (Generalmusic System Exclusive) ..76 ○...
- Page 8 • 11 MIDI/GENERAL ........... 83 • Reference Section Technical Specifications of WK1 ........Ref. 2 Index ................. Ref. 3 • Appendix Table of Sounds ..............A. 1 Table of Styles, Songs, Performances ......... A. 3 Table of Reverb ..............A. 4 Table of Chorus ..............
- Page 9 ○ ○ ○ ○ ○ ○ ○ ○ ○ ○ ○ ○ ○ ○ ○ ○ ○ ○ ○ ○ ○ ○ ○ ○ ○ ○ ○ ○ ○ ○ ○ ○ ○ ○ ○ ○ ○ ○ ○ ○ ○...
-
Page 10: The Owner's Manual
Digital Signal Processor ocessor ocessor WK1 features a double Digital Signal Processor that can be controlled in Real Time. Two different effects (1 Reverb and 1 Modulation/Delay) can be assigned and stored to each Performance. • • • • •... -
Page 11: Important Warning
Operating System le Operating System The Operating System, that is, the software that controls WK1, is stored in a Flash ROM. It can be updated by loading more powerful releases that offer more functions. • • • • •... -
Page 12: Important Preliminary Notes
30 days. If you have not used WK1 for a long period of time, you are advised to leave the instrument on for at least 8/10 hours in order to fully recharge the battery. -
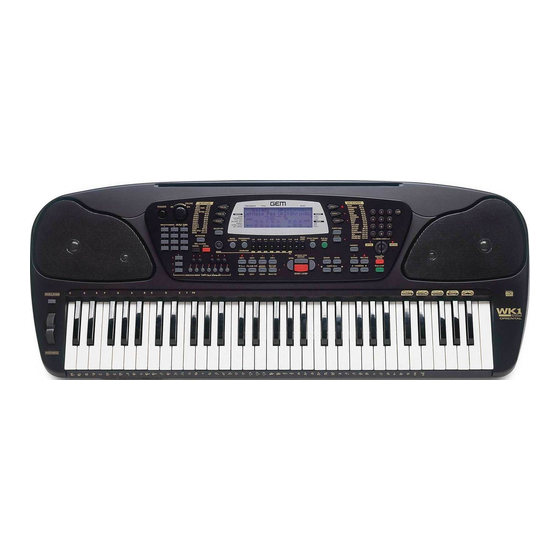
Page 13: Front Panel Wk1
Demo Songs, Performances, Single Touch Play settings, Style, Song Style or current Song tracks, depending on the selected mode of WK1 . When in Song mode, the two rows of numbers under the function keys correspond to the 16 Song Tracks (F1 … F8). F9 toggles between tracks 01- 08 and 09-16. - Page 14 Pedal. accordingly. When a MIDIFile is played, WK1 display 16. REV/CHO. Enables (led ON) or disables (led OFF) the will show the lyrics of the song in the first two lines (for Digital Signal Processori.
-
Page 15: Rear Panel Wk1 (Connections)
28. PITCH/BEND . The Pitch Bend wheel directly controls numeric keypad to recall Styles (00-95), USER Styles (96- the pitch of the sounds generated by WK1 ; moving it 103),Song/ Styles (104-110) and Songs (111-117). horizontally gives a “gliding” effect that adds realistically to 27. - Page 16 ○ ○ ○ ○ ○ ○ ○ ○ ○ ○ ○ ○ ○ ○ ○ ○ ○ ○ ○ ○ ○ ○ ○ Front/Rear Panel 7...
-
Page 17: • 1 Get Star Ted
The switch to turn the keyboard on and off is located on the left lateral panel. To power WK1 WK1 up insert the power supply cable in the rear-panel mains socket, and plug the cable into a 220V wall socket. Play on the ke... -
Page 18: Select Performances And Listen To The Sounds
Select P Select P ormances and listen to the ormances and listen to the Select P Select Perf Select P erformances and listen to the ormances and listen to the ormances and listen to the sounds sounds sounds sounds sounds 1. -
Page 19: Select Styles And Play With Automatic Accompaniments
Select STYLES and pla Select STYLES and pla y with automatic y with automatic Select STYLES and pla Select STYLES and play with automatic Select STYLES and pla y with automatic y with automatic accompaniments accompaniments accompaniments accompaniments accompaniments One Style will already be selected, but you can select another in the following way: 1. -
Page 20: Use The Effects
You can temporarily modify the active effects in a Performance or a Style, by holding the REV/CHO REV/CHO REV/CHO REV/CHO REV/CHO key down. WK1 features 22 types of Reverb and 22 types of Modulation/ Delay (Chorus) effect. Use the Headphones Use the Headphones Use the Headphones Use the Headphones Use the Headphones •... -
Page 21: Transpose The Instrument (In Semitones)
If you play a difficult tune that implies the use of many black keys, or if the tune you are playing is not in key with the Singer’s voice or with another instrument , you can transpose WK1 to play in a different key. TRANSPOSE b /# keys allow to transpose the instrument by ±12 semitones (12 semitones = 1 octave). -
Page 22: Demo
Demo Songs w to listen to the Demo Songs Demo Songs of WK1 can be started at any time to get an idea of the real sound potential of this instrument. 1. Press the DEMO key. -
Page 23: Basic Concepts
• 2 Basic Concepts In this chaper you will find the basic concepts to make WK1 work, along with general information that will help youunderstand the various parts of the instrument. To gain access to the keyboard functions, as well as following the instructions in the Owner’s Manual chapter, you can follow a friendly shortcut: by holding... -
Page 24: Style Lock And Single Touch Play
Up to 7 Song Styles can be loaded to the WK1 memory. SONG MODE A Song is a multi-timbral 16-track performance, in which each track represents an instrument of the orchestra or of the band. WK1 can load and playback songs in the following formats: GMX, GMX,... -
Page 25: Performances
Styles, the configuration of tracks 10-16 does not influence either playing mode (track 9 is used by the Pads). On the other hand, if you are programming WK1 to use it as a multi-timbral slave device, all 16 tracks are considered. -
Page 26: Tracks
Bank 4 contains a special drumkit (location 112) configured with some extra special sounds (DrumSFX) to tickle your immagination. SAMPLES WK1 can load samples in WK2, PK7, WK3 and CD formats. They can be loaded to the memory using the “ Load All Disk” function. ○... -
Page 27: Connections
• Recording Songs on a computer or external sequencer. Connect the WK1 MIDI IN to the MIDI OUT of the external device, the WK1 MIDI OUT to the MIDI IN of the external device. In MIDI/GENERAL mode scroll with the PAGE keys to the page where LOCAL is shown. -
Page 28: Pedals
The Video RGB and S-VHS sockets connect the instrument to a TV set or monitor to display Song lyrics in Karaoke Style. WK1 is configured to operate with the European Video Standard (PAL). In the U.S.A. the instrument must be configured in the NTSC standard. Refer to the “MIDI/GENERAL”... -
Page 29: The Display
The Display WK1 features a large, back-lit multifunction liquid crystal display that will simplify all operations performed on the instrument. The user interface is divided into 7 areas: 1) MENU (left) It lists all functions that are accessed by the reference keys. -
Page 30: Data Entry
Entering alphanumeric data When you need to enter the name of a Performance, of a Song Style, or during SAVE operations in Disk mode, WK1 keyboard operates like a alphanumeric input peripheral. Each keyboard note corresponds to a letter,a number or a symbol. -
Page 31: Sounds And Keyboard Modes
• 3 Sounds and Performances SOUNDS AND TRACKS A Sound is assigned to each Performance track. THE REAL TIME KEYBOARD SECTIONS (UPPER 1, UPPER2, LOWER) The display constantly shows which tracks are assigned to the accompaniment and which ones are assigned to the keyboard section (this does not happen only when a special mode is selected, where the deactivation of the tracks is required). - Page 32 To recap, the possible situations are as follows: when ARRANGE ON/OFF is off (the accompaniment is off) a) only UPPER 1 on: Sound from track 9 over the entire keyboard range; b) only UPPER 2 on: Sound from track 8 over the entire keyboard range.;...
-
Page 33: Sounds Can Be Selected As Follows
(GMX is an extended General Midi standard created by Generalmusic). WK1 Drumkits are contained in Banks 2, 3 and 4 (112-119). You can choose among the 17 Drumkits are available. The relative drum maps are provided in the Appendix to the Owner’s Manual. Bank 4 offers an extra Drumkit (DrumSFX). -
Page 34: Selecting A Performance
Performance. 2. Use the function keys (F1… F9) located below the display to recall one of the 9 Performances of the first group (WK1 default setting is group 1); 3. Use the PAGE keys or the + and - keys in the numeric keypad to have access to the 7 groups of 9 Performances each. - Page 35 d) Modify the volume of the tracks. Use the Function keys (F1… F9) to enter the desired track. The first page will be shown in the display. Press the CURSOR key once: the volume value will start blinking. Use the TEMPO/DATA key to modify the volume.
- Page 36 - PITCH/M - PITCH/M - PITCH/M - PITCH/M - PITCH/M: (ON/OFF) enables or dsables the track for the action of the Pitch/Modulation control. - PITCHRG - PITCHRG - PITCHRG - PITCHRG - PITCHRG: (00/12) indicates the Bender range: if the value is 00, the Pitch Bender wheel will have no effect on the track.
-
Page 37: Store Performance
If you modify the first of the 63 available Performances, this will appear whenever WK1 WK1 is turned on. You may choose not to store your programmed Performances to disk but keep them in the machine RAM memory taking advantage of the battery back-up. -
Page 38: How To Restore The Original Performance Settings
PERFORMANCE NAME To change the Performance name, proceed as follows: 1. Keep the STORE PERF. key pressed for a few seconds 2. Use the symbol located below the keyboard to write the new name. 3 4 5 6 7 8 9 0 A B C D E F G H I J K L M N O P Q R S A B C D E F G H I J K L M N O P Q R S A B C D E F G H I J K L M N O P Q R S... -
Page 39: Wk1 Styles
Styles are a collection of musical patterns typical of various forms of making music, ranging from rock and pop to traditional and Latin music. Each WK1 Style features 4 Variations, 4 Intros, 4 Fills and 4 Endings. A Style, therefore, provides a complete range of musical structures with which you can play whatever type of music you prefer. -
Page 40: Recalling A Style From A Performance
TEMPO/DATA keys to control Tempo. Recalling a Performance automatically disables the SINGLE TOUCH PLAY function and restores WK1 WK1 to the default status of the Perfor- mance. If the TEMPO LOCK function is disabled, the Tempo is also updated. 4. 4. 4. 4. 4. Press ST... -
Page 41: The Style Controls
The Style controls The keys and controls of the Style functions are explained in the next few paragraphs. START/STOP Starts or Stops the automatic accompaniments (Styles). When recording a Song Style, this key will be used to start the Style: the Song Style will be recorded by the Sequencer area with the PLAY/STOP key. -
Page 42: Var 1, Var 2, Var 3, Var
VAR 1, VAR 2, VAR 3, VAR 4 These keys control 4 different variations of the same Style. Before starting the accompaniment, you can decide in which Variation you wish to play. While you are playing, you can switch from a Variation to another by simply pressing the desired Variation key. -
Page 43: The Arranger Section
The Arranger Section The keys to enable the more important functions to operate the Styles are contained in this section. ARRANGE ON/OFF When ARRANGE ON/OFF is on (LED on), all the accompaniment tracks are enabled for play. If this button is off, only the Drum track will play after the start. -
Page 44: Tempo Lock
3. Press the keyboard note you wish to set as the new Split point. 4. Press ESCAPE to exit. The new Split point is now set to all the instrument. It will remain in WK1 memory even if this is turned off. ○... -
Page 45: Arrange Mode
Arrange Mode WK1 The WK1 has 4 different Chord recognition modes which trigger the automatic accompaniment in different ways: FINGERED 1, FINGERED 2, ONE FINGER and FREESTYLE Press and hold down ARRANGE ON/OFF ARRANGE ON/OFF ARRANGE ON/OFF ARRANGE ON/OFF ARRANGE ON/OFF for a few seconds to get into Arrange mode: the display will show the following messages: Arrange Mode: Fingered 1;... -
Page 46: Arrange Memory
Arrange Memory and Bass to lowest. To have access to this function press and hold for a one second the ARRANGE ON/OFF key, then the PAGE+ key: the two functions Arrange Memory e Bass to lowest will be shown in the display- Use the CURSOR key to toggle between the two modes: Arrange Memory When Arrange Memory is ON, the automatic accompaniment will... -
Page 47: Single Touch Play
INGLE OUCH TORE ERFORMANCE ERFORMAN ECALL TYLE EMPO SINGLE TOUCH PLAY The SINGLE TOUCH PLAY button assigns the factory set sounds stored in ROM to all the tracks (accompaniment and keyboard tracks) for each Style/ In addition, this button activates the ARRANGE ON/ OFF button (LED on) and the ARRANGE MEMORY function (corre- sponding display indicator on). -
Page 48: Style / Tempo Lock
STYLE / TEMPO LOCK The STYLE LOCK function allows you to select Performances without changing the current Style. When STYLE LOCK is active (the display indicator is ON), you can move from one Performance to another without changing the Style.. If you hold down this button for about 2 seconds, the TEMPO LOCK function activates (as already explained). - Page 49 REV/CHO Rev:Hall 2 Vol=100 WK1 can process the signals it generates, thanks to two built-in multieffect Cho:Chorus 2 Vol=100 devices that affect the sections independently. It is possible to set the effect processor to active (Led ON) or non active (Led OFF) mode.
-
Page 50: The Disk
Working with a hard disk and floppy disks provides you with the possibility to create an extensive library of Sounds, Samples, Performances, Styles, Songs e Song Styles, that can be loaded to WK1 RAM at any time. This chapter is an introduction to the concepts of File, Floppy Disks and RAM memory. -
Page 51: What Is A Midi File
○ ○ ○ ○ NOTE 0 FORMAT: all tracks are mixed to a single WK1 reads format 0 e 1 MIDIFiles, and saves MIDI file in 0 format. track. 1 FORMAT: all tracks are kept separate (Multi-track). ○ ○ ○... -
Page 52: Loading Styles
WK1 can also load Samples from WK3 and PK7 series. LOADING SONG STYLES WK1 Song Styles can only be loaded to the memory using the “ Load All Disk” procedure, since this format contains files of different types. WK1 only loads WK1 Song Styles. -
Page 53: Load Operations
The extension for SAMPLES and PERFORMANCES, will be shown in the display. No extension is shown for Songs in WK and PK format. WK1 is not Mid: NewYork compatible with the files of WK3 and PK7 series made in SONG STYLE mode. -
Page 54: Save Operations
○ ○ NOTE: To ensure that ALL loads exactly the WK1 can be saved to a Floppy Disk: desired combination of files, load them to the RAM as single elements, save them using the 1. as single elements (Song, Style, MidiFile);... -
Page 55: Saving Song Styles
MidiFile with text (Karaoke). All WK1 WK1 Songs saved as a MidiFile are always compatible with the GMX format. Consequently they are compatible with all instruments of the WK series which feature a Disk Drive. -
Page 56: Formatting A Floppy Disk
Formatting a Floppy Disk WK1 will not read from a Floppy Disk which is not in a recognized format. Using a disk in a non-compatible format will prompt a message that requests to abandon the current Floppy Disk and try with a new one. -
Page 57: Inserting A Floppy Disk Into The Drive
P U S H EJECTING A FLOPPY DISK Before ejecting a Floppy Disk, make sure that the operation led in the drive is OFF, and that WK1 display shows no disk operation being in progress. eject b eject b eject b... -
Page 58: Back-Up Copies
RAM memory. The contents of the source Floppy Disk (the one containing the data you want to back-up) should be first loaded to WK1 RAM memory, then saved to the destination Floppy Disk (the one you will keep as a back-up copy). -
Page 59: What Is A Song
Change, Pan, Volume, Effects) within each track. Selecting a Song WK1 can save up to 7 Songs in the SONG group of the USER section (from 111 to 117, if the memory locations are not all in use). HOW TO SELECT A SONG Refer to the “DISK ”... -
Page 60: Cancelling A Song (Clear Function)
5. Press the STOP and then the PLAY key to restart the playback from the beginning. If you wish to playback your Song direcly without loading it to WK1 internal memory, seek for it in the Floppy Disk and play START/STOP to start it. - Page 61 A) How to deactivate one of the tracks engaged in the Sequencer A) How to deactivate one of the tracks engaged in the Sequencer A) How to deactivate one of the tracks engaged in the Sequencer A) How to deactivate one of the tracks engaged in the Sequencer A) How to deactivate one of the tracks engaged in the Sequencer 1.
-
Page 62: Displaying Lyrics
If your Song or MIDI File contain the Lyrics track (the text of the song), you can have them displayed both to on an external monitor, and to WK1 display. In this way you will be ready to sing in Karoke style. -
Page 63: Song Style Performance
A Song Style cannot be saved as a MIDI file, only as an “ALL” data package. Song Style selection WK1 can store up to 7 Song Styles in the locations numbered from 104 to 110 in the USER section. SELECTING A SONG STYLE... -
Page 64: Play A Song Style In Real Time
Press the RECORD key: the first free location is made available. Press PLAY/STOP , to start the recording. While you play, WK1 records the panel status and all the operations that you carry out. The CHORD track is automatically activated only if empty. The keyboard tracks are recorded only if their relative indicators are shown on in the display. -
Page 65: Listen To The Song Style Playback
3. Start playing. 4. Continue as if you were using a normal Style. • Use Fills • Change the Variation • Change the Style • Adjust the Volume • Use the optional Volume and Damper • Change the sounds etc..5. -
Page 66: Clear Song Style (User Song Style)
Use the Page keys to move to the section you wish to clear and press ENTER. Press ENTER again to confirm the display message. Song Styles are retained in WK1 memory also when the instrument is turned off. It is advisable to save a copy of the favourite recordings as an ALL format file on a Floppy Disk. - Page 67 8 • Programmable Styles (User) WK1 sequencer memory can store up to 7 programmable User Styles (96 - 103) which can either be loaded from disk or programmed by the user. An extensive User Style library, available on Generalmusic Floppy Disks, offers a large selection of User Styles to choose from.
- Page 68 THE BASIC STRUCTURE OF A STYLE RIFF THE BASIC STRUCTURE OF A STYLE RIFF THE BASIC STRUCTURE OF A STYLE RIFF THE BASIC STRUCTURE OF A STYLE RIFF THE BASIC STRUCTURE OF A STYLE RIFF It is important to be familiar with the basic structure of a Style. Styles provide automatic accompaniments based on the chords.
- Page 69 Selecting a different recording track - [Optional] 6. You may wish to start recording your Style from a different track that is not default set one (Drums). Use the (F1 - F5) Function keys to select the desired track among the following ones: F1 = Drums, F2 = Bass, F3 = Acc.1, F4 = Acc.2, F5 = Acc.3.
- Page 70 To set the number of beats to a Riff, press the CURSOR key to move the flashing cursor, and use the TEMPO/DATA to select the number of beats. You can record up to 16 measures for each Riff. 9 9 9 9 9 .
-
Page 71: User Style Playback
Always remember that simple Variations lead to the best results. A simple Variation can be enhanced and enriched by adding new tracks. For example, you can record Major Variation 1 on three tracks only (Drums, Bass, Acc1) and with simple patterns. Record Variation 2 setting Major e Minor in the same tracks (Drums, Bass, Acc1), but adding small differences. -
Page 72: Clear Note
Quantize Quantize function self-corrects errors in the recording Tempo. In other words, small possible imperfections are trimmed and corrected, and the beats are made homogeneous within a bar, according to the established Quantize value. 1 1 1 1 1 . Select and playback the Riff you wish to correct, then press the Q Q Q Q Q U U U U U ANTIZE ke ANTIZE ke ANTIZE ke... -
Page 73: Saving Your User Style To A Floppy Disk
Change number. Saving your User Style to a Floppy Disk User Styles are stored to the machine memory even when WK1 is turned off. To prevent unwanted loss of data, you are recommended to save your User Styles to a Floppy Disk. Information about Save Style procedure are given the “DISK”... -
Page 74: The User Style Performance
The User Style Performance All emply User Styles contain a default Performance default made of the following sounds, assigned to the accompaniment tracks: Default setting of a User Style Performance T T T T T raccia raccia raccia raccia raccia Sound Sound Sound... -
Page 75: Recording A Program Change
Recording Commands All controls generated by hardware devices (Pedali, Pitch bend, Modu- lation), or by the pedals connected to WK1 rear-panel sockets will be recorded to the relative track. Attivate solo la traccia su cui desiderate registrare i controlli. -
Page 76: How To Select The Type Of Effect
• 9 Digital Signal Processor WK1 allows you to process Performances (Style/RealTime, Song Style e Song Performance) through the on-board multi-effect processor and to make the overall sound more realistic. The Digital Signal Processor is made by two units that process the Performances with Reverb and Modulation / Delay effects. -
Page 77: Disabling The Effects
DISABLING THE EFFECTS You can disable the effects assigned to the current Performance at any time. • • • • • By pressing the By pressing the By pressing the By pressing the REV/CHO REV/CHO REV/CHO REV/CHO ke key y y you will either enab ou will either enab ou will either enab... -
Page 78: What Is Midi
This chapter illustrates some of the more common MIDI applications for WK1. WK1. WK1. WK1. WK1. WK1 is equipped with a standard MIDI interface, consisting of a MIDI IN MIDI IN MIDI IN MIDI IN and a MIDI IN MIDI OUT MIDI OUT MIDI OUT port . -
Page 79: Midi Lock
All other settings assigned to the other Performances will be ignored. To keep the last programmed setting stored to the instrument memory even when WK1 is turned off, it is necessary to save the first Performance with the Store Performance function. WK1 will automatically set to that Performance this upon powering up. -
Page 80: Chord Channel
If you wish to exclude the sounds generated by WK1 WK1 and only hear those coming from the expander, you can either set WK1 track volume values to Zero, or set WK1 tracks to “Local Off” (as explained in the “MIDI/GENERAL” chapter ). -
Page 81: Controlling Wk1 From A Midi Accordion
3. Set WK1 tracks to the midi channels, using the table shown below. 4. Set COMMON channel to OFF. 5. Make sure that WK1 is set to ONE FINGER mode (refer to the ARRANGE MODE instructions). 6. Extend the SPLIT point to the maximum setting allowed for the chords (refer to the SPLIT chapter). - Page 82 WK1 control panel. You can set sounds, volumes, pan, select and modify effects etc. When you send messages to WK1 to select Sounds, the messages must be transmitted on the MIDI channel assigned to the track containing the Sound you wish to modify. To...
- Page 83 PLAYING WK1 WITH A MASTER KEYBOARD Master keyboard are usually mute instruments which do not feature a sound generator. They require an external sound source to produce sounds. WK1 internal sound generator may operate as an external sound source (Slave).
- Page 84 Var 1+2+3+4 24-27 Key Start Fade In/Out Rotary Tempo increment Tempo decrement Next Performance Previous Performance Style Control Style Control Style Control Value of CC81 / 0 - 63=OFF / 64 - 127=ON Style Control Style Control (ON/OFF - double function keys or buttons) Fill ><...
- Page 85 PC 1 -128 The WK1 WK1 banks that can be selected via MIDI (Bank Select - CC 00 + value of the bank) to command a Sound change are the following ones: Bk 1, 2, 3, relative to GMX (standard Generalmusic) sound...
- Page 86 Note: the “OFF” indication shows that the keyboard is no longer dynamic. Serial Computer Serial Computer Serial Computer: in case WK1 is connected to a PC through a serial Serial Computer Serial Computer port, it is necessary to select the type of connection according to the computer used (PC1, PC2, MAC).
- Page 87 (CLOCK EXT), connected to WK1 MIDI IN por WK1 MIDI IN por WK1 MIDI IN por WK1 MIDI IN por WK1 MIDI IN port t t t t ; in this case, use the TEMPO/DATA keys to select “External” mode. G.Midi G.Midi G.Midi...
- Page 88 The last setting saved will be maintained in the machine memory even when WK1 is turned off, provided that the first Performance, which is the one on which WK1 sets by default upon turning on, has been saved to Store Performance.
- Page 89 ○ ○ ○ ○ ○ ○ ○ ○ ○ ○ ○ ○ ○ ○ ○ ○ ○ ○ ○ ○ ○ ○ ○ Midi/General 80...
- Page 90 Reference Section • T echnical Specifications...
- Page 91 WK1 TECHNICAL SPECIFICATIONS Keyboard : 61 keys (C2 - C7) - dynamic, after touch via midi. Display : Large multifunction, coloured, backlit LCD display Control buttons : cursor, page, enter, escape, tempo/data keys . 1 numeric keypad. Operating Mode : 3 real time sections (lower, upper 2, upper 1).
- Page 92 Appendix Appendice Anhang...
- Page 93 A•2 Appendix...
- Page 94 WK1 Sound table (GM - GMX - Sample) Bk 1 (Rom) Bk 2 (Rom) Bk 3 (Rom) Bk 5 (SMP - RAM) Bk 1 (Rom) Bk 2 (Rom) Bk 3 (Rom) Bk 5 (SMP - RAM) PIANO group BRASS group...
- Page 95 Bk 1 (Rom) Bk 2 (Rom) Bk 3 (Rom) Bk 5 (SMP - RAM) ROM Bk 4 (midi Bank 6) PERCUSSIVE group DetuneEP1 TinkleBell Dk_Stand.1 Dk_Stand.2 DetuneEP2 Agogo Dk_Room Dk_WS CpHarpsy SteelDrums Dk_Power Dk_Std.1WX ChurcBel Woodblock Dk_Elect. Dk_Dance DetnOrg1 Taiko Dk_House Dk_Techno DetnOrg2...
- Page 96 Style - Song - Performance tables (Via Midi Common) ROM STYLES† ROM STYLES† User Styles† CC00 CC32 PC CC00 CC32 PC CC00 CC32 PC User Style 1-8 00-95 Style 00-95 Style 96-103 8 BEAT JAZZ User Style 1 00 8BtHIT 48 SWING User Style 2 01 8BtSLOW...
- Page 97 Reverb table Chorus table Reverb† Chorus† CC16 - vv (vv=0) CC16 - vv (vv=64) CC48 - nn (nn=reverb number) CC48 - nn (nn=effect number) 00 Hall 1 00 Mono Delay 1 01 Hall 2 01 Mono Delay 2 02 Hall 3 08 Stereo Delay 1 08 Warm Hall 09 Stereo Delay 2...
- Page 98 DRUMKIT TABLES DK_STAND1 113-2 DK_ROOM 114-2 DK_POWER 115-2 DK_ELECT. 116-2 DK_HOUSE 117-2 DK_JAZZ 118-2 DK_SFX 112-4 (Bk6 via MIDI) ROLLSNARE < < < < < FINGERSNAP < < < < < ZAPP < < < < < GunShot < < <...
- Page 99 Drumkit tables DK_BRUSH 119-2 DK_ORCH. 120-2 DK_STAND.2 113-3 DK_WS 114-3 DK_STD.1WX 115-3 DK_DANCE 116-3 < < < < < < < < < < < HHTGHT1 < < < < HHPEDAL < < < < HHOPEN2 < < < < RIDECYM <...
- Page 100 Drumkit tables DK_TECHNO 117-3 DK_JAZZ2 118-3 DK_M1 119-3 DK_SY77. 120-3 < < < < < < < < < < < < < < < < < < < BDTEKNO < BDJAZZ BDJAZZ < BDSTD2 HOUSERIM RIMSHOT2 BDROOM1 BDROOM1 HOUSSD1 SDJAZZ3 BDELECT1 BDELECT1...
- Page 101 Recognized chords - example in the key of C 7sus4 7sus4 1. C 10. Cm 19. C 2. C 11. Cm 20. C m7b5 3. CM 12. Cm 21. C madd9 add9 4. CM 13. Cm 22. C add9 7aug 5.
-
Page 102: Midi Implementation Chart
MIDI Implementation Chart Manufacturer: Generalmusic S.p.A. Model: WK1Version: 1.00 Function Transmitted Recognized Remarks Basic Default 1-16 1-16 1 MIDI IN; 1 THRU; OUT Channel Changed 1-16 1-16 EXTRA COMMON/CHORD CH. Mode Default Mode 3 Mode 3 Messages Altered ***** Note 0-127 0-127 true voice on banks 1 - 2 - 3 - 5 - 6... - Page 103 Recognized Control Change messages (MIDI Control- Erkannte Control Change Messages (MIDI Control- lers) lers) A ControlChange message activates a Controlller, determined Eine ControlChange Message aktiviert einen Controlller, der by the first ControlChange value. vom ersten Wert des ControlChanges bestimmt wird. The ControlChange consists of three parts: Der ControlChange besteht aus drei Teilen: •...
- Page 104 FEDERAL COMMUNICATIONS COMMISSION Note: This equipment has been tested and found to comply with the limits for a Class B digital device, pursuant to Part 15 of FCC Rules. These limits are designed to provide reasonable protection against harmful interference in a residential installation. This equipment generates, uses, and can radiate radio frequency energy and, if not installed and used in accordance with the instructions, may cause harmful interference to radio communications.
- Page 105 GENERALMUSIC Code 271340 Specifications are subject to change without prior notice. Specifiche soggette a cambiamento senza preavviso. Änderungen -auch ohne Vorankündigung- sind vorbehalten. PRINTED IN ITALY Sales Division: I -47048 S.Giovanni in Marignano (RN) - Italy – Via delle Rose, 12 – tel. +39 541 959511 – fax +39 541 957404 – tlx 550555 GMUSIC...