
Related Manuals for Argus DC-1088


Summary of Contents for Argus DC-1088
-
Page 1: User Manual
DC-1088 USER MANUAL Package Contents: Argus DC-1088 Digital Camera User Guide USB Cable Wrist Strap Installation CD 3 AAA Batteries Camera Pouch... -
Page 2: Table Of Contents
Table of Contents Safety And General Information .......3 Getting To Know Your Camera ......6 Operating The Camera ........8 Installing The Software ........16 Downloading Photos ........17 Frequently Asked Questions ......21 Specification ............23... -
Page 3: Safety And General Information
Safety and General Information Thank you for purchasing the Argus QC-1088. Please read this manual carefully before using the camera and follow the instructions to avoid any damage that could be caused by improper operation. We built in a 4X16Mb SDRAM memory and a SD/MMC card... -
Page 4: Copyright Information
Any loss caused by the malfunction of this product (such as costs of photography or loss of benefit generated by the photography) is not the responsibility of Argus Camera Company and no compensation will be given for it. Copyright Information Unless agreed by the rightful owner, pictures taken with this digital camera cannot be used in violation of copyright law. - Page 5 Do not open the battery cover when the power is on as this may cause a loss of images. If the camera has gotten wet, immediately turn the power OFF and remove the batteries. This camera is a precision electronic device. Do not attempt to service this camera yourself.
-
Page 6: Getting To Know Your Camera
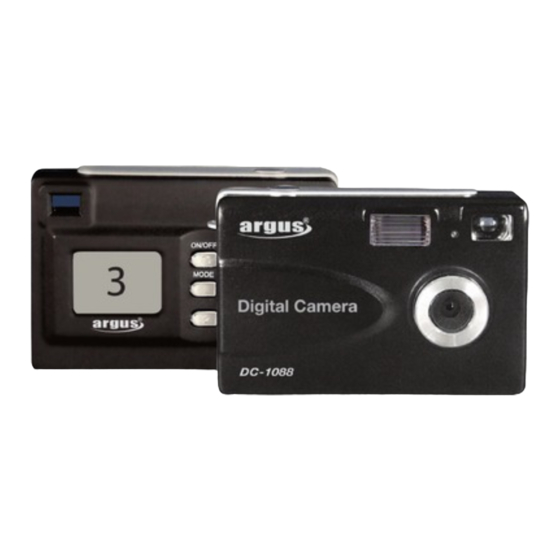
Getting To Know Your Camera Power on/off Operation-on light Flash DOWN Shutter Button Charge light Strap holder USB port Viewfinder Battery cover Lens... - Page 7 Button Shutter Button This button has two functions: Shoot - Press this button for more than 1 second to take pictures. Select - During mode change, press this button to confirm the selected function. ON/OFF button: Press this button to turn the camera on. Press again to turn the camera off.
-
Page 8: Lcd Icon Display
LCD Icon Display S X GA V G A H Q LCD Display Flash mode Self-timer - delayed snap shot Burst mode - takes 3 continuous pictures Hi/Low quality: *LQ: compression ration is ON *HQ: compression is OFF Video mode (frame rate is about 8 fps) Battery status - displays the battery condition 50/60 Eliminates the flicker effect on the image Deletes the last picture taken... -
Page 9: Operating The Camera
Operating the Camera Press the mode button to change the settings of the camera. The mode setting cycles by pressing the Up and Down button. SX G A s ta ndby s ta te ima ge qua lity fla s h light s e tting Down SXG A de le te c hoos e... -
Page 10: Flash Mode
Flash Mode Press the Mode button and select “ “. Change the setting by pressing Up and Down to make the selection and press the shutter button to confirm. - AUTO mode: the flash fires whenever there is insufficient brightness - ON mode: the flash fires everytime a picture is taken. -
Page 11: Image Quality
Image Quality Press the Mode button and select LQ/HQ. Change the mode by pressing Up or Down to make the selection and press the shutter button to confirm. Image Size SXGA Press the Mode button and select the SXGA/VGA. Change the mode by pressing the Up or Down to make the selection and press the shutter button to confirm. - Page 12 Camera Mode Press the Mode button and select Camera mode. Press Up or Down to make the selection and press the shutter button to confirm. is the default mode of the camera. - When the icon is displayed, the camera to take 3 continuous pictures.
- Page 13 Self-Timer Mode Press the Mode button and select mode. Change the mode by pressing Up or Down to make the selection and press the shutter button to confirm. The camera will take the picture after 25 beeps (approx. 10 sec delay). Frequency Control Press the Mode button until you see 50H/60H.
-
Page 14: Deleting Images
Deleting Images Press the Mode button until you see mode. Change the mode by pressing Up or Down to make the selection and press the shutter button to confirm. ONE deletes the last picture taken; ALL deletes all the pictures in the camera. Additional Information - When selecting a mode, a corresponding icon will appear on the LCD display panel. - Page 15 - When the camera is connected to the USB port of a computer, it enters PC-cam mode and all the functions of DSC are disabled. The camera will display ‘PC’. SXGA --> USB connect --> When the camera is disconnected from the computer, it will returns to DSC mode and auto power off.
-
Page 16: Installing The Software
Installing The Software Insert the CD in you CD-ROM drive and the application runs automatically. An interface will appear. On the right of the interface, there are four buttons. -
Page 17: Downloading Photos
Downloading Photos Connect the camera to the rear USB port of the computer using the supplied cable. Follow the Found New Hardware Wizard installation process. - Page 18 Open PhotoImpression 4 and click on “Camera/Scanner.” Select your camera under select source and click on “ .”...
- Page 19 An interface will appear, click “Get Dsc”.
- Page 20 “DSC VIEWER” appears, click “Download Images” The function button: “Download Images”: Download Images from your camera. “Save Images”: Save Images to default folder “Erase DSC Images”: delete the images from camera. “Preference”: set preference “Transfer ALL”: Transfer all images to specify folder “Transfer”: Transfer the images to specify folder that you select.
-
Page 21: Frequently Asked Questions
Frequently Asked Question My camera does not turn on. The battery is not properly installed. Remove and reinstall the batteries. Insufficient battery voltage. Do not use old batteries or batteries with mixed battery life. Why would I get fuzzy, unclear photos? There might be some movements of your body or hands when taking photos. - Page 22 (e.g. European’s 50Hz), you will get horizontal, black stripes in those photos, due to incorrect mains frequency. There will be no problems when taking photos under sunlight. How do I contact technical support? Argus Technical Support: (888) 552 - 7487 support@arguscamera.com www.arguscamera.com...
-
Page 23: Specification
Technical Specifications Image Resolution : 1.3M 1280x1008 300K 640x480 Built-in memory: 4x16Mb (SDRAM) Photos (Memory 4x16 SDRAM) Photos to be saved are subject to change from different ambient light 1.3M - 5 normal photos (16 compressed photos) 300K - 22 normal photos (55 compressed photos) Camera Lens: 1/2 inch fixed lens Focus: 8.34mm... - Page 24 PC Compatibility 1. CPU 486/66MHz or above 2. memory 64MB or above 3. monitor 800X600 or above, 24bit or above 4. Windows 98SE / Me / 2000 / XP 5. USB port and USB cable, CD driver...