Table of Contents
Advertisement
Quick Links
Advertisement
Table of Contents
Troubleshooting

Related Manuals for DeLonghi ECAM45.760


Summary of Contents for DeLonghi ECAM45.760
- Page 1 De’Longhi Appliances via Seitz, 47 31100 Treviso Italia...
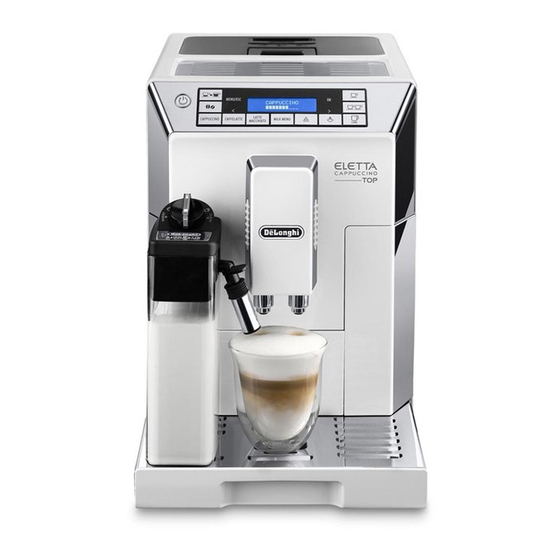
- Page 2 ECAM45.760 BEAN TO CUP ESPRESSO AND CAPPUCCINO MACHINE Instruction for use...
- Page 3 page 6...
-
Page 7: Table Of Contents
CONTENTS MAKING CAPPUCCINOS AND MILK BASED COFFEES ............13 INTRODUCTION ..........7 Filling and attaching the milk container ......13 Symbols used in these instructions ........7 Adjusting the amount of froth ........14 Letters in brackets ............7 Making milk based coffees automatically ...... 14 Troubleshooting and repairs .......... -
Page 8: Introduction
INTRODUCTION • Unplug directly from the plug only. Never pull the power cable as you could damage it. Thank you for choosing this automatic espresso and cappuccino • To disconnect the appliance completely, unplug it from the machine. mains socket. We hope you enjoy using your new appliance. -
Page 9: Instruction For Use
Description of the control panel This is a household appliance only. (page 2 - B ) It is not intended to be used in: A number of buttons on the panel have a double function. This is • staff kitchen areas in shops, offices and indicated in brackets in the description. -
Page 10: Installing The Appliance
Installing the appliance 3. “FILL TANK”: extract the water tank (fig. 4), open the lid (fig. 5), fill to the MAX line with fresh water (fig. 6); close Important! the lid again and then replace the tank. When you install the appliance, you should respect the fol- 4. -
Page 11: Menu Settings
1. Press the MENU/ESC button to enter the menu; Danger of burns! 2. Press < or > (fig. 9) until “Adjust time” is displayed; During rinsing, a little hot water flows from the coffee spouts. 3. Press the OK button (fig. 10): the hours flash; Avoid contact with splashes of water. -
Page 12: Energy Saving
Setting water hardness Proceed as follows: 1. Press the MENU/ESC button to enter the menu; For instructions on setting water hardness, see page 20. 2. Press < or > (fig. 9) until “Cup warmer” is displayed; 3. Press the OK button: “Enable?” or “Disable?” will be Setting the language displayed To modify the language of the display, proceed as follows:... -
Page 13: Making Coffee
5. Press the MENU/ESC button twice to exit the menu. Please note! The grinding adjustment dial must only be turned when the MAKING COFFEE coffee mill is in operation. Selecting the coffee taste If the coffee is delivered too slowly or The appliance is set by default to make coffee with a standard not at all, turn one click clockwise to- taste. -
Page 14: Making Coffee Using Pre-Ground Coffee
Press OK”. Add one level measure of pre-ground coffee and press Please note! • Various alarm messages could be displayed while using Coffee delivery resumes and the progress bar gradually fills as the machine (FILL TANK, EMPTY GROUNDS CONTAINER, preparation progresses. etc.). -
Page 15: Adjusting The Amount Of Froth
6. Attach the milk container to the connection nozzle and 4. Press < or > until the required drink is displayed (MILK, push as far as it will go (fig. 23). The machine emits a beep CAFFELATTE, ESPRESSO MACCHIATO or MY MILK). 5. -
Page 16: Programming The Quantity Of Coffee And Milk In The Cup
Programming the quantity of coffee and milk Please note! in the cup for the CAPPUCCINO, FLAT WHITE and If “Energy saving” mode is active, you may have to wait a few LATTE buttons seconds before the hot water or steam is delivered. The appliance is set by default to automatically deliver standard quantities. -
Page 17: Cleaning
Cleaning the coffee grounds container • To avoid milk with poor froth or large bubbles, always clean the spout as described in the following section. When “EMPTY GROUNDS CONTAINER” is displayed, the grounds container must be emptied and cleaned. Cleaning the spout after use Until the grounds container has been cleaned, the appliance will not make coffee. -
Page 18: Cleaning The Pre-Ground Coffee Funnel
1. Check regularly (about once a week) that the inside of the appliance (accessible after removing the drip tray) is not dirty. If neces- sary, remove coffee deposits with the brush supplied and a sponge. 2. Remove the residues with a vacuum cleaner (fig. -
Page 19: Cleaning The Milk Container
6. Check that the intake tube and spout are not clogged with milk residues. 7. Replace the dial (in correspondence to the word “INSERT”), spout and milk intake tube. 8. Place the lid back on the milk container. Cleaning the hot water/steam connection nozzle Each time you prepare milk, clean the connection nozzle with a sponge to remove milk residues from the gaskets (fig. -
Page 20: Setting Water Hardness
Avoid contact with splashes of water. 9. Press the OK button to confirm that you have added the solution. The descale programme automatically performs a series of rinses and pauses to remove limescale deposits from inside the machine. “Descale underway” is displayed. The descale programme starts, and descaler comes out of the water spout. -
Page 21: Replacing The Filter
1. Extract the tank and exhausted filter; 0,5 L 2. Take the new filter out of its packet and proceed as illustra- ted in points 2-3-4-5-6-7 in the previous section; 3. Position a container with a minimum capacity of 500 ml under the hot water spout;... -
Page 22: Displayed Messages
DISPLAYED MESSAGES DISPLAYED MESSAGE POSSIBLE CAUSE SOLUTION FILL TANK Insufficient water in the tank. Fill the tank with water and/or insert it cor- rectly, pushing it as far as it will go until it clicks into place. EMPTY GROUNDS CONTAINER The grounds container (A10) is full. Empty the grounds container and drip tray, clean and replace (fig. -
Page 23: Troubleshooting
GENERAL ALARM The inside of the appliance is very dirty. Clean the inside of the appliance thoroughly, as described in the section “Cleaning”. If the message is still displayed after cleaning, contact a service centre. EMPTY CIRCUIT, FILL CIRCUIT The water circuit is empty Press OK and deliver water from the spout Water delivery (D5), until it flows out normally. - Page 24 Coffee does not come out of one of the The spouts are blocked. Clean the spouts with a toothpick (fig. 34). spouts. The appliance does not come on. The power cable is not plugged in Plug the cable fully into the socket on the back properly.
- Page 25 ELECTRICAL CONNECTION (UK ONLY) Before using this appliance ensure that the voltage indicated on the product corresponds with the main voltage in your home, if you are in any doubt about your supply contact your local electricity company. The flexible mains lead is supplied connected to a B.S. 1363 fused plug having a fuse of 13 amp capacity. Should this plug not fit the socket outlets in your home, it should be cut off and replaced with a suitable plug, following the proce- dure outlined below.