
Related Manuals for Kenwood HM-333


Summary of Contents for Kenwood HM-333
-
Page 1: Instruction Manual
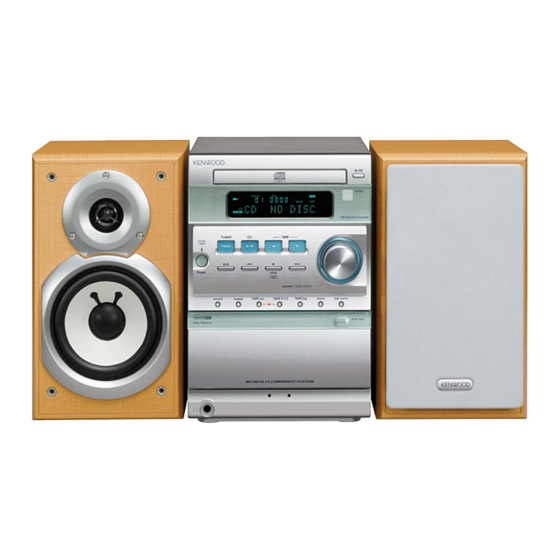
MICRO HI-FI COMPONENT SYSTEM HM-333 INSTRUCTION MANUAL KENWOOD CORPORATION COMPACT COMPACT DIGITAL AUDIO DIGITAL AUDIO TEXT B60-4976-00 01 MA (K, P, M, I, X, T, E2) AP 0011... -
Page 2: Before Applying Power
Before applying power Caution : Read this page carefully to ensure safe operation. Units are designed for operation as follows. U.S.A. and Canada ... AC 120 V only Australia ... AC 240 V only Europe and U.K..AC 230 V only For the United Kingdom Factory fitted moulded mains plug 1. -
Page 3: Special Features
Special features CD text information display When discs conforming to CD-TEXT are played with this unit, the text information recorded on the CD (disc name or titles) is displayed automatically. Some CDs conforming to CD-TEXT may not display text information. Up to 1000 letters may be displayed. - Page 4 If any accessories are missing, or if the unit is damaged or fails to operate, notify your dealer immediately. If the unit was shipped to you directly, notify your shipper immediately. Kenwood recommends that you retain the original carton and packing materials in case you need to move or ship the unit in the future.
-
Page 5: Table Of Contents
Contents Caution : Read the pages marked Preparation section Before applying power ...2 Safety precautions ... 2 Special features ... 3 System connection ...6 Connection of the System Accessories ... 6 Connection of Other Accessories (Commercially Available Parts) ... 8 Controls and indicators ...9 Display ... -
Page 6: System Connection
System connection Connection of the System Accessories This figure shows the method of connection between the main unit and provided accessories. CAUTION Note on Connection Connect the components as shown in the diagram. Only plug the power cord into a power outlet once connections are completed. - Page 7 Malfunction of microcomputer If operation is not possible or erroneous display appears even though all connections have been made properly, reset the microcomputer refer- ring to "In case of difficulty". o ANTENNA FRONT SPEAKERS (6-16 ) How to connect speaker cords to the main unit FM indoor antenna The accessory antenna is for temporary indoor use only.
-
Page 8: Connection Of Other Accessories
Connection of Other Accessories CAUTION Note on Connection Connect the components as shown in the dia- gram. Only plug the power cord into a power outlet once connections are completed. * DIGITAL OUT jack (OPTICAL) The DIGITAL OUT jack (OPTICAL) outputs the CD signal. -
Page 9: Controls And Indicators
Controls and indicators Display T he displays given in this manual are approximations only. They may differ from what actually appears on the display. 0 0 0 0 0 0 0 0 0 0 0 Tape-related indicators CD-related indicators Character information display/tuner- related indicators RDS-related indicators (For Europe and U.K.) -
Page 10: Main Unit
Main unit & 0 CD key Press to open or close the CD tray. Remote sensor Display panel volume/multi control knob Normally, this is used for volume adjustment. 4 and ¢ keys CD : Used to skip CD tracks. TAPE : Used to fast forward or rewind tape. - Page 11 Cassette holder To load or eject a cassette tape, press the area marked 0 push open on the cassette holder to open it. menu key Press to switch the function of the volume/multi control knob to the menu select mode. This key is also used when setting the time of the day.
-
Page 12: Operation Of Remote Control Unit
Operation of remote control unit The keys on the remote control unit with the same names as on the main unit have the same function as the keys on the main unit. TUNER / BAND AUTO/MONO STOP 7 ¡ TUNING P.CALL ENTER TAPE REC TAPE O.T.E. - Page 13 Numeric keys Used to select a CD track number or recall a preset station of the tuner. PTY/ TIME DISPLAY key (For Europe and U.K.) Used at the time of program type detection. Press to switch the displayed time information on CD. TIME DISPLAY key (For other countries) Press to switch the displayed time information on CD.
-
Page 14: Basic Use Method
Basic use method The system is switched ON and STANDBY Bass and treble compensation Muting the sound temporarily Power Example: To select the CD input The volume The volume decreases increases volume / multi control Bass and treble compensation Tone adjustment Listening through headphones 1. - Page 15 Listening through headphones Insert the headphone plug into the headphone jack. ÷ Headphones with a stereo mini plug can be con- nected. ÷ The sounds from all speakers are cut off. Muting the sound temporarily Remote control unit only MUTE ÷...
-
Page 16: Playback Of Cd
Playback of CD When a disc is placed into the CD player in advance, the unit will be switched on automatically by pressing the CD 6 key, and playback will start. Playback from desired track To stop playback To fast forward and backward Start playback/ To pause playback Skipping tracks... - Page 17 Start playback/ To pause playback ÷ Each press pauses and plays the CD alternately. To stop playback STOP 7 Playback from desired track Remote control unit only Select the desired track No. Press the numeric keys as shown below... To select track No. 23 :+10 To select track No.
- Page 18 Time display on CD player Each press of the TIME DISPLAY key changes the displayed contents. Remote control unit only ÷ ÷ TIME DISPLAY (For U.K. and Europe) ÷ Only time information 1 and 2 can be displayed during single-track repeated playback or random playback. ÷...
- Page 19 Basic use method...
-
Page 20: Playback Of Tape
Playback of tape If you load a tape in the cassette deck in advance while the power is off. Pressing the TAPE 2 3 key turns power on automatically and starts the tape playback. Selection of TAPE equalizer (TAPE EQ.) Start playback To stop playback To wind tape... - Page 21 To wind tape at high speed To fast wind in To fast wind in direction | direction \ TUNING ÷ Press the STOP 7 key to stop fast winding. ÷ The same operation is also available with the 4 and ¢ keys on the main unit. Selection of TAPE equalizer (TAPE EQ.) When playing a tape prerecorded with Noise Re- duction system (such as the DOLBY NR) ON, be...
-
Page 22: Receiving Broadcast Station
Receiving broadcast station When the TUNER FM/AM key is pressed, the unit will automatically be switched on and reception status will be reached. One-by-one presetting (3) ¢ Tuning a non- preset radio station (1) ¢ One-by-one preset- ting (2,4) ¢ TUNER FM/AM ¢... -
Page 23: Collective Presetting Of Stations
Collective presetting of stations AUTO MEMORY .. For U.K. and Europe AUTO PRESET ...For other countries Main unit only Receive a broadcast. TUNER FM/AM Select "AUTO MEMORY" (or "AUTO PRESET"). menu volume / multi control Channel space setting (Except for U.S.A., Canada, U.K., Europe, Malaysia and Australia) The space between radio channels has been set to the one that prevails in the area to which the system is shipped. -
Page 24: Tuning A Non-Preset Radio Station (Auto Tuning, Manual Tuning)
Tuning a non-preset radio station Select the tuning mode according to the radio wave receiving condition. When the receiving condition is good: AUTO mode When it is poor due to weak radio waves: MANUAL mode 1 Select the AUTO or MANUAL mode. AUTO/MONO STOP 7 2 Tune a station. -
Page 25: Radio Data System)
R.D.S. (Radio Data System) RDS is a system which transmits useful information (digital data) for FM broadcasts together with the broad- cast signal. Tuners and receivers designed for RDS re- ception can extract the information from the broadcast signal for use with various functions such as automatic display of the station name. -
Page 26: Searching For A Desired Program Type (Pty Search)
Searching for a desired program type By specifying the type of program (genre) you want to listen to, the tuner automatically searches for a station which is currently broadcasting a program of the specified type. Set the reception band to FM. Preset RDS stations with the auto memory function. £ Select the PTY search mode. - Page 27 Start the search. ÷ ÷ TIME DISPLAY ÷ No sound is heard while "PTY" is blinking. ÷ If a program of the desired type cannot be found, "No Program" is displayed, then after several seconds the display returns to the original display. ÷...
-
Page 28: Recording On Tape
Recording on TAPE The tape deck of the unit can record signals only on Normal (Type ) and High (Type ) tapes. It cannot record on Metal (Type ) tapes. Stop the recording push open TAPE Stop the recording Start recording/ Pause the recording 1. -
Page 29: Start Recording
menu volume / multi control set / demo Select an input source other than "TAPE" Example: To select the CD input TAPE rec Pause the recording TAPE rec ÷ Press the TAPE rec key during recording. It stops after leaving a non-recorded blank of 4 seconds. (Press the key again to resume recording.) 3. - Page 30 Points in CD recording When recording CD tracks onto a tape, if you leave the cassette deck in record-pause mode be- forehand, the cassette deck recording can be started at the CD starts to be played. Put the CD player in pause mode. Select the track to be recorded with the skip (4, ¢) keys.
-
Page 31: Various Cd Playback Features
Various CD playback features Listening to the desired sequence Use the following procedure to program desired tracks in a desired order. (up to 32 tracks) Select the CD input. Let the "PGM" indicator light. Press in stop mode Select track numbers in the order you want to play them. Select the track. - Page 32 To add a track to an existing program Select the track number to be added with the numeric keys. Press in stop mode Press the SET key. To clear a programmed track Press in stop mode CLEAR To clear the entire program Press in stop mode The program mode is cancelled when the unit is turned off or the programmed disc is ejected.
-
Page 33: Repeated Playback
Repeated playback You can repeatedly listen to a favorite track or disc. Select the CD input. Setup for repeating a single track Confirm that the "PGM" indicator is not lit. Play the track to be repeated. Select "ONE REPEAT". REPEAT Setup for repeating all tracks in a disc Confirm that the "PGM"... -
Page 34: Playing Tracks In A Random Order (Random Playback)
Setup for repeating selected tracks Program the track sequence according to steps 1 to 2 of "Listening to the desired se- quence (program playback)". ⁄ Select "REPEAT". REPEAT Start playback. Playing tracks in a random order As the titles each time are selected randomly, the music can be enjoyed without getting tired of it. Select the CD input. -
Page 35: Convenient Recording Methods
Convenient recording methods This unit provides the following recording features in addition to normal recording. Select the appropriate method according to the purpose of recording. The tape deck of the unit can record signals only on Normal (Type ) and High (Type ) tapes. It cannot record on Metal (Type ) tapes. -
Page 36: One-Touch Edit Recording (Cd = Tape)
One-touch edit recording Records all tracks in a CD with a simple operation. (All-track recording) Records a single CD track being played from the beginning. (Single-track recording) The tape deck of the unit can record signals only on Normal (Type ) and High (Type ) tapes. It cannot record on Metal (Type ) tapes. -
Page 37: Program Recording (Cd = Tape)
(CD = TAPE) Program recording Desired CD tracks can be programmed in the desired sequence and recorded onto a tape. The tape deck of the unit can record signals only on Normal (Type ) and High (Type ) tapes. It cannot record on Metal (Type ) tapes. -
Page 38: Listening To An Aux Input Source
Listening to an AUX input source Select AUX (external input). Play the connected equipment. Adjust the volume. volume / multi control Adjusting the AUX Input Level This adjusts the input level for the external equipment (video deck etc.) connected to the AUX input termi- nal. - Page 39 Timer operation...
-
Page 40: Clock Adjustment
Clock adjustment As the clock is not used to show the time of the day but is also used in timer operations, be sure to set the clock in advance. Activate the clock adjustment mode. Press and hold for more than 2 sec. when the power is ON. -
Page 41: Timer Operation
Timer operation Sleep timer (SLEEP) The unit is turned OFF automatically after the specified period has elapsed. Operate easy To use Timer (O.T.T.) w Playback of the selected input source starts at the specified time, and the unit is switched off after one hour. This timer operates only once directly after setting. -
Page 42: Setting The O.t.t. Timer
Setting the O.T.T. timer Timer playback which occurs only once and only for an hour can be programmed by simply setting the start time. The timer playback reproduces the source selected at the last time the unit is turned off at the last set volume. - Page 43 Set the time at which you want to start playback or reception (On time). Adjust the time. The time is returned volume / multi control Set it. set / demo To check or modify the reservation contents, restart the timer reservation from the beginning. Reserve the timer operation.
-
Page 44: Setting An Everyday Timer Program (Prog. Timer)
Setting an everyday timer program In each of PROG.1 and PROG.2, the timer data including the operating period and played contents can be set and selected to be activated or not as required. Adjust the clock before setting the timer ‚ Connect the related equipment under reference to "System connection"... - Page 45 Set the ON time then the OFF time. Adjust the time. The time is returned volume / multi control Set it. set / demo Make the desired reservation. For timer playback or AI timer playback Select the mode. (1) Select "PLAY" or "AI PLAY". 1 "PLAY"...
- Page 46 Select the broadcast station (only when TUNER is selected above). (1) Select the preset station No. (2) Set it. set / demo ÷ When the timer setting is completed by pressing the set/demo key, "COMPLETE !" is displayed. ÷ When "PLAY" is selected, the timer playback will start at the volume setting used at the moment the unit is set to the Standby mode.
-
Page 47: Important Items
Important Items Maintenance Cleaning the head section Cotton swab Capstan Head Pinch roller Tape guides Maintenance of the unit When the front panel or case becomes dirty, wipe with a soft, dry cloth. Do not use thinner, benzine, alcohol, etc. for these agents may cause discoloration. - Page 48 Disc handling precautions Handling Hold the discs so that you do not touch the playing sur- face. Do not attach paper or tape to either the play- ing side or the label side of the discs. Cleaning If fingerprints or foreign matter become attached to the disc, lightly wipe the disc with a soft cotton cloth (or similar) from...
-
Page 49: In Case Of Difficulty
In case of difficulty What seems to be a malfunction is not always so. Before calling for service, check the following table according to the symptom of your trouble. Operation to reset The microcomputer may fall into malfunction (impossibil- ity to operate, erroneous display, etc.) when the power cord is unplugged while unit is ON or due to an external factor. - Page 50 CD player section Symptom A CD is placed in the player but it cannot be played. Sound is not produced. Sound skips. Cassette deck section Symptom Sound cannot be produced by pressing the play key. No operation occurs even when an operation key is pressed.
- Page 51 Displayed messages and actions to be taken against them Displayed Message ÷ An attempt is made to select a 33rd track during programming of CD. PGM FULL ÷ An attempt is made to start random playback in the program mode. Exit from the PGM Mode program mode before random playback.
-
Page 52: Specifications
Impedance ... 6 Maximum input level ... 30 W Dimensions ... W : 150 mm (5-7/8”) Weight (net) ... 2.3 kg (5.5 lb) (1 piece) KENWOOD follows a policy of continuous ad- vancements in development. For this reason Notes Notes specifications may be changed without notice.