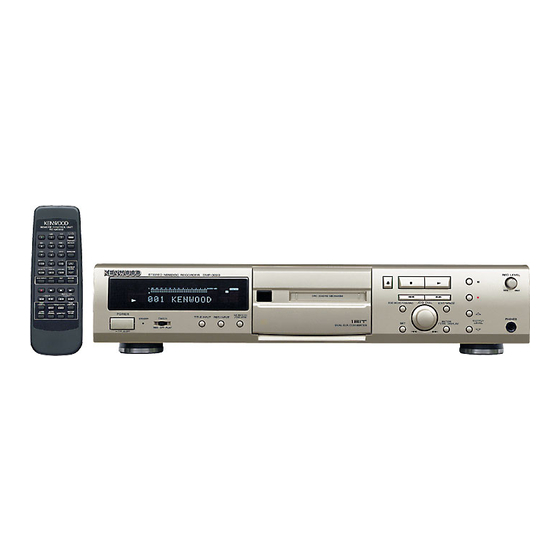
Kenwood DMF-3020 Instruction Manual
Stereo minidisc recorder
Hide thumbs
Also See for DMF-3020:
- Instruction manual (55 pages) ,
- Service manual (25 pages) ,
- Instruction manual (55 pages)
Table of Contents
Advertisement
Advertisement
Table of Contents

Related Manuals for Kenwood DMF-3020


Summary of Contents for Kenwood DMF-3020
-
Page 1: Instruction Manual
STEREO MINIDISC RECORDER DMF-5020 DMF-3020 MD-203 INSTRUCTION MANUAL This instruction manual is used to describe multiple models listed above. Model availability and features (functions) may differ depending on the country and sales area. B60-4074-00 01 MA (K,P,T) MC 9806... -
Page 2: Introduction
Introduction Before applying power Units are designed for operation as follows. U.S.A. and Canada ... AC 120 V only U.K..AC 230 V only For the United Kingdom 1. The mains plug contains a fuse. For replacement, use only a 13- Amp ASTA-approved (BS1362) fuse. 2. -
Page 3: Table Of Contents
Names and functions of parts ... 12 Display/Main unit ... 12 Remote control unit (DMF-5020) ... 14 Remote control unit (DMF-3020/MD-203) ... 15 Operation of remote control unit... 16 Playback of Mini Disc ... 17 Playing tracks in order from track No. 1 ... 17 Searching a desired track by its title (TITLE SEARCH) ... -
Page 4: Accessories
Check that the following accessories are present. Audio cord (2) Remote control unit (1) RC-M0705 (For DMF-5020) System control cord (1) Remote control unit (1) RC-M0302 (For DMF-3020/MD-203) Introduction DMF-5020/DMF3020/MD-203 (En) Optical fiber cable (1) Batteries (2) R03 ("AAA"-size) batteries (For RC-M0705) -
Page 5: Special Feature
Sampling rate converter Versatile editing functions SOUND SYNCHRO REC functions Title input, title search The DMF-5020 is equipped with KENWOOD-original “24-bit D/A D.R.I.V.E.II”, providing high quality playback. (D.R.I.V.E.:Dynamic Resolution Intensive Vector Enhancement) The sampling rate converter incorporated in this unit is compatible with all digital sources (32 kHz, 44.1 kHz, 48 kHz). -
Page 6: Important Safeguards
IMPORTANT SAFEGUARDS Caution :Read this page carefully to ensure safe operation. Please read all of the safety and operating instructions before operating this appliance. Adhere to all warnings on the appliance and in the instruction manual. Follow all the safety and operating instructions. -
Page 7: Power Off
13.Lightning – For added protection for this appliance during a lightning storm, or when it is left unattended and unused for long periods of time, unplug it from the wall outlet and disconnect the antenna or cable system. This will prevent damage to the appliance due to lightning and power-line surges. -
Page 8: Information That You Should Know
Information that you should know Safety Precautions Handling of Mini Disc As the Mini Disc is accommodated inside a cartridge, it can be handled without caring about dust or fingerprint. However, stained or soiled cartridge may cause malfunction. To enjoy beautiful sound for ex- tended period of time, take care on the following points. -
Page 9: Maintenance
Maintenance Maintenance of the set When the front panel or case becomes dirty, wipe with a soft, dry cloth. Do not use thinner, benzine, alcohol, etc. for these agents may cause discoloration. Unplug power cord Reference notes Caution on condensation Condensation (of dew) may occur inside the unit when there is a great difference in temperature between this unit and the outside. -
Page 10: System Connections
System connections Make connection as shown below. When connecting the related system components, refer also to the in- struction manuals of the related components. Caution: Do not plug in the power lead until all connec- tions are completed. REC PLAY Audio cords 2 (accessories) LINE... - Page 11 About the system control connections About the system control connections Connecting system control cords after connecting a Kenwood audio component system lets you take advantage of convenient system control operations. There are two Kenwoood system control modes. Make connections according to the groups of terminal symbols shown below.
-
Page 12: Names And Functions Of Parts
Names and functions of parts Display / Main unit REPEAT indicator PGM (Program) indicator TITLE and SEARCH indicators REPEAT FADE TITLE SEARCH COPY SINGLE Operation indicators TOTAL ¶ REC indicator REMAIN 8 Pause indicator 3 Play indicator SINGLE, TOTAL and REMAIN indicators STEREO MINIDISC RECORDER POWER... - Page 13 Description of main unit keys POWER key : Press to turn the unit ON and OFF. : The unit may enter the standby mode when the POWER key is pressed to turn it ON. This is because the unit holds the memory that it has been put to the standby mode by the remote control unit in the last operation.
-
Page 14: Remote Control Unit (Dmf-5020)
Remote control unit (DMF-5020) The remote control unit incorporates the basic operation keys as well as a variety of applied operation keys so that it can be used in a wide range of purposes. The keys on the remote control unit with the same names as on the main unit have the same function as the keys on the main unit. -
Page 15: Remote Control Unit (Dmf-3020/Md-203)
Remote control unit (DMF-3020/MD-203) The remote control unit incorporates the basic operation keys as well as a variety of applied operation keys so that it can be used in a wide range of purposes. The keys on the remote control unit with the same names as on the main unit have the same function as the keys on the main unit. -
Page 16: Operation Of Remote Control Unit
Loading batteries Remove the cover. RC-M0705 (For DMF-5020) RC-M0302 (For DMF-3020/MD-203) Operation Plug the power cord into a power outlet, then turn on the main unit's POWER key to turn the power on. (If in the standby mode, press the ON/STANDBY key on the remote control unit.) Once the power has been switched ON, press... -
Page 17: Playback Of Mini Disc
÷ If the “PGM” indicator is lit, press the CHARA. / P.MODE key of the remote control unit to turn it off. ÷ In a few seconds, playback starts from track No, 1. DMF-5020/DMF-3020/MD-203 (En) SEARCH D I S C... -
Page 18: Searching A Desired Track By Its Title (Title Search)
÷ Title search is possible in either stop or play mode. To larger track No. ¢ ÷ Playback starts in a few seconds. Playback of Mini Disc DMF-5020/DMF-3020/MD-203 (En) OVER ( dB) TITLE SEARCH T I T L E 0 0 1... -
Page 19: Playback From Desired Track
Press in stop mode. CHARA. P.MODE Press the RANDOM key. RANDOM Playback of Mini Disc DMF-5020/DMF-3020/MD-203 (En) Each press switches the mode. 1 Track mode : PGM goes off 2 Program mode : PGM lights up “PGM” goes off SEARCH... -
Page 20: Skipping Tracks
÷ Press the 3 key to resume playback. ÷ When this function is not required, be sure to press the AUTO PAUSE key so that the “A. PAUSE” indicator is extinguished. Playback of Mini Disc DMF-5020/DMF-3020/MD-203 (En) Remote control unit EJECT D I S C Mini Disc has been ejected. -
Page 21: Programming
Repeat steps till the desired tracks have been programmed, in the desired order. Start playback. £ DMF-5020/DMF-3020/MD-203 (En) Each press switches the mode. 1 Track mode : PGM goes off 2 Program mode : PGM lights up “PGM” lights up... -
Page 22: To Add A Track To The Program
“PGM” blinks ÷ Each press displays the next track in the program. The number of the track that has been cleared is displayed. ÷ The entire program is cleared. Programming DMF-5020/DMF-3020/MD-203 (En) Track No. OVER ( dB) SEARCH 0 1 4... -
Page 23: Repeated Playback
To stop repeated playback Press the REPEAT key again. ÷ The “REPEAT” indicator goes off and the playback following the current mode (TRACK) of the MD player starts. Programming DMF-5020/DMF-3020/MD-203 (En) : PGM goes off OVER ( dB) SEARCH OVER ( dB) -
Page 24: Recording-Related Keys
÷ Step 3 consists of adjusting the setting of the “Setting adjustment mode” selected in step 2. ÷ To end the setting adjustment, press the REC MODE/CHARAC. key again. DMF-5020/DMF-3020/MD-203 (En) ‡ ). Even when “MANUAL” is set, the AUTO CUT and AUTO OVER ( dB) SEARCH “MONITOR”... - Page 25 Recording pauses more easily Recording pauses more easily Recording starts less easily Initial display SEARCH W R I T Setting display SEARCH Recording-related keys DMF-5020/DMF-3020/MD-203 (En) OVER ( dB) ANALOG DIGITAL 32kHz O F F MONITOR 44.1kHz 48kHz During recording...
-
Page 26: Automatically Starting Recording When The Track Starts (Sound Synchro Rec)
PAUSE mode. ÷ It is not possible to start recording from the sound 6 seconds before the current sound if less than 6 seconds have passed in the recording pause mode. Recording-related keys DMF-5020/DMF-3020/MD-203 (En) OVER ( dB) ANALOG DIGITAL 32kHz S Y N C . -
Page 27: Recording (Analog Input)
Set the selection. Go to step 2 if setting adjustments are not required. Select ANALOG or MONO. REC INPUT DMF-5020/DMF-3020/MD-203 (En) Each press switches the mode. 1 REC MODE : off 2 REC MODE : on The modes are switched by rotating the JOG DIAL. - Page 28 ÷ The eject (0)key is not accepted during recording. Note Note Note Recording (ANALOG input) DMF-5020/DMF-3020/MD-203 (En) : Track numbers can be marked as desired. SEARCH 0 0 1 Extinguished in “AUTO” mode, lit in “MANUAL” mode. : Disc is full \Erase undesired tracks.
-
Page 29: Recording (Digital Input)
Select one of “DIGITAL 1, 2 ”. REC INPUT Select AUTO or MANUAL. (Remotecontrol unit only) AUTO/MANU. DMF-5020/DMF-3020/MD-203 (En) Each press switches the mode. 1 REC MODE : off 2 REC MODE : on The modes are switched by rotating the JOG DIAL. - Page 30 Note Note Note being written on the Mini Disc. Recording (DIGITAL input) DMF-5020/DMF-3020/MD-203 (En) Disc is full The digital cord or optical fiber cable is not locked in position or connected incompletely (or not connected). properly.
-
Page 31: Synchro Recording With Cd Playback
Synchro recording with CD playback By connecting this unit with a KENWOOD “ using system control cords, the recording of MD can be started in synchronism with the playback of the CD player. Set the amplifier’s input selector to CD. -
Page 32: Editing
“Symptoms related to MD standard”. Dividing a track, combining two tracks ‹ Dividing the track being played (TRACK DIVIDE) fi Combining the track being played (TRACK COMBINE) ALL ERASE DMF-5020/DMF-3020/MD-203 (En) Editing ‡ ·... -
Page 33: Moving The Track Being Played (Track Move)
÷ Editing is aborted if no operation has been performed for 8 seconds. Track being played Example of MOVE: To move track No. 1 to track No. 7 To increase track No. DMF-5020/DMF-3020/MD-203 (En) : Dividing a track : Combining tracks : Erasing track(s) : Moving (reordering) tracks... - Page 34 Note being written on the Mini Disc. Track to be moved Selected destination When moved to a position after current position Editing DMF-5020/DMF-3020/MD-203 (En) › EJECT D I S C Mini Disc has been ejected. Inserted immediately after destination track...
-
Page 35: Moving Several Tracks At A Time (Quick Move)
÷ The orders of tracks can be confirmed by pressing the 1 key (or ¡ key) of the remote control unit. DMF-5020/DMF-3020/MD-203 (En) OVER ( dB) SEARCH Q . M O V E... - Page 36 ÷ If you execute an editing operation by mistake, the condition before editing can be recovered by performing the “EDIT CANCEL” opera- tion. Note Note Note 23 24 26 27 28 29 1 2 3 DMF-5020/DMF-3020/MD-203 (En) SEARCH « ? / 0 SEARCH « ? / 0 SEARCH «...
-
Page 37: Dividing The Track Being Played (Track Divide)
JOG DIAL ¢ ¢ Establish the division point. DMF-5020/DMF-3020/MD-203 (En) Limitation of functionality due to MD standard Some functions are limited due to the restrictions im- posed by the MD standard. Before considering the symp- toms as a sign of trouble with the unit, please read “Symptoms related to MD standard”. - Page 38 Note Note being written on the Mini Disc. Image of preview The point where the EDIT / SPACE key is pressed DMF-5020/DMF-3020/MD-203 (En) EJECT D I S C Mini Disc has been ejected. Approx. 2 sec. Fine adjustment range in 32 steps Editing ›...
-
Page 39: Combining The Track Being Played (Track Combine)
÷ If the operation is started during playback, it pauses automatically. To combine track Nos. 5 and 7 : To increase track No. DMF-5020/DMF-3020/MD-203 (En) : Dividing a track : Erasing track(s) : Moving (reordering) tracks OVER ( dB) - Page 40 Should be approx. 2 sec. or longer. Track No. and title of the second track are cleared. Track No. and title of the first track are left. DMF-5020/DMF-3020/MD-203 (En) EJECT D I S C Mini Disc has been ejected. Track No. is adjusted.
-
Page 41: Erasing The Track Being Played (Track Erase)
Set the selection. Confirm that the track has been erased. Execute the track erasure operation. ENTER /TIME DISPLAY DMF-5020/DMF-3020/MD-203 (En) The modes are switched by rotating the JOG DIAL. 1 DIVIDE? : Dividing a track 2 COMBINE? : Combining tracks... - Page 42 While “WRITING” is displayed, do not apply shock or vibration to the unit because information is Note Note Note being written on the Mini Disc. Track to be erased Track Nos. are adjusted. Editing DMF-5020/DMF-3020/MD-203 (En) EJECT D I S C Mini Disc has been ejected.
-
Page 43: Erasing One Or More Track At A Time (Quick Erase)
÷ The orders of tracks can be confirmed by pressing the 1 key (or ¡ key) of the remote control unit. SEARCH Selected track Editing DMF-5020/DMF-3020/MD-203 (En) OVER ( dB) ANALOG DIGITAL 32kHz A S E MONITOR 44.1kHz... -
Page 44: Erasing All Tracks
Erasing desired tracks: ÷ Once the “DISC ERROR” message has been displayed, the “ALL ERASE” operation is possible but “EDIT CANCEL” operation is not possible. DMF-5020/DMF-3020/MD-203 (En) OVER ( dB) SEARCH : When editing is in progress : When editing is completed successfully... -
Page 45: Editing Titles
Uppercase alphabets x 26 : ABCD...WXYZ Lowercase alphabets x 26 : abcd...wxyz Numerals x 10 Space & symbols x 26 DMF-5020/DMF-3020/MD-203 (En) : Disc title : Track title : Preset title : Erasing both disc and track titles... - Page 46 ÷ The cursor can be moved to the left and right with the 1 and ¡ keys. ÷ Pressing the TITLE SEARCH key during title input switches the input mode between the “overwrite mode” and “insert mode”. ÷ Pressing the EDIT/SPACE key inserts a blank space character. DMF-5020/DMF-3020/MD-203 (En) ¤ A ¤ B ¤ C ¤...
- Page 47 A = B = C.) ÷ The cursor can be moved to the left and right with the 1 and ¡ keys. £ ¢ TITLE DMF-5020/DMF-3020/MD-203 (En) OVER ( dB) SEARCH Selected character blinks. character. : Inputs a character before or after an exist- ing character.
- Page 48 (or right) so that other information which has been hidden can be displayed. This leftward or rightward movement of the display characters is referred to as “scrolling.” Main unit ¡ Remote control unit (DMF-3020/MD-203) CURSOR ¡ TITLE ENTER...
-
Page 49: Changing The Displayed Contents
Each press switches the level meter display modes. 1 Example of normal display: 2 Example of wide display: DMF-5020/DMF-3020/MD-203 (En) : Elapsed time of the track being played : Remaining time on the track being played : Total elapsed play time of tracks : Total remaining play time of tracks (The total num- ber of tracks is also displayed during stop mode.) -
Page 50: Timer Operations
÷ After having set the timer, be careful not to press the ON/STANDBY key of the remote control unit to ON; otherwise the timer operation would be activated. Amplifier DMF-5020/DMF-3020/MD-203 (En) Audio cord Tuner Audio timer DMF-5020/DMF-3020/MD-203... -
Page 51: In Case Of Difficulty
The period in which “READING” is displayed is abnormally long. The total number of characters used in the titles is less than 1792 characters. DMF-5020/DMF-3020/MD-203 (En) With the POWER key left to ON, unplug the power cord from the power outlet then, while holding the eject (0) key depressed, plug the power cord again. - Page 52 ÷ The Mini Disc is in the “WRITE PROTECT” condition. ÷ A playback-only Mini Disc is loaded. In case of difficulty DMF-5020/DMF-3020/MD-203 (En) Action ÷ Load a disc. ÷ The digital cord or optical fiber cable is not locked in position or connected incompletely (or not connected).
- Page 53 ÷ A disc in which distorted sound has been re- corded is played. ÷ An external noise is induced. ÷ The POWER key is set to OFF. In case of difficulty DMF-5020/DMF-3020/MD-203 (En) Remedy ÷ Connect the cords in accordance with “System connections”. ÷ Load a disc.
-
Page 54: Specifications
Weight (Net) ... 4.0 kg (8.8 lb) 1. KENWOOD follows a policy of continuous advancements in development. For this reason specifications may be changed without notice. 2. The full performance may not be exhibited in an extremely cold location (under a water-freezing temperature). -
Page 55: Fcc Warning
KENWOOD CORPORATION 2967-3, ISHIKAWA-CHO, HACHIOJI-SHI, TOKYO,JAPAN KENWOOD CORP. CERTIFIES THIS EQUIPMENT CONFORMS TO DHHS REGULATIONS NO. 21 CFR 1040.10, CHAPTER 1, SUBCHAPTER J. Location: Back Panel DMF-5020/DMF-3020/MD-203 (En) -
Page 56: For Your Records
For your records Record the serial number, found on the back of the unit, in the spaces designated on the warranty card, and in the space provided below. Refer to the model and serial numbers whenever you call upon your dealer for information or service on this product.