Kenwood KRF-V8030D Instruction Manual
Kenwood instruction manual audio video surround receiver krf-v8030d vr-409
Hide thumbs
Also See for KRF-V8030D:
- Instruction manual (52 pages) ,
- Service manual (40 pages) ,
- Remote control manual (14 pages)
Table of Contents
Advertisement
AUDIO VIDEO SURROUND RECEIVER
KRF-V8030D
VR-409
INSTRUCTION MANUAL
KENWOOD CORPORATION
This instruction manual is used to describe multiple models listed above.
Model availability and features (functions) may differ depending on the country and
sales area.
About the supplied remote control (RC-R0809)...
Compared to standard remote controls, the remote control supplied with this receiver has several operation
modes. These modes enable the remote control to control other audio/video components. In order to
effectively use the remote control it is important to read the operating instructions and obtain a proper
understanding of the remote control and how to switch its operation modes (etc.).
Using the remote control without completely understanding its design and how to switch the operation modes
may result in incorrect operations.
B60-4593-00 (EN)
Advertisement
Table of Contents

Related Manuals for Kenwood KRF-V8030D


Summary of Contents for Kenwood KRF-V8030D
- Page 1 AUDIO VIDEO SURROUND RECEIVER KRF-V8030D VR-409 INSTRUCTION MANUAL KENWOOD CORPORATION This instruction manual is used to describe multiple models listed above. Model availability and features (functions) may differ depending on the country and sales area. About the supplied remote control (RC-R0809)...
-
Page 2: Before Applying The Power
Before applying the power Units are designed for operation as follows. U.S.A. and Canada ... AC 120 V only Australia ... AC 240 V only China and Russia ... AC 220 V only *Other countries ... AC 110-120 / 220-240 V switchable * AC voltage selection The AC voltage selector switch on the rear panel is set to the voltage that prevails in the area to which the unit is shipped. -
Page 3: Table Of Contents
TAR ® Partner, Kenwood Corpora- As an NERGY tion has determined that this products meets the TAR ® guidelines for energy efficiency. NERGY This product can save energy. Saving energy reduces air pollution and lowers utility bills. Maintenance of the unit When the front panel or case becomes dirty, wipe with a soft, dry cloth. -
Page 4: How To Use This Manual
How to use this manual This manual is divided in to four sections, Preparations, Operations, Other, and Remote Control. Preparations Shows you how to connect your audio and video components to the receiver and prepare the surround processor. We've tried to make setting up your system as easy as possible. However, since this receiver works with all of your audio and video components, connecting the system can be fairly complex. -
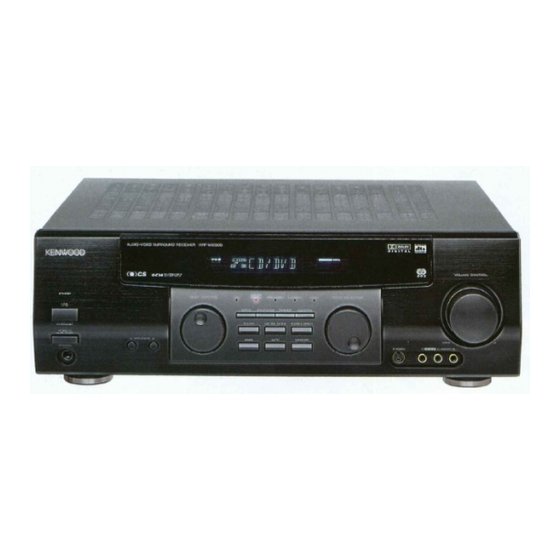
Page 5: Names And Functions Of Parts
Names and functions of parts Speaker indicator TI.VOL CLIP MUTE RDS EON NEWS MUTE indicator Speaker selection indicators Input channel indicators Output channel indicators STANDBY STANDBY POWER ON/STANDBY ON/STANDBY POWER A SPEAKERS B PHONES For U.S.A. and Canada 1 POWER key (Except for U.S.A. -
Page 6: Remote Control Unit
If you connect audio components from KENWOOD and other makers to the MD/ TAPE or CD jacks, you can set the remote control to operate these components by registering the appropriate setup code at the respective input. -
Page 7: Setting Up The System
Be sure to adhere followings. Or proper ventilation will be blocked causing damage or fire hazard. • Install the KRF-V8030D on the top of the system. • Do not place any objects impairing heat radiation onto the top of unit. -
Page 8: Connecting Video Components
Connecting video components S Video jacks PLAY IN REC OUT PLAY IN PLAY IN PLAY IN S VIDEO VIDEO 1 VIDEO 1 VIDEO 2 VIDEO 3 MONITOR OUT REC OUT PLAY IN PLAY IN PLAY IN VIDEO 1 VIDEO 2 VIDEO 3 VIDEO DVD player or LD player... -
Page 9: Digital Connections
PCM OUT To connect an LD player with a DIGITAL RF OUT, connect the LD player to the KENWOOD RF digital demodulator (DEM-9991D). Next, connect the DIGITAL OUT jacks of the demodulator to the DIGITAL IN jacks of the receiver. -
Page 10: Connecting To The Aux In Jacks
Connecting to the AUX IN jacks The AUX IN jacks are convenient for connection of video components such as a camcorders and video games. S VIDEO AV AUX S VIDEO cord VIDEO OUT Camcorder, other VCR, video game, digital camera, S VIDEO OUT or portable MD player •... -
Page 11: Connecting The System Control
• Once you finish making the system connections, be sure to register the appropriate setup code for each component. • If you own remote controllable KENWOOD audio components that are not compatible with system control, registering the setup code en- ables you to control those components using the remote control supplied with this unit (without connecting system control cords). -
Page 12: Connecting The Speakers
Connecting the speakers 1 Strip coating. 2 Loosen. 3 Insert. 4 Secure. 1 Strip coating. 2 Push the lever. 3 Insert the cord. 4 Return the lever. Front Speakers A Right Left FRONT SPEAKERS CENTER SPEAKER (8 – 16 ) (8 –... -
Page 13: Channel Space Switching
Speaker placement Center speaker Subwoofer Front speaker Listening position Surround speaker Front speakers : Place to the front left and right of the listening position. Front speakers are required for all surround modes. Center speaker : Place front and center. This speaker stabilizes the sound image and helps recreate sound motion. -
Page 14: Preparing For Surround Sound
Preparing for surround sound Speaker settings To enable you to obtain optimum enjoyment from the receiver’s listening modes, make sure to complete the speaker settings (subwoofer, front, center, and surround speakers) as described below. MULTI CONTROL ON/STANDBY SETUP POWER Display operation 1 Display operation 2 Turn on the power to this receiver by pressing POWER (and ON/STANDBY) key(s). - Page 15 Adjust the volume levels for the speakers. Sit in your normal listening position and listen to the test tone. Adjust the volume levels for the speakers until all speakers seem to be equally loud. 1 Use the MULTI CONTROL knob or the 5/∞ keys to adjust the volume when the test tone is being output from the speaker channel to be adjusted.
-
Page 16: Normal Playback
Normal playback Preparing for playback Some preparatory steps are needed before starting playback. INPUT MODE ON/STANDBY AUTO POWER INPUT SELECTOR SPEAKERS A/B Selecting the input mode If you have selected a component connected to the CD, DVD, VIDEO2, or VIDEO3 jacks, make sure that the input mode setting is correct for the type of audio signal to be used. -
Page 17: Adjusting The Sound
Adjusting the sound SOURCE DIRECT SOUND PHONES MULTI CONTROL SPEAKERS A/B 5/∞ VOLUME +/– MUTE SOUND BASS BOOST F.SHIFT Adjusting the tone You can adjust the sound quality when the receiver is in the stereo mode. 1 Press the SOUND key to select the tone mode to be adjusted. BASS: Select this to adjust the low frequency range. -
Page 18: Recording
Recording Recording audio (analog sources) MONITOR INPUT SELECTOR Recording a music source 1 Use the INPUP SELECTOR knob to select the source (other than "MD/TAPE") you want to record. 2 Set the cassette deck or MD recorder to record. 3 Start playback, then start recording. Recording tapes or MDs MONITOR = MD/TAPE recording 1 Press the MONITOR key. -
Page 19: Listening To Radio Broadcasts
Recording music in M-REC MODE DIMMER INPUT SELECTOR 1 Use the input selector to select the source (CD, DVD,VIDEO2, or VIDEO3) you want to record. 2 Set the cassette deck to record. 3 Play the source to be recorded. 4 Press and hold the DIMMER key for more than 2 seconds to select the M-REC MODE. -
Page 20: Presetting Radio Stations Manually
Presetting radio stations manually MEMORY MULTI CONTROL Tune to the station you want to store. Press the MEMORY key while receiving the station. Blinks for 5 seconds TI.VOL CLIP MUTE RDS EON NEWS Proceed to step 3 within 5 seconds. (If more than 5 seconds elapse, press the MEMORY key again). -
Page 21: Ambience Effects
Ambience effects This receiver is equipped with listening modes that allow you to enjoy an enhanced sonic ambience with a variety of video sources. In order to obtain the optimum effect from the surround modes, make sure to input the proper speaker settings beforehand. - Page 22 Dolby 3 Stereo Dolby 3 Stereo is available for systems that do not have surround speakers. When in the Dolby 3 Stereo mode, the surround information is redirected to the front left and right speakers. This mode is designed for use with Dolby Surround program sources, but can also improve sound field unity for programs that are not Dolby Surround encoded.
-
Page 23: Surround Play
Surround Play The DTS compatible models can reproduce a CD, DVD, or LD carrying the DTS mark. DOLBY DIGITAL can be used when playing DVD or LD software bearing mark and DOLBY DIGITAL (AC-3) format digital broadcasts (etc.). DOLBY PRO LOGIC and DOLBY 3 STEREO can be used when playing video, DVD, or LD software bearing the Circle surround enables you to listen to multi channel sound from the stereo source. -
Page 24: Dvd 6-Channel Playback
DVD 6-channel playback Using a DVD player or the like equipped with six (5.1) output channels and the receiver, you can enjoy surround sound playback. When you try to play a disc other than Dolby Digital (AC-3) such as DTS CD, no sound is produced or, noise may be heard. - Page 25 Midnight mode (Dolby Digital (AC-3) mode only) When watching movies at night you might not be able to raise the volume as loud as normal. Midnight mode compresses the dynamic range of previously specified parts of the Dolby Digital (AC-3) sound track (like scenes with sudden increases in volume) to minimize the difference in volume between the specified and non-specified parts.
-
Page 26: In Case Of Difficulty
In case of difficulty Resetting the Microcomputer If the microcomputer may malfunction (unit cannot be operated, or shows an erroneous display) if the power cord is unplugged while the power is ON, or due to some other external factor. If this happens, execute the following procedure to reset the micro- computer and return the unit to its normal operating condition. -
Page 27: Specifications
Coaxial ... 0.5 Vp-p / 75 Notes 1. KENWOOD follows a policy of continuous advancements in development. For this reason specifications may be changed without notice. 2. The full performance may not be exhibited in an extremely cold location (under a water-freezing temperature). - Page 28 Coaxial ... 0.5 Vp-p / 75 Notes 1. KENWOOD follows a policy of continuous advancements in development. For this reason specifications may be changed without notice. 2. The full performance may not be exhibited in an extremely cold location (under a water-freezing temperature).
-
Page 29: Quick Start Guide
Remote Control Instruction Manual Preset Remote Control Quick Start Guide SHIFT MACRO MUSIC MOVIE AV. POWER SYS. POWER VOL. VOL. – – MUTE DIMMER BASS BOOST LISTEN M. SOUND SUB.W. TITLE/GUIDE MENU TUNING BAND ENTER RETURN /PAGE /PAGE AUTO/MONO F.SHIFT LEARN REPEAT RANDOM... - Page 30 Back Enter Step 6 5/∞ Press the of the component that you want to reg- >Kenwood ister, then press the display operation >Aiwa 2 [Enter] key. Back Enter Automatic input naming In the initial factory setting, the remote control already has provisional component names registered for each input. Before you register setup codes, pressing the input keys of the remote control causes the display to change from the factory preset input names of the receiver (VIDEO1, VIDEO2, etc.) to the input...
-
Page 31: Getting The Most From Your Remote Control
Getting the most from your remote control The remote control supplied with this receiver is also capable of controlling components from a variety of manu- facturers once you register the appropriate setup codes into the remote control unit. Refer to "Remote operation of other components" for de- tails about the operations available for each component. - Page 32 • The selected input does not appears when you select “Delete.” Press the display operation 2 [Enter] key. • The maker selecting display appears. For Europe and U.K For other countries >Kenwood >Kenwood >Admidral >Aiwa Back Enter Back Enter Press the 5 / ∞...
-
Page 33: Operating Other Components
Operating other components This operation lets you operate the registered components. KENWOOD audio components with system control turn on and off automatically with the receiver via the system control connections. SHIFT MUSIC, MOVIE, AV.POWER I / – – During opration, make sure you start the next step within 8 seconds of completing the previous one. - Page 34 Preparing for automatic operations (MACRO play) The macro play function allows you to set the remote to control several components in succession. After completing this setup, you can perform a series of operations automatically. Enter the setup codes for the components you want to control beforehand.
-
Page 35: Executing An Automatic Operation
Executing an automatic operation MACRO MUSIC, MOVIE, – – During opration, make sure you start the next step within 8 seconds of completing the previous one. If more than 8 seconds elapses between any two steps, press the display operation key so that the display appears. Press the MACRO key. - Page 36 Storing the remote control cord of the other components The remote control unit can store the remote control cord of the other components and you can operate the other components from the remote control unit. The remote control cord is stored on the key or memory of the remote control unit.
- Page 37 4 Press the 5/∞ keys to select the location. • Extend1 – Extend5 are available. 5 Press the [Enter] key. • The remote control is ready for receiving the remote control code. Waiting >Extend1 >Extend1 Clr Exit 6 Press the key of the same operation that you want to store. •...
- Page 38 Displaying the CD TEXT data When you connect a KENWOOD CD player (CD-425M, CD-4700M, CD- 4260M, DPF-J6030), you can display the CD TEXT data in the display of the remote control unit. Display operation 1 Display operation 2 – –...
-
Page 39: Remote Operation Of Other Components
Remote operation of other components You can operate other components by pressing keys or using the display. The setup code for each component must be entered beforehand. When you operate by using the keys 1 Press the MUSIC, MOVIE, or TV key to select the component you want to control. - Page 40 TV operations TUNING BAND ENTER – AUTO/MONO CHANNEL + Cursor CHANNEL - 5/∞/2/3 ENTER VOLUME + › VOLUME - $ & (Mute) VCR operations – CHANNEL + ‹ (Play) CHANNEL - * (Pause) & (Stop) TUNING $ (Skip) BAND ENTER ›...
- Page 41 DSS receiver operations TUNING BAND ENTER – AUTO/MONO Cursor CHANNEL + 5/∞/2/3 CHANNEL - ENTER Cable tuner operations TUNING BAND ENTER – AUTO/MONO Cursor CHANNEL + 5/∞/2/3 CHANNEL - ENTER /PAGE VOLUME + › PAGE UP (%) VOLUME - $ Satellite tuner operations TUNING BAND...
-
Page 42: In Case Of Difficulty
In case of difficulty Remote control unit Symptom The battery indicator flashes during opera- tion. Subwoofer volume cannot be adjusted. Certain inputs cannot be selected using the remote control. Remote control operation is not possible. Cause • The batteries are nearing exhaustion. •...