Table of Contents
Advertisement
Advertisement
Table of Contents

Related Manuals for Plustek OpticFilm 120


Summary of Contents for Plustek OpticFilm 120
- Page 1 Installation Usage & Maintenance Troubleshooting...
- Page 2 Trademarks © 2012 Plustek Inc. All rights are reserved. No portion of this document may be reproduced without permission. All trademarks and brand names mentioned in this publication are property of their respective owners. Liability While all efforts have been made to ensure the accuracy of all contents in this...
-
Page 3: Table Of Contents
Table of Contents INTRODUCTION ............................1 ......................... 1 OW TO UIDE ..........................2 OTE ABOUT CONS ..........................2 AFETY RECAUTIONS .......................... 3 YSTEM EQUIREMENTS ............................4 ONTENTS ..........................5 CANNER VERVIEW LED I ............................6 NDICATOR ............................6 OLDERS ............................8 OWER ............................ -
Page 4: Introduction
Introduction Welcome to the world of Plustek scanners – the ultimate in computer imaging. Your new scanner will improve the professionalism of your day-to-day computing tasks by allowing you to input images into your computer system. Like all of our products, your new scanner is thoroughly tested and backed by our reputation for unsurpassed dependability and customer satisfaction. -
Page 5: A Note About Icons
A Note about Icons This guide uses the following icons to point out information that deserves special attention. Danger: A procedure that must be followed carefully to prevent injury, or accidents. Danger Caution: Information that, if not followed, may result in data loss or damage to the product. -
Page 6: System Requirements
Before installing the device drivers, please disconnect all other imaging devices (other scanners, printers, digital cameras, web cameras) from the PC. Save the Setup/Application CD, the SilverFast DVD and DVD-ROM case. You may need to reinstall the driver and software in the future. 10. -
Page 7: Box Contents
Box Contents Scanner Mounted Slide Holder and Filmstrip Holder A. For scanning 35mm mounted slides (max. 5 slides) B. For scanning 35mm filmstrips (max. 12 frames) C. For scanning 120/220 6x4.5 filmstrips (max. 4 frames) D. For scanning 120/220 6x6 filmstrips (max. 3 frames) E. -
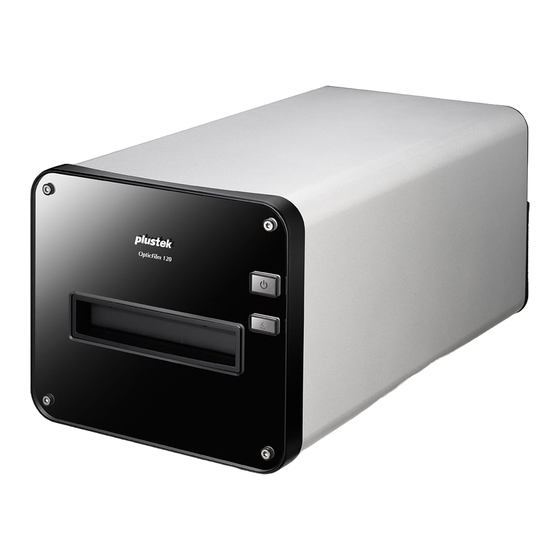
Page 8: Scanner Overview
Scanner Overview Logo LED: It indicates the scanner status. Power Button: Press the button to turn the scanner ON or wake it up from standby mode. Press and hold the button for 3 seconds to turn the scanner OFF. ... -
Page 9: Led Indicator
LED Indicator The Power button LED and Logo LED indicate different scanner status. Logo LED Power button Status (blue) LED (orange) The scanner is turned on and operating normally. The film holder has been ejected and can be Blinking removed. The scanner is in standby mode. - Page 10 Using 35mm Filmstrip Holder Open the film holder and place the filmstrip in the film holder with the emulsion (non- glossy) side down. Always align the film towards the direction of insertion. The direction of insertion is indicated by a white square and an arrow. When scanning a single filmstrip or filmstrips of different lengths, please use the included masking sheets to cover any open frames, then close the film holder cover.
-
Page 11: Power Save
Power Save To save power consumption, the scanner light source always automatically turns itself off after the scanning process is finished. The scanner will enter the standby mode after it is idle for a few minutes. Simply press the power button on the scanner and the scanner will return to the normal status. -
Page 12: Maintenance
Maintenance To keep your scanner working smoothly, take a moment to review the following maintenance tips. Caution Avoid using the scanner in a dusty environment. When it is not in use, keep the scanner covered. Dust particles and other foreign objects may damage the unit. ... -
Page 13: Chapter I. Installing The Scanner
Chapter I. Installing the Scanner Before installing your scanner, please verify that you have all of the proper components. A list of the package contents is provided in the Box Contents section of this guide. Installing and Setting up the Scanner Please follow the step-by-step procedures described below to install the USB scanner. -
Page 14: Step 2. Installing The Software
Step 2. Installing the Software Windows Installation 1. Insert the Setup/Application CD-ROM, included with your scanner, into your CD-ROM drive. Click [Run install.exe] in the [AutoPlay] window. If the installation does start automatically, browse your CD- ROM drive and manually run the [install.exe] file. - Page 15 4. After the software is installed, close all open applications and click on the [Finish] button to restart your computer. For Windows XP / Vista, please follow the on-screen installation instructions after connecting the scanner. Attention Manually Installing the Software 1.
- Page 16 Installing SilverFast Software under Windows Your scanner comes with the advanced and feature rich scanning application SilverFast. Please insert the SilverFast DVD into your optical drive and click on [Run InstallPilot.exe] to launch the installation assistant, then follow below illustrated guide to install the application: 1.
- Page 17 4. After the installation finishes, please activate the option you wish to execute, then click on [Finish] to exit the installer. 5. Launch the SilverFast program using the SilverFast shortcut on your Desktop. Verify your [Image Source] and [Language selection], then click on [Start] to launch the program.
-
Page 18: Mac Os X Installation
Mac OS X Installation 1. Insert the Setup/Application CD-ROM, included with your scanner, into your CD- ROM drive and a [Film Scanner] CD icon will show on the desktop of your Mac OS X. 2. Double-click on the CD icon, and an installation disk [Mac Driver] will appear on the desktop and a window will pop up displaying the file folder. - Page 19 Installing SilverFast Software under Mac OS X Your scanner comes with the advanced and feature rich scanning application SilverFast. Please insert the SilverFast DVD into your optical drive and double-click on [SilverFast InstallPilot] to launch the installation wizard, then follow below illustrated guide to install the application: 1.
- Page 20 4. After the installation finishes, click on [Close] to exit the installer. 5. Launch the SilverFast launcher using the SilverFast shortcut on your Desktop. Verify your [Image Source] and [Language selection], then click on [Start] to launch the program. 6. Once the program has been launched, enter your [First name], [Last name] and [Serial number], then click...
-
Page 21: Chapter Ii. Operating The Scanner
Chapter II. Operating the Scanner Your scanner accepts 35mm slides and negatives, as well as 120/220 film. However, some software programs have limitations as to the information they can handle. The capacity of the computer’s memory and free space on your hard drive can also limit the physical size of the film that you scan. - Page 22 Open the film holder and place the filmstrip in the film holder with the emulsion (non- glossy) side down. Always align the film towards the direction of insertion. The direction of insertion is indicated by a white square and an arrow. When scanning a single filmstrip or filmstrips of different lengths, please use the included masking sheets to cover any open frames, then close the film holder cover.
-
Page 23: Step 3. Insert The Film Holder
Step 3. Insert the Film Holder Insert the film holder into the scanner through the Front Film Holder Slot until it is automatically pulled in by the scanner. The scanner will not pull in the film holder if the USB cable is disconnected. Please allow about 35 cm in front of the scanner to insert and remove the film holder. -
Page 24: Appendix A: Troubleshooting
Appendix A: Troubleshooting Scanner Connection The first step to take when troubleshooting connection problems with your scanner is to check all physical connections. Scanning Problems Most problems are easily solved, and some of the most common questions and their recommended solutions are listed below. Symptom Cause &... - Page 25 You pressed the power button to bring the scanner out The film holder is automatically of standby mode or you just connected the USB cable ejected after accidently disconnecting it The scanner will eject any inserted film holder when coming out of standby mode or when connection with a computer has been established.
-
Page 26: Appendix B: Specifications
Appendix B: Specifications OpticFilm 120 Image Sensor Light Source Maximum Input:10600 dpi Hardware Resolution Maximum Output:5300 dpi Color: 48-bit input, 24/48-bit output Scan Modes Grayscale: 16-bit input, 8/16-bit output Dynamic Range Infrared Built-in Scanning Area (W x L) 60 mm x 120 mm... -
Page 27: Appendix C: Customer Service And Warranty
If you encounter problems with your scanner, please review the installation instructions and troubleshooting suggestions contained in this guide. Visit our website www.plustek.com for more customer service information. For further assistance call our customer support phone number listed on the website. One of our... -
Page 28: Statement Of Limited Warranty
Statement of Limited Warranty This Statement of Limited Warranty applies only to the options you originally purchase for your use, and not for resale, from an authorized reseller. The manufacturer warranty includes all parts and labor, and is not valid without the receipt of original purchase. -
Page 29: Fcc Radio Frequency Statement
Some jurisdictions do not allow the exclusion or limitations of incidental or consequential damages, so the above limitation or exclusion may not apply to you. This Limited Warranty gives you specific legal rights, and you may also have other rights that vary from jurisdiction to jurisdiction. To obtain the warranty service, you may: ...