Table of Contents
Advertisement
Advertisement
Table of Contents

Related Manuals for Clarity BT914


Summary of Contents for Clarity BT914
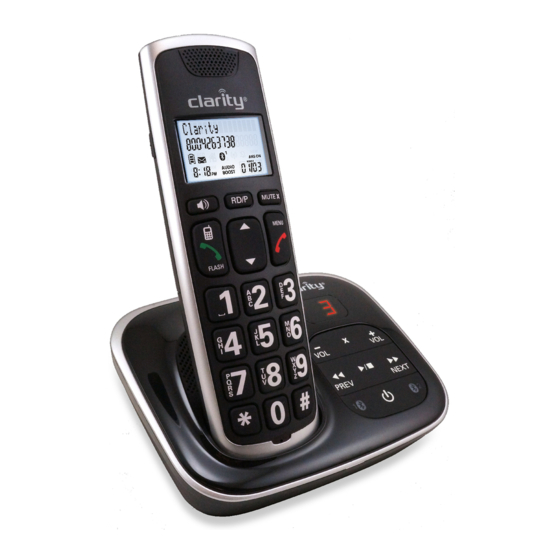
- Page 1 User Guide BT914 Amplified Big Button Cordless Phone with Bluetooth® Connectivity...
-
Page 3: Important Safety Instructions
IMPORTANT SAFETY INSTRUCTIONS Congratulations on purchasing your new Clarity product. Before using this telephone, please read Important Safety Instructions. WARNINGS: PRIVACY OF COMMUNICATIONS MAY NOT BE ENSURED WHEN USING THIS PHONE. To maintain the compliance with the FCC’s RF exposure guideline, place the base unit at least 20 cm from nearby persons. - Page 4 IMPORTANT SAFETY INSTRUCTIONS 6. Unplug this telephone from the wall outlets before clean- ing. Do not use liquid cleaners or aerosol cleaners on the telephone. Use a damp cloth for cleaning. 7. Place this telephone on a stable surface. Serious damage and/or injury may result if the telephone falls.
- Page 5 IMPORTANT SAFETY INSTRUCTIONS 13. To reduce the risk of electrical shock, do not take this phone apart. Opening or removing covers may expose you to dangerous voltages or other risks. Incorrect reassembly can cause electric shock when the appliance is subsequently used.
- Page 6 21. Discontinue use of product and contact Clarity if the prod- uct overheats, has a damaged cord or plug, if the product has been dropped or damaged or if the product has come into contact with liquids.
- Page 7 Use the phone on the lowest volume setting as possible. Limit the amount of time you use the telephone at high volume levels. 25. If you experience a skin irritation after using this product, discontinue use and contact Clarity. SAVE THESE INSTRUCTIONS...
-
Page 8: Battery Safety Instructions
IMPORTANT SAFETY INSTRUCTIONS BATTERY SAFETY INSTRUCTIONS WARNING: Dispose of used batteries according to the instructions. 1. Do not dispose of the battery in a fire as it may explode. Check with local codes for possible special disposal in- structions. 2. Do not open or mutilate the battery. Released electrolyte is corrosive and may cause damage to the eyes and skin. -
Page 9: Installation Location
PACKAGING CONTENTS LOCATION Package contains the following items: • Answering Machine base station • AC power adapter for Answering Machine base station • Telephone line cord for Answering Machine base station • Cordless Handset • (2) Rechargeable batteries for cordless handset •... -
Page 10: Connecting The Base
CONNECTING THE BASE If the reception for a base unit location is not satisfactory, move it to another location for better reception. Depending on the surrounding conditions as well as spatial and structural factors, the range may be reduced. The range indoors is normally less than outdoors. - Page 11 CONNECTING THE BASE WARNINGS: Use only the power adapter provided for the base station. Always use the cables provided in the box, others may not be compatible. NOTE: The base unit needs mains power for normal operation, and the cordless handset will not work without it. •...
-
Page 12: Installing The Batteries
INSTALLING THE BATTERIES Note: • Use only the batteries provided or equivalent. • If the handset will not be used for a long time, disconnect and remove the batteries to prevent possible leakage. • To purchase replacement batteries, go to any store that sells batteries: NiMH AAA 1.2V 500mAh. -
Page 13: Battery Details
BATTERY DETAILS Battery Battery status Action indicators The screen is The battery has Charge without blank, or shows no charge or very interruption (at Put in charger little charge. The least 30 minutes) and the battery handset cannot be symbol flashes. used. -
Page 14: Operating Time
BATTERY DETAILS When it is fully charged, you can expect the following performance: Operations Operating Time While in handset use Seven hours (talking*) While in speakerphone Three hours mode (talking*) While not in use (stand- Five days by**) *Operating times vary depending on your actual use and the age of the battery **Handset is not charging or in use. -
Page 15: Before Use
BEFORE USE After you install your telephone or power returns follow- ing a power outage, the handset will prompt you to set the date and time, and the answering system through voice guide. If you choose to set up the date and time, and the answer- ing system at a later stage, you can do it manually. - Page 16 BEFORE USE 1. Press MENU to start the voice guide for the answering system setup. You hear the voice prompt “Hello! This voice guide will assist you with the basic setup of your answering sys- tem.” 2. Setup your answering system by inputting the designated numbers as instructed in the voice guide.
-
Page 17: Operating Range
BEFORE USE Operating range This cordless telephone operates with the maximum power allowed by the Federal Communications Commis- sion (FCC). Even so, this handset and telephone base can communicate over only a certain distance- which can vary with the locations of the telephone base and handset, the weather, and the layout of your home or office. -
Page 18: Getting To Know Your Handset
GETTING TO KNOW YOUR HANDSET... -
Page 19: Handset Earpiece
GETTING TO KNOW YOUR HANDSET Handset earpiece LCD Display UP Arrow key/Phonebook • Review the phone book when the phone is not in use. • Increase the listening volume during a call or mes- sage playback. • Scroll up while in a menu, or in the phonebook, caller ID log, or redia list. -
Page 20: Speakerphone Button
GETTING TO KNOW YOUR HANDSET 1 key/Voicemail • Press repeatedly to add or remove “1” in front of the caller ID log entry before dialing or saving it to the phonebook. • Press and hold to set or dial your voicemail number. - Page 21 GETTING TO KNOW YOUR HANDSET Red Phone button • Hang up a call. • Silence the ringer temporarily while the handset is ringing. • Press and hold to erase the missed call indica- tor while the phone is not in use. •...
-
Page 22: Boost Button
GETTING TO KNOW YOUR HANDSET # key • Press repeatedly to show other dialing options when reviewing a caller ID log entry. Mute/X • Mute the microphone during a call. • Delete digits or characters while using the dialing keys. •... - Page 23 GETTING TO KNOW YOUR BASE...
-
Page 24: Power Button
GETTING TO KNOW YOUR BASE • Delete the playing message. • Press twice to delete all previously reviewed mes- sages when the phone is not in use. Find • Press to page all system handsets. Prev • Press to repeat a message. •... -
Page 25: About Cordless Telephones
GETTING TO KNOW YOUR BASE Message window • Shows the number of messages, and other infor- mation of the answering system or telephone base. Play/Stop • Play messages. • Stop playing messages. Next • Skip to the next message. Bluetooth 1 and Bluetooth 2/Headset Lights •... - Page 26 GETTING TO KNOW YOUR BASE reason, you should not think of cordless telephone conversa- tions as being as private as those on corded telephones. • Electrical power: The telephone base of this cordless telephone must be connected to a working electrical out- let.
-
Page 27: Bluetooth Functions
Pair and connect your Bluetooth enabled cell phone To use a Bluetooth enabled cell phone with your BT914, you must first pair and connect your Bluetooth cell phone(s) with the telephone base. All BT914 handsets can be used to make or answer calls on the cell line. - Page 28 2/Headset) turns on. If the pairing fails, turn off the Bluetooth feature on your cell phone and on the BT914 by pressing Bluetooth1 or Bluetooth 2/Headset. Then repeat the steps above to pair and connect again. In some cases, it may take you a few attempts to com- plete the pairing process.
- Page 29 BLUETOOTH FUNCTIONS Search headset…. 4. Set your headset to discoverable mode. Once your handset finds your headset, press SELECT. • Enter the PIN of your headset if required. The PIN for most Bluetooth devices is 0000 (refer to the user’s manual of your headset), and then press SELECT.
- Page 30 BLUETOOTH FUNCTIONS information about how that device uses Bluetooth connec- tivity. • Certain cell phones do not support SIM card download. If this is the case, transfer the contacts from your SIM card to your cell phone memory first. Then download from your cell phone memory.
-
Page 31: Handset Menu
HANDSET MENU Telephone settings Default settings are indicated by asterisks (*). Settings menu Description Options LCD language Set the screen English*, display language. Français, Español Voicemail # Save the speed dial Voicemail # _ voicemail number to key 1. Clr voicemail Turn off the voice- mail indicators (see the note below). - Page 32 HANDSET MENU Equalizer Set the best audio Natural*, Treble, tone for your hear- Bass ing needs. Auto Boost Auto boost keeps Off* the boost button activated at all times. This elimi- nates the need to press the “Boost” button for each call.
-
Page 33: Telephone Operations
TELEPHONE OPERATIONS The following are some of the telephone features you may wish to set. Ringer volume (handset) You can adjust the ringer volume level, or turn the ringer off. 1. Press MENU when the handset is not in use. 2. -
Page 34: Make A Home Call
TELEPHONE OPERATIONS Set date and time If you subscribe to caller ID service, the day, month, and time are set automatically with each incoming call. You can also set the date and time manually. 1. Press MENU when the handset is not in use. 2. - Page 35 TELEPHONE OPERATIONS Note: • After first pressing the Cell phone button, you may need to choose a cell device. Scroll to select the desired cell device when necessary, and then press SELECT. • While using the cell line, place your cell phone closer to the telephone base, and make sure that there are no physical obstacles between the telephone base and the cell phone, such as large furniture or thick walls.
-
Page 36: Call Waiting
TELEPHONE OPERATIONS Note: The handset earpiece volume setting and speakerphone volume setting are independent. Boost • During a call, press the Boost button to give added amplifi- cation of the listening volume. The handset displays Audio Boost. Press the Boost button again to turn the Boost off. -
Page 37: Temporary Ringer Silencing
TELEPHONE OPERATIONS • Press FLASH to switch back and forth between calls. Call waiting on the cell line: • Press the Cell phone button to put the current call on hold and take the new call. • Press the Cell phone button to switch back and forth between calls. -
Page 38: Find Handset
TELEPHONE OPERATIONS Find handset Use this feature to find all system handsets. To start paging: • Press FIND on the telephone base. All idle handsets ring and display **Paging**. To end paging: • Press FIND again on the telephone base. -OR- •... -
Page 39: Join A Call In Progress
TELEPHONE OPERATIONS 2. Press the UP or DOWN arrow keys or REDIAL repeat- edly until the desired entry displays. 3. Press the Green phone button, Cell phone button or Speakerphone button to dial. To delete a redial entry: When the desired redial entry displays, press MUTE X. Join a call in progress You can use up to two system handsets at a time on a home line call. -
Page 40: Transfer A Call
TELEPHONE OPERATIONS 3. To answer the intercom call, press the Green phone but- ton, Cell phone button, Speakerphone button or any dialing key on the destination handset. 4. To end the intercom call, press the Red phone button or place the handset back in the telephone base or charger. Transfer a call While on an outside call, you can use the intercom feature to transfer the call from one handset to another. -
Page 41: Answer An Incoming Call During An Intercom Call
TELEPHONE OPERATIONS Answer an incoming call during an intercom call If you receive an incoming call during an intercom call, there is an alert tone. • To answer a home call, press the Green phone button. The intercom call ends automatically. •... - Page 42 TELEPHONE OPERATIONS 6. Use the dialing keys to enter the name (up to 15 charac- ters). Additional key presses show other characters of that particular key. 7. Press SELECT to save. While entering numbers and names, you can: • Press MUTE X to erase a digit or character. •...
- Page 43 TELEPHONE OPERATIONS 3. When the desired entry appears, press the Green phone button, Cell phone button or Speakerphone to dial. To edit a phonebook entry: 1. When the desired entry displays, press MENU. 2. Use the dialing keys to edit the number, and then press SELECT.
-
Page 44: Caller Id Log
TELEPHONE OPERATIONS subscription, you may see the caller’s name, number, date and time of calls that are sent by your telephone service provider after the first or second ring. Caller ID log The caller ID log stores up to 50 entries. If you answer a call before the caller information appears, it will not be saved in the caller ID log. - Page 45 TELEPHONE OPERATIONS To save a caller ID log entry to the phonebook: 1. When the desired caller ID log entry displays, press MENU. 2. Scroll to To Phonebook then press SELECT. 3. Use the dialing keys to modify the number, and then press SELECT.
- Page 46 TELEPHONE OPERATIONS The main differences between them are as follows: Category Built-in an- Voicemail from swering system telephone service Storage Messages are Messages are stored in stored in the tele- a server or system pro- phone base. vided by your telephone service.
-
Page 47: Set Your Built-In Answering System
TELEPHONE OPERATIONS Set your built-in answering system Your answering system has various features, read below for the basic settings. Default settings are indicated by asterisks (*). Menu Description Options Announcement Play, record, or delete an Play [2]; announcement for incoming Del [3];... - Page 48 TELEPHONE OPERATIONS Ans sys setup Change the settings of call screening, number of rings, remote code, or message alert tone. Set whether you hear the callers • Call while they are leaving messages screening to you. 3*;2;Toll Set the number of times the •...
-
Page 49: Set Number Of Rings
TELEPHONE OPERATIONS Record your own announcement with a handset You can use the preset announcement to answer calls, or re- place it with your own recorded announcement. It can be up to 90 seconds in length. 1. Press MENU when the phone is not in use. 2. -
Page 50: Message Alert Tone
TELEPHONE OPERATIONS Message alert tone When the message alert tone is set to on, and there is at least one new message, the telephone base beeps every 10 seconds. The message alert tone is preset to off. 1. Press MENU when the phone is not in use. 2. -
Page 51: Options During Playback
TELEPHONE OPERATIONS retrieve, press the Play/Stop button when the phone is not in use. Note: It can record up to 99 messages, depending on the length of each message. Each message can be up to three minutes in length. The total recording time is approximately 25 minutes. -
Page 52: Retrieve Voicemail From Telephone Service
TELEPHONE OPERATIONS Use the built-in answering system and voicemail service You can use your answering system and voicemail service together by setting your answering system to answer before voicemail service answers as described below. To learn how to program your voicemail settings, contact your telephone service provider. -
Page 53: Expand Your System
EXPAND YOUR SYSTEM then enter a security code. Contact your telephone service provider for instructions on how to configure the voicemail settings and listen to messages. Add and register a handset You can add new cordless handsets (BT914HS) to your tele- phone system (purchased separately). -
Page 54: Deregister All Devices
EXPAND YOUR SYSTEM The handset shows Registered and you hear a beep when the registration process completes. The registration process takes about 90 seconds to complete. Deregister all devices To replace a handset or reassign the designated handset num- ber of a registered handset, you must deregister all devices and then individually register each handset. -
Page 55: Frequently Asked Questions
Bluetooth device, and is connected to the tele- phone base and active on the device list. • Remove Clarity BT914 from your cell phone’s hands free device history list (see the user’s manual of your cell phone for more information). - Page 56 BT914 cannot improve the reception. However, if there is a location in your house with better reception, you can leave your cell phone at that location while you use the BT914 cell line. In order for this to work, the telephone base must be within 30 feet of the cell phone.
- Page 57 FREQUENTLY ASKED QUESTIONS • Make sure the power adapter is securely plugged into an outlet not controlled by a wall switch. • Make sure the telephone line cord is plugged firmly into the telephone base and the wall jack. • Unplug the electrical power to the telephone base. Wait for approximately 15 seconds, and then plug it back in.
- Page 58 FREQUENTLY ASKED QUESTIONS • Eliminate any background noise. Mute the cordless handset before dialing, or dial from another room in your home with less background noise. • If you have changed your telephone service to digital ser- vice from a cable company or a VoIP service provider, the telephone line may need to be rewired to allow all existing telephone jacks to work.
- Page 59 FREQUENTLY ASKED QUESTIONS activate your voicemail, contact your telephone service provider. • If there is a fax machine connected to the same telephone line, try disconnecting the fax machine. If that solves the problem, consult your fax machine documentation for infor- mation on compatibility with answering systems.
-
Page 60: Common Cure For Electronic Equipment
FREQUENTLY ASKED QUESTIONS Common cure for electronic equipment. • If the telephone is not responding normally, put the cord- less handset in the telephone base. If this does not fix the problem, do the following (in the order listed): Disconnect the power to the telephone base. Disconnect the batteries on the cordless handset. -
Page 61: Energy Saving
ENERGY SAVING To activate the energy-saving charging mode: 1. Unplug the telephone base power adapter from the power outlet. Make sure all handsets are plugged with charged batteries before proceeding. 2. While you press and hold FIND, plug the telephone base power adapter back to the power outlet. -
Page 62: General Product Care
GENERAL PRODUCT CARE UNTIL YOU UNPLUG THE POWER CORD AND TELEPHONE LINE CORD FROM THE WALL. Then remove the telephone by the unplugged cords. Taking care of your telephone Your cordless telephone contains sophisticated electronic parts, so it must be treated with care. Avoid rough treatment Place the handset down gently. -
Page 63: Technical Details
TECHNICAL DETAILS Transmit frequency DECT frequency: 1921.536-1928.448 Bluetooth frequency: 2402.000- 2480.000 MHz Channels DECT: 5 Bluetooth: 79 Nominal effective Maximum power allowed by FCC range and IC. Actual operating range may vary according to environment con- ditions at the time of use. Power requirements Handset: Two 1.2V Ni-MH 500 mAh rechargeable batteries... - Page 64 YOUR SYSTEM section. The Bluetooth® word mark and logos are owned by Bluetooth SIG, Inc. and any use of such marks by Clarity, a division of Plantronics, is under license. Clarity, a division of Plantronics, is a member of Bluetooth SIG, Inc. Other trademarks and trade names are those of their respective owners.
- Page 66 Chattanooga,TN 37416 Tel: 800-426-3738 Fax: 800-325-8871 E-mail: claritycs plantronics.com Website: www.clarityproducts.com ©2014 Clarity, a Division of Plantronics, Inc. All rights reserved. Clarity, BT914, BT914HS, Smart for Seniors, are trademarks or registered trademarks of Plantronics, Inc. Rev. E (9-14) Printed in China...