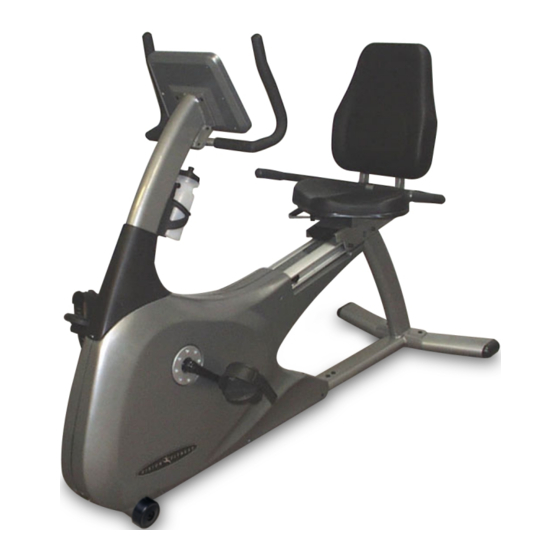
Vision Fitness R2000 Owner's Manual
Semi-recumbent fitness cycles
Hide thumbs
Also See for R2000:
- Owner's manual (44 pages) ,
- Assembly manual (9 pages) ,
- Assembly instruction manual (8 pages)

Related Manuals for Vision Fitness R2000


Summary of Contents for Vision Fitness R2000
- Page 1 O w n e r ’ s G u i d e R 2 0 0 0 , R 2 1 0 0 , R 2 2 0 0 & R 2 2 0 0 H R T S E M I - R E C U M B E N T F I T N E S S C Y C L E S...
- Page 4 Some kinds of service to your Bike should only be performed by your VISION FITNESS retailer. Please contact your authorized VISION FITNESS retailer should service be required. If a question or problem arises which cannot be handled by your VISION FITNESS retailer, please contact us: VISION FITNESS P.O. Box 280 621-D East Lake St.
-
Page 5: Table Of Contents
Table of Contents A L L M O D E L S R 2 2 0 0 H R T CONSOLE SAFETY INSTRUCTIONS ..4 SETTING MPH/KPH ... 28 ASSEMBLY, PLACEMENT, MOVING . - Page 6 CONSOLE TENSION KNOB SEAT ADJUSTMENT REAR FOOT FRONT FOOT & TRANSPORT WHEELS R 2 0 0 0 S E M I - R E C U M B E N T F I T N E S S C Y C L E...
- Page 7 SEAT CONSOLE ADJUSTMENT TENSION KNOB (MODEL R2100 ONLY) REAR FOOT POWER FRONT FOOT & SWITCH TRANSPORT WHEELS R 2 1 0 0 R 2 2 0 0 R 2 2 0 0 H R T S E M I - R E C U M B E N T F I T N E S S C Y C L E S...
-
Page 8: Safety Instructions
To disconnect, turn the switch to the OFF position, then remove plug from outlet. • Only use the power cord provided with your VISION FITNESS Bike. • Never place the power cord under carpeting or place any object on top of the power cord, which may pinch and damage it. - Page 9 OTHER SAFETY TIPS FOR YOUR VISION FITNESS BIKE CAUTION! If you experience chest pains, nausea, dizziness or shortness of breath, stop exercising immediately and consult your physician before continuing. • Do not wear loose clothing that might catch on any part of the Bike.
-
Page 10: Assembly, Placement, Moving
It is recommended, when possible, that assembly be performed by an authorized VISION FITNESS retailer. If you have any questions regarding any part or function of your Bike, contact your retailer. -
Page 11: Seat Adjustments
SEAT ADJUSTMENT R2000 While seated on the Bike, pull the Seat Lever up and slide the seat forward or back. When the seat is... - Page 12 LUMBAR ADJUSTABLE SEAT R2200HRT One of the biggest reasons why people don’t exercise is because it is uncomfortable. On the Semi-Recumbent bike, the area that has the largest impact on comfort is the seat. If your seat is comfortable you are more likely to finish your workouts and achieve your fitness goals.
-
Page 14: Batteries, Turning On
R2000 Your easy-to-use VISION FITNESS Manual computer console provides the information you need to monitor your progress toward your personal fitness goals. INSTALLING BATTERIES If your Bike batteries have not already been installed by your retailer, please install them now. -
Page 15: Countdown, Countup, Off
CHOOSING TIME AND STARTING There are two ways to use the timer: Count-Down Mode or Count-Up Mode. COUNT-DOWN MODE Press the SET TIME button to enter your workout time. When the time you choose is showing in the TIME window, start pedaling. The timer will begin counting down to zero. -
Page 16: Resistance, Resetting
R2000 CHANGING RESISTANCE There are two ways to increase your workload. You can pedal faster, or you can turn the tension knob which is located below the console. The tension knob will adjust to one of 15 levels of resistance. -
Page 17: Feedback Display
R2000 FEEDBACK DISPLAY Shown as Revolutions-per-Minute. Improve cycling technique while reducing leg muscle fatigue by pedaling between 80 and 100 RPMs. SPEED Shown as Miles-per-Hour. View your current pedaling speed. CALORIES Shown as estimated total Calories burned during workout. DISTANCE... -
Page 18: Batteries, Turning On
R2100 Your easy-to-use VISION FITNESS R2100 computer console provides the information you need to monitor your progress toward your personal fitness goals. INSTALLING BATTERIES If your batteries have not already been installed by your retailer, please install them now. Your R2100 console uses two size AA batteries. -
Page 19: Setting Mph/Kph
R2100 SETTING MPH & KPH Your R2100 console should be set to Miles when you receive it. If it is not set to Miles or if you would like to change the feedback to Kilometers do the following steps. • Take out the batteries. •... -
Page 20: Countdown, Countup, Start
CHOOSING TIME AND STARTING There are two ways to use the timer: Count-Down Mode and Count-Up Mode. COUNT-DOWN MODE Press the TIME L or M button to enter your workout time. When the Time you choose is showing in the TIME window, move to the WEIGHT button. -
Page 21: Choosing Weight, Resistance
CHOOSING WEIGHT After deciding on workout time, press the WEIGHT L or M button. The default Weight of 150 pounds will flash in the second window. Continue to set the appropriate Weight. Press START and begin exercising. CHANGING RESISTANCE There are two ways to increase your workload. -
Page 22: Pause, Reset
PAUSE You can pause your program for 30 seconds. Simply press the START button while you are pedaling and the time will stop counting. Resume time counting by pressing the START button a second time. If you do not resume time within seconds, it will reset to ‘0:00’. -
Page 23: Feedback Display
R2100 FEEDBACK DISPLAY Use the SELECT button to change the readout of the feedback information. The SPEED, DISTANCE, TIME and AVG SPEED feedback will be displayed. To view the METS, WATTS, CALORIES, and RPM feedback press the SELECT button. To scan through all feedback, press and hold the SELECT button for 3 seconds. -
Page 24: Setting Mph/Kph
R2200 SETTING MPH & KPH Your R2200 Console arrives preset to display Miles. If you wish to display Kilometers instead, remove the Console from the Console Mast by removing the four mounting bolts. Inside the mounting recess you will find a small switch;... -
Page 25: Starting In Manual Mode
R2200 DISPLAY Simply press the START button to begin exercising in the MANUAL Program. -
Page 26: Program Details
R2200 PROGRAM DETAILS Customize your workout; no default Time. Improves your maximum aerobic capacity by alternating performance intervals and recovery intervals. A great work- out that produces results and saves time; Time defaults to 24 minutes. Simulates rolling hills by gradually raising and lowering resistance. -
Page 27: Feedback Display
R2200 FEEDBACK DISPLAY Use the SELECT button to change the readout of the feedback information. The SPEED, DISTANCE, TIME and AVG SPEED feedback will be displayed. To view the LEVEL, WATTS, CALORIES, and RPMS feedback press the SELECT button. To scan through all feedback, press and hold the SELECT button for 3 seconds. -
Page 28: Setting Weight Default
CHANGING THE DEFAULT FOR WEIGHT Since some R2200 Bikes are used in the home setting, VISION FITNESS has included the option of changing the default weight to achieve more accurate Calorie feedback. The default Weight feature allows the user to set the default Weight that most closely relates to its users. -
Page 29: Program, Level, Time
CHOOSING A PROGRAM If you do not choose a Program, the console will default to the MANUAL Program. If you wish to choose another Program, simply press one of the other Program buttons. CHOOSING A LEVEL After you have chosen a Program, the Level will default to L6 and then flash. -
Page 30: Race Program
USING YOUR BIKE’S RACE PROGRAM The RACE Program is exclusive to the R2200 console. It is a challenging program that simulates an outdoor bike race. You determine the speed of the “Racer” by selecting the LEVEL when you start the program. The speed of the “Racer”... -
Page 32: Setting Mph/Kph
R2200HRT SETTING MPH & KPH Your R2200HRT Console arrives preset to display Miles. If you wish to display Kilometers instead, remove the Console from the Console Mast by removing the four mounting bolts. Inside the mounting recess you will find a small switch;... -
Page 33: Starting In Manual Mode
R2200HRT DISPLAY Simply press the START button to begin exercising in the MANUAL Program. -
Page 34: Program Details
R2200HRT PROGRAM DETAILS Customize your workout; no default Time. Improves your maximum aerobic capacity by alternating performance intervals and recovery intervals. A great work- out that produces results and saves time; Time defaults to 24 minutes. Simulates rolling hills by gradually raising and lowering resistance. -
Page 35: Feedback Display
R2200HRT FEEDBACK DISPLAY Use the SELECT button to change the readout of the feedback information. The SPEED, DISTANCE, TIME and HEART RATE feedback will be displayed. To view the LEVEL, WATTS, CALORIES, and RPMS feedback press the SELECT button. To scan through all feedback, press and hold the SELECT button for 3 seconds. -
Page 36: Setting Weight Default
CHANGING THE DEFAULT FOR WEIGHT Since some R2200HRT Bikes are used in the home setting, VISION FITNESS has included the option of changing the default weight to achieve a more accurate estimate of Calorie feedback. The default Weight feature allows the user to set the default Weight that most closely relates to its users. -
Page 37: Program, Level, Time
CHOOSING A PROGRAM If you do not choose a Program, the console will default to the MANUAL Program. If you wish to choose another Program, simply press one of the other Program buttons. CHOOSING A LEVEL After you have chosen a Program, the Level will default to L6 and then flash. -
Page 38: Using Hrt Program
USING YOUR BIKE’S HRT PROGRAM Use the chart on Page 48 to determine your Target Heart Rate, then follow the instructions on Page 35 to place the wireless transmitter on your chest. Choose the Heart Rate Program ♥ by pressing the HR TRAINING button. -
Page 39: Using Heart Rate Strap
TRANSMITTER STRAP PLACEMENT Center the Transmitter Strap just below the breast or pectoral muscles, directly over your sternum with the VISION FITNESS logo facing out. Adjust the elastic strap length to avoid bouncing or sliding. -
Page 40: Bikes
TROUBLESHOOTING YOUR FITNESS BIKE Our Bikes are designed to be reliable and easy to use. If, however, you have a problem, these troubleshooting steps may indicate the cause. PROBLEM: The Console does not light up. SOLUTION: 1) Check to make sure the Bike is turned on (switch is located near power supply). -
Page 41: Heart Rate Monitor
TROUBLESHOOTING YOUR HEART RATE MONITOR CHEST STRAP PROBLEM: No pulse reading appears SOLUTION: There may be a poor connection between the contact pads and skin. Remoisten electrodes. SOLUTION: Transmitter is not properly positioned. Reposition the chest strap. SOLUTION: Verify that the distance between transmitter and receiver is not beyond the recommended range of 36 inches. -
Page 42: Common Questions
COMMON BIKE QUESTIONS Q: Are the sounds my Bike makes normal? A: Our Bikes are some of the quietest available because they use belt drives and magnetic resistance. We use the highest grade European bearings and top quality belts to minimize noise. However, because the resistance system itself is so quiet, you will occasionally hear some slight mechanical noises from the drive train. - Page 43 Q: What kind of routine maintenance is required? A: We use sealed bearings throughout our Bikes so lubrication is not needed. The most important maintenance step is to simply wipe your perspiration off the Bike after each use. Q: Will the magnets wear out over time? A: No, we use permanent magnets that will retain their braking force indefinitely in this application.
-
Page 44: Home Warranty
LABOR - ONE YEAR VISION FITNESS shall cover the Labor cost for the repair of the device for a period of one year from the date of original purchase, so long as... - Page 45 WARRANTY REGISTRATION Your warranty card must be completed and sent to VISION FITNESS before a warranty claim can be processed. You may also register via our website at www.visionfitness.com. Inside the enclosed warranty card you will find a customer survey.
-
Page 46: (R2100, R2200 & R2200Hrt)
LIMITED LIGHT COMMERCIAL WARRANTY Up to 3 hours use per day LIGHT COMMERCIAL USES DEFINED VISION FITNESS warrants models R2100, R2200 & R2200HRT for use in light commercial facilities including: Hotels, Resorts, Police & Fire Stations, Apartment Complexes, Corporate Fitness Centers, Hospitals, Rehabilitation and Sports Medicine Clinics, where average use is up to three hours per day. - Page 47 WARRANTY REGISTRATION Your warranty card must be completed and sent to VISION FITNESS before a warranty claim can be processed. You may also register via our website at www.visionfitness.com. Inside the enclosed warranty card you will find a customer survey.
-
Page 48: Fitness Guidelines
DEVELOPING A FITNESS PROGRAM WARM UP When you exercise you need more oxygen to fuel your muscles. This oxygen is carried to the muscles through blood. The increasing demands of exercise will cause increased breathing rate, heart rate, blood flow and blood temperature. - Page 49 FLEXIBILITY Before stretching, take a few minutes to warm-up as stretching a cold muscle can cause injury. When stretching you should start slowly, exhaling as you gently stretch the muscle. Try to hold each stretch for at least 15 to 30 seconds. Don’t bounce when you stretch. Holding a stretch is more effective and less of a risk for injury.
- Page 50 STANDING CALF STRETCH Standing about 3 feet from a wall, take one step forward with your left foot. Place your hands on the wall in front of you. Your elbows slightly bent, shoulders, hips, and feet are pointed directly towards the wall.
- Page 51 EXERCISE GUIDELINES The American Council of Sports Medicine (A.C.S.M.) recommends the following exercise guidelines, for healthy aerobic activity: Frequency: Exercise 3 to 5 days each week. Warm-up: Warm-up 5 to 10 minutes before aerobic activity. Duration: Maintain your exercise intensity for 20 to 60 minutes. Cool Down: Gradually decrease the intensity of your workout, then stretch to cool down during the last 5 to 10 minutes.
-
Page 52: Target Heart Rate
EXERCISE INTENSITY To reap the most cardiovascular benefits from your workout, it is necessary to exercise within a recommended intensity. The three ways to monitor exercise intensity are Target Heart Rate, Perceived Exertion, and the Talk Test. TARGET HEART RATE Target Heart Rate is a percentage of your maximum heart rate. -
Page 53: Rate Of Perceived Exertion
RATE OF PERCEIVED EXERTION Rate of Perceived Exertion (R.P.E.) is one of the easiest ways to monitor exercise intensity. By becoming familiar with the RPE scale, you can continually assess your level of intensity and insure a level of exertion that is comfortable. - Page 54 Longer term goals can lose some of the immediate motivation benefits. Short term goals are easier to achieve. Your VISION FITNESS Product console provides you with several readouts that can be used to record your progress. You can track Distance, Calories or Time.
- Page 55 SAMPLE GOALS: Goal-setting is a popular motivational technique. It’s important to set goals and reward yourself when initiating a new exercise program because you’re attempting to break current patterns and form a new habit. Whether you use this technique or another, make fitness a priority in your life. You can achieve the ultimate reward to yourself: you can establish the exercise habit! Some sample goals may be:...
- Page 64 621-D East Lake Street • P.O. Box 280 • Lake Mills. WI 53551 toll free 1.800.335.4348 • phone 1.920.648.4090 • fax 1.920.648.3373 www.visionfitness.com 2001 Vision Fitness. All Rights Reserved. HRT is a Trademark of Vision Fitness. 4.01 Part #Z22RB43-OM1805PRD OM18.05PRD REV1...