Table of Contents
Advertisement
INSTALLER: THESE INSTRUCTIONS MUST BE CONVEYED TO AND REMAIN WITH THE HOMEOWNER.
CERTIFIED IN CANADA TO CAN/C SA 22.2 #B40.0 - M87 & R91 B140.1 & B140.3 CERTIFIED IN THE UNITED ST ATES TO UL 896 - 199
INSTALLATION AND OPERATION INSTRUCTIONS FOR
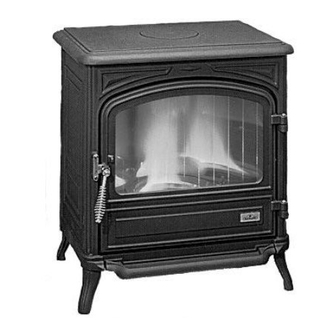
OIL-FIRED CAST IRON STOVE
MODEL OS10
Wolf Steel Ltd., RR#1, 9 NAPOLEON RD.,
Barrie, ON., Canada L4M 4Y8 (705)721-1212
ISO 9002 CERTIFIED
Registered Quality
R-2000
Fax: (705)722-6031
Email: ASK@NAPOLEON.ON.CA
S y s t e m
R
WORLD RECOGNITION FOR QUALITY
Web:
WWW.NAPOLEON.ON.CA
WS-415-108 / 09.29.97
Advertisement
Table of Contents

Summary of Contents for Napoleon OS10
- Page 1 CERTIFIED IN CANADA TO CAN/C SA 22.2 #B40.0 - M87 & R91 B140.1 & B140.3 CERTIFIED IN THE UNITED ST ATES TO UL 896 - 199 INSTALLATION AND OPERATION INSTRUCTIONS FOR OIL-FIRED CAST IRON STOVE MODEL OS10 Wolf Steel Ltd., RR#1, 9 NAPOLEON RD., Barrie, ON., Canada L4M 4Y8 (705)721-1212 ISO 9002 CERTIFIED Registered Quality...
-
Page 2: Table Of Contents
TABLE of CONTENTS PG 2-4 INTRODUCTION PG 7 FUEL SUPPLY Warranty OPERATING INSTRUCTIONS General Information Understanding Your Stove Care of Enamelled Parts Lighting Instructions Care of Glass Shut Down INSTALLATION ADJUSTMENTS Unit Specifications Oil Flow Adjustment Locations and Clearances Chimney Draft Adjustment Safety Precautions Overheating Draft Air... -
Page 3: Warranty
After the first year, NAPOLEON will not be responsible for installation, labour or any other costs or expenses related to the reinstallation of a warranted part, and such expenses are not covered by this warranty. -
Page 4: General Information
If the glass should ever crack while the fire is burning, do not open the door until the fire is out and do not operate the stove again until the glass has been replaced with new borosilicate glass, available from your Napoleon / Wolf Steel Ltd. dealer. DO NOT SUBSTITUTE MATERIALS. Check gaskets and seals regularly. INSTALLATION SPECIFICATIONS 16”... -
Page 5: Locations And Clearances
Please read the installation instructions carefully, prior to installing the oil stove. Your Napoleon oil stove must be installed in accordance with all national and local building code standards. Consult the authority having jurisdiction (such as municipal building department, fire department, fire prevention bureau, etc.) to determine the need to obtain a permit. -
Page 6: Chimney Specifications
THE TOTAL SMOKE PIPE LENGTH SHOULD NOT EXCEED 40% OF THE CHIMNEY HEIGHT ABOVE THE STOVE TO A MAXIMUM HORIZONTAL RUN OF 10 FEET. All smoke pipe must slope upwards at a minimum of 1/4" per foot (6mm/0.3m) and all connections must be tight and secured by three sheet metal screws equally spaced. -
Page 7: Adding Chimney Sections
FUEL SUPPLY The NAPOLEON OS10 cast iron oil burning stove is designed and fitted with a special carburetor to use only a specific category of fuel oil. This fuel oil must be clean and free of any dirt or traces of water. Impurities in the fuel oil can cause a reduced efficiency level. -
Page 8: Operating Instructions
OPERATING INSTRUCTIONS UNDERSTANDING YOUR OIL STOVE 1. Relief Door Plate 2. Main Door 3. Door Handle 4. Catalyser Top 5. Upper Ring 6. Catalyser 7. Burner 8. Flue Collar 9. Reflector 10. Tray 11. Control Knob 12. Draft Regulator 13. De-scaling Lever 14. -
Page 9: Lighting Instructions
LIGHTING INSTRUCTIONS Proceed once installation is complete and all necessary instructions have been followed: When lit for the first time, the stove will emit a slight odour for a few hours. This is a normal temporary condition caused by the curing and the "burn-in" of internal paints and lubricants used in the manufacturing process and will not occur again. -
Page 10: Adjustments
ADJUSTMENTS OIL FLOW ADJUSTMENTS Always burn the stove on low for at least 15 minutes before attempting to adjust the flow. TURN THE SCREW ONLY A QUARTER TURN AT A TIME. WAIT 10 TO 15 MINUTES BETWEEN ADJUST- MENTS TO ALLOW THE FIRE TO STABILISE. The oil flow setting is done by the manufacturer and nor- mally should not require any adjustment. -
Page 11: Maintenance
MAINTENANCE FIGURE 13 WEEKLY - DESCALE Push and pull the de-scaling lever in and out as well as turning slightly at the same time completely two or three times. Push in for normal burner operations or before relighting. EVERY 3 TO 4 MONTHS - CLEAN BURNER Remove all three catalyser components. -
Page 12: Replacements
ORDERING REPLACEMENT PARTS Contact your dealer or the factory for questions concerning prices and policies on replacement parts. Normally all parts can be ordered through your Napoleon dealer or distributor. When ordering replacement parts always give the following information: 1. M &... -
Page 14: Trouble Shooting
TROUBLE SHOOTING SYMPTOM PROBLEM TEST SOLUTION Very cold chimney. Flames extinguish - leave door ajar until fire has caught. No draft established during lighting. Fire extinguishes - fill tank Fuel tank is empty. once firestarter has - open valve Fuel valve is closed. burnt off.


