Table of Contents
Advertisement
Advertisement
Table of Contents

Related Manuals for Kenwood KDC-237


Summary of Contents for Kenwood KDC-237
- Page 1 CD-RECEIVER KDC-237 INSTRUCTION MANUAL © B64-3700-00/00 (E0/E20)
-
Page 2: Table Of Contents
Station Preset Memory Auto Memory Entry Preset Tuning RDS features Traffic Information PTY (Program Type) Program Type preset Changing Language for PTY Function CD player features Playing CD Fast Forwarding and Reversing Track Search Track Repeat Scan Play Random Play English... -
Page 3: Safety Precautions
CDs to play. In such a situation, remove the disc and wait for the condensation to evaporate. If the unit still does not operate normally after a while, consult your Kenwood dealer. English... -
Page 4: Notes
• If you experience problems during installation, consult your Kenwood dealer. • When you purchase optional accessories, check with your Kenwood dealer to make sure that they work with your model and in your area. • The characters which can be displayed by this unit are A-Z 0-9 @ "... -
Page 5: Laser Product
Handling CDs • Do not touch the recording surface of the CD. • Do not stick tape etc. on the CD, or use a CD with tape stuck on it. • Do not use disc type accessories. • Clean from the center of the disc and move outward. -
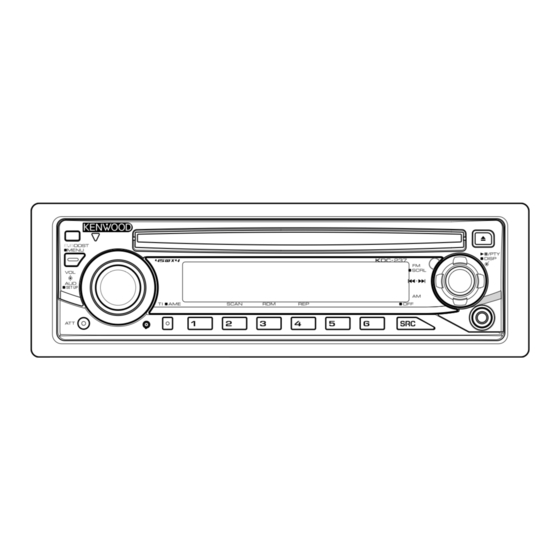
Page 6: General Features
General features Release button ATT indicator Power Turning ON the Power Press the [SRC] button. Turning OFF the Power Press the [SRC] button for at least 1 second. Selecting the Source Press the [SRC] button. Source required Tuner Auxiliary input* Standby (Illumination only mode) * An equipment such as a portable audio player can be connected to the auxiliary input terminal using a... -
Page 7: Attenuator
Attenuator Turning the volume down quickly. Press the [ATT] button. Each time you press the button, the Attenuator turns ON and OFF. When the Attenuator is ON, the "ATT" indicator blinks. Audio Control Select the source to adjust Press the [SRC] button. Enter Audio Control mode Press the [VOL] knob. -
Page 8: Speaker Setting
General features Speaker Setting Fine-tuning so that the System Q value is optimal when setting the speaker type. Enter Standby Press the [SRC] button. Select the "STANDBY" display. Enter Speaker Setting mode Press the [VOL] knob. Select the Speaker type Turn the [VOL] knob. -
Page 9: Tel Mute
TEL Mute The audio system automatically mutes when a call comes in. When a call comes in "CALL" is displayed. The audio system pauses. Listening to the audio during a call Press the [SRC] button. The "CALL" display disappears and the audio system comes back ON. -
Page 10: Tuner Features
Tuner features Band display Tuning Selecting the station. Select tuner source Press the [SRC] button. Select the "TUNER" display. Select the band Push the Control knob towards [FM] or [AM]. Each time you push the knob toward [FM], it switches between the FM1, FM2, and FM3 bands. Tune up or down band Push the Control knob towards [4] or [¢]. -
Page 11: Auto Memory Entry
Auto Memory Entry Putting stations with good reception in the memory automatically. Select the band for Auto Memory Entry Push the Control knob towards [FM] or [AM]. Open Auto Memory Entry Press the [AME] button for at least 2 seconds. "A-MEMORY"... -
Page 12: Rds Features
RDS features TI indicator Traffic Information Changing to traffic information automatically when a traffic bulletin starts even when you are not listening to the radio. Press the [TI] button. Each time you press the button, the Traffic information function turns ON and OFF. When traffic information is ON, "TI"... -
Page 13: Pty (Program Type)
PTY (Program Type) Selecting the Program Type and searching for a station. Enter PTY mode Press the Control knob. During PTY mode the "PTY" indicator is ON. ⁄ • This function cannot be used during a traffic bulletin or AM reception. Select the Program Type Push the Control knob towards [FM] or [AM]. -
Page 14: Changing Language For Pty Function
RDS features Changing Language for PTY Function Selecting the Program Type display language. Enter PTY mode Refer to <PTY (Program Type)> (page 13). Enter Changing Language mode Press the [TI] button. Select the language Push the Control knob towards [FM] or [AM]. Each time you push the knob, the language alternates between the languages shown in the table below. -
Page 15: Cd Player Features
CD player features Playing CD When a disc is inserted Press the [SRC] button. Select the "CD" display. ⁄ • When a CD is inserted, the "IN" indicator is ON. Pause and play Press the Control knob. Each time you press the knob, the audio pauses or plays. -
Page 16: Track Search
CD player features Track Search Selecting the song you want to hear. Push the Control knob towards [4] or [¢]. Track Repeat Replaying the song you are listening to. Press the [REP] button. Each time you press the button, the Track Repeat turns ON or OFF. -
Page 17: Menu System
Menu system RDS indicator Menu System Setting beep sound during operation, etc. functions. The Menu system basic operation method is explained here. The reference for the Menu items and their setting content is after this operation explanation. Enter Menu mode Press the [MENU] button for at least 1 second. -
Page 18: Manual Clock Adjustment
Menu system In Standby mode Manual Clock Adjustment ⁄ • You can do this adjustment when the <Synchronize Clock> (page 18) is set as OFF. Select Clock Adjustment mode Push the Control knob towards [FM] or [AM]. Select the "CLK ADJ" display. Enter Clock Adjust mode Press the Control knob for at least 1 second. -
Page 19: Local Seek
In Tuner mode Local Seek Only stations whose reception is good are searched in auto seek tuning. Display Setting "LO.S OFF" The local seek function is OFF. "LO.S ON" The local seek function is ON. In Tuner mode Tuning Mode Sets the tuning mode. -
Page 20: Auxiliary Input Display Setting
Menu system Auxiliary Input Display Setting Selecting the display when alternating to Auxiliary input source. Select Auxiliary input source Press the [SRC] button. Select the "AUX" display. Enter Menu mode Press the [MENU] button for at least 1 second. "MENU" is displayed. Select Auxiliary input display setting mode Push the Control knob towards [FM] or [AM]. -
Page 21: Accessories/Installation Procedure
...1 • If your car is not prepared for this special connection- system, consult your Kenwood dealer. • Only use antenna conversion adapters (ISO-JASO) when the antenna cord has an ISO plug. • Make sure that all wire connections are securely made by ...2... -
Page 22: Connecting Wires To Terminals
Connect to the terminal that is grounded when either the telephone rings or during conversation. ⁄ To connect the Kenwood navigation system, consult your navigation manual. Connect either to the power control terminal when using the optional power amplifier, or to the antenna control terminal in the vehicle. -
Page 23: Connecting The Iso Connector
Connector Function Guide Pin Numbers for Cable Colour ISO Connectors External Power Connector Yellow Blue/White Black Speaker Connector Purple Purple/Black Gray Gray/Black White White/Black Green Green/Black 2WARNING Functions Connecting the ISO Connector The pin arrangement for the ISO connectors depends on the type of vehicle you drive. -
Page 24: Installation
Installation Installation Metal mounting strap (commercially available) Firewall or metal support Bend the tabs of the mounting sleeve with a screwdriver or similar utensil and attach it in place. Self-tapping screw (commercially available) Screw (M4X8) (commercially available) ⁄ • Make sure that the unit is installed securely in place. If the unit is unstable, it may malfunction (for example, the sound may skip). -
Page 25: Troubleshooting Guide
➪ Press the reset button on the unit. If the "E-99" code does not disappear, consult your nearest service center. IN (Blink): The CD player section is not operating properly. ➪ Reinsert the CD. If the CD cannot be ejected or the display continues to flash... -
Page 26: Specifications
: 25 μV LW tuner section Frequency range : 153 kHz – 281 kHz Usable sensitivity (S/N = 20dB) : 45 μV CD player section Laser diode : GaAlAs Digital filter (D/A) : 8 Times Over Sampling D/A Converter : 1 Bit Spindle speed : 500 –...