
Related Manuals for Memorex Mi4390


Summary of Contents for Memorex Mi4390
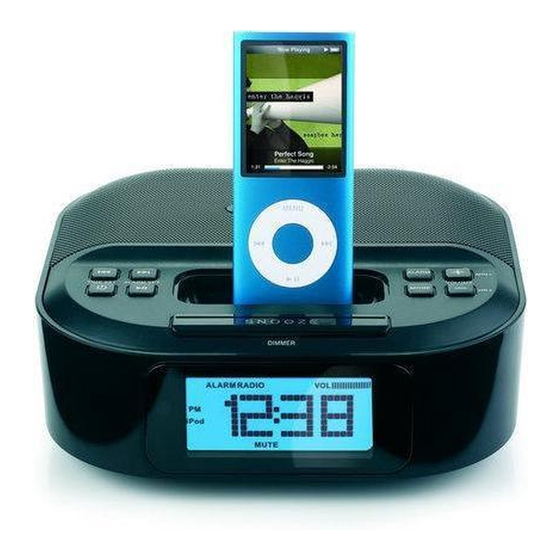
- Page 1 Clock Radio Dual Alarm Rise and Shine User Guide Please read these instructions completely, before operating this product. Guía del usario Por favor lea toda las instruciones antes de tratar de usar este producto. memorex.com Mi4390...
- Page 2 SAFETY PRECAUTIONS CAUTION RISK OF ELECTRIC SHOCK DO NOT OPEN CAUTION: TO REDUCE THE RISK OF ELECTRIC SHOCK, DO NOT REMOVE COVER (OR BACK). NO USER-SERVICEABLE PARTS INSIDE. REFER SERVICING TO QUALIFIED SERVICE PERSONNEL. DANGEROUS VOLTAGE: The lightning flash with arrowhead symbol within an equilateral triangle is intended to alert the user to the presence of uninsulated dangerous voltage within the product’s enclosure that may be of sufficient magnitude to...
- Page 3 SAFETY PRECAUTIONS INFORMATION: This equipment complies with Class B digital device regulations. This equipment generates, uses and can radiate radio frequency energy and, if not installed and used in accordance with the instructions, may cause harmful interference to radio communications. However, there is no guarantee that interference will not occur in a particular installation.
- Page 4 Dear Customer: Selecting fine audio equipment such as the unit you’ve just purchased is only the start of your musical enjoyment. Now it’s time to consider how you can maximize the fun and excitement your equipment offers. This manufacturer and the Electronic Industries Association’s Consumer Electronics Group want you to get the most out of your equipment by playing it at a safe level.
- Page 5 LOCATION OF CONTROLS FRONT/TOP 1. TIME SET/Tune/Skip/ 9. Power Button Search Down o Button 10. Play/Pause (®p) Button 2. ALARM SET/Tune/Skip/ 11. Remote Sensor Search Up n Button 12. SNOOZE/DIMMER Button 3. FM Wire Antenna (Rear of 13. Display Unit) 14.
- Page 6 LOCATION OF CONTROLS (CONTINUED) REMOTE 1. Power Button 7. MODE Button 2. VOL (Volume) –/HR 8. VOL (Volume) +/MIN (Hour) + Button (Minute) + Button 3. TIME SET/Tune/Skip/ 9. ALARM SET/Tune/Skip/ Search Down o Button Search Up n Button 4. Play/Pause (®p) Button 10.
- Page 7 POWER SOURCE AC CONNECTION Insert the small end of the AC adapter into the DC IN jack (located on the rear of the unit). Connect the other end to a wall outlet having 120V AC, 60 Hz. AC Adapter, DC 9V Z NOTES: •...
- Page 8 POWER SOURCE (CONTINUED) REMOTE BATTERY INSTALLATION Remove the Battery Compartment by pressing in on the tab and then sliding the compartment out. Install a CR2025 battery by popping it in through the back of the compartment, paying attention to the polarity diagram in the compartment (positive side up).
- Page 9 INSERTING AN iPod I n s e r t t h e U n i v e r s a l D o c k Slide the iPod (A) into the included with your iPod (A) into Universal Dock (B) (as shown). the iPod compartment (B) (as G e n t l y p u s h d o w n s o t h e shown), making sure the tabs...
- Page 10 OPERATION USING AN iPod WITH THIS UNIT With an iPod connected (see previous Y o u c a n o p e r a t e t h e i P o d page), if this unit is not already on, using its own controls, as per turn this unit on by pressing the its owner’s manual, or you can...
-
Page 11: Adjusting The Volume
OPERATION (CONTINUED) ADJUSTING THE VOLUME To mute the sound: To adjust the main volume: Press the MUTE button once Press the VOL +/MIN + 1 or VOL to mute the sound and again to –/HR + 2 button to increase or resume previous volume level. - Page 12 OPERATION (CONTINUED) USING THE FM RADIO Turn this unit on by pressing the Repeatedly press the MODE button Power button. to select the FM Radio mode; “RADIO” will appear in the display. NOTES: • When a station is tuned, after three seconds, the radio frequency will disappear and the actual time will reappear in the display.
- Page 13 OPERATION (CONTINUED) TO SET OR RESET THE ACTUAL TIME Follow the instructions below to manually set the time. Press the VOLUME +/MIN + With the power off, press the TIME button 1 to set the Minute and SET/Tune/Skip/Search Down o the VOLUME –/HR + button 2 to button;...
- Page 14 OPERATION (CONTINUED) TO SET OR RESET THE ALARM TIME With the power off, press the Press the VOLUME +/MIN + ALARM SET/Tune/Skip/Search button 1 to set the alarm minute Up n button; the Alarm time will and the VOLUME –/HR + button blink in the display.
- Page 15 OPERATION (CONTINUED) If set to Radio (in Step 4), then If set to iPod (in Step 4), insert the iPod as shown on page 8. Select your while the frequency is blinking, desired track and then make sure set the frequency using the Tune/ both your iPod and this unit are turned Skip/Search Down o 1 or Up n off.
- Page 16 OPERATION (CONTINUED) TO SHUT THE ALARM OFF Press the Power button 1 or ALARM button 2 and the alarm will turn off and be set for the next day. To NOT set the alarm for the next day, press the ALARM button 2 repeatedly to select Alarm Off (no indicator in the display).
- Page 17 OPERATION (CONTINUED) SLEEP DIMMER Press the DIMMER button on the With the unit in the LINE IN , Radio or iPod mode, press the SLEEP button remote (shown) or the SNOOZE/ on the remote; “00” will appear in the Dimmer button on the main unit display for about five seconds.
- Page 18 TROUBLESHOOTING GUIDE If you experience a problem with this unit, check the chart below before calling for service. SYMPTOM CAUSE SOLUTION No sound. Volume is set to Increase volume. minimum. FM: no sound. Power is not on or FM Press the Power button, mode is not selected.
- Page 19 Frequency Range (FM) ....... 87.5–108 MHz Specifications are subject to change without notice. FOR ADDITIONAL SET-UP OR OPERATING ASSISTANCE, PLEASE VISIT OUR WEBSITE AT: WWW.MEMOREX.COM FOR CONSUMER REPLACEABLE PART(S), SEE PART NUMBER(S) ON PAGES 4 AND 5 AND THEN CONTACT FOX INTERNATIONAL AT: 1-800-321-6993.
- Page 20 Imation Corp. and its af liates. Imation Electronic Products, Una division de Imation Enterprises Corp., Weston, Florida. Impreso en China memorex.com Memorex y el logo de Memorex son una marca registrada de Imation Corp. y sus empresas a liadas.