Table of Contents
Advertisement
Advertisement
Table of Contents

Related Manuals for Ryobi R2-PWWDV-G


Summary of Contents for Ryobi R2-PWWDV-G
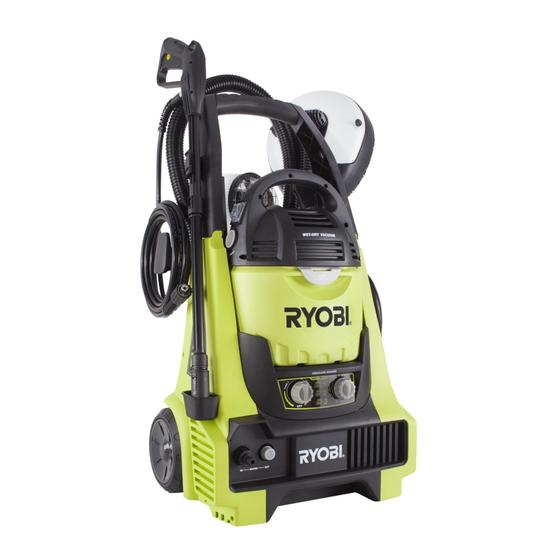
- Page 1 ORIGINAL INSTRUCTIONS High-Pressure Cleaner and Wet/Dry Vacuum R2-PWWDV-G...
-
Page 2: Table Of Contents
Contents 1 Overview ............4 4 High-pressure cleaning ......22 1.1 Scope of delivery .............. 4 .1 Connecting attachments to pistol ......... 22 1.2 High-pressure cleaner in detail ........6 4.2 Filling the cleaning agent tanks (only when required) 24 1.3 Dry/wet vacuum cleaner in detail ........8 4.3 Selecting location of installation and area of use ..25 1.4 Pistol in detail ..............9 4.4 Connecting the high-pressure hose ......25... - Page 3 Contents 8 Transport and storage ........ 42 8.1 Transporting ..............42 8.2 Storage ................42 9 Maintaining the appliance ......43 9.1 Maintaining the filter screen of the high-pressure cleaner ............43 9.2 Replace sealing rings ............44 9.3 Cleaning the lance ............44 9.4 Cleaning/changing the motor protection filter of the vac ................45 9.5 Cleaning the housing ............47...
-
Page 4: Overview
Machine Overview 1.1 Scope of delivery High-pressure cleaner, Chapter 1.2, Operating manual with cleaning needle “High-pressure cleaner in detail“ stuck to it 2 Wet/dry vacuum cleaner, Chapter 1.3, 6 Plastic bag with four replacement “Dry/wet vacuum cleaner in detail“ sealing rings Pistol, Chapter 1.4, “Pistol in detail“... - Page 5 Machine Overview Accessories console Quick connector adapter 2 Universal nozzle 10 Plastic bag with ten self-cutting screws Furniture brush 11 Lance 4 Crevice nozzle 12 Turbo lance Upper pistol holder 13 Roto-brush 6 Lower pistol holder 14 Patio cleaner extension Suction hose 15 Patio cleaner 8 Filter screen...
-
Page 6: High-Pressure Cleaner In Detail
Machine Overview 1.2 High-pressure cleaner in detail On/Off switch with three positions: Thread for the high-pressure hose 2 Thread for the adapter of the quick connector Lower pistol holder 8 Continuously adjustable control knob 4 Upper pistol holder for adding cleaning agent, Chapter 4.9, Braces of the carrying handle “Applying cleaning agent“... - Page 7 Machine Overview Accessories console 2 Filler cap Cleaning agent hose 4 Service socket Cleaning agent tank 6 Electricity cable with device plug...
-
Page 8: Dry/Wet Vacuum Cleaner In Detail
Machine Overview 1.3 Dry/wet vacuum cleaner in detail Carrying handle Connection nozzle ‘BLOWER’ 2 On/Off switch 8 Electricity cable with device plug Connection piece ‘VACUUM’ Rubber band 4 Motor unit 10 Motor protection filter with marking Motor cage 11 Dirt tank 6 Retaining clip... -
Page 9: Pistol In Detail
Machine Overview 1.4 Pistol in detail Nozzle with view window to connect the attachments 2 Pistol Child protection device 4 Spray button Thread to connect the high-pressure hose... -
Page 10: Additional Things You Have To Provide
Machine Overview 1.5 Additional things you have to provide Service water connection Only if required: 2 Garden hose 6 Funnel (for cleaning agent) Quick connector Cleaning agent 4 Slot-head or Philips screwdriver Open-end spanner (size: 17) - Page 11 Machine Overview...
-
Page 12: Safety Instructions
General Safety Information 2.1 Concerning the operating manual Read this operating manual carefully before you start working with the appliance. Keep the operating manual in a safe place. Include the operating manual if you pass the appliance on to someone else. -
Page 13: Concerning The Power Supply
General Safety Information 2.3 Concerning the power supply The appliance is operated with electrical power which means there is always a risk of electric shock. Consequently, particularly comply with the following instructions: Never touch the appliance plug with wet hands. Always pull directly at the appliance plug if you want to disconnect the appliance from the mains. -
Page 14: Concerning The Jet Of High-Pressure Produced
General Safety Information 2.4 Concerning the jet of high-pressure produced The high-pressure cleaner cleans using a jet of high pressure. This could indirectly or directly lead to injury. So please observe the following: Never direct the high-pressure jet at persons or animals. Never point the high-pressure jet at electric or electronic parts, especially not sockets. -
Page 15: Regarding How To Proceed In The Case Of A Defective Appliance
General Safety Information 2.6 Regarding how to proceed in the case of a defective appliance Turn off the appliance immediately if you notice strange sounds during operation or the high-pressure jet stutters or comes out in bursts. Never use a defective appliance or operate an appliance with a defective power cord. If the power cord of the appliance is damaged, it must be replaced by the manufacturer, their authorised service representative, or a similarly qualified person to avoid danger. -
Page 16: Concerning Predicted Misuse
General Safety Information Intended use of the wet/dry vacuum cleaner Only use the wet/dry vacuum cleaner without the motor protection filter to vacuum up dirty water, Chapter 5, “Wet vacuuming“. Only use the wet/dry vacuum cleaner with the motor protection filter inserted to vacuum up dry dirt, Chapter 6, “Dry vacuum cleaning“. -
Page 17: Concerning The Safety Equipment Installed
General Safety Information CAUTION: Using Water Blasters on any asbestos containing material (including asbestos roofs) is illegal. Never clean the high-pressure cleaner yourself with the high-pressure jet. Never block the spray button to prevent it from snapping back to the neutral position as soon as it is released. Never operate the high-pressure cleaner without an attachment being attached to the pistol. -
Page 18: Concerning The Personal Protective Equipment Required
General Safety Information 2.10 Concerning the personal protective equipment required When using the high-pressure cleaner, the following personal protective equipment has to be worn: - Face protection or safety goggles with side protection - Hearing protection - Water-resistant protective work suit - Slip-safe safety shoes that protect feet from the high-pressure jet in emergencies When using the wet/dry vacuum cleaner as a blower the following protective equipment has to be worn:... -
Page 19: Unpacking And Assembling
Unpacking And Assembling 3.1 Unpacking 1. Unpack the appliance and all its accessories. WARNING: Danger of suffocation! Small parts such as screws are delivered with the appliance. Keep these parts away from children at all times as children could swallow them and suffocate. WARNING: Danger of suffocation! The appliance is packaged in plastic film. -
Page 20: Assembly
Unpacking And Assembling 3.2 Assembly WARNING: Danger of injury! Only assemble the appliance if it is not connected to the power supply. Otherwise the appliance could start up accidentally and cause injury. 1. Mount the carrying handle by screwing in at the handle 2 of the screws delivered into each brace (Fig. - Page 21 Unpacking And Assembling 7. Push the accessories console into the recesses on the back of the high-pressure cleaner (Fig. 13). Screw on tightly with one of the screws provided (Fig. 13). NOTE: Tighten the screws by hand. 8. Mount the high-pressure hose to 9.
-
Page 22: High-Pressure Cleaning
High-pressure cleaning 4.1 Connecting attachments to pistol WARNING: Danger of injury! Mount the attachments only if the child protection device of the pistol is in the ‘locked’ position (Fig. 16/magnifier). Otherwise, water could exit under high pressure and cause injury. 1. - Page 23 High-pressure cleaning All attachments are attached to the pistol in the same way: 1. Guide the lance/brush into the pipe connection of the pistol (Fig. 17/a). 2. Ensure that the lock appears in the window as shown (Fig. 17/b). 3. Rotate the lance/brush slightly and stop pushing as soon as the lock in the window locks into place as shown. The lock snaps into place (Fig.
-
Page 24: Filling The Cleaning Agent Tanks (Only When Required)
High-pressure cleaning 4.2 Filling the cleaning agent tanks (only when required) CAUTION: Danger of material damage! Only use cleaning agents which are expressly suited for use with high-pressure cleaners. Domestic cleaners, acids, soaps, bleaches, thinners, solvents, alcohol, flammable substances, mineral cleaning agents and cleaning agents containing solid matter could damage the integrated pump. -
Page 25: Selecting Location Of Installation And Area Of Use
High-pressure cleaning 4.3 Selecting location of installation and area of use WARNING: Danger of injury for others! Ensure that there is no one else in the working area. Always work alone! WARNING: Danger of electric shock! Never submerge the appliance in water. Never put it in pools and the like. -
Page 26: Connecting A Garden Hose (Not In The Scope Of Delivery)
High-pressure cleaning 4.5 Connecting a garden hose (not in the scope of delivery) CAUTION: Danger of material damage! Only connect the high-pressure hose to a garden hose that is connected to a service water line. Do not vacuum water form pools, barrels, containers and the like. On the one hand, the water quality would otherwise be insufficient, on the other, it avoids the danger of the pump running dry or getting blocked. -
Page 27: Connecting The Appliance Plug To The Power Supply
High-pressure cleaning 4.6 Connecting the appliance plug to the power supply WARNING: Danger of electric shock! Even if the socket is equipped with the following safety equipment, the following rules concerning electricity use must be complied with to minimise the risk of an electric shock. -
Page 28: High-Pressure Cleaning With The Lance
High-pressure cleaning 4.7 High-pressure cleaning with the lance WARNING: Danger of injury! Keep aware! Even if using the appliance seems easy to you or you are using the high-pressure cleaner from the nth time, proceed carefully and comply with the following rules when using the appliance. - Page 29 High-pressure cleaning 4. Ensure that you are standing securely (Fig. 25). 5. Unlock the child safety by pushing it in (Fig. 26). 6. Prepare yourself for the recoil of the pistol when you press the spray button. 7. Point the pistol and attachment towards the surface to be cleaned. Choose a large distance to begin with. 8.
- Page 30 High-pressure cleaning 9. Carefully set the spray angle by rotating the spray head of the lance (Fig. 28). CAUTION: To take care of the material, we recommend not concentrating the jet of high pressure right from the start. Instead begin with a wide angle and only concentrate the jet if it does not damage the surface.
-
Page 31: High-Pressure Cleaning With The Brushes (Optional)
High-pressure cleaning 4.8 High-pressure cleaning with the brushes (optional) CAUTION: Danger of material damage! Consider that despite the soft brushes, grains of sand and similar material could cause scratches. Generally refrain from high pressure cleaning sensitive surfaces! NOTE: If you soak the dirt before high-pressure cleaning, the high-pressure cleaning is faster. The brushes with their soft bristles are ideal for the high-pressuring cleaning of: Proceed as follows to use the brushes efficiently: 1. -
Page 32: Applying Cleaning Agent
High-pressure cleaning 4.9 Applying cleaning agent CAUTION: Protect the environment! Always only use the quantity of cleaning agent that you actually require. NOTE: If you soak the dirt with cleaning agent before high-pressure cleaning, cleaning is faster. Apply cleaning agent over a broad area (to soften dirt before cleaning): 1. -
Page 33: After High-Pressure Cleaning
High-pressure cleaning 4.10 After high-pressure cleaning WARNING: Danger of injury due to pressure reserves! Always keep to this action sequence so that pressure reserves can be reduced purposefully. You can avoid injuries in this way. CAUTION: Possible device damage! Always keep to this sequence of actions so that as little water as possible remains in the appliance. -
Page 34: Wet Vacuuming
Wet Vacuuming 5.1 Before wet vacuuming So that you can use the wet/dry vacuum cleaner, the motor protection filter is not permitted to be attached. Therefore, proceed as follows to ensure that the motor protection filter is not installed or to remove it: 1. -
Page 35: Selecting And Fitting Suction Nozzle
Wet Vacuuming 5.2 Selecting and fitting suction nozzle NOTE: If required, you can also use the suction tube without any suction nozzle. There are three suction nozzles delivered that can be used for certain cleaning tasks: have sensitive surfaces. of dirt when wet and dry vacuuming. from hard to reach places. -
Page 36: Switching On And Wet Vacuuming
Wet Vacuuming 5.3 Switching on and wet vacuuming WARNING: Danger of injury! A damaged or incompletely installed appliance must never be used. Check the wet/dry vacuum cleaner and the power cord before each use. 1. If required, put on a suction nozzle, Chapter 5.2, “Selecting and fitting suction nozzle“. 2. -
Page 37: Switching Off And Emptying The Dirt Tank
Wet Vacuuming 5.4 Switching off and emptying the dirt tank WARNING: Danger of injury! Switch off the appliance and pull the appliance plug from the socket before disassembling the appliance. has triggered. 1. Switch the appliance off and pull the appliance plug out of the socket. 2. -
Page 38: Dry Vacuum Cleaning
Dry Vacuum Cleaning 6.1 Before dry vacuum cleaning So that you can use the wet/dry vacuum cleaner as a dry vacuum cleaner, the motor protection filter must be attached. Therefore, proceed as follows to ensure that the motor protection filter is installed correctly. 1. -
Page 39: Switching On And Dry Vacuuming
Dry Vacuum Cleaning 6.2 Switching on and dry vacuuming WARNING: Danger of injury! A damaged or incompletely installed appliance must never be used. Check the device and its power cord before every use. WARNING: Danger of injury! Be particularly careful when vacuuming stairs. Hold the appliance by hand when vacuuming stairs. -
Page 40: After Dry Vacuum Cleaning
Dry Vacuum Cleaning 6.3 After dry vacuum cleaning 1. Switch off the wet/dry vacuum cleaner with the on/off switch (Fig. 47) and pull the plug from the mains socket. 2. Empty the dirt tank, Chapter 5.4, “Switching off and emptying the dirt tank“. -
Page 41: Using The Vacuum Cleaner As A Blower
Using the vacuum cleaner as a blower 7.1 Re-equipping from a dry vacuum cleaner to a blower NOTE: If you want to use the vacuum cleaner as a blower, the motor protection filter has to be installed. If you are unsure as to whether the motor protection filter is actually installed, proceed as described in Chapter 6.1, “Before dry vacuum cleaning“. -
Page 42: Transport And Storage
Transport and storage 8.1 Transporting behind you (Fig. 50). WARNING: Danger of injury! Do not carry the high-pressure cleaner. With the integrated vacuum cleaner and full cleaning agent tanks it can reach a considerable weight (> 15 kg). There is the danger of underestimating its weight and injuring yourself. -
Page 43: Maintaining The Appliance
Maintaining the appliance 9.1 Maintaining the filter screen of the high-pressure cleaner WARNING: Danger of injury! Switch the appliance off and pull the appliance plug out of the socket. Release pressure reserves by holding down the spray button until no more water comes out. You can avoid injuries in this way. -
Page 44: Replace Sealing Rings
Maintaining the appliance 9.2 Replace sealing rings The lance, both brushes and the adapter of the quick coupling each have a sealing ring (Fig. 55). If the sealing ring is obviously damaged, then it has to be replaced. Four sealing rings are delivered for this purpose. Proceed as follows to replace the sealing rings: 1. -
Page 45: Cleaning/Changing The Motor Protection Filter Of The Vac
Maintaining the appliance 9.4 Cleaning/changing the motor protection filter of the vac WARNING: Danger of injury! Before you clean or maintain the appliance, switch off the appliance and pull the appliance plug from the socket. Proceed as follows to ensure that the motor protection filter is always clean and intact: 1. - Page 46 Maintaining the appliance water comes out. If you want to dry vacuum after this, then allow the motor protection filter to dry for at least 24 hours at room temperature. CAUTION: The filter can be washed, but it is unsuitable for washing machines. Only put the filter back in for dry vacuuming once it is completely dry.
-
Page 47: Cleaning The Housing
Maintaining the appliance 9.5 Cleaning the housing WARNING: Danger of injury! Before you clean or maintain the appliance, switch off the appliance and pull the appliance plug from the socket. CAUTION: Do not use cleaning or scouring agents, solvents or alcohol, as these might damage the appliance’s housing. -
Page 48: Correcting Problems
Correcting Problems WARNING: Danger of injury! Never use a defective appliance! Always switch off the appliance and disconnect it from the mains before starting troubleshooting. Before contacting or even sending the appliance to us, use the following table to check whether you can correct the problem yourself. - Page 49 Correcting Problems Problem Possible cause Solution A jet of water does come out but it The diameter of your garden hose Choose a garden hose with a larger is too weak. is too small. diameter. See the information in Chapter 4.5, “Connecting a garden hose (not in the scope of delivery)“...
-
Page 50: Correcting Problems At The Wet/Dry Vacuum Cleaner
Correcting Problems 10.2 Correcting problems at the wet/dry vacuum cleaner Problem Possible cause Solution Appliance suddenly sets suction The integrated overheating Switch the appliance off and pull power back to minimum. protection has tripped (possibly due the appliance plug out of the to blocked suction channels, filters, socket. -
Page 51: Accessories, Spare Parts And Reference Sources
Correcting Problems 10.3 Accessories, spare parts and reference sources WARNING: Danger of injury! High-pressure hoses, fittings and couplings are important for appliance safety. Only use original high-pressure hoses, fittings and couplings obtained from us. Otherwise, water under high pressure could come out of high-pressure hoses, fittings and couplings unpredictably and injure you. WARNING: Danger of injury! The appliance contains no components that are permitted to be repaired by the owner himself. -
Page 52: Disposing Of The Appliance
Correcting Problems 10.4 Disposing of the appliance Dispose of the appliance in compliance with the environmental protection laws of your country. Electrical waste may not be disposed of together with domestic waste. Use local old-appliance collection points instead. The filter is made from environmentally friendly materials. You can dispose of it — unlike the appliance —... -
Page 53: Technical Information
Technical Information 11.1 Technical data of the high-pressure cleaner Type of appliance High-pressure cleaner Appliance name Ryobi High-Pressure Cleaner Model number R2-1PW Rated output High-pressure cleaner: 1800 W Service socket: max. 1200 W Degree of protection IPX5 Protection class Dimensions... - Page 54 Technical Information 11.2 Technical data of the wet/dry vacuum cleaner Type of appliance Wet/dry vacuum cleaner Appliance name Ryobi Wet/Dry Vacuum Cleaner Model number R2-2WDV Rated output 800 W Degree of protection IPX5 Protection class Dimensions 400 mm x 300 mm x 230 mm Total weight (empty) 3.0 kg...
- Page 55 Other Information Subject to technical change without notice. Class II Regulatory Indoor Read Structure Compliance Mark Instructions (RCM) Caution! Use Hearing Keep Explosive Hazard Do Not Protection Spray Waste electrical products should not be disposed of with household waste. Please recycle where facilities exist. Check with your Local Authority or retailer for recycling advice.
- Page 56 Notes...
- Page 57 Techtronic Industries (Australia) Pty. Ltd. Level 1, 660 Doncaster Road Doncaster, VIC 3108, Australia Techtronic Industries New Zealand Ltd. 18-26 Amelia Earhart Avenue Mangere, Auckland 2022, New Zealand...