Canon imagePRESS C800 Series Operation Manual
Hide thumbs
Also See for imagePRESS C800 Series:
- Quick manual (312 pages) ,
- Troubleshooting manual (256 pages) ,
- Technical & service manual (168 pages)
Table of Contents
Advertisement
Quick Links
Advertisement
Table of Contents

Related Manuals for Canon imagePRESS C800 Series


Summary of Contents for Canon imagePRESS C800 Series
-
Page 1: Operation Guide
Operation guide i m a g e P R E S S C 8 0 0 Series... - Page 2 No part of this publication may be reproduced, transmitted, transcribed, stored in a retrieval system, or translated into any language or computer language in any form or by any means, electronic, mechanical, magnetic, optical, chemical, manual or otherwise, without the prior written permission of Canon Inc. Edition 2014-10...
-
Page 3: Table Of Contents
Scan jobs..............................Use the automatic document feeder to copy or scan................Use the glass plate to copy or scan......................61 Make a copy..............................63 Make a scan.............................. Use templates for recurring jobs......................Copy subsets (combined copying)......................Scan subsets (combined scanning)......................68 imagePRESS C800 Series... - Page 4 Check and prepare envelopes before loading..................Check and prepare transparencies before loading................Load media into the internal paper trays.....................135 Load media into the paper module...................... Load media into the bulk paper module....................Load media into the special feeder...................... imagePRESS C800 Series...
- Page 5 Clean the automatic document feeder scanning area................ Clean the scanning sensors........................Clean the automatic document feeder rollers..................Clean the inside of the print module....................Clean the corona assembly wires......................222 Clean the main unit rollers........................Refresh the fixing belt..........................224 Enable Remote Service..........................imagePRESS C800 Series...
- Page 6 Supported media types for paper input optionals................Supported media sizes by paper input optional................. Supported envelope types by paper input optional................Settings Editor.............................. Settings Editor specifications........................293 Settings Editor media attributes......................Settings Editor settings and information..................... Index..........................305 imagePRESS C800 Series...
-
Page 7: Chapter 1 Preface
Chapter 1 Preface... -
Page 8: Disclaimers
Disclaimers The information in this document is subject to change without notice. CANON INC. MAKES NO WARRANTY OF ANY KIND WITH REGARD TO THIS MATERIAL, EITHER EXPRESS OR IMPLIED, EXCEPT AS PROVIDED HEREIN, INCLUDING WITHOUT LIMITATION, THEREOF, WARRANTIES AS TO MARKETABILITY, MERCHANTABILITY, FITNESS FOR A PARTICULAR PURPOSE OF USE OR NON-INFRINGEMENT. -
Page 9: Trademarks
Copyright © 2007 -08 Adobe Systems Incorporated. All rights reserved. Protected by U.S. Patents 5,737,599; 5,781,785; 5,819,301; 5,929,866; 5,943,063; 6,073,148; 6,515,763; 6,639,593; 6,754,382; 7,046,403; 7,213,269; 7,242,415; Patents pending in the U.S. and other countries. Chapter 1 - Preface imagePRESS C800 Series... - Page 10 Adobe Systems Incorporated in the United States and/or other countries. All other trademarks are the property of their respective owners. Other product and company names herein may be the trademarks of their respective owners. Chapter 1 - Preface imagePRESS C800 Series...
-
Page 11: Notes For The Reader
Notes for the reader Notes for the reader Introduction This manual helps you to use the imagePRESS C800 Series. The manual contains a description of the product and guidelines to use and operate the imagePRESS C800 Series. Definition Attention-Getters Parts of this manual require your special attention. These parts can provide the following: •... -
Page 12: Installation Precautions
In addition, do not install this machine where it exhausts directly onto a person. • Avoid locations where a considerable amount of dust accumulates. • Avoid locations where ammonia gas is emitted. Chapter 1 - Preface imagePRESS C800 Series... - Page 13 • Contact an authorized Canon dealer if communication is unavailable. Depending on your locale or your telephone connection, you may be unable to perform data communication.
- Page 14 Moving the machine If you intend to move the machine, even to a location on the same floor of your building, contact your local authorized Canon dealer beforehand. Do not attempt to move the machine yourself. Provide Adequate Installation Space Provide enough space on each side of the machine for unrestricted operation.
- Page 15 6,445 mm / 253 3/4” *2 Make sure you provide at least 100 mm / 4" of space if none of the Paper Folding Unit-F1, Professional Puncher-C1, Document Insertion Unit-M1, or Multi-Drawer Paper Deck-A1. are attached. Chapter 1 - Preface imagePRESS C800 Series...
-
Page 16: Handling Precautions
If there is smoke, or unusual noise, immediately turn the main power switch OFF, disconnect the power cord from the power outlet, and then call your local authorized Canon dealer. Using the machine in this state may cause a fire or electrical shock. Also, avoid placing objects around the power plug so that the machine can be disconnected whenever necessary. -
Page 17: Handling Precautions
Paper that has just been output from the machine may be hot. Be careful when removing or aligning paper from the output tray. Touching paper right after it is output may result in low- temperature burns. Chapter 1 - Preface imagePRESS C800 Series... -
Page 18: Information In This Operation Guide
• Staple Finisher-T1 / Booklet Finisher-T1 • External 2/3 Hole Puncher-C1 The following optionals have their own operation guides: • Perfect Binder-D1 • High Capacity Stacker-G1 • Booklet Trimmer-D1 • Two-Knife Booklet Trimmer-A1 Chapter 1 - Preface imagePRESS C800 Series... -
Page 19: Explore The Print System
Chapter 2 Explore the print system... -
Page 20: What Can This Print System Do For You
What can this print system do for you? What can this print system do for you? The imagePRESS C800 Series is an easy-to-use multitasking print system that offers many useful functions. • There is one central control panel, the single point of control, which simplifies the print process. -
Page 21: What Output Can You Create
For information detailing how to check and prepare media, see: Check and prepare media before loading on page 130 Check and prepare envelopes before loading on page 132 Check and prepare transparencies before loading on page 134 Chapter 2 - Explore the print system imagePRESS C800 Series... -
Page 22: Chapter 2
Settings Editor media attributes on page 294) For more information on media specifications, see: Consumables on page 185 Paper input specifications on page 270 Supported media types for paper input optionals on page 289 Chapter 2 - Explore the print system imagePRESS C800 Series... -
Page 23: Finishing For Your Output
Finishing optionals Stacker/stapler Saddle-stitch unit Saddle-stitched booklet Stacker/stapler Saddle-stitch unit Booklet trimmer Saddle-stitched booklet, leading-edge trimmed Stacker/stapler Saddle-stitch unit Booklet trimmer Two-knife booklet trimmer Saddle-stitched booklet, trimmed at three sides Chapter 2 - Explore the print system imagePRESS C800 Series... -
Page 24: Chapter 2
Finishing optionals Stacker/stapler Punch unit 4-holes punching 3-holes punching 2-holes punching Professional punching options Finishing optionals Professional puncher Die sets Punching with various 4-holes punching punch patterns 3-holes punching 2-holes punching Chapter 2 - Explore the print system imagePRESS C800 Series... -
Page 25: Chapter 2
Main hardware parts on page 32 Print job settings on page 242 Finishing and delivery on page 43 Finishing and delivery specifications on page 274 Output settings values and icons on page 246 Chapter 2 - Explore the print system imagePRESS C800 Series... -
Page 26: Color Reproduction For Your Output
• Photographic content This color preset is optimal for the reproduction of photographs, pictures, and images. System configuration on page Create new color presets in the Settings Editor. (See 182) Chapter 2 - Explore the print system imagePRESS C800 Series... -
Page 27: Chapter 2
The control panel indicates when printer calibration is needed. (See About calibration on page 160) Chapter 2 - Explore the print system imagePRESS C800 Series... -
Page 28: Prismasync Operating Concept
3. Print job production The print system prints and finishes jobs according to the job sequence in the list of scheduled jobs. The print operator enables the system to keep running. Chapter 2 - Explore the print system imagePRESS C800 Series... -
Page 29: Chapter 2
Job planning Media loading Finishing and delivery Refilling toner and staples [5] Task-based workflow The prepress staff know the quality requirements of the jobs and the way to submit the jobs. Chapter 2 - Explore the print system imagePRESS C800 Series... -
Page 30: Chapter 2
Color reproduction for your output on page 26 Settings Editor media attributes on (See page 294) When you work with the media catalog, you can take advantage of the following benefits: Chapter 2 - Explore the print system imagePRESS C800 Series... -
Page 31: Chapter 2
• The control panel, the printer driver and the PRISMA software access the same media catalog. • You can use the media catalog for copy jobs. System configuration on page Define the media attributes with the Settings Editor. (See 182) Chapter 2 - Explore the print system imagePRESS C800 Series... -
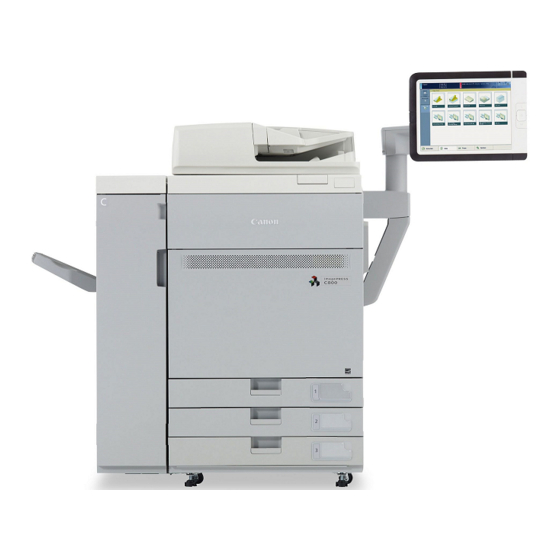
Page 32: Main Hardware Parts
Automatic document feeder, to copy and scan originals. Cover, only needed for a print-only system. Toner compartment cover, to access the toner cartridges. Internal paper trays, to hold media. Print module, where the print process takes place. Chapter 2 - Explore the print system imagePRESS C800 Series... -
Page 33: Paper Module Bulk Paper Module
High Capacity Stacker-G1 Folder Paper Folding Unit-F1 Stacker / stapler Professional stacker / stapler: Finisher-AM1 or Saddle Finisher-AM2 Standard stacker / stapler: Staple Finisher-T1 or Booklet Finisher-T1 Booklet trimmer Booklet Trimmer-D1 Chapter 2 - Explore the print system imagePRESS C800 Series... -
Page 34: Chapter 2
Main hardware parts Optional Commercial name Two-knife booklet trimmer Two-Knife Booklet Trimmer-A1 Finishing modules specifications on page For more information, see 274. Chapter 2 - Explore the print system imagePRESS C800 Series... -
Page 35: Overview Of Licenses
101 Advanced color manage- Advanced color management Advanced Color Management- ment on page 27 Asian font sets Fontset Simplified Chinese-D1 Fontset Traditional Chinese-D1 Fontset Japanese-D1 Fontset Korean-D1 Chapter 2 - Explore the print system imagePRESS C800 Series... -
Page 36: Control Panel
• The list of waiting jobs • The list of printed jobs • The list of scanned documents [Trays] button, to access paper tray functions and overviews (see the paper tray but- ton (3)). Chapter 2 - Explore the print system imagePRESS C800 Series... - Page 37 You can also view the dashboard remotely with the remote monitor. (See monitor specifications on page 288) System monitoring on Status LED, to indicate the system status with a color. (See page 120) Chapter 2 - Explore the print system imagePRESS C800 Series...
-
Page 38: Paper Input
Front cover, to access the paper path when a paper jam occurs. Tray buttons, to open a paper tray. Paper trays, to hold the media. Paper input specifications on page 270 for specifications. Chapter 2 - Explore the print system imagePRESS C800 Series... -
Page 39: Bulk Paper Module
POD Deck Lite Attachment Kit-A1, to connect the bulk paper module to the system and to access the paper path when a paper jam occurs. Paper input specifications on page 270 for specifications. Chapter 2 - Explore the print system imagePRESS C800 Series... -
Page 40: Inserter
Slides guide, to place the media in the correct position in the tray. Front cover, to access the paper path when a paper jam occurs. Paper input specifications on page 270 for specifications. Chapter 2 - Explore the print system imagePRESS C800 Series... -
Page 41: Automatic Document Feeder
Cover, to access the scan area to clean. Handle (ADF Access Handle), as support equipment to close the automatic document feeder. Paper input specifications on page 270 for specifications. Chapter 2 - Explore the print system imagePRESS C800 Series... -
Page 42: Special Feeder
Description alignment tray Screws, to attach or loosen the alignment tray. Alignment guides, to place the media in the correct position in the tray. Paper input specifications on page 270 for specifications. Chapter 2 - Explore the print system imagePRESS C800 Series... -
Page 43: Finishing And Delivery
Lower tray, to collect finished output. The guides enable correct placement of the printed output. Upper tray, to collect finished output. The guides enable correct placement of the printed output. Chapter 2 - Explore the print system imagePRESS C800 Series... - Page 44 Punch waste tray, to collect the punch waste. Staple waste tray, to collect the staple waste. See for specifications: Finishing and delivery specifications on page 274 Finishing for your output on page 23 Chapter 2 - Explore the print system imagePRESS C800 Series...
-
Page 45: Standard Stacker / Stapler
Lower tray, to collect finished output. Upper tray, to collect finished output. Top tray, to collect finished output. See for specifications: Finishing and delivery specifications on page 274 Finishing for your output on page 23 Chapter 2 - Explore the print system imagePRESS C800 Series... -
Page 46: Professional Puncher
Description professional puncher integration unit Front cover, to access the paper path when a paper jam occurs. See for specifications: Finishing and delivery specifications on page 274 Finishing for your output on page 23 Chapter 2 - Explore the print system imagePRESS C800 Series... -
Page 47: Folder
Folding unit cover, to access the paper path when a paper jam occurs. Tray, to collect folded output. See for specifications: Finishing and delivery specifications on page 274 Finishing for your output on page 23 Chapter 2 - Explore the print system imagePRESS C800 Series... -
Page 48: Output Tray
Auxiliary tray, to collect large, printed output (A3 / 11" x 17" or A4R / LTRR). Output tray, to collect printed output. Finishing and delivery specifications on page 274 for specifications. Chapter 2 - Explore the print system imagePRESS C800 Series... -
Page 49: Chapter 3 Prepare The Jobs
Chapter 3 Prepare the jobs... -
Page 50: Prepare Print Jobs
The online help of the printer driver provides detailed information on the available functions. System configuration on page Download the printer drivers from the Settings Editor. (See 182) [22] The media catalog in the printer driver Chapter 3 - Prepare the jobs imagePRESS C800 Series... -
Page 51: Chapter 3
Change the settings for one or more presets, if required (4). Define the job production settings (7). Check the results in the preview pane (2). Save the settings in a template, if required (5). Click [OK] (8). Chapter 3 - Prepare the jobs imagePRESS C800 Series... -
Page 52: Prepare Print Jobs With Prismaprepare
Open the document in PRISMAprepare. Add pages or page ranges, if required. Define which pages or page ranges need specific layout. Select media from the media catalog by page or page range. Chapter 3 - Prepare the jobs imagePRESS C800 Series... -
Page 53: Chapter 3
Prepare print jobs with PRISMAprepare [25] The media catalog in PRISMAprepare Select the required color preset. Define the required finishing and delivery options. Chapter 3 - Prepare the jobs imagePRESS C800 Series... -
Page 54: Print A File From A Usb Drive
Touch [Print] to submit the document to the list of [Scheduled jobs] or touch [Save] to store the document in one of the other locations. Touch the eject button and remove the USB drive. Chapter 3 - Prepare the jobs imagePRESS C800 Series... -
Page 55: Prepare Copy And Scan Jobs
When you have a simple copy job with one type of media. [Combined copy job] When you have a copy job with subsets of originals. [Booklet job] When you need copied booklets. Chapter 3 - Prepare the jobs imagePRESS C800 Series... -
Page 56: Chapter 3
Preview pane, to show the results of the settings. Action buttons, to save settings in a template or to indicate subsets. For more information, see: Copy job settings on page 236 Output settings values and icons on page 246 Chapter 3 - Prepare the jobs imagePRESS C800 Series... -
Page 57: Scan Jobs
Scan job definition PRISMAsync automatically defines a number of settings for the originals and the scan file. However, you can overrule these automatic settings. The automatic settings have the prefix "Auto". Chapter 3 - Prepare the jobs imagePRESS C800 Series... -
Page 58: Chapter 3
Preview pane, to show the results of the settings. Action buttons, to save settings in a template or to use subsets. For more information, see: Scan job settings on page 240 Output settings values and icons on page 246 Chapter 3 - Prepare the jobs imagePRESS C800 Series... -
Page 59: Use The Automatic Document Feeder To Copy Or Scan
220) Action Adjust the paper guides to fit the size of your originals. You can place a set of mixed-size originals into the automatic document feeder. Chapter 3 - Prepare the jobs imagePRESS C800 Series... -
Page 60: Chapter 3
* blinks. For more information, see: Automatic document feeder on page 41 Paper input specifications on page 270 Feed direction on page 251 Chapter 3 - Prepare the jobs imagePRESS C800 Series... -
Page 61: Use The Glass Plate To Copy Or Scan
Define the copy or scan settings and touch [Start] . CAUTION Be aware that the light of the glass plate is very bright. Remove the original from the glass plate. For more information, see: Automatic document feeder on page 41 Chapter 3 - Prepare the jobs imagePRESS C800 Series... -
Page 62: Chapter 3
Use the glass plate to copy or scan Paper input specifications on page 270 Feed direction on page 251 Chapter 3 - Prepare the jobs imagePRESS C800 Series... -
Page 63: Make A Copy
To scan now and print later, select the list of waiting jobs or a DocBox . Check the results of your settings in the preview pane (4). Touch the start button Chapter 3 - Prepare the jobs imagePRESS C800 Series... -
Page 64: Make A Scan
• For scanning to USB, insert the USB drive into the USB port and select the required folder on the drive. Enter a job name and a file name ID (3). Check the results of your settings in the preview pane (4). Chapter 3 - Prepare the jobs imagePRESS C800 Series... - Page 65 Make a scan Touch the start button Touch the eject button and remove the USB drive, if applicable. Chapter 3 - Prepare the jobs imagePRESS C800 Series...
-
Page 66: Use Templates For Recurring Jobs
Select one of the available job templates. Adjust the template settings. Press [Save as template]. Enter a name for the custom template and touch [OK]. Touch [Jobs]->[Copy/Scan] to view the new template. Chapter 3 - Prepare the jobs imagePRESS C800 Series... -
Page 67: Copy Subsets (Combined Copying)
Use the optional [Page programming] function to define the layout and finishing of the subsets. Touch [Ready] to close the [Page programming] function. Define the destination and enter a name for the copy. Touch the start button to start the copy job. Chapter 3 - Prepare the jobs imagePRESS C800 Series... -
Page 68: Scan Subsets (Combined Scanning)
Touch [Ready] to close the [Page programming] function. Define the destination for the scan file, enter the job name and the file name ID for the scan file. Touch the start button to start the scan job. Chapter 3 - Prepare the jobs imagePRESS C800 Series... -
Page 69: Plan The Jobs
Chapter 4 Plan the jobs... -
Page 70: Set Up Your Print Production Preferences
The optional hotfolder feature is useful for environments that print many files with the same print settings. The format of the files you can print with hotfolders depends on the print language licenses of your print system (PostScript/PDF, Direct PDF (Adobe PDF Print Engine APPE), PCL). Chapter 4 - Plan the jobs imagePRESS C800 Series... - Page 71 • Print a proof of the first record. • Interrupt the print process after a certain record, and resume the print process of the job later. • Print a range of records. Chapter 4 - Plan the jobs imagePRESS C800 Series...
- Page 72 • Change the settings of the job. Be aware that when you change settings of a PDF/VT job, these settings are applicable to all records of the job. NOTE Page programming is not available for PDF/VT jobs. Chapter 4 - Plan the jobs imagePRESS C800 Series...
-
Page 73: Workflow Profiles
Then, this custom workflow profile is completely fitted to your workflow. [34] Workflow profile attributes Below you find the descriptions of the default workflow profiles. Chapter 4 - Plan the jobs imagePRESS C800 Series... - Page 74 The standard workflow profile fits a productive workflow with sufficient control over jobs. Jobs go to the list of scheduled jobs and the print system prints the jobs. The print system selects another output tray for each next job. Chapter 4 - Plan the jobs imagePRESS C800 Series...
- Page 75 All jobs come in the list of scheduled jobs and you start the jobs one by one from the list of scheduled jobs. The print system selects another output tray for each next job. Chapter 4 - Plan the jobs imagePRESS C800 Series...
- Page 76 All jobs are received in the list of scheduled jobs and only the first set of the job is printed. After approval of the first set, you give the print command to print the other sets in one run. The print system selects another output tray for each next job. Chapter 4 - Plan the jobs imagePRESS C800 Series...
- Page 77 The manual planning workflow fits a workflow in which you want to determine the print priority of the jobs. All jobs are received in the list of waiting jobs. The print system selects another output tray for each next job. Chapter 4 - Plan the jobs imagePRESS C800 Series...
- Page 78 To keep the system running, you should make sure consumables remain available and you remove printed output and waste on time. For more information, see: DocBox on page 91 Job management in the queues on page 99 Operating concept on page 28 Chapter 4 - Plan the jobs imagePRESS C800 Series...
-
Page 79: Select A Workflow Profile
Job management in the queues on page 99 Procedure Touch [System] -> [Setup] -> [Workflow profile]. Select a workflow profile. Adjust the workflow profile, if required. The name of the workflow profile changes into [Custom]. Press [OK]. Chapter 4 - Plan the jobs imagePRESS C800 Series... -
Page 80: Select An Accounting Mode
This mode uses a fixed account ID, but you can change the account ID. Be aware that the fixed mode implies that the print system overrules the account ID that is entered in the printer driver. [36] Accounting modes For more information, see: System configuration on page 182 Chapter 4 - Plan the jobs imagePRESS C800 Series... - Page 81 Select an accounting mode Procedure Touch [System] -> [Setup] -> [Accounting]. Press [Accounting mode]. Select an accounting mode. Press [OK]. Chapter 4 - Plan the jobs imagePRESS C800 Series...
-
Page 82: Change Or Disable The Warning Time
Touch [Warning in advance] to enable or disable the function. Touch the - or + button to decrease or increase the warning time in increments of 1 minute. Set a time from 1 - 60 minutes. Press [OK]. Chapter 4 - Plan the jobs imagePRESS C800 Series... -
Page 83: Change The System Language
Change the system language You can change the language of the control panel. [37] Overview of the available languages Procedure Touch [System] -> [Setup] -> [Language]. Select the language. Press [OK]. Chapter 4 - Plan the jobs imagePRESS C800 Series... -
Page 84: Use Of Shorter Job Names
You can determine how PRISMAsync shortens the job names. [38] Job name truncation Procedure Touch [System] -> [Setup] -> [Job name truncation]. Indicate how you want to shorten the job name. Press [OK]. Chapter 4 - Plan the jobs imagePRESS C800 Series... -
Page 85: Adjust The Readability Of The Control Panel
[39] Control panel adjustments Procedure Touch [System] -> [Setup] -> [Operator panel settings]. Select the auto adjustment method, or touch the + and - buttons to adjust the brightness and contrast. Press [OK]. Chapter 4 - Plan the jobs imagePRESS C800 Series... -
Page 86: Use The Remote Monitor
Make sure that your web browser allows pop-up windows. Procedure Open the web browser. Enter the IP address or hostname of the PRISMAsync controller. Use the following format: http://<IP address>/remoteinfo or http://<hostname>/remoteinfo https://<IP address>/remoteinfo or https://<hostname>/remoteinfo Chapter 4 - Plan the jobs imagePRESS C800 Series... -
Page 87: Transaction Printing
In this instance, you can see the different job names on the control panel. 2. The print resolution for IPDS is 240, 300, 600 dpi, or automatically detected. Chapter 4 - Plan the jobs imagePRESS C800 Series... - Page 88 The schedule Schedule on page cannot predict the time needed for a streaming job. (See 122) [41] The schedule when the transaction printing mode is active Chapter 4 - Plan the jobs imagePRESS C800 Series...
- Page 89 Settings Editor, the print system does not perform an output recovery and deletes all remaining pages. A stack eject follows when the printed output goes to the high capacity stacker. As a result, you must submit the job again. Chapter 4 - Plan the jobs imagePRESS C800 Series...
-
Page 90: Print In Transaction Printing Mode
Monitor the jobs on the control panel, to make sure that all jobs are printed. After you finish To switch off the transaction printing mode: 1. Touch [System] -> [Transaction] ->[Transaction online] -> [Off] 2. Touch [System] -> [Transaction] -> [Transaction printing mode] -> [Off]. Chapter 4 - Plan the jobs imagePRESS C800 Series... -
Page 91: Use The Docbox
Configure the DocBox with the Settings Editor. ( 182) For more information, see: Operating concept on page 28 Job management in the queues on page 99 Print job settings on page 242 Chapter 4 - Plan the jobs imagePRESS C800 Series... -
Page 92: Change A Docbox Job
Touch [Properties], or double-tap the job to open the [Properties] window. Make the required settings. Use the optional [Page programming] function, if required. Check the results of the changed settings in the preview pane. Press [OK]. Chapter 4 - Plan the jobs imagePRESS C800 Series... -
Page 93: Combine Docbox Jobs
Use the [Up] and [Down] buttons to change the job sequence in the combined job, if required. Touch [OK]. NOTE Split the combined job into the original jobs with the [Split] function. Move a job to an other DocBox folder with the [Move] function. Chapter 4 - Plan the jobs imagePRESS C800 Series... -
Page 94: Lock Docbox Job Settings
Select one or more jobs that you want to lock, or use an option from the [Select] menu to select multiple jobs together. Select [Lock] from the drop-down menu. NOTE Unlock the job again with the [Unlock] function. Chapter 4 - Plan the jobs imagePRESS C800 Series... -
Page 95: Print Docbox Jobs
Enter a PIN, if requested. Select one or more jobs that you want to print, or use an option from the [Select] menu to select multiple jobs together. Touch [Print], [Print now], or [Proof]. Chapter 4 - Plan the jobs imagePRESS C800 Series... -
Page 96: Load And Assign Media
[47] Temporary media on the control panel For more information, see: Media for your output on page 21 Procedure Touch [System] -> [Media]. Select the media from the [Temporary media] section. Press [To catalog]. Chapter 4 - Plan the jobs imagePRESS C800 Series... -
Page 97: Assign Media To A Paper Tray
Press the open button on the paper tray or touch [Open] in the Trays view. Load the media into the paper tray. Close the paper tray. Touch [Assign] if the media type in the paper tray has changed. Chapter 4 - Plan the jobs imagePRESS C800 Series... - Page 98 Assign media to a paper tray Select the media from the media catalog and touch [OK], if applicable. Press the paper tray button , to close the Trays view. Chapter 4 - Plan the jobs imagePRESS C800 Series...
-
Page 99: Manage The Jobs In The Queue
The original jobs are no longer visible, but you can recover the original jobs with the split function. You can change some properties and the print order of the individual jobs in the bundled job. [49] List of waiting jobs Chapter 4 - Plan the jobs imagePRESS C800 Series... - Page 100 When the automatic job removal is not active, it is important to prevent a full system disc. Delete print jobs manually from the list of printed jobs and the DocBox folders on a regular base. Chapter 4 - Plan the jobs imagePRESS C800 Series...
- Page 101 Refer to the user manual of PRISMAsync remote manager for the possibilities and use of this product. For more information, see: DocBox on page 91 Workflow profiles on page 73 Print job settings on page 242 Operating concept on page 28 Chapter 4 - Plan the jobs imagePRESS C800 Series...
-
Page 102: View The Jobs In The Queues
Job management in the queues on page 99 Procedure Touch [Jobs] -> [Queues]. Touch to expand the list of [Waiting jobs], if required. Touch to expand the list of [Scheduled jobs], if required. Chapter 4 - Plan the jobs imagePRESS C800 Series... -
Page 103: Bundle Jobs
Select the jobs to combine, or use an option from the [Select] menu to select multiple jobs together. Press [Bundle]. The [Create bundle] window appears. Use the [Up] and [Down] buttons to change the job order in the bundle, if required. Press [OK]. Chapter 4 - Plan the jobs imagePRESS C800 Series... - Page 104 Bundle jobs NOTE Split the combined job into the individual jobs using the [Split] function. Chapter 4 - Plan the jobs imagePRESS C800 Series...
-
Page 105: Add Extra Sheets To A Job
Select the job to which you want to add separator sheets. Touch [Properties], or double-tap the job to open the [Properties] window. Indicate at the top right corner that you want separator sheets. Chapter 4 - Plan the jobs imagePRESS C800 Series... -
Page 106: Change Job Settings
Change the settings in the [Job] pane (3). Use the optional [Page programming] function (5), if required. Check the results of the changed settings in the preview pane (4). Touch [OK] (5). Chapter 4 - Plan the jobs imagePRESS C800 Series... -
Page 107: Use Page Programming
Combine and split subsets 1. Select the subsets to combine. 2. Touch [Merge] to create the new subset. Use [Split] to get the individual subsets. Chapter 4 - Plan the jobs imagePRESS C800 Series... - Page 108 Use [Split finishing] to use the original finishing set- tings. For more information, see: Print job settings on page 242 Copy subsets (combined copying) on page 67 Scan subsets (combined scanning) on page 68 Chapter 4 - Plan the jobs imagePRESS C800 Series...
-
Page 109: Print A Waiting Job
[Waiting jobs], if required. Select the jobs you want to print, or use an option from the [Select] menu to select multiple jobs together. Touch [Print] or [Proof]. Chapter 4 - Plan the jobs imagePRESS C800 Series... -
Page 110: Print A Scheduled Job Immediately
View the jobs in the queues on page 102 Procedure Touch [Jobs] -> [Queues]. Touch to expand the list of [Scheduled jobs], if required. Select the job that you want to print immediately. Touch [Print now] or [To top]. Chapter 4 - Plan the jobs imagePRESS C800 Series... -
Page 111: Move A Scheduled Job To The List Of Waiting Jobs
[Scheduled jobs], if required. Select the jobs you want to move, or use an option from the [Select] menu to select multiple jobs together. Press [Move]. Chapter 4 - Plan the jobs imagePRESS C800 Series... -
Page 112: Reprint A Job
Select the jobs you want to reprint, or use an option from the [Select] menu to select multiple jobs together. Press [Copy]. Touch [Queues] -> [Waiting jobs]. Select the jobs you want to reprint. Touch [Properties], if you want to change job settings. Press [Print]. Chapter 4 - Plan the jobs imagePRESS C800 Series... -
Page 113: Send A Job To Another Printer
Select [Copy to] from the button bar or from the drop-down menu. Select a printer from the list or use [Other printer] to manually enter a printer name. Touch [OK]. Chapter 4 - Plan the jobs imagePRESS C800 Series... -
Page 114: Remove Print Jobs
Go to the location of the jobs. Select the jobs you want to combine, or use an option from the [Select] menu to select multiple jobs at once. Press [Delete]. Confirm the deletion action. Chapter 4 - Plan the jobs imagePRESS C800 Series... -
Page 115: Chapter 5 Print The Jobs
Chapter 5 Print the jobs... -
Page 116: Proofing
You can make a proof print of jobs that are ready for the print process in the list of waiting jobs and in the DocBox. The proof print does not affect the number of sets that the print system prints for the job. The proof print is an additional set. Chapter 5 - Print the jobs imagePRESS C800 Series... - Page 117 You can perform last-minute job changes in the list of waiting jobs, a DocBox, or the list of scheduled jobs. For more information, see: Job management in the queues on page 99 Print job settings on page 242 Workflow profiles on page 73 Chapter 5 - Print the jobs imagePRESS C800 Series...
-
Page 118: Make A Proof
Press [Jobs]. Go to the location of the job. Select the jobs you want to proof, or use an option from the [Select] menu to select multiple jobs together. Press [Proof]. Chapter 5 - Print the jobs imagePRESS C800 Series... -
Page 119: Print A Job Ticket
Press [Jobs]. Go to the location of the job. Select the jobs for the job ticket print, or use an option from the [Select] menu to select multiple jobs together. Press [Ticket]. Chapter 5 - Print the jobs imagePRESS C800 Series... -
Page 120: Keep The System Printing
Description of the dashboard parts Current status of the print system and the active printing mode. Transaction The document printing mode The transaction printing mode is active. (See printing on page is active. Chapter 5 - Print the jobs imagePRESS C800 Series... - Page 121 [70] Remote monitor The remote monitor shows the following information: • The control panel dashboard • A 30-minute timeline Remote monitor specifications on page For more information, see 288. Chapter 5 - Print the jobs imagePRESS C800 Series...
-
Page 122: Schedule
The print system does not go on hold after a stack eject. • The zoom menu (5) allows you to select a shorter or longer time scale. Chapter 5 - Print the jobs imagePRESS C800 Series... - Page 123 Red, to indicate that you must perform an action immediately. Gray Gray, to indicate that the print system cannot estimate the time and the pages per job, for example, for jobs in the transaction printing mode. Chapter 5 - Print the jobs imagePRESS C800 Series...
- Page 124 To see all messages, select the first message. For more information, see System monitoring on page 120 Status indicators on page 264 Chapter 5 - Print the jobs imagePRESS C800 Series...
-
Page 125: Load Media For The Scheduled Jobs
Make sure you know how to load the different media types into the paper trays. (See media on page 130) Procedure Press [Schedule]. Select the media you want to load in the [Required media] pane (2). Chapter 5 - Print the jobs imagePRESS C800 Series... - Page 126 Select a paper tray to load the media. Open the paper tray and load the media into the paper tray. Close the paper tray. Touch [OK] to confirm. PRISMAsync automatically assigns the media to the correct paper tray. Chapter 5 - Print the jobs imagePRESS C800 Series...
-
Page 127: Check The Filling Level Of The Toner Cartridge
Schedule on page 122 System monitoring on page 120 Replace a toner cartridge on page 193 Procedure Touch the indicator or go to [System] -> [Printer]. Check the filling levels in the [Supplies] pane. Chapter 5 - Print the jobs imagePRESS C800 Series... -
Page 128: Check The Filling Level Of The Staple Cartridge
Replace the staple cartridge in the stapler unit on page 199 Replace the staple cartridge in the saddle stitch unit on page 201 Procedure Touch the indicator or go to [System] -> [Printer]. Check the filling level in the [Finishers] pane. Chapter 5 - Print the jobs imagePRESS C800 Series... -
Page 129: Check The Filling Level Of The Waste Toner Container
System monitoring on page 120 Replace the waste toner container on page 196 Procedure Touch the indicator or go to [System] -> [Printer]. Check the filling level in the [Supplies] pane. Chapter 5 - Print the jobs imagePRESS C800 Series... -
Page 130: Handle Media
• Do not store media in places exposed to open flames. This can cause the paper to ignite which could result in burns or a fire. NOTE • Use paper recommended by Canon for high-quality output. • Some commercially available media types are not appropriate for your print system. Contact Consumables on page your local authorized Canon dealer to order media. - Page 131 When the paper is curled, straighten out the paper. After you finish Tightly rewrap the remaining media in the original package, and store the package in a dry place, away from direct sunlight or high temperatures. Chapter 5 - Print the jobs imagePRESS C800 Series...
-
Page 132: Check And Prepare Envelopes Before Loading
Make sure the media specifications match the paper tray specifications. (See put specifications on page 270) Take five envelopes and fix curls or bends. Loosen and stack the five envelopes together. Chapter 5 - Print the jobs imagePRESS C800 Series... - Page 133 Remove air and creases to flatten the enve- lopes. * = Flap After you finish Tightly rewrap the remaining media in the original package, and store the package in a dry place away from direct sunlight. Chapter 5 - Print the jobs imagePRESS C800 Series...
-
Page 134: Check And Prepare Transparencies Before Loading
Remove the packaging and check that the transparencies are in good condition. After you finish Tightly rewrap the remaining media in the original package, and store the package in a dry place away from direct sunlight. Chapter 5 - Print the jobs imagePRESS C800 Series... -
Page 135: Load Media Into The Internal Paper Trays
Check and prepare media before loading on page 130 Check and prepare transparencies before loading on page 134 • Awake the print system from sleep mode, if applicable. See: Use the energy save modes on page 192 Chapter 5 - Print the jobs imagePRESS C800 Series... - Page 136 For these media, take a new stack. • Tightly rewrap the remaining media in the original package, and store the package in a dry place, away from direct sunlight or high temperatures. Chapter 5 - Print the jobs imagePRESS C800 Series...
-
Page 137: Load Media Into The Paper Module
CAUTION When you handle paper, be careful not to cut your hands on the edges of the paper. For more information, see: Chapter 5 - Print the jobs imagePRESS C800 Series... - Page 138 When the media size does not change, continue with step 9, otherwise go to step 3. Slide the right-hand paper guide to the right- hand side of the paper tray. Chapter 5 - Print the jobs imagePRESS C800 Series...
- Page 139 0.4". Squeeze the lever and slide the paper guides against the media stack and check the size mark for the exact alignment. Slide the right-hand paper guide towards the media stack. Chapter 5 - Print the jobs imagePRESS C800 Series...
- Page 140 For these media, take a new stack. • Tightly rewrap the remaining media in the original package, and store the package in a dry place, away from direct sunlight or high temperatures. Chapter 5 - Print the jobs imagePRESS C800 Series...
-
Page 141: Load Media Into The Bulk Paper Module
CAUTION When you handle paper, be careful not to cut your hands on the edges of the paper. For more information, see: Bulk paper module on page 39 Chapter 5 - Print the jobs imagePRESS C800 Series... - Page 142 Lift the feeding support roller and remove all media. Squeeze the lever and slide the paper guides so that there is enough space to load the me- dia. Chapter 5 - Print the jobs imagePRESS C800 Series...
- Page 143 Gently close the paper tray and make sure it clicks into place. CAUTION When you close the bulk paper mod‐ ule, be careful not to get your fin‐ gers caught. This can cause personal injury. Chapter 5 - Print the jobs imagePRESS C800 Series...
- Page 144 For these media, take a new stack. • Tightly rewrap the remaining media in the original package, and store the package in a dry place, away from direct sunlight or high temperatures. Chapter 5 - Print the jobs imagePRESS C800 Series...
-
Page 145: Load Media Into The Special Feeder
Check and prepare envelopes before loading on page 132 Check and prepare transparencies before loading on page 134 • Awake the print system from sleep mode, if applicable. See: Use the energy save modes on page 192 Chapter 5 - Print the jobs imagePRESS C800 Series... - Page 146 For these media, take a new stack. • Tightly rewrap the remaining media in the original package, and store the package in a dry place, away from direct sunlight or high temperatures. Chapter 5 - Print the jobs imagePRESS C800 Series...
-
Page 147: Load Media Into The Inserter
• Check and prepare the media. See: Check and prepare media before loading on page 130 • Awake the print system from sleep mode, if applicable. See: Use the energy save modes on page 192 Chapter 5 - Print the jobs imagePRESS C800 Series... - Page 148 ( [85] Lower tray After you finish Tightly rewrap the remaining media in the original package, and store the package in a dry place, away from direct sunlight or high temperatures. Chapter 5 - Print the jobs imagePRESS C800 Series...
-
Page 149: Load Envelopes Into The Internal Paper Trays
• Awake the print system from sleep mode, if applicable. See: Use the energy save modes on page 192 Procedure Action Grip the handle and pull out the paper tray un- til it stops. Chapter 5 - Print the jobs imagePRESS C800 Series... - Page 150 When you close the paper tray, be careful not to get your fingers caught. This can cause personal injury. Return the envelope guide to its holder when the job is ready. Chapter 5 - Print the jobs imagePRESS C800 Series...
- Page 151 Make sure you put the envelope guide into its holder to avoid a paper jam. Tightly rewrap the remaining media in the original package, and store the package in a dry place, away from direct sunlight or high temperatures. Chapter 5 - Print the jobs imagePRESS C800 Series...
-
Page 152: Load Tab Paper Into The Internal Paper Trays
Grip the handle and pull out the paper tray un- til it stops. Lift up the tab paper guide from its holder (1) and fix the tab paper guide with the blue screw (2). Chapter 5 - Print the jobs imagePRESS C800 Series... - Page 153 Make sure you put the tab paper guide into its holder to avoid a paper jam. Tightly rewrap the remaining media in the original package, and store the package in a dry place, away from direct sunlight or high temperatures. Chapter 5 - Print the jobs imagePRESS C800 Series...
-
Page 154: Stop Printing
A horizontal, red and white stop bar in the schedule and the list of scheduled jobs indicates that the stop-after-job function is active. The print system stops when the job before the stop bar is ready. Touch the [Resume] button to resume the print process. Chapter 5 - Print the jobs imagePRESS C800 Series... -
Page 155: Remove Printed Output From The Stacker/Stapler
The output tray can move upwards and your hands may get caught. • Do not place your hands in the part of the output tray near the rollers where stapling takes place. This can cause personal injury. Chapter 5 - Print the jobs imagePRESS C800 Series... - Page 156 • You cannot saddle-fold media when the media weight is more than 256 g/m² / 94 lb cover. • You cannot saddle-fold vellums, transparencies, prepunched paper, tab paper, labels, and envelopes. Chapter 5 - Print the jobs imagePRESS C800 Series...
- Page 157 Make sure that the booklet tray of the standard stacker / stapler matches the correct booklet size to avoid paper jams. [90] 305 mm x 457 mm / 12" x 18", A3 / 11" x 17" [91] A4R / LTRR Chapter 5 - Print the jobs imagePRESS C800 Series...
-
Page 158: Store The Printed Output
• Do not store the printed output in a location with high temperatures. • Printed output can discolor after a long period of time. • Adhesive can be used to stick printed output sheets; only use insoluble adhesive that is completely dry. Chapter 5 - Print the jobs imagePRESS C800 Series... -
Page 159: Keep The Image Quality High
Chapter 6 Keep the image quality high... -
Page 160: Calibration
• After the installation of the print system, for the default media families coated and uncoated. • When a new media family is created. • When a service replaces system parts. Chapter 6 - Keep the image quality high imagePRESS C800 Series... - Page 161 Normal media for standard and professional printer calibration: • Océ Top Colour FSC (100 g/m² / 27 lb bond) • Canon CS-814 (81.4 g/m² / 22 lb bond) • Mondi Neusiedler (100 g/m² / 27 lb bond) • International Paper Hammermill Color Copy Digital (105 g/m² / 28 lb bond) Heavy media for professional printer calibration: •...
-
Page 162: Calibrate The Printer
Touch [Start printer calibration]. Follow the instructions on the control panel. Select [Automatic (internal sensor)] in the [Calibration method] window, if the optional internal sensor is installed. Close the menu. Chapter 6 - Keep the image quality high imagePRESS C800 Series... -
Page 163: Calibrate The Media Family
Procedure Calibrate the printer on page 162 Calibrate the printer. (See ) Touch [System] -> [Color adjustment] -> [Media family calibration]. Select the media family to calibrate. Chapter 6 - Keep the image quality high imagePRESS C800 Series... - Page 164 Follow the instructions on the control panel. Repeat step 3, 4, 7, and 8 for each halftone. IMPORTANT Make sure you have calibrated all halftones: [Normal], [Fine] and [Error diffusion]. Touch [Close]. Chapter 6 - Keep the image quality high imagePRESS C800 Series...
-
Page 165: Calibrate For Maximum Print Quality
When the shading correction produces a "density not within required range" error, perform a Fix "density not within required range" error on correction procedure for this error. (See page 233) Chapter 6 - Keep the image quality high imagePRESS C800 Series... -
Page 166: Adjust The Color Quality
Register the color tones for the ACCT function on page 172 Correct the color tones with the ACCT function on page 173 About calibration on page 160 Problem Solving on page 230 Chapter 6 - Keep the image quality high imagePRESS C800 Series... -
Page 167: Adjust Cmyk Curves For A Single Job
• List of waiting jobs • A DocBox IMPORTANT Be aware that a consistent reproduction of colors is difficult when you adjust CMYK curves on job level. [94] Basic mode Chapter 6 - Keep the image quality high imagePRESS C800 Series... - Page 168 Define the clipping ranges with the [Color clipping] settings, if required. Adjust the calibrated CMYK curve with the three control points on the CMYK curves, if required. Save the adjustments as a preset for later use, if required. Chapter 6 - Keep the image quality high imagePRESS C800 Series...
-
Page 169: Adjust Cmyk Curves For All Jobs
IMPORTANT Be aware that the CMYK adjustments on system level affect all print jobs that use the same media family/halftone combination in future. [96] Adjustments in basic mode Chapter 6 - Keep the image quality high imagePRESS C800 Series... - Page 170 Adjust the calibrated CMYK curve with the three control points on the CMYK curves, if required. Repeat step 3 - 8 for each media family/halftone combination. Save the adjustments as a preset for later use, if required. Chapter 6 - Keep the image quality high imagePRESS C800 Series...
-
Page 171: Automatic Color Mismatch Correction
Touch [Auto color mismatch correction]. Follow the instructions on the control panel. Close the menu. After you finish If the procedure displays an engine error, contact your local service representative. Chapter 6 - Keep the image quality high imagePRESS C800 Series... -
Page 172: Register The Color Tones For The Acct Function
Select the location in which you want to store the measured values of the color tones. Touch [OK]. Select the media. IMPORTANT Do not stop the registration procedure before it has completed. Touch [OK]. Follow the instructions on the control panel. Close the menu. Chapter 6 - Keep the image quality high imagePRESS C800 Series... -
Page 173: Correct The Color Tones With The Acct Function
Follow the instructions on the control panel. After you finish When the ACCT function is no longer required, for example when parts are replaced, you can deactivate the ACCT function again with the [Reset] button. Chapter 6 - Keep the image quality high imagePRESS C800 Series... -
Page 174: Create A Trapping Preset
Define the trapping settings in the [Trap width], [Trap appearance], [Images] and [Trap thresholds] panes. Click [Save as] to save the settings and enter a name for the preset. Click [OK]. Chapter 6 - Keep the image quality high imagePRESS C800 Series... -
Page 175: Adjust The Print Quality For Media
Correct skewed and rotated images on page 179 Perform a media registration on page 177 Correct curled output media on page 176 Media for your output on page 21 Chapter 6 - Keep the image quality high imagePRESS C800 Series... -
Page 176: Correct Curled Output Media
Select the media from the media catalog. Press [Curl correction]. Define the correction factor with the + and - buttons. Start with small increments to avoid paper jams. Press [OK]. Chapter 6 - Keep the image quality high imagePRESS C800 Series... -
Page 177: Perform A Media Registration
Check if the image on the printed output is skewed. Then, first perform a skewed image Correct skewed and rotated images on page correction. (See 179) Required tools Ruler Procedure Touch [System] -> [Media]. Select the media from the media catalog. Press [Registration]. Chapter 6 - Keep the image quality high imagePRESS C800 Series... - Page 178 Perform a media registration Make your adjustments manually or start the registration wizard. Follow the instructions of the wizard. Close the menu. Chapter 6 - Keep the image quality high imagePRESS C800 Series...
-
Page 179: Correct Skewed And Rotated Images
Media for your output on page 21 Required tools Ruler Procedure Touch [System] -> [Media]. Select the media from the media catalog. Touch [Skew correction]. Follow the instructions on the control panel. Chapter 6 - Keep the image quality high imagePRESS C800 Series... - Page 180 Correct skewed and rotated images Chapter 6 - Keep the image quality high imagePRESS C800 Series...
-
Page 181: Maintain The Print System
Chapter 7 Maintain the print system... -
Page 182: System Configuration And Maintenance
Settings Editor. Part of the Setting Editor settings and information is also available on the System view of the control panel. You need a key operator or system administrator password to change these settings. Chapter 7 - Maintain the print system imagePRESS C800 Series... - Page 183 • Support settings, to view contact and counter information, to install licenses, to update software, to download the printer driver, to troubleshoot, to generate loggings, to save and restore settings for color management. Chapter 7 - Maintain the print system imagePRESS C800 Series...
- Page 184 [103] The media catalog in the Settings Editor Settings Editor settings and information on page For Settings Editor settings, see 295. Settings Editor specifications on page For Settings Editor specifications, see 293. Chapter 7 - Maintain the print system imagePRESS C800 Series...
-
Page 185: Consumables
Toner comes in four colors: black, cyan, magenta, and yellow. Check the toner color that you need to replace before ordering toner from your local authorized Canon dealer. Also, when replacing the toner cartridge, make sure that you replace toner of the correct color. - Page 186 Please be aware that there are counterfeit Canon toners in the marketplace. Use of counterfeit toner may result in poor print quality or machine performance. Canon is not responsible for any malfunction, accident or damage caused by the use of counterfeit toner.
- Page 187 Staple Cartridge-D3 (2 cartridges per box) Genuine supplies Canon has developed and manufactured toner, parts, and supplies specifically for use in this machine. For optimal print quality and for optimal machine performance and productivity, we recommend that you use Genuine Canon toner, parts, and supplies.
- Page 188 Consumables Chapter 7 - Maintain the print system imagePRESS C800 Series...
-
Page 189: Use The Power Modes
Turn the main power switch at the upper right-hand side of the print module into the "I" position. Use the energy save Press the sleep button at the right-hand side of the control panel. (See modes on page 192) Chapter 7 - Maintain the print system imagePRESS C800 Series... -
Page 190: Turn Off The Print System
Touch [System] -> [Setup]. Press [Shut down system]. Press [Yes]. A message indicates when the shut-down process has started. When the shut-down process is ready, the control panel light will be off. Chapter 7 - Maintain the print system imagePRESS C800 Series... -
Page 191: Restart The Print System
You can restart the print system from the control panel, when needed. System configuration on The Settings Editor also provides a function to restart the print system. ( page 182) Procedure Touch [System] -> [Setup]. Press [Shut down system]. Press [Restart]. Chapter 7 - Maintain the print system imagePRESS C800 Series... -
Page 192: Use The Energy Save Modes
System configuration on page 182 Control panel on page 36 Procedure Press the sleep button at the right-hand side of the control panel. Press the sleep button again to awake the system. Chapter 7 - Maintain the print system imagePRESS C800 Series... -
Page 193: Refill Toner And Staples
185. • Be careful with counterfeit toners. Be aware that there are counterfeit Canon toners in the marketplace. Use of counterfeit toner can result in poor print quality or machine performance. Canon is not responsible for any malfunction, accident or damage caused by the use of counterfeit toner. For more information, see http://www.canon.com/counterfeit. - Page 194 Pull out the empty toner cartridge. WARNING Do not burn or throw used toner car‐ tridges into open flames. This can cause toner ignition in the cartridge which may result in burns or a fire. Chapter 7 - Maintain the print system imagePRESS C800 Series...
- Page 195 After you finish After you replace a color cartridge, a color difference in the output may occur. If this happens, perform the Auto gradation adjustment. (See Calibrate the printer on page 162) Chapter 7 - Maintain the print system imagePRESS C800 Series...
-
Page 196: Replace The Waste Toner Container
• For information about Canon waste toner containers, see 185. • Your local authorized Canon dealer will dispose of used waste toner containers. • You cannot reuse toner. Do not mix new and used toner together. • Only use waste toner containers intended for your print system. - Page 197 Do not close the top hole of the con- tainer with the cap before you return the tray to its original position. This can cause a malfunction or machine damage. Chapter 7 - Maintain the print system imagePRESS C800 Series...
- Page 198 Close the front left-hand cover of the print module. CAUTION When you close the front left-hand cover of the print module, be careful not to get your fingers caught. This can cause personal injury. Chapter 7 - Maintain the print system imagePRESS C800 Series...
-
Page 199: Replace In The Professional Stacker / Stapler The Staple Cartridge In The Staple Unit
• Remove the seal that holds the staples together after you place the staple cartridge into the staple case. NOTE • We recommend ordering staple cartridges from your local authorized Canon dealer before your stock runs out. • Only use staple cartridges intended for your print system. - Page 200 Close the front cover of the stacker/stapler. CAUTION When you close the front cover of the stacker/stapler, be careful not to get your fingers caught. This can cause personal injury. Chapter 7 - Maintain the print system imagePRESS C800 Series...
-
Page 201: Replace In The Professional Stacker / Stapler The Staple Cartridge In The Saddle-Stitch Unit
• Remove the printed output from the booklet tray before you replace the staple cartridge in the saddle-stitch unit. NOTE • We recommend ordering staple cartridges from your local authorized Canon dealer before your stock runs out. • When a staple cartridge is empty, replace both cartridges. - Page 202 Squeeze (1) to release and lift the empty staple cartridge (2). Insert the new staple cartridge until it clicks in- to place. Place the staple case cover back in its original position. Chapter 7 - Maintain the print system imagePRESS C800 Series...
- Page 203 This can cause personal injury. • When you close the front cover of the stacker/stapler, be careful not to get your fingers caught. This can cause personal injury. Chapter 7 - Maintain the print system imagePRESS C800 Series...
-
Page 204: Replace In The Standard Stacker / Stapler The Staple Cartridge In The Staple Unit
• Remove the seal that holds the staples together after you place the staple cartridge into the staple case. NOTE • We recommend ordering staple cartridges from your local authorized Canon dealer before your stock runs out. • Only use staple cartridges intended for your print system. - Page 205 (2). Remove the seal that holds the staples togeth- IMPORTANT Make sure you pull the seal straight out to avoid tearing. Chapter 7 - Maintain the print system imagePRESS C800 Series...
- Page 206 The stapler unit may staple to reposition the staples. CAUTION When you close the front cover of the stacker/stapler, be careful not to get your fingers caught. This can cause personal injury. Chapter 7 - Maintain the print system imagePRESS C800 Series...
-
Page 207: Replace In The Standard Stacker /Stapler The Staple Cartridge In The Saddle-Stitch Unit
• Remove the printed output from the booklet tray before you replace the staple cartridge in the saddle-stitch unit. NOTE • We recommend ordering staple cartridges from your local authorized Canon dealer before your stock runs out. • When a staple cartridge is empty, replace both cartridges. - Page 208 This can cause personal injury. Close the front cover. CAUTION When you close the front cover of the stacker/stapler, be careful not to get your fingers caught. This can cause personal injury. Chapter 7 - Maintain the print system imagePRESS C800 Series...
-
Page 209: Remove The Staple Waste
Pull out the staple waste tray at the bottom of the front side of the staple unit. Discard the staple waste. CAUTION When you discard the staple waste, be careful not to touch it. This can cause personal injury. Chapter 7 - Maintain the print system imagePRESS C800 Series... - Page 210 Close the front cover of the stacker/stapler. CAUTION When you close the front cover of the stacker/stapler, be careful not to get your fingers caught. This can cause personal injury. Chapter 7 - Maintain the print system imagePRESS C800 Series...
-
Page 211: Remove In The Professional Stacker /Stapler The Punch Waste
Check that the guide (F-A2) is closed. When the guide is open, you cannot pull out the punch waste tray. If applicable, close the guide. Pull out the punch waste tray. Chapter 7 - Maintain the print system imagePRESS C800 Series... - Page 212 Close the front cover of the stacker/stapler. CAUTION When you close the front cover of the stacker/stapler, be careful not to get your fingers caught. This can cause personal injury. Chapter 7 - Maintain the print system imagePRESS C800 Series...
-
Page 213: Remove In The Standard Stacker / Stapler The Punch Waste
(1) and close the front cover of the punch unit (2). CAUTION When you close the front cover of the punch unit, be careful not to get your fingers caught. This can cause personal injury. Chapter 7 - Maintain the print system imagePRESS C800 Series... -
Page 214: Keep The Print System Clean
Clean the inside of the print module on page 221 Clean the corona assembly wires on page 222 • Clean the main unit rollers on page 223 • Refresh the fixing belt on page 224 • Chapter 7 - Maintain the print system imagePRESS C800 Series... -
Page 215: Clean The Control Panel
Moisten the cloth with water or a mild cleaning agent and wring the cloth out thorough- Clean the display of the control panel. Wipe dry with a soft, dry cloth. Chapter 7 - Maintain the print system imagePRESS C800 Series... -
Page 216: Clean The Glass Plate Area
Moisten the cloth with water or a mild cleaning agent and wring it out thoroughly. Clean the glass plate (1) and the underside of the automatic document feeder (2) with the cloth. Wipe dry with a soft, dry cloth. Chapter 7 - Maintain the print system imagePRESS C800 Series... -
Page 217: Clean The Automatic Document Feeder Scanning Area
(1) to open the document scan cover and open the inside cover (2). IMPORTANT Open the document scan cover care- fully to prevent scratches on the glass plate. Chapter 7 - Maintain the print system imagePRESS C800 Series... - Page 218 This can cause personal injury. • Be aware that the light emitted from the glass plate can be very bright when you close the auto‐ matic document feeder. Chapter 7 - Maintain the print system imagePRESS C800 Series...
-
Page 219: Clean The Scanning Sensors
If streaks appear on the printed output or you cannot scan originals properly, clean the scanner sensors. Procedure Touch [System] -> [Maintenance]. Touch [Start maintenance]. Enter your maintenance PIN. Touch [Clean the scanner sensors]. Follow the wizard steps. Close the menu. Chapter 7 - Maintain the print system imagePRESS C800 Series... -
Page 220: Clean The Automatic Document Feeder Rollers
• Make sure you have clean A4 / LTR paper (60 - 80 g/m² / 16 lb bond - 20 lb bond). Procedure Touch [System] -> [Maintenance]. Touch [Start maintenance]. Enter your maintenance PIN. Touch [Clean the rollers of the ADF]. Follow the wizard steps. Close the menu. Chapter 7 - Maintain the print system imagePRESS C800 Series... -
Page 221: Clean The Inside Of The Print Module
The control panel displays how long it takes to clean the inside of the print module. Procedure Touch [System] -> [Maintenance]. Touch [Start maintenance]. Enter your maintenance PIN. Touch [Clean the inside of the main unit]. Follow the wizard steps. Close the menu. Chapter 7 - Maintain the print system imagePRESS C800 Series... -
Page 222: Clean The Corona Assembly Wires
Enter your maintenance PIN. Touch [Clean the corona wires]. Follow the wizard steps. Close the menu. After you finish NOTE If the procedure displays an engine error, contact your local service representative. Chapter 7 - Maintain the print system imagePRESS C800 Series... -
Page 223: Clean The Main Unit Rollers
Make sure the print system does not process any jobs. Procedure Touch [System] -> [Maintenance]. Touch [Start maintenance]. Enter your maintenance PIN. Touch [Clean the clean roller (main unit)]. Follow the wizard steps. Close the menu. Chapter 7 - Maintain the print system imagePRESS C800 Series... -
Page 224: Refresh The Fixing Belt
Touch [Refresh the fixing belt]. Follow the wizard steps. Close the menu. After you finish IMPORTANT If the procedure fails or if you do not achieve the required result, contact your local service representative. Chapter 7 - Maintain the print system imagePRESS C800 Series... -
Page 225: Enable Remote Service
Touch [Connectivity] to check the connectivity settings. Touch [Remote connection enabled] -> [Yes]. Touch [Test] to test the connection. NOTE The dashboard shows the status of the connection when Remote Service is active. Close the menu. Chapter 7 - Maintain the print system imagePRESS C800 Series... -
Page 226: Read The Counters
Procedure Touch [System] -> [Maintenance]. Touch [Reset day counters] to set the day counters to null. Touch [Print billing counters report] to print the billing counters in your own language. Chapter 7 - Maintain the print system imagePRESS C800 Series... -
Page 227: Chapter 8 Help
Chapter 8 Help... -
Page 228: Access The Print Module Parts
LAN port, to connect the print module to the controller Left-hand cover, to access the paper path to clear a paper jam. Breaker, to detect an excess current or a current leakage. Test button, to test the circuit breaker. Chapter 8 - Help imagePRESS C800 Series... - Page 229 Toner compartment cover, to access the toner cartridges. Toner cartridges. Waste toner container, to collect wasted toner. Left-hand cover, to access the paper path when a paper jam occurs or to access the waste toner container. Chapter 8 - Help imagePRESS C800 Series...
-
Page 230: Problem Solving
Calibrate the media family on page 163 (See ) CMYK colors are not cor- Perform the automatic color mismatch procedure. Automatic color mismatch correction on page 171 rectly aligned. (See ) Chapter 8 - Help imagePRESS C800 Series... - Page 231 Register the color tones for the ACCT function on page (See 172) (See Correct the color tones with the ACCT function on page 173) When also the ACCT function cannot fix the color tone deviations, contact your local service representative. Chapter 8 - Help imagePRESS C800 Series...
-
Page 232: Optimize The Scan Quality Of The Print System
Copy job settings on page page 240, 236) Zoom function on • Use the correct zoom factor. (See page 250) The information on the page is Select the correct [Adjust image] settings. too light or too dark. Chapter 8 - Help imagePRESS C800 Series... -
Page 233: Fix "Density Not Within Required Range" Error
Select [Auto gradation adjustment]. Press [Start printer calibration]. Follow the instructions on the control panel. Close the menu. After you finish If the [Shading correction] procedure still fails, contact your local service representative. Chapter 8 - Help imagePRESS C800 Series... - Page 234 Fix "density not within required range" error Chapter 8 - Help imagePRESS C800 Series...
-
Page 235: Chapter 9 References
Chapter 9 References... -
Page 236: Job Settings
Standard or custom sizes of originals Background [Background] Suppression of vague or yellowish background Layout settings Property Job setting What you can define Printing sides [1- or 2-sided] Print on one or two sides of the sheet Chapter 9 - References imagePRESS C800 Series... - Page 237 Advanced settings -> [Print delivery] • Delivery order of the sheets [Advanced settings] • Delivery position of the sheets • Delivery with rotation Apply these settings for one or more finishing optionals. Chapter 9 - References imagePRESS C800 Series...
- Page 238 About copy jobs on page 55 Output settings values and icons on page 246 Zoom function on page 250 Finishing for your output on page 23 Color reproduction for your output on page 26 Chapter 9 - References imagePRESS C800 Series...
- Page 239 Copy job settings Media for your output on page 21 Chapter 9 - References imagePRESS C800 Series...
-
Page 240: Scan Job Settings
• Compression factor • Quality factor for JPG and PDF scan files The compression factor determines the size of the scan file. Page size [Size] Page size of the digital document Resolution [Resolution] Scan resolution Chapter 9 - References imagePRESS C800 Series... - Page 241 New name for the job File ID [Enter file ID] Numeric value that is part of file name For more information, see: About scan jobs on page 57 Zoom function on page 250 Chapter 9 - References imagePRESS C800 Series...
-
Page 242: Print Job Settings
• Same-up printing with variable number of images • Multiple-up printing with variable number of images Zoom images [Zoom] • Automatic zoom according to print size • Manual zoom from 25% - 400% Chapter 9 - References imagePRESS C800 Series... - Page 243 Adjust CMYK curves for a job on page 167) The advanced settings enable adjustment of CMYK curves at three control points and clip- ping of color ranges. Save the adjustments in a preset for later use. Chapter 9 - References imagePRESS C800 Series...
- Page 244 What you can define Job name [Job name] New name for the job Number of sets [Number of sets] • Number of sets (maximum 65,000) • Check first set: print only the first set of the Chapter 9 - References imagePRESS C800 Series...
- Page 245 Use of special media to distinguish individual sets For more information, see: Job management in the queues on page 99 Orientation on your output on page 21 Use page programming on page 107 Chapter 9 - References imagePRESS C800 Series...
-
Page 246: Output Settings, Values And Icons
[Portrait top] [Landscape left] [Landscape top] [Media] [Media] [Cover] [Media] [Print sides] [Cover] [Front] [Back] [Layout] [Normal] [Booklet] [Same up] [Multiple up] [Zoom] [Fit to page] [Percent] [Align] [Top left] [Top center] [Top right] Chapter 9 - References imagePRESS C800 Series... - Page 247 [Print delivery] -> [Advanced settings] -> [Sheet order] [Face up] [Face up reverse] [Face down] [Face down reverse] [Print delivery] -> [Advanced settings] -> [Sheet orientation] [Header up LEF] [Header up SEF] [Header down LEF] [Header down SEF] Chapter 9 - References imagePRESS C800 Series...
- Page 248 [None] [1 staple] [2 staples] [Top left] [Left edge] [Top right] [Top edge] [Bottom left] [Bottom edge] [Bottom right] [Right edge] [Saddle stitch] [Saddle press] [Folding] [Tri-fold in] [Tri-fold out] [Parallel fold] [None] Chapter 9 - References imagePRESS C800 Series...
- Page 249 Output settings, values and icons [Folding] [Print method]: [Print inside] [Print outside] [Half-fold] [Multi half-fold] [Z-fold] [Trimming] [None] [Finishing size] [Trim size] [Punching] [None] [2 holes] [3 holes] [Left] [Top] [Right] [Die set dependent] [4 holes] [Bottom] Chapter 9 - References imagePRESS C800 Series...
-
Page 250: Zoom Function
The upper left-hand corner of the glass plate is the origin of the image. Result of a scan with 100% zoom factor. Result of a scan with 50% zoom factor. Result of a scan with a 200% zoom factor. Chapter 9 - References imagePRESS C800 Series... -
Page 251: Feed Direction
Staple setting [1 staple] [1 staple] [Top left] [Bottom left] [1 staple] [Top right] [2 staples] [Left edge] [2 staples] [Left edge] [1 staple] [1 staple] [Bottom left] [Top left] [1 staple] [Top right] Chapter 9 - References imagePRESS C800 Series... - Page 252 [Left edge] [2 staples] [Right edge] [1 staple] [1 staple] [Top right] [Top left] [1 staple] [Bottom right] [2 staples] [Right edge] [1 staple] [1 staple] [Top left] [Top right] [1 staple] [Bottom right] Chapter 9 - References imagePRESS C800 Series...
- Page 253 Staple setting [1 staple] [1 staple] [Top left] [Bottom left] [1 staple] [Top right] [2 staples] [Left edge] [2 staples] [Left edge] [1 staple] [1 staple] [Bottom left] [Top left] [1 staple] [Top right] Chapter 9 - References imagePRESS C800 Series...
- Page 254 [Right edge] [1 staple] [1 staple] [Top right] [Top left] [1 staple] [Bottom right] [2 staples] [Right edge] [1 staple] [1 staple] [Top left] [Top right] [1 staple] [Bottom right] [2 staples] [Right edge] Chapter 9 - References imagePRESS C800 Series...
- Page 255 Feed direction for stapling Staple position A4 / LTR A3 / 11"x 17" Orientation Staple setting Orientation Staple setting [Saddle stitch- ing] Chapter 9 - References imagePRESS C800 Series...
-
Page 256: Feed Direction For Punching
Feed direction for punching The following table shows the orientation of originals in relation to the position of punch holes. Glass plate Automatic document feeder * Position of the holes in the output. Chapter 9 - References imagePRESS C800 Series... -
Page 257: Feed Direction For Folding
Automatic document feeder [128] Leading-edge length (1) and feed direction (2) [Tri-fold in] The [Tri-fold in] option folds paper to make it suitable for envelopes. The paper gets the shape of a C. Chapter 9 - References imagePRESS C800 Series... -
Page 258: Parallel Fold
[Parallel fold] The [Parallel fold] option folds the paper in four equal parts. Orientation for the [Parallel fold] option Folded output Glass plate Automatic document feeder [131] Leading-edge length (1) and feed direction (2) Chapter 9 - References imagePRESS C800 Series... -
Page 259: Feed Direction For The Inserter
Feed direction for the inserter Feed direction for the inserter Stapling The following table shows how to feed insert sheets in relation to the staple position. Staple position A4 / LTR A3 / 11"x 17" Orientation Orientation Chapter 9 - References imagePRESS C800 Series... - Page 260 Feed direction for the inserter Staple position A4 / LTR A3 / 11"x 17" Orientation Orientation Chapter 9 - References imagePRESS C800 Series...
-
Page 261: Feed Instruction For Envelopes
100 mm / 3.9" Yougatanaga 3 100 mm / 3.9" Kakugata 2 100 mm / 3.9" Kakugata 2, side-seam envelope 45 mm / 1.8" Not applicable No. 10 (COM10) 100 mm / 3.9" ISO-C5 Chapter 9 - References imagePRESS C800 Series... - Page 262 Loading limit Loading limit mark Monarch 70 mm / 2.8" Special feeder [139] Nagagata 3, Kakugata 2 [140] Nagagata 3, to prevent creased envelopes [141] No. 10 (COM10), DL, ISO-C5, Yougatanaga 3 [142] Monarch Chapter 9 - References imagePRESS C800 Series...
-
Page 263: Feed Instruction For Tab Paper
• Internal paper trays of the print module • Inserter Load forward-order tab paper face up, with the tabs at the right-hand side of the in tray: • Paper module • Bulk paper module • Special feeder Chapter 9 - References imagePRESS C800 Series... -
Page 264: Status Indicators
The job is a proof print. The job is a bundled job. The settings of the job can cause a conflict. Check the job settings to resume the print process. The job causes a ripping error. Chapter 9 - References imagePRESS C800 Series... -
Page 265: Paper Tray Indicators
The paper tray is in use for the print production. The paper tray contains tab sheets. The paper tray of the inserter contains tab sheets as insert sheets. The paper tray of the inserter contains insert sheets. Chapter 9 - References imagePRESS C800 Series... -
Page 266: More Prismasync Color Information
Spot colors allow the printing of unique brand colors for logos or business graphics. Spot colors are converted to the proper CMYK output color value via spot color tables or spot color libraries. Chapter 9 - References imagePRESS C800 Series... - Page 267 “None”. You can use leave out separations for the following document areas: • White separations • Cutting marks • Spot layers, that indicate a foil to be applied after the print process • Spot layers, that indicate a gold print Chapter 9 - References imagePRESS C800 Series...
-
Page 268: System Specifications
SMB), Static IP / Auto-IP (DHCP) Page Description Language Adobe ® ® PostScript 3 (3020), PDF 1.7 Extension level 3, PDF/X, Op- ® ® timized PostScript , Optimized PDF, Adobe PDF Print Engine 3.4, IPDS PDF, IPDS PCL Chapter 9 - References imagePRESS C800 Series... - Page 269 Asian font sets licenses: Korean, Japanese, Simplified Chinese, Traditional Chinese Languages British English, French, Italian, German, Spanish, Dutch, Finnish, Norwegian, Swedish, Danish, Polish, Czech, Hungarian, Portu- guese, American English, Russian, Japanese, Simplified Chinese Chapter 9 - References imagePRESS C800 Series...
-
Page 270: Paper Input Specifications
Approximately 26.9 kg / 59.3 lb Printer Cover-F1 Specification Value Description Cover for print-only system Stack Bypass-B1 Specification Value Description Special feeder to feed special media manually Maximum paper capacity 100 sheets (80 g/m² / 22 lb bond) Chapter 9 - References imagePRESS C800 Series... - Page 271 60 - 325 g/m² / 16 lb bond - 120 lb cover Paper feed technology • Suction feed • Air separation Features • Paper-level detection (visual) • Automatic tray opening • Double-sheet detection Chapter 9 - References imagePRESS C800 Series...
-
Page 272: Multi-Drawer Paper Deck-A
/ 4.7" x 9 1/4"), Kakugata 2 (240 mm 332 mm / 9 1/2" x 13") Paper weight 64 - 300 g/m² / 17 lb bond - 110 lb cover Paper feed technology • Friction feed • Air separation Chapter 9 - References imagePRESS C800 Series... -
Page 273: Document Insertion Unit-M
100-240 V AC, 50/60 Hz, 1.0 A Power consumption Maximum 120 W Dimensions (WxDxH) 746 mm x 793 mm x 1407 mm / 29 3/8" x 31 1/4" x 55 3/8" Weight Approximately 61 kg / 134 lb Chapter 9 - References imagePRESS C800 Series... -
Page 274: Finishing And Delivery Specifications
Professional Puncher Integration Unit-A1: 120-127 V AC, 60 Hz, 5.5 A Professional Puncher-C1 takes power from Professional Puncher Integration Unit-A1 Power consumption Professional Puncher Integration Unit-A1: Maximum 130 W Professional Puncher-C1: Maximum 320 W Chapter 9 - References imagePRESS C800 Series... -
Page 275: Paper Folding Unit-F
• Z-fold/half fold: 10 sheets Paper weight 52 - 105 g/m² / 14 lb bond - 28 lb bond Parallel fold: 52 - 90 g/m² / 14 lb bond - 24 lb bond Chapter 9 - References imagePRESS C800 Series... - Page 276 210 mm x 182 mm - 297 mm x 432 mm / 8.3" x 7.2" - 11.7 x 17" Custom sizes 2 staples: 182 mm x 182 mm - 297 mm x 432 mm / 7.2" x 7.2" - 11.7" x 17" Chapter 9 - References imagePRESS C800 Series...
- Page 277 1,500 sheets or 216 mm / 8.5" 330 mm x 483 mm, 305 mm x 457 mm, SRA3 / 13" x 19", 12" x 18", 12.6" x 17.7": 1,000 sheets or 147 mm / 5.79" Chapter 9 - References imagePRESS C800 Series...
- Page 278 210 mm x 182 mm - 297 mm x 432 mm / 8.3" x 7.2" - 11.7 x 17" Custom sizes 2 staples: 182 mm x 182 mm - 297 mm x 432 mm / 7.2" x 7.2" - 11.7" x 17" Chapter 9 - References imagePRESS C800 Series...
- Page 279 330 mm x 483 mm, 305 mm x 457 mm, SRA3, A3, A4R / 13" x 19", 12" x 18", 12.6" x 17.7" 11" x 17" LTTR: 1,000 sheets or 147 mm / 5.79" Chapter 9 - References imagePRESS C800 Series...
- Page 280 120-127 V AC, 50/60 Hz, 8 A Power consumption Maximum 500 W Dimensions (WxDxH) 800 mm x 792 mm x 1,239 mm / 31 1/2" x 31 1/4" x 48 3/4" Weight Approximately 180 kg / 397 lb Chapter 9 - References imagePRESS C800 Series...
- Page 281 Paper size for stapling Location: lower tray Default sizes: A3, A4, A4R / 11" x 17", LTR, LTRR Paper size for punching Location: lower tray, upper tray External 2/3 Hole Puncher-C1: Letter, Executive, 11" x 17" Chapter 9 - References imagePRESS C800 Series...
- Page 282 A3, A4R / 11" x 17", LTRR,: 650 sheets / 50 sets or 96 mm / 3.78" Different media sizes or lighter than 59 g/m² / 16 lb bond: 650 sheets or 96 mm / 3.78" Chapter 9 - References imagePRESS C800 Series...
- Page 283 52 - 256 g/m² / 14 lb bond - 95 lb cover Lower and upper tray: 52 - 300 g/m² / 14 lb bond - 110 lb cover Booklet tray : 60 - 256 g/m² / 16 lb bond - 95 lb cover Chapter 9 - References imagePRESS C800 Series...
- Page 284 A3, A4R / 11" x 17", LTRR,: 650 sheets / 50 sets or 96 mm / 3.78" Different media sizes or lighter than 59 g/m² / 16 lb bond: 650 sheets or 96 mm / 3.78" Chapter 9 - References imagePRESS C800 Series...
-
Page 285: Booklet Trimmer-D
50 sheets: 48 book pages (80 g/m² / 22 lb bond) including 2 cover sheets (up to 300 g/m² / 110 lb cover) Trim width 2 mm - 20 mm / 0.08" - 0.8" Output capacity 30 booklets Waste tray capacity 1,500 trimmed strips Chapter 9 - References imagePRESS C800 Series... - Page 286 Power requirement 120-127 V AC, 50/60 Hz, 4 A Dimensions (WxDxH) 536 mm x 770 mm x 1,040 mm / 21 1/8" x 30 3/8" x 41" (without conveyor tray and output tray) Chapter 9 - References imagePRESS C800 Series...
- Page 287 Finishing and delivery specifications Specification Value Weight Approximately 145 kg / 319 lb Chapter 9 - References imagePRESS C800 Series...
-
Page 288: Remote Monitor Specifications
Update frequency Every 5 seconds Time line Fixed (30 minutes) Printer information displayed • Host name • Print mode • Status panel • Attention light • Operator instruction • Time line Chapter 9 - References imagePRESS C800 Series... -
Page 289: Media Specifications
(17 lb cover - 28 lb cover) Color (64 g/m² - 90 g/m²) (17 lb cover - 24 lb cover) Prepunched (64 g/m² - 90 g/m²) (17 lb cover - 24 lb cover) Chapter 9 - References imagePRESS C800 Series... - Page 290 *5 Use with Envelope Feeder Attachment-F1 for ISO-C4 and Kakugata 2. *6 Use with Envelope Feeder Attachment-G1. Some types of Yougatanaga 3 and Nagagata 2 do not need the Envelope Feeder Attachment-G1. This depends on the manufacturer of the envelopes. Chapter 9 - References imagePRESS C800 Series...
-
Page 291: Supported Media Sizes By Paper Input Optional
139. 7 mm x 182 mm - 330.2 mm x 487.7 mm / 5 1/2" x 7.2" - 13" x 19.2" *5 Custom sizes for inserter: 182 mm x 182 mm - 330.2 x 487.7 mm / 7.2" x 7.2" - 13" x 19.2" Chapter 9 - References imagePRESS C800 Series... -
Page 292: Supported Envelope Types By Paper Input Optional
100 mm x 148 mm - 330.2 mm x 487.7 mm / 3.9" x 5.8" - 13" x 19.2" *4 Custom size paper module: 139. 7mm x 182 mm - 330.2mm x 487.7 mm / 5 1/2" x 7.2" - 13" x 19.2" Chapter 9 - References imagePRESS C800 Series... -
Page 293: Settings Editor
• Mozilla Firefox ® 10 and higher • Google Chrome™ 17 and higher • Apple Safari ® 6 and higher Language As defined in your browser, as long as the printer sup- ports this language Chapter 9 - References imagePRESS C800 Series... -
Page 294: Settings Editor Media Attributes
Select this check box when the media is used in the inserter. • Media family Select the media family that correctly matches the media type. • Surface type Select the surface that correctly matches the media family. Chapter 9 - References imagePRESS C800 Series... -
Page 295: Settings Editor Settings And Information
Software upgrade and download Settings and information Location Role Upload license file * [Support] -> [Software] Software upgrade * [Support] -> [Software updates] Printer driver download * [Support] -> [Software] Chapter 9 - References imagePRESS C800 Series... - Page 296 Other printers to send jobs to [Workflow] -> [Remote printers] The printers become available on the con- trol panel and in PRISMAsync remote manager. LPR print path [Configuration] -> [Connectivity] Socket printing [Configuration] -> [Connectivity] Chapter 9 - References imagePRESS C800 Series...
- Page 297 Scan to SMB shares [Workflow] -> [SMB shares] Energy saving Settings and information Location Role Energy save modes (low power mode, [Preferences] -> [System settings] sleep mode) and timers Chapter 9 - References imagePRESS C800 Series...
- Page 298 (device link support, device simulation, [Color] -> [Color & information bars] named color profile import and export, in- [Color] -> [Output profiles] formation and color control bars, color [Color] -> [Spot color libraries] mapping, leave out separations) Chapter 9 - References imagePRESS C800 Series...
- Page 299 Settings to enable the transaction printing [Transaction printing] -> [Settings] mode and to define the port Creation of transaction printing setups [Transaction printing] -> [Setups] A transaction printing setup is a collection of preset settings for streaming jobs. Chapter 9 - References imagePRESS C800 Series...
- Page 300 Face and header orientation in the output [Preferences] -> [Print job defaults] trays of finishers Delivery order of the output sheets [Preferences] -> [Print job defaults] Distance between staples when output [Preferences] -> [System adjustments] has two staples Chapter 9 - References imagePRESS C800 Series...
- Page 301 (color, size, type and weight) Default print settings [Preferences] -> [PostScript] (print resolution, 1-sided or 2-sided, bind- ing edge for 2-sided pages, offset stack- ing, sorting, output location, stapling) Default font substitution [Preferences] -> [PostScript] Chapter 9 - References imagePRESS C800 Series...
-
Page 302: Troubleshooting
Handling of crashed jobs [Support] -> [Troubleshooting] Error job analysis / save last received job [Support] -> [Troubleshooting] when a problem occurs Removal of printed jobs [Support] -> [Troubleshooting] Removal of scheduled jobs [Support] -> [Troubleshooting] Chapter 9 - References imagePRESS C800 Series... - Page 303 Restore factory default settings or factory [Support] -> [Troubleshooting] default color settings Save current system settings [Support] -> [Troubleshooting] Restore previous system settings [Support] -> [Troubleshooting] Export or import of color settings [Support] -> [Troubleshooting] Chapter 9 - References imagePRESS C800 Series...
- Page 304 Settings Editor settings and information Chapter 9 - References imagePRESS C800 Series...
-
Page 305: Index
Auxiliary booklet tray perform media family calibration....location (professional stacker / stapler)..perform printer calibration......162 location (standard stacker / stapler)....recommendation..........161 Auxiliary originals receiving tray Check first set location............. imagePRESS C800 Series... - Page 306 Covers Registration............ copy jobs............236 Color print setting............ management............ Curled output media Compression factor correction............176 scan jobs............Consumables recommended media........185 Daily maintenance for operator staple cartridges for saddle-stitch unit..187 tasks..............staple cartridges for staple unit....Dashboard toner cartridges..........imagePRESS C800 Series...
- Page 307 Image adjustment Error transaction printing mode.......89 shading correction......... Image alignment copy jobs............236 print setting............ scan jobs............Feeding originals Image quality automatic document feeder......copy jobs............238 File ID media..............scan jobs............media registration..........177 imagePRESS C800 Series...
- Page 308 Job planning media corrections.......... in job workflow..........28 printer driver.............50 media assignment..........97 PRISMAprepare..........52 Job preparation skew and rotation adjustments.....179 automated workflow........70 Media family from USB drive..........54 calibration............imagePRESS C800 Series...
- Page 309 Output location Placement originals copy jobs............237 Glass plate............print setting............ Power switch Output tray print module........... commercial name..........Prepress staff parts..............tasks..............Output Print job production removing............155 automated workflows........settings and values........hotfolders............70 storage............in job workflow..........28 imagePRESS C800 Series...
- Page 310 Print ticket Punch unit creation............. location (professional stacker / stapler)..Printed job location (standard stacker / stapler)....loading media to..........Punch waste Printed jobs removing (professional stacker / stapler)..211 E-shredding............ removing (standard stacker / stapler)...213 enable printing..........Punching imagePRESS C800 Series...
- Page 311 Scanning specifications..........270 license............... Spot color Scheduled jobs description............change print order of........Spot Colors media assignment via schedule....color mapping..........moving to the list of waiting jobs....Spot layers order of printing..........Advanced color management......27 imagePRESS C800 Series...
- Page 312 Turn off settings............295 print system............190 tasks............29, Turn on System configuration print system............189 tasks..............Two-knife trimmer System view commercial name..........information............location............. System specifications..........286 language............parts..............remote monitoring...........86 imagePRESS C800 Series...
- Page 313 Variable data printing description............description............Waiting jobs printing............99, printing job ticket........... Warning time configuration............ Waste toner container checking filling level........ordering............replacing............Workflow profiles selection of............transaction printing mode.......73 Zoom copy jobs............236 function............print setting............ scan jobs............imagePRESS C800 Series...
- Page 314 Index imagePRESS C800 Series...
- Page 315 6390 Dixie Road Mississauga, Ontario L5T 1P7, Canada CANON EUROPA N.V. Bovenkerkerweg 59, 1185 XB Amstelveen, The Netherlands (See http://www.canon-europe.com/ for details on your regional dealer) CANON LATIN AMERICA, INC. 703 Waterford Way Suite 400 Miami, Florida 33126 U.S.A. CANON AUSTRALIA PTY. LTD 1 Thomas Holt Drive, North Ryde, Sydney, N.S.W.