Table of Contents
Advertisement
Business HSI Basic Installation
Netgear 7550
Technical Reference Guide v2.0
Static Business Class HSI Basic Installation
NETGEAR 7550
Table of Contents
Multiple Lan Support ........................................................................................................ 3
Full Bhsi Install Summary ................................................................................................ 7
Physical Connections .......................................................................................................... 8
Auto Configuration ............................................................................................................. 9
Auto Configuration ............................................................................................................. 9
Gateway Configuration ..................................................................................................... 10
Remote Access Configuration .......................................................................................... 15
Public Lan Configuration ................................................................................................ 19
Wireless Network Configuration ...................................................................................... 23
Support Team Contacts ..................................................................................................... 41
Appendix A: Configuring Static Ip Into Computers ......................................................... 42
Appendix B: Wireless Guest Access ................................................................................ 59
1
Advertisement
Table of Contents

Related Manuals for NETGEAR 7550


Summary of Contents for NETGEAR 7550
- Page 1 Business HSI Basic Installation NETGEAR 7550 Technical Reference Guide v2.0 Static Business Class HSI Basic Installation NETGEAR 7550 Table of Contents Multiple LAN Support ......................3 Full BHSI Install Summary ....................7 Physical Connections ......................8 Auto Configuration ......................9 Auto Configuration ......................
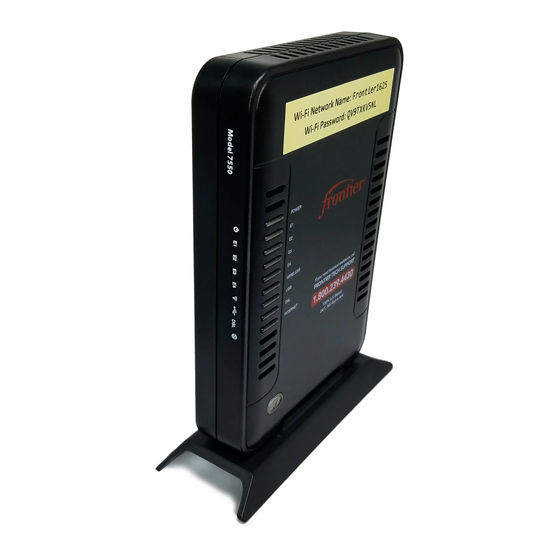
- Page 2 Netgear 7550. Note: Westell sold its modem technology to Netgear in early 2011 and Netgear has rebranded the 7550 as a Netgear product. Except for the name change the Netgear version is the same as the Westell version.
-
Page 3: Multiple Lan Support
Private + Public (resi or business) What does this When deploying a 7550 to a Static Business Class customer, there are no mean? restrictions on wireless use. (Wireless devices can use the Private LAN) Any customer devices manually provisioned with the assigned LAN Block IP addresses will use the Public LAN. - Page 4 Auto assigned 192.168.254.14 DHCP Server Public LAN 173.84.136.169 Auto assigned 192.168.254.15 To access modem: Use the 7550’s Private LAN address - 192.168.254.254 How many devices can the Private LAN support? Answer: 33 devices (with default settings) Continued on next page...
- Page 5 Public LAN 173.84.136.169 Manually assigned 173.84.136.171 (IP is LAN Block +3) To access modem: Use the 7550’s Public LAN address – 173.84.136.169 How many devices can the Public LAN support? Answer: depends on the LAN Block subnet mask: /30=1, /29=5, /28=13...
- Page 6 Business HSI Basic Installation NETGEAR 7550 Technical Reference Guide v2.0 Typical two A typical scenario using both Private and Public LANs together is shown LAN scenario here: A customer with 1 usable public LAN address (/30) can still benefit from wireless by using the 33 available private addresses for wireless connections.
-
Page 7: Full Bhsi Install Summary
Business HSI Basic Installation NETGEAR 7550 Technical Reference Guide v2.0 Full BHSI Install Summary Full install The following list summarizes all the tasks required to be manually summary completed for a Business HSI full install. • Outside cable and equipment conditioning and maintenance. -
Page 8: Physical Connections
Business HSI Basic Installation NETGEAR 7550 Technical Reference Guide v2.0 Physical Connections Overview The connections section of this document describes the physical connections required prior to configuration of a NETGEAR 7550 gateway. Connection diagram Ethernet cable Connect the Follow these steps to properly connect the gateway prior to configuration:... -
Page 9: Auto Configuration
Technical Reference Guide v2.0 Auto Configuration Auto On initial setup (out of box installation) or after a factory reset, the 7550 will Configuration run auto configuration. During the process, 7550 automatically detects WAN connection type, i.e. DSL or Ethernet (E1/Uplink Port). It also auto detects the PVC (0/35, 8/35 and 0/36) and connection type, i.e. -
Page 10: Gateway Configuration
Walled garden An Internet connection that is restricted prior to authentication. The Frontier Netgear 7550 gateway has a built-in walled garden, also known as the one- time setup wizard. When the walled garden/setup wizard is successfully completed, the customer should be able to surf the Internet. - Page 11 Business HSI Basic Installation NETGEAR 7550 Technical Reference Guide v2.0 Gateway Configuration, Continued Configure the gateway (continued) Step Action Time Zone Setting: Select your time zone and click on Apply. Wireless Settings: By default, Wireless is enabled (On). SSID is Frontier plus the last 4 digits of the gateway serial number.
- Page 12 Business HSI Basic Installation NETGEAR 7550 Technical Reference Guide v2.0 Gateway Configuration, Continued Configure the Step Action gateway PPPoE User Name and Password: Enter the primary account (continued) email address into the User Name field and the primary account password into the New Password and Retype New Password fields, and then click the Apply button on the PPP User Name and Password screen.
- Page 13 Business HSI Basic Installation NETGEAR 7550 Technical Reference Guide v2.0 Gateway Configuration, Continued Configure the gateway Step Action (continued) Do not fill out the fields on the Welcome to Frontier’s (continued) High-Speed Internet Service page when displayed. Leave the web browser open and continue to the next section: “Verify the gateway static WAN IP address”.
- Page 14 Business HSI Basic Installation NETGEAR 7550 Technical Reference Guide v2.0 Gateway Configuration, Continued Verify the When the one-time setup wizard is successfully completed, verify that the gateway static gateway has the correct static WAN IP address assigned. Follow these steps...
-
Page 15: Remote Access Configuration
Business HSI Basic Installation NETGEAR 7550 Technical Reference Guide v2.0 Remote Access Configuration Background Remote access is configured to provide the Internet Help Desk (IHD) direct access to the gateway via the WAN, rather than the LAN, minimizing customer and technician on-site assistance requirements. - Page 16 Business HSI Basic Installation NETGEAR 7550 Technical Reference Guide v2.0 Remote Access Configuration, Continued Configure the gateway for remote access (continued) Step Action Click Remote Administration on the Advanced screen. If presented, login to the gateway. Remember the password? (fr0nt13r) Result: The Remote Administration screen is displayed.
- Page 17 Enter remoteadmin in User Name field and enter f+rR3m0te in the Password field on the Remote Administration screen. Note that the 7550 now supports both HTTP and HTTPS with a check box “Enable Https” (Secured Communication) in the GUI. HTTPS is enabled by default.
- Page 18 Business HSI Basic Installation NETGEAR 7550 Technical Reference Guide v2.0 Select Enable Remote Access and Disable Timeout then click the Apply button on the Remote Administration screen. Result: Remote access is enabled. IHD can access the gateway at http://WAN IP Address: 2420 (i.e., http://74.42.41.170:2420).
-
Page 19: Public Lan Configuration
Technical Reference Guide v2.0 Public LAN Configuration Public LAN The NETGEAR 7550 will be configured to allow two simultaneous LAN networks: Public LAN and Private LAN. This section deals with the Public LAN. The Public LAN supports the customer’s devices assigned public IP addresses (from the work order’s LAN Block). - Page 20 Business HSI Basic Installation NETGEAR 7550 Technical Reference Guide v2.0 Public LAN Configuration, Continued Configure the Public LAN (continued) Step Action Click Public LAN on the Advanced screen. Select Public LAN Enable on the Public LAN screen. Continued on next page...
- Page 21 Business HSI Basic Installation NETGEAR 7550 Technical Reference Guide v2.0 Public LAN Configuration, Continued Configure the Public LAN (continued) Step Action Enter the gateway IP address and subnet mask into the Modem’s Public IP Address and Subnet Mask fields on the Public LAN screen.
- Page 22 Business HSI Basic Installation NETGEAR 7550 Technical Reference Guide v2.0 Public LAN Configuration, Continued Configure the Public LAN (continued) Step Action Click the OK button on the warning. Wait while the modem restarts. Result: The modem restarts and displays the Main screen after restarting.
-
Page 23: Wireless Network Configuration
The wireless network configuration section of this document provides step- by-step procedures to change the wireless network configuration. Default wireless The NETGEAR 7550 transmits a WPA2 encrypted wireless network in its network default configuration. The modem has a label on the bottom with its serial configuration number and a WPA encryption key. - Page 24 Business HSI Basic Installation NETGEAR 7550 Technical Reference Guide v2.0 Wireless Network Configuration, Continued Turn off If the customer desires wireless, skip this and jump to “Change the wireless – if SSID”. desired If the customer does not want the wireless feature left enabled, follow these...
- Page 25 Business HSI Basic Installation NETGEAR 7550 Technical Reference Guide v2.0 Wireless Network Configuration, Continued Turn off wireless – if desired (continued) Step Action Click the Apply button at the bottom of the Basic Security Settings screen. Click OK on the pop-up message.
- Page 26 Business HSI Basic Installation NETGEAR 7550 Technical Reference Guide v2.0 Wireless Network Configuration, Continued Change the Upon customer request, follow these steps to change the SSID (wireless SSID network name) from the default: Step Action On the Main page, under My Gateway > Quick Links, click the Change Wireless Settings link.
- Page 27 Business HSI Basic Installation NETGEAR 7550 Technical Reference Guide v2.0 Wireless Network Configuration, Continued Change the SSID Step Action (continued) Click the Apply button at the bottom of the Basic Security Settings screen. Click OK on the pop-up message. If presented, login to the modem.
- Page 28 Explain to the customer that using WPA-PSK encryption ensures that the wireless communications between their wireless clients and the NETGEAR 7550 gateway’s wireless access point are secure. Follow these steps to change the wireless network configuration from WEP to WPA:...
- Page 29 Business HSI Basic Installation NETGEAR 7550 Technical Reference Guide v2.0 Select WPA from Wireless Security drop down menu. Continued on next page...
- Page 30 Business HSI Basic Installation NETGEAR 7550 Technical Reference Guide v2.0 Wireless Network Configuration, Continued Change from WEP to WPA encryption (continued) Step Action Under WPA, select Personal (Pre-Shared Key), select the WPA type and encryption method, and enter a pre-shared key in the WPA Shared Key field.
- Page 31 Business HSI Basic Installation NETGEAR 7550 Technical Reference Guide v2.0 Wireless Network Configuration, Continued Change from WEP to WPA encryption (continued) Step Action Click Basic Security Settings in the left-hand column. Under Basic Settings, direct the customer to record or print the...
- Page 32 Wireless Network Configuration, Continued Guess Access 7550 now supports a 2 SSID via a new feature called “Guest Access” in the Wireless Settings page. To enable Guest Access, click “Wireless Settings” and then “Guest Access”. Once “Guest Access” is enabled, you can change the SSID (the default Guest Access SSID is Guest plus the last 4 digits of the serial number, e.g.
- Page 33 Business HSI Basic Installation NETGEAR 7550 Technical Reference Guide v2.0...
- Page 34 Business HSI Basic Installation NETGEAR 7550 Technical Reference Guide v2.0 Test the Service Overview There are three components of the Business install we must test: 1. WAN address is correct 2. Public LAN block addresses are correct 3. Wireless (if enabled)
- Page 35 • DSL trained (DSL light on solid) • Laptop wireless OFF • Laptop set to obtain an IP address automatically • Laptop wired to the 7550 via an Ethernet cable If we can reach the Internet, test 1 was successful. (WAN IP works)
- Page 36 Test number 1 (continued) Step Action Using your web browser, connect to 7550 (192.168.254.254) IF… THEN… 7550 GUI loads in browser… Problem with WAN IP address. • Contact 866-ISIS-NOC Unable to display page… • Verify physical connections (PC to 7550) •...
- Page 37 • Laptop manually assigned IP address (from customer’s LAN block) • Laptop manually assigned DNS address • Laptop wired to the 7550 via an Ethernet cable If we can reach the Internet, test 2 was successful. (Public LAN & WAN IP works)
- Page 38 Technical Reference Guide v2.0 Wireless Network Configuration, Continued Test number 2 (continued) Step Action Connect laptop to 7550 via Ethernet cable (any port E1-E4) Using your web browser, connect to an Internet site (ex. www.yahoo.com) IF… THEN… Yahoo loads in browser…...
- Page 39 Business HSI Basic Installation NETGEAR 7550 Technical Reference Guide v2.0 Wireless Network Configuration, Continued Test number 3 This will test for a working wireless connection. Requirements: • DSL trained (DSL light on solid) • All Ethernet cables disconnected • Laptop wireless ON •...
- Page 40 Business HSI Basic Installation NETGEAR 7550 Technical Reference Guide v2.0 Wireless Network Configuration, Continued Test number 3 (continued) Step Action Using your web browser, connect to an Internet site (ex. www.yahoo.com) IF… THEN… Yahoo loads in browser… Go to step 6 Unable to display page…...
-
Page 41: Support Team Contacts
Business HSI Basic Installation NETGEAR 7550 Technical Reference Guide v2.0 Support Team Contacts NETGEAR Use the following numbers for technical support with the NETGEAR 7550: 7550 Support Technical Support Customers Call All customers using a NETGEAR 7550 800-239-4430 modem/gateway Technicians... -
Page 42: Appendix A: Configuring Static Ip Into Computers
Business HSI Basic Installation NETGEAR 7550 Technical Reference Guide v2.0 Appendix A: Configuring Static IP into Computers Static IP PC This section is intended as a reference. It provides instructions on how to Programming program a Static IP into computers with very common operating systems. - Page 43 Business HSI Basic Installation NETGEAR 7550 Technical Reference Guide v2.0 Appendix A: Configuring Static IP into Computers, Continued Setting a Static Use the following table to program a static IP into a Windows XP machine. IP On Windows Step Action Click the start button.
- Page 44 Business HSI Basic Installation NETGEAR 7550 Technical Reference Guide v2.0 Appendix A: Configuring Static IP into Computers, Continued Setting a Static IP On Windows Step Action XP (continued) Click on View Network Connections. If the LAN connection is enabled, go to step 5.
- Page 45 Business HSI Basic Installation NETGEAR 7550 Technical Reference Guide v2.0 Appendix A: Configuring Static IP into Computers, Continued Setting a Static IP On Windows Step Action XP (continued) The Local Area Connection Properties window should open. Click on Internet Protocol (TCP/IP) to highlight it then click on properties.
- Page 46 Business HSI Basic Installation NETGEAR 7550 Technical Reference Guide v2.0 Appendix A: Configuring Static IP into Computers, Continued Setting a Static IP On Windows Step Action XP (continued) Enter the IP address, Subnet Mask and Default gateway address. IP address: <LAN block +2> ex. 173.84.136.170 Subnet mask: 255.255.255.252...
- Page 47 Business HSI Basic Installation NETGEAR 7550 Technical Reference Guide v2.0 Appendix A: Configuring Static IP into Computers, Continued Setting a Static IP On Windows Step Action XP (continued) Open the browser and test your internet connection by going to www.Frontier.com Setting a Static Use the following table to program a static IP into a Windows Vista machine.
- Page 48 Business HSI Basic Installation NETGEAR 7550 Technical Reference Guide v2.0 Appendix A: Configuring Static IP into Computers, Continued Setting a Static IP On Windows Step Action Vista Click Network and Share Center. (continued) Continued on next page...
- Page 49 Business HSI Basic Installation NETGEAR 7550 Technical Reference Guide v2.0 Appendix A: Configuring Static IP into Computers, Continued Setting a Static IP On Windows Step Action Vista Click Manage network connections from the left menu. (continued) Continued on next page...
- Page 50 Business HSI Basic Installation NETGEAR 7550 Technical Reference Guide v2.0 Appendix A: Configuring Static IP into Computers, Continued Setting a Static IP On Windows Step Action Vista Right-click Local Area Connection and click Properties. (continued) Note: You may need to accept a User Account control prompt Select Internet Protocol Version 4 (TCP/IPv4) and click Properties.
- Page 51 Business HSI Basic Installation NETGEAR 7550 Technical Reference Guide v2.0 Appendix A: Configuring Static IP into Computers, Continued Setting a Static IP On Windows Step Action Vista Enter the IP address, Subnet Mask and Default gateway address. (continued) IP address: <LAN block +2> ex. 173.84.136.170 Subnet mask: 255.255.255.252...
- Page 52 Business HSI Basic Installation NETGEAR 7550 Technical Reference Guide v2.0 Appendix A: Configuring Static IP into Computers, Continued Setting a Static IP On Windows Step Action Vista On the Network Connection Window, click on File then Close. (continued) Please restart your computer to apply the new settings.
- Page 53 Business HSI Basic Installation NETGEAR 7550 Technical Reference Guide v2.0 Appendix A: Configuring Static IP into Computers, Continued Setting a Static IP On Mac OS Step Action X 10.4 The System Preferences window opens. Click Network on the (continued) top menu.
- Page 54 Business HSI Basic Installation NETGEAR 7550 Technical Reference Guide v2.0 Appendix A: Configuring Static IP into Computers, Continued Setting a Static IP On Mac OS Step Action X 10.4 The Network window opens. (continued) 1. Select Built-in Ethernet in the show field.
- Page 55 Business HSI Basic Installation NETGEAR 7550 Technical Reference Guide v2.0 Appendix A: Configuring Static IP into Computers, Continued Setting a Static Use the following table to program a static IP into a Mac OS 10.5 Operating IP On Mac OS System.
- Page 56 Business HSI Basic Installation NETGEAR 7550 Technical Reference Guide v2.0 Appendix A: Configuring Static IP into Computers, Continued Setting a Static IP On Mac OS Step Action X 10.5 The System Preference window opens. Click Network on the top (continued) menu.
- Page 57 Business HSI Basic Installation NETGEAR 7550 Technical Reference Guide v2.0 Appendix A: Configuring Static IP into Computers, Continued Setting a Static IP On Mac OS Step Action X 10.5 The Network window opens. In the dropdown menu labeled (continued) Configure, select Manually.
- Page 58 Business HSI Basic Installation NETGEAR 7550 Technical Reference Guide v2.0 Appendix A: Configuring Static IP into Computers, Continued Setting a Static IP On Mac OS Step Action X 10.5 Enter your: (continued) 1. Enter your static IP. 2. Enter your Subnet Mask.
-
Page 59: Appendix B: Wireless Guest Access
Technical Reference Guide v2.0 Appendix B: Wireless Guest Access What is guest The Netgear 7550 has a guest access feature that can be enabled so that guests access of the customer may access Internet services without the ability to connect to any of the customer’s computers or the 7550’s gateway menu. - Page 60 Business HSI Basic Installation NETGEAR 7550 Technical Reference Guide v2.0 Appendix B: Wireless Guest Access, Continued Guest access Step Action configuration Enable Guest Access Set the SSID to whatever name the customer wants By default, wireless security is turned off for guest access...
- Page 61 Business HSI Basic Installation NETGEAR 7550 Technical Reference Guide v2.0 Appendix B: Wireless Guest Access, Continued Guest access Step Action configuration Leave option 4 set for the default of Broadcast and click Apply (continued) Click on System Monitoring and then click on Advanced Status...