
Related Manuals for Samsung SCX-5835 series


Summary of Contents for Samsung SCX-5835 series
- Page 1 SCX-5835_5935 Series Multi Functional Printer User’s Guide imagine the possibilities Thank you for purchasing a Samsung product.
- Page 2 This user’s guide is provided for information purposes only. All information included herein is subject to change without notice. Samsung Electronics is not responsible for any direct or indirect damages, arising from or related to use of this user’s guide.
-
Page 3: Safety Information
safety information These warnings and precautions are included in order to prevent injury to you and others, as well as preventing any potential damage to your machine. Be sure to read and understand all of these instructions before using the machine. Use common sense for operating any electrical appliance and whenever using your machine. -
Page 4: Operating Method
If the machine gets overheated, it releases smoke, makes strange noises, or generates an odd odor, immediately turn off the power switch and unplug the machine. ► This could result in electric shock or fire. Caution During an electrical storm or for a period of If the plug does not easily enter the electrical outlet, do not non-operation,remove the power plug from the attempt to force it in. -
Page 5: Installation / Moving
INSTALLATION / MOVING Warning Do not place the machine in an area with dust, humidity or water leaks. ► This could result in electric shock or fire. Caution When moving the machine, turn the power off and Do not put a cover over the machine or place it in an airtight disconnect all cords;... -
Page 6: Supply Usage
► This could result in electric shock or fire. ► Otherwise, it can cause damage to the machine. Do not remove any covers or guards that are fastened with screws. ► The machine should only be repaired by Samsung service technician. SUPPLY USAGE Caution Do not disassemble the toner cartridge. -
Page 7: Regulatory Information
During normal operation, this machine produces ozone. The ozone produced does not present a hazard to the operator. However, it is advisable that the machine be operated in a well ventilated area. If you need additional information about ozone, request your nearest Samsung dealer. Regulatory information_ 15... -
Page 8: Mercury Safety
MERCURY SAFETY Contains Mercury, Dispose According to Local, State or Federal Laws.(U.S.A. only) PERCHLORATE WARNING This Perchlorate warning applies only to primary CR (Manganese Dioxide) Lithium coin cells in the product sold or distributed ONLY in California USA. Perchlorate Material - special handling may apply. See www.dtsc.ca.gov/hazardouswaste/perchlorate. -
Page 9: Correct Disposal Of This Product (Waste Electrical & Electronic Equipment)
CORRECT DISPOSAL OF THIS PRODUCT (WASTE ELECTRICAL & ELECTRONIC EQUIPMENT) (Applicable in the European Union and other European countries with separate collection systems) This marking shown on the product or its literature, indicates that it should not be disposed with other household wastes at the end of its working life. -
Page 10: Fax Branding
TAIWAN ONLY RUSSIA ONLY AE95 AE95 FAX BRANDING The Telephone Consumer Protection Act of 1991 makes it unlawful for any person to use a computer or other electronic device to send any message via a telephone facsimile machine unless such message clearly contains in a margin at the top or bottom of each transmitted page or on the first page of the transmission the following information: 1. -
Page 11: Ringer Equivalence Number
RINGER EQUIVALENCE NUMBER The Ringer Equivalence Number and FCC Registration Number for this machine may be found on the label located on the bottom or rear of the machine. In some instances you may need to provide these numbers to the telephone company. The Ringer Equivalence Number (REN) is a measure of the electrical load placed on the telephone line, and is useful for determining whether you have “overloaded”... -
Page 12: Important Warning
The CE marking applied to this product symbolizes Samsung Electronics Co., Ltd. Declaration of Conformity with the following applicable 93/68/EEC Directives of the European Union as of the dates indicated: The declaration of conformity may be consulted at www.samsung.com/printer, go to Support > Download center and enter your printer name to browse the EuDoC. -
Page 13: Openssl License
OPENSSL LICENSE Copyright (c) 1998-2001 The OpenSSL Project. All rights reserved. Redistribution and use in source and binary forms, with or without modification, are permitted provided that the following conditions are met: 1. Redistributions of source code must retain the above copyright notice, this list of conditions and the following disclaimer. 2. - Page 14 CHINA ONLY Regulatory information_ 22...
-
Page 15: Using The Machine
about this user’s guide This user’s guide provides information about basic understanding of the machine as well as detailed explanation on each step during actual usage. Valuable for both novice and professional users can refer to this as a guide for installing and using the machine. -
Page 16: Finding More Information
SyncThru™ Web Admin Service on http://solution.samsungprinter.com. SetIP program is provided in the software CD. This help provides you with help information on printer driver and instructions for setting up the options for printing. (See "Samsung tab" Driver Help on page 8.) -
Page 17: Features Of Your New Product
features of your new product Your new machine is equipped with a number of special features that improve the quality of the documents you print. SPECIAL FEATURES Print with excellent quality and speed * Zoran IPS Emulation compatible with PostScript 3 •... -
Page 18: Features By Models
FEATURES BY MODELS The machine is designed to support all of your document needs from printing and copying to more advanced networking solutions for your business. Features by models include: FEATURES SCX-5835FN SCX-5935FN ● ● USB 2.0 ● ● USB Memory Interface ●... -
Page 19: Machine Overview
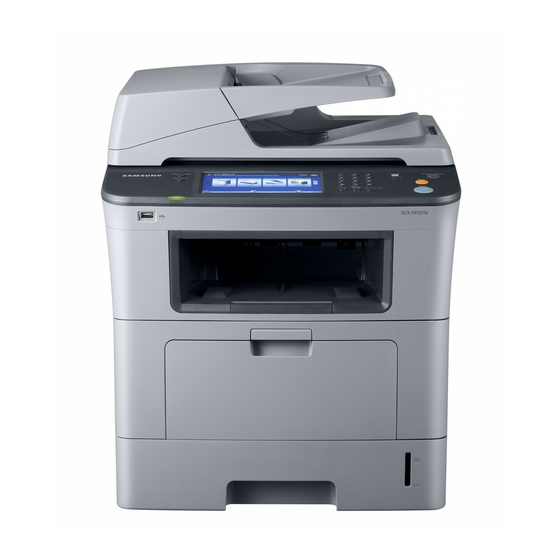
introduction These are the main components of your machine: This chapter includes: • Machine overview • Understanding the Status LED • Control panel overview • Introducing the touch screen and useful buttons MACHINE OVERVIEW Front view Scanner lock switch Optional tray 2 Document feeder cover Multi-purpose tray Document feeder width... -
Page 20: Rear View
Rear view USB host port Duplex unit USB port Rear cover Network port Power receptacle Telephone line socket Power-switch Extension telephone socket Control board cover (EXT) Introduction_ 2... -
Page 21: Control Panel Overview
CONTROL PANEL OVERVIEW Guides you to the machine setup and advanced settings. (See "Machine Setup" on page 1.) Machine Setup Shows jobs currently running, queued jobs and completed. Job Status Shows the status of your machine. (See "Understanding the Status LED" on page 4.) Status Displays machine’s current status and prompts during an operation. -
Page 22: Understanding The Status Led
UNDERSTANDING THE STATUS LED INTRODUCING THE TOUCH SCREEN AND USEFUL BUTTONS The color of the status LED indicates the machine's current status. Touch screen STATUS DESCRIPTION The touch screen on the control panel allows user-friendly operation of the • The machine is off-line. machine. -
Page 23: Power Saver Button
Machine Setup button Power Saver button When you press the Machine Setup button, you can browse current When the machine is not in use, save electricity by pressing the power save machine settings or change machine values. (See "Machine Setup" on mode button. -
Page 24: Getting Started
getting started This chapter gives you step-by-step instructions for setting up the USB connected machine and software. This chapter includes: • Setting up the hardware • Installing USB connected machine’s driver • Supplied software • Sharing your machine locally • System requirements 2. -
Page 25: Supplied Software
PDF files directly. 512 MB Pentium IV 1 GHz 10 GB • Windows Samsung Scan Manager: You can find out about (Pentium IV 2 GHz) (2048 MB) Scan Manager program information and installed scan Server 2008 driver's condition. -
Page 26: Installing Usb Connected Machine'sdriver
Macintosh INSTALLING USB CONNECTED MACHINE’S DRIVER REQUIREMENTS (RECOMMENDED) OPERATING A locally connected machine is a machine directly attached to your FREE HDD SYSTEM computer using the USB cable. If your machine is attached to a network, SPACE skip the following steps below and go on to installing network connected machine’s driver. - Page 27 6. If the test page prints out correctly, click Yes. 14. For Mac OS X 10.3, if Auto Select does not work properly, select Samsung in Printer Model and your machine name in Model Name. If not, click No to reprint it.
-
Page 28: Sharing Your Machine Locally
5.Double click cdroot > Linux > smartpanel > install.sh. Linux Installing the Printer Setting Utility You need to download Linux software package from the Samsung website 1.Make sure that the machine is connected to your computer and to install the printer softwares. -
Page 29: Setting Up A Host Computer
If the Host computer is directly connected to the machine with USB cable 6.If a set up complete message appears, click OK. and is also connected to the local network environment, the client computer 7.Open the file you want to print and start printing. connected to the local network can use the shared machine through the host computer to print. -
Page 30: Network Setup
network setup This chapter gives you step-by-step instructions for setting up the network connected machine and software. This chapter includes: • Network environment • Configuring TCP/IP • Introducing useful network programs • Installing network connected machine’s driver NETWORK ENVIRONMENT SyncThru™ Web Service Web server embedded on your network machine server, which allows you You can use network after connecting network cable to a corresponding port on your machine. - Page 31 If not, click No to reprint it. 8. To register as a user of the machine in order to receive information from Samsung, select the checkbox and click Finish. You are now registered to the Samsung web site. Network setup_ 2...
- Page 32 17. For Mac OS X 10.3, if Auto Select does not work properly, select Samsung in Printer Model and your machine name in Model Name. •For Mac OS X 10.4, if Auto Select does not work properly, select Samsung in Print Using and your machine name in Model.
-
Page 33: Basic Setup
basic setup After installation is complete, you may want to set the machine’s default settings. Refer to the next section if you would like to set or change values. This chapter gives you step-by-step instructions for setting up the machine. This chapter includes: •... -
Page 34: Changing The Display Language
CHANGING THE DISPLAY LANGUAGE USING POWER SAVING FEATURE To change the language that appears on the display, follow the steps below: When you are not using the machine for a while, use this feature to save power. 1. Press Machine Setup on the control panel. 1. -
Page 35: Understanding The Keyboard
Macintosh UNDERSTANDING THE KEYBOARD Macintosh does not support this function. Macintosh users need to You can enter alphabet characters, numbers, or special symbols using the change the default setting manually each time they want to print using keyboard on the touch screen. This keyboard is the same as a normal other settings. -
Page 36: Media And Tray
media and tray This chapter provides information on how to load originals and print media into your machine. This chapter includes: • Preparing originals • Loading paper in the tray • Loading originals • Printing on special media • Selecting print media •... -
Page 37: Selecting Print Media
• If you are copying a page from a book or magazine, lift the SELECTING PRINT MEDIA scanner lid until its hinges are caught by the stopper and then close the lid. If the book or magazine is thicker than 30 mm, You can print on a variety of print media, such as plain paper, envelopes, start copying with the lid open. -
Page 38: Changing The Tray Size
CHANGING THE TRAY SIZE LOADING PAPER IN THE TRAY The tray is preset to Letter or A4 size, depending on your country. To Tray 1 / optional tray change the size, you need to adjust the paper guides. Load the print media you use for the majority of your print jobs into tray 1. 1. -
Page 39: Multi-Purpose Tray
4. When you print a document, set the paper type and size for the tray. 3. Load the paper. For information about setting the paper type and size on the control panel. (See "Setting the paper size and type" on page 50.) •... -
Page 40: Printing On Special Media
PRINTING ON SPECIAL MEDIA The table below shows the available special media for each tray. When using special media, we recommend you feed one paper at a time. Check the maximum input number of media for each tray. (See "Print media specifications" on page 148.) OPTIONAL MULTI-PURPOSE TYPES... -
Page 41: Card Stock/ Custom-Sized Paper
• Make sure that there is no exposed adhesive material between labels. Transparency Exposed areas can cause labels to peel off during printing, which can To avoid damaging the machine, use only transparencies designed for use cause paper jams. Exposed adhesive can also cause damage to in laser printers. -
Page 42: Setting The Paper Size And Type
Glossy Load one paper to the multi-purpose tray at a time, glossy side facing • Recommended media: Glossy paper (Letter) for this machine by HP Brochure Paper (Product: Q6611A) only. • Recommended media: Glossy paper (A4) for this machine by HP Superior Paper 160 glossy (Product: Q6616A). -
Page 43: Printer Driver Features
printing This chapter explains common printing tasks. This chapter includes: • Printer driver features • Setting your machine as a default machine • Basic printing • Printing to a file (PRN) • Using special print features • Macintosh printing • Understanding Printing Preferences •... -
Page 44: Using Special Print Features
Macintosh basic printing. (See "Macintosh printing" on page 9.) USING SPECIAL PRINT FEATURES Linux basic printing. (See "Linux printing" on page 11.) Special print features include: The following Printing Preferences window is for Notepad in Windows XP. • "Printing multiple pages on one sheet of paper" on page 2. Your Printing Preferences window may differ, depending on your operating system or the application you are using. -
Page 45: Printing Booklets
5. Click the Paper tab, select the Size, Source, and Type. •Short Edge: This option is the conventional layout used in calendars. 6. Click OK or Print until you exit the Print window. 7. You can complete the poster by pasting the sheets together. Printing booklets This feature prints your document on both sides of a paper and arranges the pages so that the paper can be folded in half after printing to produce a... -
Page 46: Using Watermarks
Using watermarks Deleting a watermark The watermark option allows you to print text over an existing document. 1.To change the print settings from your software application, access For example, you use it when you want to have large gray letters reading Printing Preferences. -
Page 47: Opening Printing Preferences
Using a page overlay Basic tab After an overlay has been created, it is ready to be printed with your Use Basic tab to adjust how the document appear on the printed page. document. To print an overlay with a document: Click the Basic tab to display the options shown below. -
Page 48: Paper Tab
-Archive: 70 to 90 g/m (19 to 24 lb) If you need to keep the Paper tab print-out for a long period time, such as archives, select this Use the Paper tab options to set the basic paper handling specifications. option. -
Page 49: Advanced Tab
Font/Text Advanced tab Check All Text Black box to print all the texts in your document in solid Use the Advanced tab to set various printing options. black, regardless of the color it appears on the screen. Click the Advanced tab to display the options shown below. Advanced •Download as Outline: This option allows the driver to download any TrueType fonts that are used in your document not stored (resident) -
Page 50: Using Direct Printing Utility
The help screen gives detailed information about the printing Use the Samsung tab to display the copyright and the version number of features provided by the printer driver. -
Page 51: Changing The Default Print Settings
Using the shortcut icon SETTING YOUR MACHINE AS A DEFAULT MACHINE 1. Select the PDF file you wish to print, drag and drop it to the Direct Printing Utility shortcut icon on your desk top. The selected PDF file is 1. -
Page 52: Changing Printer Settings
3. Choose your paper size, orientation, scaling, other options, and make Graphics sure that your machine is selected. Click OK. The Graphics tab provides options for selecting Resolution. Select Graphics from the drop-down list under Orientation to access the graphic features. •Resolution: This option allows you to select the printing resolution. -
Page 53: Linux Printing
Printing multiple pages on one sheet of paper LINUX PRINTING You can print more than one page on a single sheet of paper. This feature provides a cost-effective way to print draft pages. Printing from applications 1. Open an application, and select Print from the File menu. There are a lot of Linux applications that allow you to print using Common UNIX Printing System (CUPS). -
Page 54: Printing Files
5. Click Apply to apply the changes and close the Properties window. 4. Click OK to apply the changes and close the Printer Properties window. 6. Click OK in the LPR GUI window to start printing. 7. The Printing window appears, allowing you to monitor the status of your print job. -
Page 55: Understanding Ps Driver's Printing Preferences
Understanding PS driver’s Printing Preferences Pages Per Sheet You can select the number of pages to print on a single sheet of paper. Opening Printing Preferences To print more than one page per sheet, the pages will be reduced in size 1.Open the document you want to print. -
Page 56: Understanding The Copy Screen
copying This chapter gives you step-by-step instructions for copying documents. This chapter includes: • Understanding the Copy screen • Using special copy features • Basic copy • Changing the default copy settings • Changing the settings for each copy UNDERSTANDING THE COPY SCREEN Advanced tab When you press Copy on the main screen, the Copy screen appears which has several tabs and lots of copying options. -
Page 57: Changing The Settings For Each Copy
6. Press Start on the control panel to begin copying. Image tab To cancel the current copy job, press Stop on the control panel. Or you can delete the current and pending job using Job Status on the control panel. Select the job you want to cancel and press Delete. CHANGING THE SETTINGS FOR EACH COPY On the Basic tab of the Copy screen, you can select copy features before starting to copy. -
Page 58: Copying On Both Sides Of Originals
pages of originals will be printed on the back side of a paper. Copying on both sides of originals Press the Basic tab > Duplex, then use left/right arrows to select Duplex value. If you want to copy originals on the scanner glass and copy both sides of original, the message Another Page? appears after the first page •... -
Page 59: Using Special Copy Features
4. Press On to enable job build function. Selecting the type of originals Press the Basic tab and select an appropriate original type. • Text: Use for originals containing mostly text. • Text/Photo: Use for originals with mixed text and photographs. •... -
Page 60: Poster Copying
1. Place the front side of an original facing down on the scanner glass Poster copying where arrows indicate as shown, and close the scanner lid. Your original will be divided into 9 portions. You can paste the printed pages together to make one poster-sized document. -
Page 61: Cover Copying
5. Press On to activate this feature. B5, ISO B5, Executive, A5 and Statement sized paper. 6. Press OK. Cover copying 7. Press Start on the control panel to begin copying. The machine automatically adds covers to your copied set using stock taken from a different tray. -
Page 62: Erasing Background Images
1. Place a single original face down on the scanner glass and close the Shifting margins scanner lid. Or load the originals face up in the document feeder. (See You can secure a room for binding by shifting the margin of a page. "Loading originals"... -
Page 63: Understanding The Scan Screen
Then, the scanned data will be stored in the connected computers My Documents folder. When you install all the softwares in the supplied CD, the Samsung Scan Manager is also automatically installed on your computer. This feature can be used via the local connection or the network connection. -
Page 64: Scan To Email
computer. Basic tab •Select: Moves to the application program you have selected. This section explains the Basic tab of Scan to Email, Scan to PC and Scan to Server’s basic screen. •Logout: Logout from the Scan to PC screen. Scan to Email •Duplex: Selects whether the machine scans on one side of the paper (1-Sided), both sides of the paper (2-Sided), or both sides of paper •From: Sender's email address. -
Page 65: Output Tab
page 1.) Output tab •Back: Returns to the previous screen. Advanced tab • Quality: Adjusts the display quality of the scan output. (See "Quality" on page 9.) • Scan Preset: Automatically changes some scan options, such as file format, resolution, and more. You can adjust options to fit each specific •... -
Page 66: Scanning And Sending Multiple Documents In A Single Email
Scanning and sending multiple documents in a Sending a scanned image to several destinations as single email an email attachment You can make multiple scanning jobs into a single file. And, therefore, you 1. Load originals face up into the document feeder, or place a single can send the document with a single email. -
Page 67: Storing Email Addresses
YOUR COMPUTER (SCAN TO PC) 4.Click Add Group. 5.Enter Group Name and Speed No.. You can scan an image on the machine via the Samsung Scan Manager 6.Add Individual addresses to the e-mail group. program that is installed in your networked computer. -
Page 68: For Network Connected Machine
If neccessary, press the right arrow to toggle from Local PC to Network 5. Select Duplex and Resolution in the Basic tab. 6. Select ID and enter Password, which you have set from the Samsung 6. Press Scan to Server to show the SMB server list you entered in the Scan Manager. -
Page 69: Using Samsung Scan Manager
If you have installed the printer driver, Samsung Scan Manager program You can make multiple scanning jobs into a single file. And, therefore, you has installed too. Start Samsung Scan Manager program to find out about can send the document with a single access to the server. -
Page 70: Changing The Scan Feature Settings
saved. You can choose among BMP, JPEG, PDF, and TIFF. To use 2 Sided and 2 Sided, Rotate Side 2, load the originals on the document feeder. If the machine cannot detect the original on the Scan Property document feeder, it automatically changes the option to 1 Sided. •Computer ID: Shows the ID of your computer. -
Page 71: Erase Background
Erase Background File Format You can lighten, reduce or deletes the dark background from scanning You can select the file format before you proceed with the scanning job. colored paper or newspaper originals. Press Scan > Scan to Email (or Scan to PC or Scan to Server) > the Press Scan >... -
Page 72: Scanning With Twain-Enabled Software
8. Check Extract text and graphics to give users permission to extract 8. Enter a picture name, and select a file format and destination to save the text or graphics. picture. 9. Press OK. 9. Your picture has been successfully copied to your computer. Choose one of the options on screen. -
Page 73: Macintosh Scanning
•You can also scan using TWAIN-compliant softwares, such as Adobe MACINTOSH SCANNING Photoshop. •If scanning does not operate in Image Capture, update Mac OS to You can scan documents using Image Capture program. Macintosh OS the latest version. Image Capture operates properly in Mac OS X offers Image Capture program. -
Page 74: Using The Image Manager
Preview Pane. To delete a Job Type setting 1.Select the setting you want to delete from the Job Type drop-down list. 2.Click Delete. The setting is deleted from the list Using the Image Manager The Image Manager application provides you with menu commands and tools to edit your scanned image. - Page 75 TOOLS NAME FUNCTION Saves the image. Save Cancels your last action. Undo Restores the action you canceled. Redo Allows you to scroll through the image. Scroll Crops the selected image area. Crop Zooms the image out. Zoom Out Zooms the image in. Zoom In Allows you to scale the image size;...
-
Page 76: Understanding The Fax Screen
faxing This chapter gives you information about using your machine as a fax machine. This chapter includes: • Preparing to fax • Using the polling option • Understanding the fax screen • Using mailbox • Sending a fax • Printing a report after sending a fax •... -
Page 77: Sending A Fax
Image tab • : Removes all digits of the selected entry. • Remove: Removes the selected fax number entry. • Remove All: Removes all the fax numbers in the input area. • Address: Picks up the frequently used fax numbers directly from your machine or from SyncThru™... -
Page 78: Resending Automatically
5. Press On Hook Dial on the control panel. Sending a fax 6. Enter a fax number using the number keypad on the control panel. 1. Press Fax from the main screen. If the number is which you have dialed recently, press the Redial/Pause 2. -
Page 79: Receiving A Fax
•Display Between Segments: After executing a segment, the job is Adding documents to a reserved delay fax job paused with this screen is displayed. Then user can select to keep You can add additional documents to the delayed fax job which is saved sending fax or stop. -
Page 80: Adjusting The Document Settings
•Off: Prints only one side of the paper. •If you have set your machine to this mode and your answering machine is switched off, or no answering machine is connected to •Long Edge: Prints both sides of the paper, however the binding will be EXT socket, your machine automatically goes into Fax mode after the long edge. -
Page 81: Setting Up A Fax Phone Book
Darkness Storing Group fax numbers (Group No.) You can select the degree of darkness of the original document. 1. Press Fax > the Basic tab > Group. Press Fax > the Image tab > Darkness. Press the right arrow to enhance 2. -
Page 82: Using The Polling Option
USING THE POLLING OPTION Polling from a remote Mailbox This option allows you to retrieve (poll) a fax which is stored in the Mailbox Polling is used when one fax machine requests another to send a of on the remote machine. Before you start polling, you must be informed of document. -
Page 83: Printing A Report After Sending A Fax
5. Press Toll Save. Storing originals in Mailbox 6. Press On. Since you created the mailbox, you can store originals in it. 7. Press Start Time and set the start date and time with left/right arrows. 1. Press Fax from the main screen. 8. -
Page 84: Forwarding A Sent Fax To Other Destination By An Email
Forwarding a sent fax to other destination by an email 1. Press Machine Setup on the control panel. 2. Press Admin Setting. When the login message pops up, enter password and press OK. (See "Setting the authentication password" on page 1.) 3. -
Page 85: Using Usb Memory Device
using usb memory device This chapter explains how to use a USB memory device with your machine. This chapter includes: • About USB memory device • Changing the scan feature settings • Understanding the USB screen • Printing from a USB memory device •... -
Page 86: Understanding The Usb Screen
UNDERSTANDING THE USB SCREEN Duplex This feature especially applies when the original documents to be scanned To use the USB feature, press USB on the main screen. If the screen are two-sided. You can select whether to scan only one side of the paper or both sides of the paper. -
Page 87: Printing From A Usb Memory Device
Darkness File Format You can select the degree of darkness of the scanned output. If your You can select the file format before you proceed with the scanning job. original document is light or faded, press the right arrow to make the output Press USB >... -
Page 88: Using Document Box
using document box This chapter explains how to use Document Box with your machine. This chapter includes: • About document box • Storing documents to document box • Understanding the document box screen • User Box tab: Create the box where you can save documents such as ABOUT DOCUMENT BOX the file you have printed, sent by email, or scanned. -
Page 89: Storing Documents To Document Box
Edit a Box Screen STORING DOCUMENTS TO DOCUMENT BOX You can modify a box name or an owner name. To modify a Document This machine allows you to store the scanned data on the hard drive. Box, select a box from the Document Box list and press Edit. Storing documents from document box You can scan orignals directly from Document Box menu. - Page 90 3. Enter the file name in the File Name field with the pop up keyboard. Then press OK. 4. Select a destination box and press OK. 5. Press Start from the control panel to begin a job. using document box_ 3...
-
Page 91: Using Standard Workflow
using standard workflow This chapter explains how to use standard workflow with your machine. This chapter includes: • About standard workflow • Various operations with workform • Understanding the standard workflow screen ABOUT STANDARD WORKFLOW Workflow Screen Favorite Tab Standard Workflow is a feature for users to conveniently operate jobs with pre-arranged task sets called workform. -
Page 92: Workform Creating Screen
•Name: Shows the workform name. set every mandatory items of every assigned transmit modules. •Input: Shows the workform’s input module name. After you do fill out all mandatory items, the Save & Execute •Transmit: Shows the workform’s transmit module name. If two or more and Save button are enabled. -
Page 93: Fax Forwarding
You can forward the received fax to another destinations. To forward a fax, your machine checks caller’s ID that the fax service provides. When the caller is also Samsung’s fax machine, your machine checks the fax number that the user defined for the machine information. -
Page 94: Machine Status And Advanced Feature
machine status and advanced feature This chapter explains how to browse the current status of your machine, and the method of setting for the advanced machine setup. Read this chapter carefully in order to use your machine's diverse features. This chapter includes: •... -
Page 95: General Settings
GENERAL SETTINGS OPTION DESCRIPTION Before using the machine, set up the machine parameter, as follows: Allows you to select the tray and paper for a Tray Management printing job. Tray Confirmation Message 1. Press Machine Setup on the control panel. activates the window asking whether you set the 2. -
Page 96: Copy Setup
OPTION DESCRIPTION OPTION DESCRIPTION You can choose the file policy for generating file You can print optional information such as ID, Stored Job File Stamp name before proceeding with the job through the Policy Machine Information, Date & Time, Comment, HDD. -
Page 97: Fax Setup
FAX SETUP OPTION DESCRIPTION This machine offers you various options for setting up the fax system. You Sets the printing method for the received fax. Received Fax can change the default settings for your preferences and needs, as follows: Printing •... -
Page 98: Access Control
SECURITY OPTION DESCRIPTION • Document Policy: You can set the document This feature lets you control and lock all outgoing data, or change the Mailbox Setup password. stored in Mailbox to delete or retain documents after completion. Select On for each option to 1. - Page 99 OPTION OPTION DESCRIPTION OPTION OPTION DESCRIPTION When you install the optional FDI Foreign Device It disables Authentication Authentication kit, select Foreign Device Interface Mathod Authentication Method. Interface Configuration Setup to activate it. It enables the local authentication Local mode. The user ID and password •...
- Page 100 User Authentication Method OPTION OPTION DESCRIPTION If you are an administrator, you can enable authentication service before You can set the local account for Standard using the machine to improve security for the device. If user maximum 500 users. When the authentication service has been activated, only authorized users can Accounting users perform their copy, fax,...
- Page 101 6.Click on Authority, and check the Role Name according to the current 9.Enter Search Root Directory, the top search level of the LDAP user’s role. directory tree. •Users can create a new role group by clicking on the Add button. 10.Select Authentication Method.
-
Page 102: Optional Service
OPTIONAL SERVICE When you want to add the optional features for this machine, you have to OPTION DESCRIPTION install the optional kit, and then, set the machine to enable, and activate You can enable (or disable) job log to record job Job Log those features. -
Page 103: Standard Workflow Management
STANDARD WORKFLOW MANAGEMENT PRINTING A REPORT You can set whether to use or not to use each features that standard You can print a report on the machine's configuration or font list, etc. workflow provides. 1. Press Machine Setup on the control panel. 1. -
Page 104: Menu Overview
MENU OVERVIEW OPTION SUB-OPTION DESCRIPTION You can print a report on the The control panel provides access to various menus to set up the machine Report Configuration or use the machine's functions. These menus can be accessed by pressing machine's overall configuration. Report Machine Setup, Job Status, or touching menus on the display screen. -
Page 105: Machine Setup Button
Admin Setting ITEMS OPTION Scan Scan to Email ITEMS OPTION Basic General Device Info Advanced Date&Time Image Default Settings Output Measurements Scan to PC Timers Basic Language Advanced Power Saver Image Tray Management Output Altitude Adjustment Scan to Server Contention Management Basic Sound Advanced... -
Page 106: Introducing Useful Management Tools
management tools This chapter introduces management tools provided to help you make full use of your machine. This chapter includes: • Introducing useful management tools • Smarthru Office • Using SyncThru™ Web Service • Using SetIP Program • Using the Smart Panel program •... -
Page 107: E-Mail Notification Setup
4. Set required settings. Programs or All Programs > your printer driver name > Smart Panel. •If you have already installed more than one Samsung machine, first select the correct machine model you want in order to access the corresponding Smart Panel. -
Page 108: Smarthru Office
Click Advanced button to set more scan options. include: Categories, Binder, Life Cycle, Scan and OCR, Fix and Enhance, and Samsung Website. You can disable this menu by checking 3.Set scan settings and click Scan. “Do not show this diaglog again”. -
Page 109: Using Setip Program
1. Double-click the Unified Driver Configurator on the desktop. It is especially for the network administrator to set several network IPs at the You can also click the Startup Menu icon and select Samsung Unified same time. Driver > Unified Driver Configurator. -
Page 110: Printers Configuration
Scanners configuration In this window, you can monitor the activity of scanner devices, view a list of The printer control buttons are, as follows: installed Samsung machine devices, change device properties, and scan •Refresh: Renews the available machines list. images. -
Page 111: Ports Configuration
“consumer” applications to these devices via the single I/O port. The Unified Linux Driver package provides an appropriate port sharing mechanism that is used by Samsung printer and scanner drivers. The drivers talk to their devices via so-called machine ports. The current status of any machine port can be viewed via the Ports configuration. -
Page 112: Maintenance
maintenance This chapter provides information for maintaining your machine and the toner cartridge. This chapter includes: • Printing a machine report • Checking Stored Documents • Monitoring the supplies life • Cleaning a machine • Finding the serial number • Storing the toner cartridge •... -
Page 113: Cleaning A Machine
3. With a dry, lint-free cloth, wipe away any dust and spilled toner from the CLEANING A MACHINE toner cartridge area. If printing quality problems occur or if you use your machine in a dusty enviroment, you need to clean your machine regularly to keep the best printing condition and use your machine longer. -
Page 114: Storing The Toner Cartridge
Cleaning the scan unit Keeping the scan unit clean helps ensure the best possible copies. We suggest that you clean the scan unit at the start of each day and during the day, as needed. 1. Slightly dampen a soft, lint-free cloth or paper towel with water. 2. -
Page 115: Troubleshooting
troubleshooting This chapter gives helpful information for what to do if you encounter an error. This chapter includes: • Redistributing toner • Clearing paper jams • Clearing original document jams • Understanding display messages • Tips for avoiding paper jams •... -
Page 116: Clearing Original Document Jams
5. Open the document feeder inner cover. Gently remove the jammed CLEARING ORIGINAL DOCUMENT JAMS paper. When an original jams while passing through the document feeder, a warning message appears on the display screen. To avoid tearing the document, remove the jammed document slowly and gently. -
Page 117: Clearing Paper Jams
• Ensure that the recommended side of the print media is facing down in 3. Remove the jammed paper by gently pulling it straight out. the tray, or facing up in the multi-purpose tray. • If paper jams occur frequently when you print on A5/B5-sized paper: Load the paper into the tray with the long edge facing the front of the tray. -
Page 118: In The Multi-Purpose Tray
4. Pull the paper straight up and out. 1. Open the front cover and pull the toner cartridge out, lightly pushing it down. 2. Remove the jammed paper by gently pulling it straight out. 5. Insert the trays back into the machine. Printing automatically resumes. In the multi-purpose tray Click this link to open an animation about clearing a jam. -
Page 119: In The Duplex Unit Area
4. If you see the jammed paper, push the pressure lever on each side up 7. While pushing the fuser lever to the right, open the fuser door. and remove the paper. Skip to step 9. 8. Pull the jammed paper out. If the jammed paper does not move when you pull, push the pressure lever on each side up to loosen the paper, and then remove it. - Page 120 2. Remove the jammed paper from the duplex unit. 6. Fold the duplex guide and close the rear cover. If the paper does not come out with the duplex unit, remove the paper from the bottom of the machine. Insert the duplex unit into the machine. If you still do not see the paper, go to the next step.
-
Page 121: Understanding Display Messages
UNDERSTANDING DISPLAY MESSAGES SUGGESTED MESSAGE MEANING SOLUTIONS Messages appear on the control panel display to indicate the machine’s status or errors. Refer to the tables below to understand the messages’ and The document failed Lift up the document Original paper jam their meaning, and correct the problem, if necessary. -
Page 122: Solving Other Problems
The toner cartridge Install a Toner cartridge is CONDITION SUGGESTED SOLUTIONS you have installed is Samsung-genuine toner not compatible. not for your machine. cartridge, designed for Check user’s guide Turn the machine off and back on again. If the The touch screen your machine. -
Page 123: Printing Problems
Printing problems CONDITION SUGGESTED SOLUTIONS • There is too much paper in the tray. Remove POSSIBLE SUGGESTED The paper keeps CONDITION excess paper from the tray. If you are printing CAUSE SOLUTIONS jamming. on special materials, use the multi-purpose The machine is not Check the power cord The machine tray. - Page 124 POSSIBLE SUGGESTED POSSIBLE SUGGESTED CONDITION CONDITION CAUSE SOLUTIONS CAUSE SOLUTIONS The document size Get more hard disk space The machine cable Disconnect the machine (Continued) The The machine is so big that the and print the document is loose or cable and reconnect.
-
Page 125: Printing Quality Problems
POSSIBLE SUGGESTED CONDITION SUGGESTED SOLUTIONS CONDITION CAUSE SOLUTIONS If faded areas, generally rounded, occur Dropouts The resolution of Reduce the photo size. If randomly on the page: The print quality the photo is very you increase the photo size of photos is not •... - Page 126 CONDITION SUGGESTED SOLUTIONS CONDITION SUGGESTED SOLUTIONS If toner smears on the page: • Ensure that the paper is loaded properly. Toner smear Page skew • Clean the inside of the machine. (See • Check the paper type and quality. (See "Print "Cleaning the inside"...
-
Page 127: Copying Problems
Copying problems CONDITION SUGGESTED SOLUTIONS • Clean the inside of the machine. (See CONDITION SUGGESTED SOLUTION Loose toner "Cleaning the inside" on page 2.) Use Light and Dark arrows to lighten or darken Copies are too light • Check the paper type and quality. (See "Print the backgrounds of copies in the Basic tab of or too dark media specifications"... -
Page 128: Scanning Problems
Scanning problems Fax problems CONDITON SUGGESTED SOLUTIONS CONDITION SUGGESTED SOLUTIONS • Make sure that you place the original to be • Unplug the power cord and plug it in again. The scanner does not The machine is not scanned face down on the scanner glass, or work. -
Page 129: Common Postscript Problems
CONDITION SUGGESTED SOLUTIONS POSSIBLE PROBLEM SOLUTION CAUSE The other fax machine may be turned off, out of The machine dials a paper, or cannot answer incoming calls. Speak The print job may Make sure that the print number, but the A PostScript error with the other machine operator and ask her/him not be PostScript. -
Page 130: Common Linux Problems
Common Linux problems CONDITION SUGGESTED SOLUTIONS This is a known bug in Ghostscript (until GNU CONDITION SUGGESTED SOLUTIONS Some color images Ghostscript version 7.05) when the base color come out all black. • Check if the printer driver is installed in your The machine does space of the document is indexed color space system. -
Page 131: Common Macintosh Problems
Common Macintosh problems CONDITION SUGGESTED SOLUTIONS • Ensure your machine is attached to your CONDITION SUGGESTED SOLUTIONS The machine does computer, connected properly via the USB not appear on the Printing the PDF file as an image may enable The machine does port, and is turned on. -
Page 132: Supplies And Accessories
HOW TO PURCHASE ACCESSORY FUNCTION PART NAME To order Samsung-authorized supplies, accessories and, maintenance parts, contact your local Samsung dealer or the retailer where you Extend your CLP-MEM202: 256 MB Memory module purchased your machine. You can also visit www.samsung.com/supplies, machine’s memory... -
Page 133: Available Maintenance Parts
4. Slowly shake the cartridge five or six times to distribute the toner evenly AVAILABLE MAINTENANCE PARTS inside the cartridge. It will assure maximum copies per cartridge. To avoid print quality and paper feed problems resulting from worn parts and to maintain your machine in top working condition, the following parts will need to be replaced after printing the specified number of pages or when the life span of each item has expired. -
Page 134: Upgrading A Memory Module
6. Close the control board cover by aligning the groove on it with the notch When installing accessories, the battery inside the machine is a service component. Do not change it by yourself. on the machine and sliding it. There is a risk of an explosion if battery is replaced by an incorrect type. -
Page 135: Replacing The Document Feeder Rubber Pad
REPLACING THE DOCUMENT FEEDER RUBBER You will need to replace the document feeder rubber pad when there seems to be a consistent problem with paper pickup or when its specified yield is reached. 1. Open the document feeder cover. 2. Remove the document feeder rubber pad from the document feeder, as shown below. -
Page 136: General Specifications
specifications This chapter guides you about this machine’s specifications such as various features. This chapter include: • General specifications • Printer specifications • Scanner specifications • Copier specifications • Facsimile specifications • Print media specifications GENERAL SPECIFICATIONS The symbol * optional feature depending on machines. ITEM DESCRIPTION Up to 50 sheets 80 g/m... -
Page 137: Printer Specifications
ITEM DESCRIPTION 500 x 465 x 547 mm External dimension (19.7 x 18.3 x 21.5 inches) without optional tray (W x D x H) 23.1 Kg (50.88 lbs) Weight (Including consumables) Paper: 2.9 Kg (6.29 lbs) Package weight Plastic: 1.9 Kg (4.17 lbs) Up to 80,000 pages (Monthly) Duty cycle 180 °C (356 °F) -
Page 138: Scanner Specifications
SCANNER SPECIFICATIONS ITEM DESCRIPTION TWAIN standard/WIA standard Compatibility Color CCD Scanning method TWAIN standard Up to 600 x 600 dpi (Up to 4,800 x 4,800 dpi by software enhancement) Resolution WIA standard Up to 600 x 600 dpi Scan to USB 100, 200, 300 dpi Scan to Email 100, 200, 300, 400, 600 dpi... -
Page 139: Facsimile Specifications
FACSIMILE SPECIFICATIONS The fax feature may not be supported depending on machines. ITEM DESCRIPTION ITU-T G3 Compatibility Public Switched Telephone Network (PSTN) or behind PABX Applicable line MH/MR/MMR/JBIG/JPEG (Tx only) Data coding 33.6 Kbps Modem speed Up to 3 seconds/page Transmission speed 356 mm (14 inches) Maximum document length... -
Page 140: Print Media Specifications
PRINT MEDIA SPECIFICATIONS PRINT MEDIA WEIGHT /CAPACITY TYPE SIZE DIMENSIONS TRAY1 / OPTIONAL TRAY MULTIPURPOSE TRAY Plain paper Letter 216 x 279 mm (8.5 x 11 inches) 75 to 90 g/m (20 to 24 lb bond) 60 to 163 g/m (16 to 43 lb bond) •... -
Page 141: Contact Samsung Worldwide
If you have any comments or questions regarding Samsung products, contact the Samsung customer care center. COUNTRY/REG CUSTOMER CARE COUNTRY/REG CUSTOMER CARE WEB SITE WEB SITE CENTER CENTER 3698-4698 www.samsung.com/hk HONG KONG 0800-333-3733 www.samsung.com/ar ARGENTINE www.samsung.com/hk_e 1300 362 603 www.samsung.com/au... - Page 142 (726-7864) TOBAGO 444 77 11 www.samsung.com/tr TURKEY 800-SAMSUNG (726-7864) www.samsung.com/ae U.A.E 8000-4726 0845 SAMSUNG www.samsung.com/uk (726-7864) 1-800-SAMSUNG www.samsung.com/us U.S.A (7267864) 8-800-502-0000 www.samsung/ua UKRAINE www.samsung.com/ua_r 8-10-800-500-55-500 www.samsung.com/kz_ru UZBEKISTAN 0-800-100-5303 www.samsung.com/latin VENEZUELA 1 800 588 889 www.samsung.com/vn VIETNAM Contact SAMSUNG worldwide_ 2...
- Page 143 glossary The following glossary helps you get familiar with the product by understanding the terminologies commonly used with printing as well Charge Coupled Device (CCD) is a hardware which enables the scan as mentioned in this user’s guide. job. CCD Locking mechanism is also used to hold the CCD module to prevent any damage when you move the machine.
- Page 144 EtherTalk The Domain Name Server (DNS) is a system that stores information A suite of protocols developed by Apple Computer for computer associated with domain names in a distributed database on networks, networking. It was included in the original Macintosh (1984) and is now such as the Internet.
-
Page 145: Mac Address
Intranet JBIG A private network that uses Internet Protocols, network connectivity, and Joint Bi-level Image Experts Group (JBIG) is an image compression possibly the public telecommunication system to securely share part of standard with no loss of accuracy or quality, which was designed for an organization's information or operations with its employees. - Page 146 Printer Driver Modified Read (MR) is a compression method recommended by ITU-T A program used to send commands and transfer data from the computer T.4. MR encodes the first scanned line using MH. The next line is to the printer. compared to the first, the differences determined, and then the differences are encoded and transmitted.
-
Page 147: Subnet Mask
SSID Service Set Identifier (SSID) is a name of a wireless local area network Universal Serial Bus (USB) is a standard that was developed by the (WLAN). All wireless devices in a WLAN use the same SSID in order to USB Implementers Forum, Inc., to connect computers and peripherals.