JVC NX-PS1 Instructions Manual
Compact component system
Hide thumbs
Also See for NX-PS1:
- Instructions manual (48 pages) ,
- Instructions manual (45 pages) ,
- Instructions manual (27 pages)
Table of Contents
Advertisement
COMPACT COMPONENT SYSTEM
NX-PS1
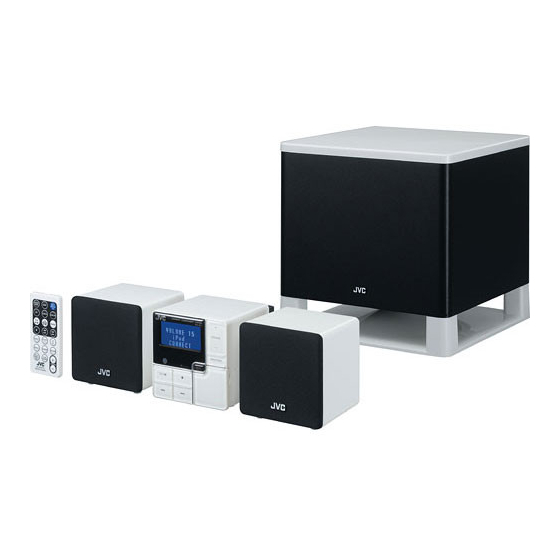
—Consists of CA-NXPS1, SP-NXPS1F and SP-NXPS1W
COMPACT COMPONENT SYSTEM
NX-PS1
STANDBY
SP-NXPS1F
CA-NXPS1
INSTRUCTIONS
VOLUME
FUNCTION
SP-NXPS1F
SP-NXPS1W
For Customer Use:
Enter below the Model No. and Serial No.
which are located either on the rear, bot-
tom or side of the cabinet. Retain this
information for future reference.
Model No.
Serial No.
LVT1633-001B
[J]
Advertisement
Table of Contents

Related Manuals for JVC NX-PS1


Summary of Contents for JVC NX-PS1
- Page 1 COMPACT COMPONENT SYSTEM NX-PS1 —Consists of CA-NXPS1, SP-NXPS1F and SP-NXPS1W SP-NXPS1F INSTRUCTIONS COMPACT COMPONENT SYSTEM NX-PS1 VOLUME FUNCTION STANDBY CA-NXPS1 SP-NXPS1F SP-NXPS1W For Customer Use: Enter below the Model No. and Serial No. which are located either on the rear, bot- tom or side of the cabinet.
- Page 2 Connect the equipment into an outlet on a circuit different from that to which the receiver is connected. Consult the dealer or an experienced radio/TV technician for help. (For U.S.A.) CAUTION Changes or modifications not approved by JVC could void the user’s authority to operate the equipment.
- Page 3 For the main unit: Declaration of Conformity Model Number: NX-PS1 Trade Name: Responsible Party: JVC Americas Corp. Address: 1700 Valley Road, Wayne New Jersey 07470 Telephone Number: 973-317-5000 This device complies with Part 15 of FCC Rules. Operation is subject to the following two conditions:...
-
Page 4: Table Of Contents
Introduction ...2 Precautions ...2 Getting Started ... 3 Connection ...4 Basic Operations ...5 Unit ...5 Remote Control ...6 Setting the Clock and Daily Timer ... 7 Setting the Clock ...7 Setting the Daily Timer ...7 Playing Back from iPod ... 8 To Connect iPod ...8 Basic Operations ...8 Playing Back from USB mass storage class... -
Page 5: Introduction
Thank you for purchasing a JVC product. Please read all instructions carefully before operation, to ensure your complete understanding and to obtain the best possible performance from the unit. Precautions Installation • Install in a place which is level, dry and neither too hot nor too cold–between 5°C and 35°C (41°F and 95°F). -
Page 6: Getting Started
Supplied Accessories After unpacking, check to be sure that you have all the following items. The number in parentheses indicates the quantity of each piece supplied. • Remote control (1) • Lithium coin battery CR2025 (1) (The battery has been installed when shipped from the factory.) •... -
Page 7: Connection
Connection Do not connect the AC power cord until all other connections have been made. To a wall outlet Plug the AC power cord only after all connections are complete. USB AUDIO terminal AC power iPod terminal cord AC adaptor AC adaptor Main speaker To connect the speaker cords... -
Page 8: Basic Operations
Unit COMPACT COMPONENT SYSTEM Display STANDBY lamp Remote control STANDBY sensor Operation buttons Operating on the Unit Buttons Functions Adjusts the volume level VOLUME MIN / 1 to 29 / VOLUME MAX. VOLUME Selects a source. iPod USB MEMORY USB AUDIO See “Playing Back from iPod”... -
Page 9: Remote Control
Remote Control Sleep timer Dimmer/ECO mode Adjust the tone FADE MUTING button Operating on the Remote Control Buttons Functions Turns on or off (standby) the power Changes the display information. USB MEMORY mode : Clock display ⇔ File information Other mode : Clock display ⇔ Source information Changes source to iPod. -
Page 10: Setting The Clock And Daily Timer
Setting the Clock and Daily Timer Setting the Clock Activate the clock setting mode (“Clock Adjust” appears). • If you have already adjusted the clock before, press the button repeatedly until “Clock Adjust” appears. If the clock has not been adjusted, “Clock Adjust” appears first. 1 Adjust the hour. -
Page 11: Playing Back From Ipod
For information on operating the iPod, see the iPod instruction manual. • JVC is not responsible for any loss of or damage to iPod that might result from the use of this product. • When you connect your iPod to the cable, make sure it connects all the way in. -
Page 12: Playing Back From Usb Mass Storage Class Device
Playing Back from USB mass storage class device This System is equipped with a USB MEMORY terminal on the front panel. You can connect a USB mass storage class device such as a USB flash memory device, Digital Audio Player (DAP), etc. to this System. This System cannot recognize a USB mass storage class device whose rating exceeds 5V/500mA. -
Page 13: Playing Back From The Pc
Repeat Play Press repeatedly before you start playback to specify the repeat mode as follows: Repeats the current track. Repeats all tracks. Repeats all tracks in the current group. Cancel Start playback. Playing Back from the PC This System is equipped with a USB AUDIO terminal on the rear panel. You can connect your PC to this terminal and enjoy the sound from your PC. -
Page 14: Playing Back From Other Equipment
Playing Back from Other Equipment To connect other equipment By using a stereo mini plug cord (not supplied), you can connect other equipment with analog audio output jacks, such as Digital Audio Player, a TV, etc. Stereo mini plug cord (not supplied) (front panel) •... -
Page 15: Specifications
See Page 3 Power Specifications NX-PS1 (System) Power Requirements Power Consumption AC Adaptor (AA-R2401) INPUT OUTPUT CA-NXPS1 (Main Unit) Power Requirements Design and specifications are subject to change without notice. " × 5- ") " × 3- ") ") cone × 1 35 Hz - 150Hz 80 dB/W •... - Page 16 TO OUR VALUED CUSTOMER THANK YOU FOR PURCHASING THIS JVC PRODUCT. WE WANT TO HELP YOU ACHIEVE A PERFECT EXPERIENCE. NEED HELP ON HOW TO HOOK UP? NEED ASSISTANCE ON HOW TO OPERATE? NEED TO LOCATE A JVC SERVICE CENTER?
- Page 17 WHAT WE WILL DO: If this product is found to be defective within the warranty period, JVC will repair or replace defective parts with new or rebuilt equivalents at no charge to the original owner. Such repair and replacement services shall be rendered by JVC during normal business hours at JVC authorized service centers.
- Page 18 © 2006 Victor Company of Japan, Limited 0806NSMCREBET...