Table of Contents
Advertisement
Advertisement
Table of Contents

Related Manuals for Denon DRA-F102 DAB


Summary of Contents for Denon DRA-F102 DAB
- Page 1 AM-FM STEREO/DAB RECEIVER DRA-F102 DAB OPERATING INSTRUCTIONS...
-
Page 2: Safety Precautions
2 NOTE ON USE 2 SAFETY PRECAUTIONS CAUTION RISK OF ELECTRIC SHOCK DO NOT OPEN CAUTION: TO REDUCE THE RISK OF ELECTRIC SHOCK, DO NOT REMOVE COVER (OR BACK). NO USER-SERVICEABLE PARTS • Do not let foreign objects into the apparatus. INSIDE. -
Page 3: Table Of Contents
Check that the following parts are attached in addition to the main RDS search ·················································································14 unit: PTY search ··················································································14 Thank you for purchasing this DENON Receiver. TP search ····················································································14 Please read the operation instructions thoroughly in order to Operating instructions .............1 RT (Radio Text) ············································································15... -
Page 4: Cautions On Installation
• It may be difficult to operate the remote control unit if the remote sensor is exposed to direct sunlight or strong artificial light. The included remote control unit (RC-1034) can be used to operate not only the DRA-F102 DAB but also other components in the F102 series ( page 4). -
Page 5: Part Names And Functions
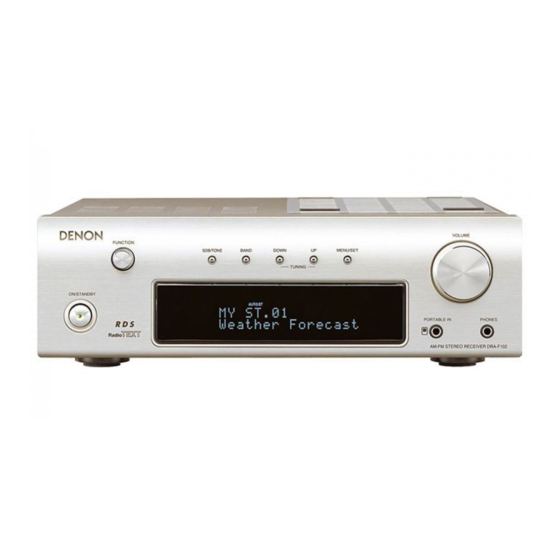
Getting Started Getting Started Part names and functions Rear panel For details on the functions of these parts, refer to the pages given in parentheses ( ). Front panel ANTENNA terminals ··································(9) Power supply cord ·····································(7) MONO OUT terminal ·································(8) DIGITAL OPT. -
Page 6: Remote Control Unit [System Remote Control Unit]
Remote control unit [System remote control unit] For detailed descriptions of the functions, etc., refer to the operating instructions included with the • The operation of the remote control unit differs according to the function to which the DRA-F102 DAB component. - Page 7 Control dock for iPod (ASD- TIME/DISPLAY: TIME/DISPLAY: Time display switching 1R) to connect an iPod to the Time display switching (Browse mode only) DRA-F102 DAB ( page 10). iPod 1/3: Play / Pause • iPod playback modes include Provides the same operation...
-
Page 8: Recommended System Layout
• Plug the power cords of devices that are used connected to the DRA-F102 DAB into the DRA-F102 DAB’s AC outlets. Do not use the outlets for hairdryers or other non-audio devices. -
Page 9: Connections [System Connections]
[DRA-F102 DAB] (This unit) Be sure to connect Wall power • All of the system operations are controlled from the DRA-F102 DAB. outlet to a wall power • It is also possible to connect devices other than F102 series outlet. -
Page 10: Speaker Connections
1. Loosen by turning If the protection circuit is activated again even counterclockwise. • When using an SC-F102/F103 (sold separately), we recommend using the DRA-F102 DAB’s optimised though there are no problems with the wiring filter ( page 23). -
Page 11: Connecting An Outdoor Antenna
• Fasten the tip of the antenna using tape, etc. NOTE: AM outdoor antenna Ground • The DRA-F102 DAB’s ground terminal ( ) is the ground for the AM loop antenna. It is not ¢ Where to install the outdoor a safety ground. -
Page 12: Connections To Devices Other Than Those In The F102 Series
OPTICAL • Use the separately sold Control dock for iPod (ASD-1R) to connect an iPod to the DRA-F102 DAB. • When connecting an exclusive Control dock for iPod (sold separately), use the system cable included ¢ When connecting the OPTICAL digital output connector with an optical with the exclusive Control dock for iPod. -
Page 13: Operation
Operation Turning the power on NOTE: • Be sure to set to the proper function for the connected device. FUNCTION SDB/TONE < ON/STANDBY > [POWER ON] Press Adjusting the tone When the power is turned on, the function that was being used when the power was last turned off is selected (selector function). -
Page 14: Recording
Operation Operation Recording Selecting a radio station BAND MENU/SET FUNCTION to select the function for the source to FUNCTION to select “TUNER”. FUNCTION TUNING be recorded. • The reception frequency is displayed. CD/HDD TUNER PORTABLE IN BAND to select the reception band. TAPE AUX (iPod) PHONO... -
Page 15: Giving A Name To The Currently Tuned In Broadcast Station And Presetting
Operation Operation Giving a name to the currently tuned in Listening to preset broadcast stations NOTE: • If a station is preset at a number where a station has already broadcast station and presetting it Example: To listen to the FM station preset at preset number 3. been preset, the old setting is deleted and replaced with the •... -
Page 16: Rds (Radio Data System)
Operation Operation RDS search RDS (Radio Data System) RDS (works only on the FM band) is a broadcasting service which BAND MENU/SET BAND to select “FM AUTO”. allows station to send additional information along with the regular FUNCTION TUNING radio program signal. [ DAB/RDS ] Press ¢... -
Page 17: Rt (Radio Text)
Operation Operation RT (Radio Text) Listening to DAB stations Presetting the currently tuned in station Tuning in DAB stations Up to 60 DAB stations can be preset. [ TIME/DISPLAY ] Press until “Radio Text” scrolls on the display. Perform steps under “Tuning in DAB stations”... -
Page 18: Switching The Reception Information For The Currently Tuned In Dab Station
Operation Operation Switching the reception information for the Making the DAB settings MENU/SET currently tuned in DAB station [DAB/RDS] Press Perform steps under “Tuning in DAB stations” The display switches as shown below each time the button is to tune in a DAB station. pressed. -
Page 19: Setting The Current Time
Setting the everyday or once timer • Be sure to set the current time first. The DRA-F102 DAB’s clock displays the time in the 24-hour mode Before setting the timer • To use the timer function to listen to AM or FM broadcasts, be sure Example: To set the current time to “19:30”... -
Page 20: Operation Of The Everyday And Once Timers
Operation Operation Operation of the everyday and once timers to select “1_off / E_on”, then FUNCTION BAND MENU/SET MENU/SET press After setting the timer at “Setting the everyday or once timer” ( TUNING • The timer standby indicator “ ” lights. The time is now set. page 17, 18), select the timer(s) you want to operate. -
Page 21: Setting The Sleep Timer
NOTE: • DENON will accept no responsibility whatsoever for loss of iPod data when using an iPod connected to the DRA-F102 DAB. • Depending on the type of iPod or the software version, some... -
Page 22: System Operations
F102 DAB’s function switches automatically. • If a disc or cassette deck is loaded in the corresponding device, playback starts. • The DRA-F102 DAB controls all system operations. • Also read the operating instructions of the various components. Auto function selection... -
Page 23: Conducting Timer Recording
System Operations System Operations Conducting timer recording to select “CD”, then press Perform steps under “Setting the everyday or MENU/SET once timer” ( page 17, 18). Example: Recording a radio program onto a cassette tape Load the cassette tape onto which you want to record beforehand. When the timer start time is reached, recording starts. -
Page 24: Edit Function
System Operations System Operations This unit [DRA-F102 DAB] System remote control unit [RC-1034] Edit function • This function lets you record onto cassette tapes with automatic editing according to the length of the tape. • Load the CD and cassette tape before starting. -
Page 25: Using The Optimised Filter
System Operations NOTE: Others • The editing function does not work with discs containing 26 tracks or more. • When using the edited recording function, be sure to load the Troubleshooting cassette tape with side A facing upwards. The beginning of the cassette tape is found automatically before recording starts. -
Page 26: Specifications
Others Specifications ¢ Remote control unit (RC-1034) ¢ Receiver section Rated output: 2-channel driving (CD / SP OUT) Remote control method: IR pulse method 35 W + 35 W (4 Ω/ohms, DIN, 1 kHz, T.H.D. 0.7%) Power supply: Two R03/AAA batteries Output terminals: Maximum external 4 to 16 Ω/ohms... - Page 28 TOKYO, JAPAN www.denon.com Denon Brand Company, D&M Holdings Inc. Printed in China 00D 511 4461 200...