Sony HXC-100 Operating Instructions Manual
2/3-type high-definition portable video camera
Hide thumbs
Also See for HXC-100:
- Service manual (206 pages) ,
- Operating instructions manual (44 pages) ,
- Service manual (130 pages)

Related Manuals for Sony HXC-100


Summary of Contents for Sony HXC-100
-
Page 1: Operating Instructions
4-137-706-02(1) HXC-100 HXCU-100 RCP-750 RCP-920 Operating Instructions Before operating the unit, please read this manual thoroughly and retain it for future reference. HXC-100 © 2009 Sony Corporation... - Page 2 E1 (residential), E2 (commercial and light industrial), E3 (urban outdoors), E4 (controlled EMC environment, ex. TV studio). The manufacturer of this product is Sony Corporation, 1-7-1 Konan, Minato-ku, Tokyo, Japan. The Authorized Representative for EMC and product safety is Sony Deutschland GmbH, Hedelfinger Strasse 61, 70327 Stuttgart, Germany.
-
Page 3: Table Of Contents
Table of Contents Overview ..............4 Features ................4 System Configuration ............5 Standalone operation example ........5 System operation example (with a Camera Control Unit) ...............6 Parts Identification ............6 Front right ..............6 Front left ..............7 Rear ................8 Operation panel ............8 Connector panel ............9 Installation ............... -
Page 4: Overview
For details on lenses supporting auto aberration 1) An HXC-100 and HSCU-300 can be connected if both units are of compensation, contact a Sony sales representative or Sony version 1.10 or later. service representative. -
Page 5: System Configuration
For advice on The boost frequency can be adjusted from 20 to 30 MHz. This choosing devices, please contact your Sony dealer or a Sony allows the detail thickness to be set appropriately for the sales representative. -
Page 6: System Operation Example (With A Camera Control Unit)
600 m (1969 ft) at maximum and 50 m (164 ft) at minimum when using Fujikura 8.5-mm dia. cables. For information of other cables, see “About the distances of triax transmission” (page 37). An HXC-100 and HSCU-300 can be connected if both units are of version 1.10 or later. d) Enabled only when an HXCU-100 is connected. -
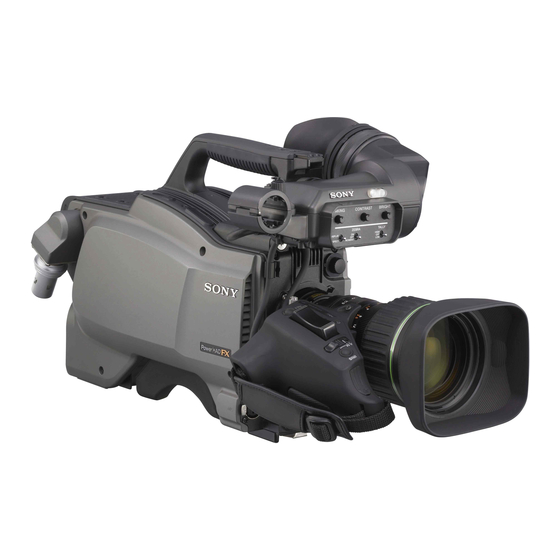
Page 7: Front Left
f Lens mount cap The switch functions the same as the DISPLAY/MENU switch The cap can be removed by moving the lens fixing lever on the rear operation panel. upward. Always keep the lens mount covered with this cap n “Memory Stick” slot and access lamp when a lens is not attached. -
Page 8: Rear
a Tally lamp and switch For details, see “Setting the Electronic Shutter” (page 15). ON: The tally lamp lights when a tally signal is input to the e AUTO W/B BAL (white and black balance automatic connected CCU or a call signal is generated in response to adjustment) switch pressing of a CALL button. -
Page 9: Connector Panel
a RET 1 (return video 1) button 1 to 5 are the same as those of the UC type. The return video signal is displayed on the viewfinder screen f MIC LINE (intercom microphone line) switch while the button is held pressed. To select the talk line for intercom: b RET (return video) button and 2/3/4 (return video 2/3/4) PROD: To talk over the producer line... -
Page 10: Installation
• When the camera is used in standalone status without Installation connecting a CCU, use this connector for input of an external sync signal (BB or 3-level sync). If a VBS signal is input, you can check the input image by pressing the RET button. -
Page 11: Attaching A Lens
Adjust the length by pulling down the end of the belt. Attaching a Lens Loosen the viewfinder left-right positioning ring and slide the viewfinder in the direction of arrow A. For information on handling lenses, refer to the operation The viewfinder stopper B automatically pops down. manual for the particular lens Tighten the viewfinder left-right positioning ring to secure the viewfinder at the most convenient... -
Page 12: Attaching A Microphone
When the DISPLAY/MENU switch is set to DISPLAY Items set to ON using the menu or related switches will be displayed. FORMAT :1080-59.94i ASSIGNABLE1 :5600K ASSIGNABLE2 :OFF ASSIGNABLE REAR:OFF !FAN :MAX !EXT EX Z55 F255 !FORMAT :1080-59.94i TALK 12.5V a Assignable button indication The functions assigned to the assignable buttons are 5600 0dB 1/125... -
Page 13: Mounting The Camera To A Tripod
To attach a microphone, using a CAC-12 When attaching a long-type microphone, such as an ECM- 674/678, use an optional CAC-12 Microphone Holder. 1 Remove the front screw-hole cover on the top then × 2 fix the CAC-12 in place with the two screws (+B4 supplied with the CAC-12. -
Page 14: Adjusting The Shoulder Pad Position
Original position Preparatory Settings Adjusting the Black Balance and White Balance In order to maintain high picture quality when using the camera, it is necessary to set the black balance and white balance appropriately for the conditions. Note Adjusting the Shoulder Pad Position When a CCU or an external control device, such as an RCP/ RM, is connected, the black balance and white balance are You can shift the shoulder pad in the range of 28 mm (1... -
Page 15: Setting The Electronic Shutter
To adjust the white balance After about one second, the message “AWB: OK” will be displayed, and the adjustment process will complete. The adjusted value will be automatically stored in the selected Select the built-in filter according to the lighting memory (A or B). -
Page 16: Setting The Local Time
Note <TOP MENU> With artificial lighting, particularly fluorescent lights and USER USER MENU CUSTOMIZE mercury vapor lamps, the brightness appears to be constant, OPERATION but in fact the strength of the red, green, and blue components PAINT MAINTENANCE varies with the power supply frequency. This phenomenon is FILE DIAGNOSIS known as “flicker.”... -
Page 17: Setting The Focus Assist Function
Place the supplied flange focal length adjustment Rotate the menu control knob to align the pointer to chart approximately 3 meters from the camera and OPERATION and push on the knob. adjust the lighting to get an appropriate video output The CONTENTS page of the OPERATION menu is level. -
Page 18: Setting The Camera Outputs
To finish the adjustments, set the DISPLAY/MENU To use the area marker switch to OFF to exit Menu mode. Setting AREA MARKER to ON displays the detection area of the focus as a marker on the viewfinder screen. Displaying the focus assist indicators You can set the size and position of the detection area with the menu items below. - Page 19 To output as HD-SDI The output is synchronized with switching among Y, R, G, and B or switching to a return signal. Menu page Item Setting • With SD-SDI or VBS, the output is synchronized only with <POWER SAVE> SDI OUT ACTIVE switching between a return signal and the camera image.
-
Page 20: Outputting A Trunk Signal
Outputting a Trunk Signal Basic Procedure for The trunk signal can be used for communication between an Shooting external device connected to the REMOTE connector of the camera and an external device connected to the TRUNK connector of the CCU. To output the trunk signal from the REMOTE Note connector... -
Page 21: Menus
• Settings for the output signals from the camera (page Menus • Flange focal length setting (page 16) Adjust the eyepiece focus as well as the contrast and brightness of the viewfinder image. The menus displayed on the viewfinder screen enable various settings of the camera. -
Page 22: Setting The Menu
<TOP MENU> If the screen can be scrolled, arrows will indicate the direction for scrolling. USER USER MENU CUSTOMIZE OPERATION CONTENTS PAINT MAINTENANCE 01.<VF DISPLAY> FILE 02.<'!'IND> DIAGNOSIS 03.<VF MARKER> Pointer 04.<VF DETAIL> 05.<FOCUS ASSIST> 06.<ZEBRA> 07.<CURSOR> 08.<VF OUT> Menu Purpose 09.<SWITCH ASSIGN1>... -
Page 23: Editing The User Menu
To reset a changed value Editing the USER Menu If you press the STATUS/ CANCEL switch toward CANCEL before pushing on the menu control knob, the You can select desired pages and items from the setting will be returned to its previous value. OPERATION, PAINT, MAINTENANCE, FILE, and To interrupt settings DIAGNOSIS menus and register them to the USER menu. - Page 24 To add items to a page Add the items. 1 Turn the menu control knob until the page that has the Select USER MENU CUSTOMIZE on the TOP MENU desired items appears, then push on the menu control screen (page 21). knob.
- Page 25 To delete a page Note You cannot insert a blank line on a page where 10 items have On the EDIT PAGE screen of the USER MENU already been registered. CUSTOMIZE menu, move the pointer to the page to be deleted and push on the menu control knob.
-
Page 26: Operation Menu
Page title Item Settings OPERATION Menu Page No. <'!' IND> [IND]: Activate/deactivate the '!' indication (page Note 02 (U05) 12). These remarks are common for all the following menu tables. [NORMAL]: Specify the conditions under which the ‘!’ indication is not to be displayed even if , ... - Page 27 Page title Item Settings Page title Item Settings Page No. Page No. <VF MARKER> MARKER ON, OFF <FOCUS INDICATOR ON, OFF, (EFFECT) 03 (U06) ASSIST> (EFFECT): Displayed WHITE, BLACK, DOT 05 (U03) when EFFECT of <VF CENTER ON, OFF MARKER> is ON. 1, 2, 3, 4 MODE BOX, B&W, COL...
- Page 28 Page title Item Settings Page title Item Settings Page No. Page No. <SWITCH GAIN – <SWITCH LENS VTR S/S UC model: [L]: 3, 0, 3, 6, 9, 12 dB ASSIGN1> ASSIGN2> Assign a function OFF, RETURN1 SW, – [M]: 3, 0, 3, 6, 9, 12 dB 09 (U09) 10 (U10) to the VTR...
-
Page 29: Paint Menu
Page title Item Settings PAINT Menu Page No. <RECEIVE TRACKER SEPARATE, MIX Page title Item Settings SEL2> RECEIVE SELECT Page No. INTERCOM - - -, LEFT, RIGHT, BOTH <SW STATUS> FLARE ON, OFF UC model only GAMMA ON, OFF TALK - - -, LEFT, RIGHT, BOTH BLK GAM ON, OFF... - Page 30 Page title Item Settings Page title Item Settings Page No. Page No. <GAMMA> LEVEL – <KNEE> K POINT – R/G/B/M: 99 to 99 0 R/G/B/M: 99 to 99 0 COARSE 0.35 to 0.45 to 0.90 K SLOPE – R/G/B/M: 99 to 99 0 (0.05 steps) KNEE ON, OFF...
- Page 31 Page title Item Settings Page title Item Settings Page No. Page No. <SKIN DETAIL> SKIN DTL ON, OFF <MULTI PHASE 0, 23, 45, 68, 90, 113, 135, MATRIX> Select an axis 158, 180, 203, 225, 248, SKIN GATE ON, OFF, (MAT) (angle) for which 270, 293, 315, 338 (MAT): Displayed when...
-
Page 32: Maintenance Menu
Page title Item Settings Page title Item Settings Page No. Page No. <SCENE FILE> To store and read scene <OHB MATRIX> PHASE 0, 23, 45, 68, 90, 113, 135, Select an axis 158, 180, 203, 225, 248, files (paint data). See “FILE (angle) for which 270, 293, 315, 338... - Page 33 Page title Item Settings Page title Item Settings Page No. Page No. <CALL/TALLY> CCU CALL - - -, ON, OFF <SDI OUT> OUTPUT MAIN, VF, RET, SD-SDI M11 (U18) CAM CALL - - -, ON, OFF (PWR SAVE) Displayed in POWER Invalid when SAVE mode only no CCU...
-
Page 34: File Menu
Page title Item Settings Page title Item Settings / Default Page No. Page No. <OTHERS 1> FAN MODE OFF, AUTO1, AUTO2, <OPERATOR READ (MS→CAM) Execute by ENTER. MIN, MAX FILE> To read the operator file AUTO1: Normal rotation from a “Memory Stick” AUTO2: Slow rotation WRITE (CAM→MS) Execute by ENTER. - Page 35 Page title Item Settings / Default Page title Item Settings / Default Page No. Page No. <REFERENCE> STORE FILE Execute by ENTER. <FILE CLEAR> PRESET Execute by ENTER. To store the current OPERATOR settings of the reference REFERENCE (ALL) Execute by ENTER. file items in the 10 SEC CLEAR ON, OFF...
-
Page 36: Diagnosis Menu
• Extremely hot or cold places D03 (U21) • Places with high humidity <SERIAL NO.> MODEL HXC-100 • Places with strong vibration Serial No. • Near strong magnetic fields • In places where it receives much direct sunlight, or near... -
Page 37: Error Messages
About digital triax transmission Consult Sony service personnel. A powerful error-correction function is incorporated for the VF RPN BUSY RPN compensation was attempted from transmission between the camera and CCU. However, if an an external device while being operated using the camera menu. -
Page 38: Specifications
BNC type (1), 1 Vp-p, 75 ohms • “Memory Stick PRO” and are trademarks RET IN of Sony Corporation. • “Memory Stick PRO Duo” is a trademark of Sony Corporation. RET CTRL 6-pin (1) • “MagicGate” is a trademark of Sony Corporation. REMOTE... - Page 39 Design and specifications are subject to change without notice. Note Always verify that the unit is operating properly before use. SONY WILL NOT BE LIABLE FOR DAMAGES OF ANY KIND INCLUDING, BUT NOT LIMITED TO, COMPENSATION OR REIMBURSEMENT ON ACCOUNT OF THE LOSS OF PRESENT OR PROSPECTIVE...
-
Page 40: Menu Tree
Menu Tree OPERATION ZEBRA (06) RECEIVE SEL3 (15) VF DISPLAY (01) ZEBRA EARPHONE RECEIVE SELECT ZEBRA1 LEVEL INTERCOM (UC model) ZOOM WIDTH ENG (CE model) DISP ZEBRA2 PROD (CE model) FOCUS CURSOR (07) PGM1 CURSOR PGM2 5600K BOX/CROSS TRACKER IRIS H POSITION OPERATOR FILE (16) WHITE... - Page 41 PAINT MAINTENANCE DETAIL 1 (P09) SW STATUS (P01) AUTO SETUP (M01) DETAIL FLARE AUTO BLACK LEVEL GAMMA AUTO WHITE LIMITER [M] BLK GAM AUTO LEVEL LIMITER [WHT] KNEE AUTO WHITE SHADING LIMITER [BLK] WHT CLIP AUTO BLACK SHADING CRISP DETAIL TEST LVL DEP LVL DEP...
- Page 42 FILE DIAGNOSIS TEST OUT (M10) OPERATOR FILE (F01) BOARD STATUS (D01) OUTPUT READ (MStCAM) (PWR SAVE) WRITE (CAMtMS) VBS-OUT PRESET CHARACTER STORE PRESET FILE GAIN FILE ID CHROMA CAM CODE SETUP (UC model) DATE PLD VERSION (D02) HD SYNC-OUT SCENE FILE (F02) V-PHASE 1/2/3/4/5 H-PHASE...
- Page 44 Camera Control Unit professional disc recorder (English, French, German, Italian and Spanish versions) in PDF format. For more details, see “Using the CD-ROM Manual” on page 7. Operating Instructions Before operating the unit, please read this manual thoroughly and retain it for future reference. HXCU-100 © 2009 Sony Corporation...
- Page 45 For the HXCU-100 WARNING: THIS WARNING IS APPLICABLE FOR USA ONLY. If used in USA, use the UL LISTED power cord specified WARNING below. DO NOT USE ANY OTHER POWER CORD. To reduce the risk of fire or electric shock, do Plug Cap Parallel blade with ground pin (NEMA 5-15P not expose this apparatus to rain or moisture.
- Page 46 TV studio). For the customers in Europe Pour les clients en Europe The manufacturer of this product is Sony Corporation, 1-7-1 Ce produit portant la marque CE est conforme à la fois à la Konan, Minato-ku, Tokyo, Japan.
- Page 47 This product with the CE marking complies with the EMC Directive issued by the Commission of the European Pour les clients en Europe Community. Le fabricant de ce produit est Sony Corporation, 1-7-1 Konan, Compliance with this directive implies conformity to the Minato-ku, Tokyo, Japon. following European standards: Le représentant autorisé...
- Page 48 Stuttgart, Germany. This apparatus shall not be used in a residential area. Pour les clients en Europe Le fabricant de ce produit est Sony Corporation, 1-7-1 Konan, Minato-ku, Tokyo, Japon. Le représentant autorisé pour EMC et la sécurité des produits est Sony Deutschland GmbH, Hedelfinger Strasse 61, 70327 Stuttgart, Allemagne.
- Page 49 Table of Contents Using the CD-ROM Manual........7 Overview ..............7 Features ................7 System Configuration Example ........9 Locations and Functions of Parts ......10 Front Panel ..............10 Rear Panel ..............11 HKCU-FP1 CCU Control Panel (Optional) ....13 Status Display ............
-
Page 50: Using The Cd-Rom Manual
Using the CD-ROM Overview Manual The HXCU-100 Camera Control Unit connects to a Sony HXC-100/HSC-300 HD color camera. It performs signal processing, provides an interface for external equipment, and The supplied CD-ROM includes versions of the Operation supplies power to the camera. - Page 51 RTS/Clear-Com intercom systems. For information on support for RTS/Clear-Com systems, contact a Sony service or sales representative. Microphone volume control The camera’s microphone volume can be controlled via the MIC REMOTE connector.
-
Page 52: System Configuration Example
Waveform HDVF-200/C35W Monitor Viewfinder VF attachment shoe CAC-12 Return video input Microphone Holder Intercom headset Video router HXC-100/HSC-300 HD Color Camera Sync input Prompter video input Zoom Lens (for ENG/EFP) Video output HD-SDI/SD-SDI/VBS Triax cable to router/switcher “Memory Stick” Power supply... -
Page 53: Locations And Functions Of Parts
Locations and Functions of Parts Front Panel a Tally light c INTERCOM audio input/output and control block Turns on red to indicate a red tally signal is being received (such as when the picture from the camera connected to the INTERCOM (intercom adjustment) knob CCU is being used). -
Page 54: Rear Panel
d MENU control block e POWER switch Switches the power for the entire system on and off, including the CCU, camera, and the RCP-1000-series Remote Control DISP/MENU (display/menu) lever and indicator Panel connected to the REMOTE connector on the rear panel. CANCEL/ENTER lever Pressing the “?”... - Page 55 g SYNC (sync signal output) connector q Pr/R/R-Y, Y/G/Y, Pb/B/B-Y (component signals) Outputs a sync signal for connection to the sync signal input connectors (BNC type) connector of a waveform monitor or picture monitor. Outputs the HD component signals, SD component signals, HD RGB signals, or SD RGB signals from the corresponding h REMOTE connector (8-pin) connectors.
-
Page 56: Hkcu-Fp1 Ccu Control Panel (Optional)
HKCU-FP1 CCU Control Panel (Optional) The switches and knobs not described below are identical to those on the front panel. See “Front Panel” on page 10. a b c d Optional panel controls a PANEL ACTIVE button • UP/DOWN lever Activates the optional HKCU-FP1 CCU Control Panel to When the ECS button is lit: Adjusts the clear scan frequency. - Page 57 j White balance adjustment controls m IRIS/MASTER BLACK adjustment controls ATW (auto tracing white balance) button MASTER BLACK (master black adjustment) knob WHITE (white balance manual adjustment) knobs EXT (lens extender) indicator AUTO (auto iris) button IRIS/MB ACTIVE (iris/master black active) indicator •...
-
Page 58: Status Display
Camera settings Status Display Page 1 1/ 20 00 OF F The CCU system status can be monitored using a picture monitor connected to the PIX output. For information on monitoring and changing settings, see “Setup Menu” on page 18. Displaying the Status Screen ND: 1 F :4 .7 EX The status screen is controlled using the knob and levers in... -
Page 59: System Status
System status TRIAX Step: Triax cable compensation step (internal circuit step display) * S y s t e m S t a t u s * 1 / 12 Fan Power: CCU power supply fan status Timer: Elapsed time since power-on H X C - 1 0 0 1 0 8 0 / 5 9 . - Page 60 CCU DPR board diagnostics Connection Speed: Connection speed setting Duplex Mode: Communication method setting * DPR Di ag * 1 0/1 2 MDI/MDIX: Communications port wiring configuration selection H D C B : BA R 1 6:9 (1 00% ) S D C B : SM PTE Link Status: Network connection status S EQ ON: NP N...
-
Page 61: Setup Menu
ROM Version Information Setup Menu * R O M V e r s i o n * 1 2 / 12 C A M E R A H X C - 1 0 0 1 . 0 0 0 9 . 0 1 . 01 C C U H X C U - 1 0 0 The CCU system and peripheral settings can be modified... - Page 62 To change the displayed page To enter a character string Some menu items require a character string input. Turn the CONTROL knob to move the , arrow to the Moving the , arrow to an item with a character string input page number, then press the CONTROL knob.
-
Page 63: Menu List
Page name Item Settings Menu List Page No. <MULTI FREQUENCY Note FORMAT> Operating frequency selection The following conventions are used in the menu list table. 1.001, 1.000 Settings column values (e.g. ON, OFF, 0): Default settings Note ENTER to execute: Press the CONTROL knob or move the Note CANCEL/ENTER lever to the ENTER position to execute. - Page 64 Page name Item Settings Page name Item Settings Page No. Page No. <OUTPUT SLOT NO <SD ASPECT> SD ASPECT SQUEEZE, EDGE CROP, FORMAT> LETTER BOX SD output aspect 1-1&2 When CAMERA FORMAT selection is 1080/59.94i: SDI OUTPUT 1080/59.94i, 525/59.94i 1/2 connector SD LB SEL 16:9, 15:9, 14:9, 13:9 output format...
- Page 65 Page name Item Settings Page name Item Settings Page No. Page No. <RETURN RET1 When CAMERA FORMAT <RETURN RET4 When CAMERA FORMAT FORMAT> is 1080/59.94i: FORMAT> is 1080/59.94i: Return 1 signal Return 4 signal 1080/59.94i, 525/59.94i, 1080/59.94i, 525/59.94i, format, aspect, format, aspect, NTSC NTSC...
- Page 66 CCU CONFIGURATION menu Page name Item Settings Page No. Page name Item Settings <MONITOR 2> LEVEL GATE ---, 1&2, 1, 2, OFF Page No. ---: Displayed when <COLOR BAR> HD BAR camera not connected, HD output color bar settings video output not set to CAMERA, or video BAR 16:9 (100%), BAR output is set to CAMERA...
- Page 67 Page name Item Settings Page name Item Settings Page No. Page No. <MIC/AUDIO> CAM MIC GAIN (REMOTE), (LOCAL) <FRONT CCU front panel (MIC ON), (OFF), (PGM INCOM> MIC/PGM switch (REMOTE): MIC position (read only) REMOTE source CCU front panel (PRIVATE), (PROD), (LOCAL): Not MIC INTERCOM switch (ENG)
- Page 68 Page name Item Settings Page name Item Settings Page No. Page No. <VIDEO SETUP ON, OFF, -- <MENU RESUME ON, OFF SETUP> SETTINGS> --: Displayed when In menu mode, format is PAL (read only) resume display of previously Q FILTER NARROW, WIDE, -- displayed page Q FILTER...
- Page 69 Page name Item Settings Page name Item Settings Page No. Page No. <DISPLAY> MESSAGE ALL, WARNING, OFF <FRONT PANEL ASSIGNABLE/CUSTOM 1> ALL: Displays all SWITCH1 NOT ASSIGN, GAMMA messages OFF, HD DTL OFF, SD Camera HKCU-FP1 DTL OFF, BLK GAMMA, messages and WARNING: Displays Displayed only...
- Page 70 Page name Item Settings Page name Item Settings Page No. Page No. <FRONT PANEL VOLUME NOT ASSIGN, HD <FRONT PANEL VOLUME REL COEFF 1> GAMMA, SD GAMMA, HD 2> HKCU-FP1 IRIS 1/1, 1/2, 1/4 DTL LEVEL, SD DTL CCU Control Relative 1/1: Variable range LEVEL, BLK GAMMA...
- Page 71 NETWORK SETTINGS menu Page name Item Settings Page No. <TCP/IP IP ADDRESS 0.0.0.0 to 255.255.255.255 SETTING> SUBNET MASK 0.0.0.0 to 255.255.255.255 DEFAULT 0.0.0.0 to 255.255.255.255 GATEWAY ENTER to execute A “SET OK?” message is displayed. Press ENTER again to confirm the change.
-
Page 72: Appendix
• A certain time is required for the video signal transmitted Appendix between the camera and the CCU to stabilize after power is applied. This is not a malfunction. Triax transmission distances The maximum and minimum transmission distances allowed Notes on Use for triax cable connections are shown in the table below. -
Page 73: License Declarations
SDI 1/3 SDI 2/4 VBS 1/3 VBS 2/4 Input/output connectors RET1 HD SDI RET4 HD SDI RET3 VBS RET2 VBS CAMERA Triax (1) United States and Canada: Kings type RET1 HD SDI RET4 SD SDI RET3 VBS RET2 VBS Other areas: Fischer type RET1 SD SDI RET4 HD SDI RET3 VBS... - Page 74 XLR 3-pin, male (2), 0/–20 dBu Always verify that the unit is operating properly before use. WF REMOTE D-sub 15-pin, female (1) SONY WILL NOT BE LIABLE FOR DAMAGES OF ANY (JAE DA-C1-J10 series recommended) KIND INCLUDING, BUT NOT LIMITED TO, WF MODE...
- Page 75 Sony Corporation Printed in Japan...
- Page 76 * 3 - 2 0 6 - 9 1 4 - 0 5 * REMOTE CONTROL PANEL RCP-750/751 OPERATION MANUAL [Japanese/English] 1st Edition (Revised 4)
- Page 77 à la pluie ou à l’humidité. (controlled EMC environment, ex. TV studio). Afin d’écarter tout risque d’électrocution, garder le coffret The manufacturer of this product is Sony Corporation, 1-7-1 fermé. Ne confier l’entretien de l’appareil qu’à un personnel Konan, Minato-ku, Tokyo, Japan.
- Page 78 Der Hersteller dieses Produkts ist Sony Corporation, 1-7-1 Konan, Minato-ku, Tokyo, Japan. Der autorisierte Repräsentant für EMV und Produktsicherheit ist Sony Deutschland GmbH, Hedelfinger Strasse 61, 70327 Stuttgart, Deutschland. Bei jeglichen Angelegenheiten in Bezug auf Kundendienst oder Garantie wenden Sie sich bitte an die in den separaten Kundendienst- oder Garantiedokumenten aufgeführten Anschriften.
- Page 79 Table of Contents Overview ....................4(E) Features ...................4(E) Locations and Functions of Parts ............5(E) Operation Panel ................5(E) Connector Panel ................11(E) Mounting on a Console ..............12(E) Menu Configuration and Basic Menu Operations ......13(E) Basic Operating Procedure ............13(E) Basic Configuration of Menu Display...........14(E) Menu Items ..................18(E) Initial Settings ..................
-
Page 80: Overview
The RCP-750/751 Remote Control Panel is designed camera to the shooting conditions for that particular for remote control of the Sony BVP/HDC-series Color scene. This panel enables up to five scene files to be Video Camera via the CCU/HDCU-series Camera created and handled. -
Page 81: Locations And Functions Of Parts
Locations and Functions of Parts Operation Panel RCP-750 1 Control select block 0 Power and output signal select block PARA MASTER SLAVE CAM PW TEST BARS CLOSE AUTO SETUP 2 STANDARD button qa AUTO SETUP block CHAR SKIN DTL LEVEL START/ STANDARD WHITE... - Page 82 Locations and Functions of Parts 1 Control select block 5600K: 5600K electric color temperature conversion function AUTO KNEE: Auto knee function. When this button is lit (ON), the knee point is automatically adjusted according to the light content of the picture. SKIN DETAIL: Skin tone detail function DTL GATE: Skin tone detail gate function.
- Page 83 6 Camera number/tally indication window B Signal output select buttons The number of the camera being controlled from this Press and light up one of these buttons to activate the panel is displayed in orange. test signal generator of the video camera and send the When a red tally signal is sent to the camera, the respective signals.
- Page 84 Locations and Functions of Parts D BLACK (black balance) button B LCD/touch panel Press to automatically adjust the black balance and Normally displays the statuses (see page 14(E)) black set. When you press a MODE button, the corresponding The button lights during adjustment and goes dark menu is displayed to permit you to adjust the displayed when adjustment is completed.
- Page 85 Iris/master black control block (RCP-750) 3 IRIS/MB ACTIVE button 4 AUTO button 5 f-number display 6 EXT indicator IRIS/MB ACTIVE 1 MASTER BLACK display 7 SENS control knob MASTER SENS BLACK AUTO 2 MASTER BLACK RELATIVE 8 COARSE control knob button RELATIVE RELATIVE...
- Page 86 Locations and Functions of Parts 9 Master black control ring Iris adjustment functions Turn to manually adjust the master black level. Relative mode Absolute mode (RELATIVE button lit) (RELATIVE button not lit) 0 IRIS control lever IRIS lever Adjusts the iris with Adjusts the iris (RCP-750)/ relative values within...
-
Page 87: Connector Panel
4 IRIS RELATIVE (iris relative) button qa AUTO button When the IRIS/MB ACTIVE button is lit, the iris Press and light the button to automatically adjust the adjustment mode can be selected with this button. iris according to the amount of input light. Press and light up the button for Relative mode or When this button is lit, the reference value for press so that it goes dark for Absolute mode. -
Page 88: Mounting On A Console
Mounting on a Console The RCP-750/751 can be mounted on a console as shown below: 12(E) -
Page 89: Menu Configuration And Basic Menu Operations
Menu Configuration and Basic Menu Operations The RCP-750/751 provides menu operations for Select the item to be adjusted. various functions such as adjustments of system equipment. Press the button that shows the name of the item on the menu to obtain the corresponding adjustment display or operation area. -
Page 90: Basic Configuration Of Menu Display
Menu Configuration and Basic Menu Operations Basic Configuration of Menu Display Status display When you do not select any of the MODE buttons (PAINT 1, PAINT 2, PAINT 3, SCENE, MAINTENANCE, FUNCTION) of the menu operation block (all unlit), the LCD shows the following status display: On the status display, each item is Shutter... - Page 91 Adjustment display (Paint menu) When you select an item on the initial display of the Paint menu, the lower half of the panel becomes the adjustment display for the selected item. Example: when you select “White” from the initial display The name of the item selected on the 1 / 7 Clear...
- Page 92 Menu Configuration and Basic Menu Operations Monitor output set display (Expansion menu) [WF/PIX Select] When you press on an adjustment display of the Paint menu, the upper half of the panel becomes the monitor output setting display. R/G/B: To independently select the R, WF/PIX Monitor Select G, or B signal.
- Page 93 Function menu displays When you press and light the FUNCTION button of the menu operation block, the scene file operation menu display is obtained. When “Operation” is selected Press v or V to select the desired filter. The number of ND and CC filters you may select depends on the camera.
-
Page 94: Menu Items
Menu Configuration and Basic Menu Operations Menu Items The “Control items” marked with are those assigned to the control knobs. The other items are operated on the menu display. Paint menu Paint menu consists of pages 1 to 7. You can select page 1 through 3 directly by pressing the MODE buttons, PAINT 1, PAINT 2, or PAINT 3. Pressing v or V of the page selected with a MODE button flip pages 1 through 7 in sequence. - Page 95 Page Menu Submenu Control item Function Paint 3 Knee Point R/G/B/Master Adjusts the knee point. Knee Off Turns the knee ON/OFF. Knee Slope R/G/B/Master Adjusts the knee slope. Knee Off Turns the knee ON/OFF. Matrix Matrix 1 R-G/G-B/B-R Adjusts the matrix coefficients. User Matrix Turns the user matrix ON/OFF.
- Page 96 Menu Configuration and Basic Menu Operations Page Menu Submenu Control item Function Paint 5 Detail 2 H/V Ratio Adjusts the HD detail H/V ratio. (Continued) N. Freq Adjusts the HD detail boost frequency. Mix Ratio Adjusts the HD detail mix ratio. Comb Adjusts the HD detail comb.
- Page 97 Page Menu Submenu Control item Function Paint 6 ECS/S-EVS Adjusts the slow-shutter speed. (Continued) Shutter Adjusts the shutter speed. Adjusts the ECS frequency. S-EVS Adjusts the Super EVS. Slow Shutter Turns the slow-shutter mode ON/OFF. Shutter Turns the shutter mode ON/OFF. Turns the ECS mode ON/OFF.
- Page 98 Menu Configuration and Basic Menu Operations Menu 2ndary menu Submenu Control item Function SD Adjusting SD Matrix Matrix 1 R-G/G-B/B-R Set the matrix coefficients. User Matrix Turns the user matrix ON/OFF. Preset Matrix Turns the preset matrix ON/OFF. Matrix Off Turns all the matrixes ON/OFF Matrix 2 R-B/G-R/B-G...
- Page 99 Menu 2ndary menu Submenu Control item Function RCP Config Date/Time Date Year Adjusts the date for the built-in clock of this unit. (Continued) Month Cancel Time Hour Adjusts the time for the built-in clock of this unit. Minute Second Cancel Information Displays the software version of this unit.
-
Page 100: Function Menu
Menu Configuration and Basic Menu Operations Function menu Menu Submenu Control item Function Operation Filter Ctrl Selects the filter remote or local mode. ND (1/2/3/4/5) Selects ND filters. CC (A/B/C/D/E) Selects CC filters. Gamma Selects the step gamma. Master Gain Selects the master gain. -
Page 101: Initial Settings
Initial Settings Setting the Operating Conditions RCP Config Menu Exit of the RCP-750/751 Date Adjusting Setting Time By using the RCP Configuration menu or LCD setting Pre- display, you can set the built-in clock of the RCP-750/ CAMERA view 751 and adjust various conditions of the RCP-750/751, Secu- such as the sound volume of the warning buzzer and rity... -
Page 102: Adjusting The Buzzer Sound
Initial Settings 2) Set the Year, Month and Day with the left three Clear Exit control knobs. [Set] 3) Press Buzzer Volume Bright The set date becomes valid. [Cancel] To restore the previous setting, press [Set] instead of To set the time: [Time] 1) Press and light [Buzzer Volume]... -
Page 103: Adjusting The Brightness Of The Leds
[RE Setting] Press on the RCP Configuration Adjusting the Brightness of the menu to obtain the Rotary Encoder Setting display. LEDs Exit You can adjust the brightness of the LEDs of the panel buttons and camera number/tally indication window. To adjust the brightness, proceed as follows. Rotary Encoder Setting [RCP Adjusting]... -
Page 104: Memory Sticks
Memory Sticks Using a Memory Stick Notes on Memory Stick When a Memory Stick is inserted in the panel, the file On Memory Stick data can be stored on the Memory Stick, which enables you to share data among RCPs. Memory Stick media are available in three sizes: standard size, compact “Memory Stick Duo”... - Page 105 Sony Corporation. Write-Protect tab • “Memory Stick PRO Duo” and trademarks of Sony Corporation. • “Memory Stick-ROM” and trademarks of Sony Corporation. • “MagicGate Memory Stick” is trademark of Sony Corporation. • “MagicGate” and are trademarks of Sony Corporation. Labeling position...
-
Page 106: Specifications
Note Always verify that the unit is operating properly before use. SONY WILL NOT BE LIABLE FOR DAMAGES OF ANY KIND INCLUDING, BUT NOT LIMITED TO, COM- PENSATION OR REIMBURSEMENT ON ACCOUNT OF THE LOSS OF PRESENT OR PROSPECTIVE PROFITS... - Page 107 The material contained in this manual consists of information that is the property of Sony Corporation and is intended solely for use by the purchasers of the equipment described in this manual. Sony Corporation expressly prohibits the duplication of any...
- Page 108 * 3 - 2 0 6 - 9 1 4 - 0 5 * Printed in Belgium Sony Corporation RCP-750/751(SY) 2008.06.08 2002 3-206-914-05(1)
- Page 109 REMOTE CONTROL PANEL RCP-920 RCP-921 OPERATION MANUAL [Japanese/English] 1st Edition (Revised 2)
- Page 110 This equipment Pour les clients en Europe generates, uses, and can radiate radio frequency energy and, Le fabricant de ce produit est Sony Corporation, 1-7-1 Konan, if not installed and used in accordance with the instruction Minato-ku, Tokyo, Japon.
- Page 111 Table of Contents Precautions................43 Overview ................43 Features..................43 Examples of System Configurations .........45 Precautions for Ethernet System Connections......47 Location and Function of Parts .......... 48 Operation Panel .................48 Connector Panel.................55 Menu Configuration and Basic Operation ......56 Basic operation ................56 Basic configuration of menu pages ...........57 Menu transition diagram............59 Menu Items ................60...
-
Page 112: Precautions
Precautions Overview Note on faulty pixels on the LCD panel Features The LCD panel fitted to this unit is manufactured with high precision technology, giving a functioning pixel ratio The RCP-920/921 Remote Control Panel is designed for of at least 99.99%. Thus a very small proportion of pixels remote control of the BVP/HDC series Color Video may be “stuck,”... - Page 113 Camera SLS/ECS/shutter function control The SLS (Slow Shutter), ECS (Extended Clear Scan), and electronic shutter functions of the camera can be turned ON/OFF from this panel. The ECS frequency and shutter speed are also selected using the buttons on the panel. Dedicated cable or Ethernet connection The connection between the remote control panel and the camera control unit is established by a single dedicated...
-
Page 114: Examples Of System Configurations
Examples of System Configurations Command cable system (for HDC series) HDCU1000 VCS-700 (+HKCU1001/HKCU1003) PIX/WF HDC1000 HDCU1500 (+HKCU1001/HKCU1003) CCU (1 to 6) HDCU1000 MSU-900 series (+HKCU1001/HKCU1003) CNU-700 RCP (1 to 6) HDC1000 HDCU1500 (+HKCU1001/HKCU1003) HDCU1000 (+HKCU1001/HKCU1003) HDC1500 HDCU1500 (+HKCU1001/HKCU1003) CCA-5 cable CCU/CNU CCU/CNU CCU/CNU... - Page 115 Ethernet system (for HDC series) HDCU1000 Video switcher (+HKCU1001/HKCU1003) HDC1000 HDCU1500 (+HKCU1001/HKCU1003) compatible switching hub HDCU1000 MSU-900 series (+HKCU1001/HKCU1003) HDC1000 HDCU1500 (+HKCU1001/HKCU1003) HDCU1000 (+HKCU1001/HKCU1003) HDC1500 HDCU1500 (+HKCU1001/HKCU1003) HDCU1000 (+HKCU1001/HKCU1003) HDC1500 RCP-920/921 HDCU1500 (+HKCU1001/HKCU1003) Ethernet straight cable (Category 5 or higher) 1) Power over Ethernet About the switching hub power supply As the maximum power of the RCP-920/921 is...
-
Page 116: Precautions For Ethernet System Connections
Attach the ground wire with the removed screw. Precautions for Ethernet System Connections When connecting the unit to the system with an Ethernet cable, make sure to ground the unit using one of the following methods. • Secure the flanges on the unit with screws. •... -
Page 117: Location And Function Of Parts
Location and Function of Parts Operation Panel STANDARD button Control select block Power and output signal select block CLOSE button AUTO SETUP block Camera/CCU function ON/OFF buttons Paint control block Scene file control block Filter control block Master gain control block SHUTTER control block White balance/black balance control block Camera number/tally indication window... - Page 118 1 STANDARD button Note When you press this button, the video camera settings are The BARS button takes priority to the TEST button. If the initialized to the reference values stored on the video BARS button is lit, press the button to turn it dark before camera, and the button lights for several seconds.
- Page 119 6 Camera/CCU function ON/OFF buttons 7 Paint control block Various functions of the video camera or the CCU/HDCU can be turned ON and OFF from this panel. The following switching functions are assigned to seven of the buttons at the factory and the rightmost button is reserved for future use.
- Page 120 b STORE (scene file store) button Note To store a scene file, first press this button so that the Once you press any of the buttons 1 and 4, all the four button starts flashing, then press the SCENE FILES button buttons light, enabling both the ND and CC filter of the desired number.
- Page 121 b ABSOLUTE (absolute value mode) button Lit: Normal connection to the control device (CCU/ Press and light up this button to set the mode of manual HDCU) is established. adjustment with the WHITE, BLACK, FLARE, BLACK Flashing: There is no connection to the control device GAMMA, and DETAIL knobs from Relative mode to (CCU/HDCU).
- Page 122 Iris/master black control block (RCP-920) a EXT indicator b Spare button c AUTO button d IRIS/MB ACTIVE button e IRIS RELATIVE button i SENS control knob f IRIS display g MASTER BLACK j COARSE control knob RELATIVE button k Master black control ring h MASTER BLACK display l IRIS control lever/preview switch a EXT (lens extender) indicator...
- Page 123 Press the switch axially to output preview key signals from Press the EXT I/O connector. See the table “Iris adjustment functions” (page 54). OPEN CLOSE Iris adjustment functions Relative mode Absolute mode (IRIS RELATIVE button lit) (IRIS RELATIVE button out) IRIS lever (RCP-920) Adjusts the iris with relative values within 1/4 of Adjusts the iris within the variable range set by...
-
Page 124: Connector Panel
Parts 1 through 0 have the same function as shown for ATTENTION the RCP-920. Par mesure de sécurité, ne raccordez pas le connecteur pour le câblage de périphériques pouvant avoir une tension k IRIS control excessive à ce port. Suivez les instructions pour ce port. When the AUTO button is out, you can adjust the iris manually by turning the control. -
Page 125: Menu Configuration And Basic Operation
Configuration menu Menu Configuration and Display the configuration menu. Basic Operation Press the ENTER button once to go to the top page of the paint menu. Press the ENTER button again and hold it for at least The RCP-920/921 provides menu operations for various 1 second. -
Page 126: Basic Configuration Of Menu Pages
Basic configuration of menu pages Paint menu Top page Press to turn off the LCD. Shows a list of setting/ Press to go to the setting/adjustment page for the available selected item. adjustment When the LCD is off, press to turn on the display. items. - Page 127 Page with SET item For pages which have a “SET” item, changes must be confirmed by the setting procedure before they become active. Otherwise the changes will be lost when switching to another page. Example: ETHERNET IF page When you press ENTER once while the cursor is here, the cursor shape becomes “?.”...
-
Page 128: Menu Transition Diagram
Menu transition diagram POWER ON Menu Paint menu CLEAR ENTER ENTER Press and to switch pages hold ENTER (LCD panel OFF) Configuration menu The LCD display and backlight turn OFF. ENTER to switch pages CLEAR to switch pages Menu Configuration and Basic Operation... -
Page 129: Menu Items
Menu Items For details on the respective functions, see the operation manual of the connected camera or CCU. Paint menu Primary Secondary Operation/ Settings Function Factory default menu menu adjustment item TOP MENU — — — Lists items on the paint menu KNEE/GAMMA/FLARE/ SHUTTER/DETAIL/SAT KNEE... -
Page 130: Configuration Menu
Primary Secondary Operation/ Settings Function Factory default menu menu adjustment item SD DTL Level — Adjusts SD detail level — Limit — Adjusts SD detail limit — Crisp — Adjusts SD detail crispening — AUTO IRIS Level — Adjusts auto iris level —... - Page 131 Primary Secondary Operation/ Settings Function Factory default menu menu adjustment item VR REL WHITE Select from 1/1, Sets variable range for white balance 1/2, or 1/4 in Relative mode MODE SET BLACK (FLARE) Select from 1/1, Sets variable range for black (flare) 1/2, or 1/4 balance in Relative mode DETAIL...
- Page 132 Primary Secondary Operation/ Settings Function Factory default menu menu adjustment item ETHERNET ETHERNET ON/OFF Turns Ethernet connection ON/OFF AUTO NEGO ON/OFF Turns the Auto Negotiation function ON/OFF AUTO MDIX ON/OFF Turns the AUTO MDI/MDIX function ON/OFF 10M/100M Sets the connection speed 100M SPEED HALF/FULL...
- Page 133 Primary Secondary Operation/ Settings Function Factory default menu menu adjustment item TCP/IP IP ADDR — Shows assigned IP address — SETTING CONDITION SUBNET MASK — Shows configured subnet mask — (Continue) DEFAULT — Shows configured default gateway — GATEWAY 1) Can only be displayed or configured if ENGINEER is selected as MODE on SECURITY MODE screen. 2) RCP-921 only.
-
Page 134: Initial Settings
Press ENTER button to enable configuration. Initial Settings The cursor appears as “?” and the selected item flashes. Configuring the RCP-920/921 Operating Environment The RCP configuration menu allows you to configure Turn the right adjustment knob to change the setting settings on the RCP-920/921 such as the internal clock, item. - Page 135 Turn the right adjustment knob to move the cursor to 3 Turn the right adjustment knob to change the hour TIME ZONE. setting, and press ENTER button. The minute setting flashes. 4 Turn the right adjustment knob to change the minute setting, and press ENTER button.
- Page 136 2 Turn the right adjustment knob to change the 2 Turn the right adjustment knob to change the setting, and press ENTER button. setting, and press ENTER button. The shutter display setting is changed. The RCP number setting is changed. Press CLEAR button.
- Page 137 2 Turn the right adjustment knob to change the 2 Turn the right adjustment knob to change the setting, and press ENTER button. setting, and press ENTER button. The preview output setting is changed. The brightness is set. Press CLEAR button. Press CLEAR button.
- Page 138 The buzzer volume is set. 2 Press ENTER button to enable configuration. The cursor appears as “?” and the setting flashes. Press CLEAR button. 3 Press ENTER button again to save the settings. The first screen of the RCP configuration menu reappears.
- Page 139 Press ENTER button to enable configuration. 1 Press ENTER button to enable configuration. The cursor appears as “?” and the START? display The cursor appears as “?” and the setting flashes. flashes. Turn the right adjustment knob to change the setting 2 Press ENTER button again.
- Page 140 Turn the right adjustment knob to move the cursor to Select a system connection mode. the item you want to change. The following three modes are available. Select one based on your system environment. Change the sensitivity for each adjustment knob. LEGACY: Select this mode when using the CCU/ CNU REMOTE connector and a CCA-5 cable for 1 Press ENTER button to enable configuration.
- Page 141 3 Turn the right adjustment knob to select LEGACY, The CNS mode is set. and press ENTER button. Set the submode for Bridge mode. The CNS mode is set. In Bridge mode, you must configure the submode and target IP address to determine functioning. Under normal circumstances, set the RCP to ACTIVE or SEMI-AT.
- Page 142 3 Turn the right adjustment knob to change the 3 Turn the right adjustment knob to select MCS, and setting, and press ENTER button. press ENTER button. The second section of the IP address flashes. Set this section of the IP address as you did above. The CNS mode is set.
- Page 143 2 Press ENTER button to enable configuration. 3 Turn the right adjustment knob to change the The cursor appears as “?.” setting, and press ENTER button. The second section of the IP address flashes. Set 3 Press ENTER button again to save the settings. this section of the IP address as you did above.
- Page 144 Use the v and V buttons to move through the settings SPEED: This is the connection speed setting for the and adjustment screens, and display the <ETHERNET Ethernet line. If Auto Negotiation is disabled, IF> page. manually configure this setting (10M or 100M) based on the devices to be connected.
-
Page 145: Adjusting The Lcd Display
Design and specifications are subject to change without notice. Note Always verify that the unit is operating properly before use. SONY WILL NOT BE LIABLE FOR DAMAGES OF ANY KIND INCLUDING, BUT NOT LIMITED TO, COMPENSATION OR REIMBURSEMENT ON ACCOUNT OF THE LOSS OF PRESENT OR... - Page 146 Specifications...
- Page 147 Specifications...
- Page 148 Ethernet is a registered trademark of Xerox Corporation. The material contained in this manual consists of information that is the property of Sony Corporation and is intended solely for use by the purchasers of the equipment described in this manual.
- Page 149 Sony Corporation Printed in Belgium RCP-920 (SY) 2008.06.08 RCP-921 (SY) 3-096-914-03(1) © 2006...