Table of Contents
Advertisement
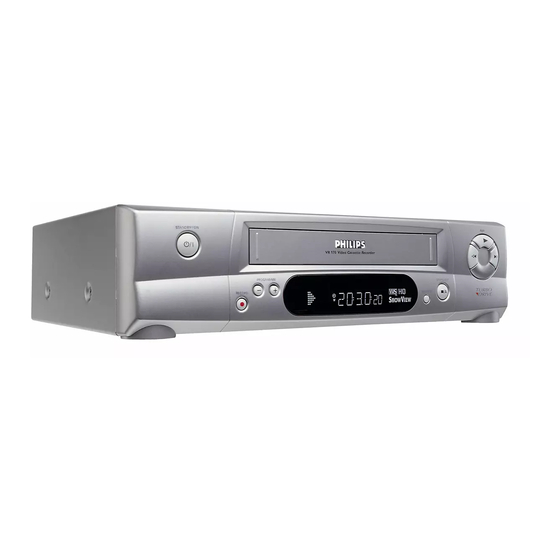
Video Cassette Recorder
Contents
1
List of PWBs, Features, Technical specifications 3
2
Safety instructions, Modifications
3
Directions for use
4
Dismantling instructions
5
Service modes, Repair tips
6
Block diagrams, Waveforms, Wiring diagram
7
Circuit diagrams and PWB layouts
8
Electrical alignments
9
Circuit descriptions and List of abbreviations
10 Tape deck
11 Exploded views
12 Spare parts list
Survey of versions:
/02/03
PAL B/G, VPS/PDC
/05
PAL I, UK
/07
PAL I, Ireland
/11
PAL B/G, Belgium
/13
PAL B/G, Nordic
/16
PAL B/G, Spain / Nordic
/38/39
SECAM L, L' & PAL B/G, I
/55
PAL B/G, I, PAL/SECAM D/K
/58/59
PAL/SECAM B/G, D/K
/60
PAL/SECAM D/K
©
Copyright 2001 Philips Consumer Electronics B.V. Eindhoven, The Netherlands.
All rights reserved. No part of this publication may be reproduced, stored in a
retrieval system or transmitted, in any form or by any means, electronic, mechanical,
photocopying, or otherwise without the prior permission of Philips.
Published by LE/MS0110, Videq Service Department Printed in Netherlands
Deck: Turbo Drive
VR120
/02/55/58
VR170
/02/07/39/58
VR220
/02/07/39/58
VR270B
/02/07/39/58
VR270W
/02/07/39/58
VR402
/58
VR420
/02/39/58
VR520
/02/07/16/58
VR570
/02/07/16/39/58
VR572
/02/16
VR620
/02/07/16/39/58
Page
10
12
46
49
57
64
91
97
113
124
128
VR622
/02/16
VR627
/02/16
VR670B
/02/07/16
VR670B
/39/58
VR670W
/02/07/16
VR670W
/39/58
VR720
/02/07/16/39/58
VR870CC
/02/07/16
VR870CC
/39/58
VR870L
/02/07/16
VR870L
/39/58
Survey of remote controls:
VR220/02/07/39/58
VR420/02/39/58
VR870L/02/07/16/39/58
VR870CC/02/07/16/39/58
SB140/03
SB145/03/11
SB445/11
SB645/03/11
SB745/03/11
SB140/38
SB445/38
SB645/38
SB745/38
65DV30/39
45DV30/39
20DV30/39
VR120/02/16/55/58
VR402/58
VR520/02/07/16/58
VR170/07/39/58
VR270W/02/07/39/58
VR570/02/07/16/39/58
VR572/02/16
VR670W/02/07/16/39/58
VR270B/02/07/39/58
VR670B/02/07/16/39/58
VR620/02/07/16/39/58
VR622/02/16
VR627/02/16
VR720/02/07/16/39/58
Subject to modification
APOLLO 13
SB140
/03/38
SB145
/03/11
SB445
/11/38
SB645
/03/11/38
SB745
/03/11/38
20DV30
/39
45DV30
/39
65DV30
/39
AA
RT112/111
8622 661 12111
RT114/111
8622 661 14111
RT116/201
8622 661 16201
RT116/204
8622 661 16204
RT121/101
8622 661 21101
RT121/111
8622 661 21111
RT121/121
8622 661 21121
RT123/111
8622 661 23111
RT128/112
8622 661 28112
5 3103 785 21760
Advertisement
Table of Contents

Related Manuals for Philips VR120


Summary of Contents for Philips VR120
- Page 1 8622 661 28112 VR720/02/07/16/39/58 © Copyright 2001 Philips Consumer Electronics B.V. Eindhoven, The Netherlands. All rights reserved. No part of this publication may be reproduced, stored in a retrieval system or transmitted, in any form or by any means, electronic, mechanical, photocopying, or otherwise without the prior permission of Philips.
-
Page 2: Table Of Contents
GB 2 VR120 Contents Page Contents Page List of PWBs, Features, Technical Electrical alignments specifications Measuring instruments Survey of sets and PWB’s with software versions 3 Setting instructions Features Video signal processing (VS-SEC) Technical specification Front End (FV) Deck electronics (DE) -
Page 3: Specifications
List of PWBs, Features, Technical specifications VR120 GB 3 1. List of PWBs, Features, Technical specifications Survey of sets and PWB’s with software versions All in One- key print SYSTEMS (AIO) µP connector TAPE DECK Pos. 7899 print System off air... - Page 4 GB 4 VR120 List of PWBs, Features, Technical specifications All in One- key print SYSTEMS (AIO) µP connector TAPE DECK Pos. 7899 print System off air Rec/Pb standard Mobo chapter 7 chapter 10 µP-ID No. 32 37 á á á á...
-
Page 5: Features
List of PWBs, Features, Technical specifications VR120 GB 5 Features General á á á á á á á á á á á á á á á á á á á á á Auto Standby On/Off á á á á á á á á á á á á á á á á á á á á á... - Page 6 GB 6 VR120 List of PWBs, Features, Technical specifications General á á á á á á á á á á á á á á á á á á á á Auto Standby On/Off á á á á á á á á á á á á á á á á á á á á...
- Page 7 List of PWBs, Features, Technical specifications VR120 GB 7 General á á á á á á á á á á á á á á á á á á á á Auto Standby On/Off á á á á á á á á á á á á á á á á á á á á...
-
Page 8: List Of Pwbs, Features, Technical
GB 8 VR120 List of PWBs, Features, Technical specifications General á á á á á á á á á á á á á á á á á á á á á á Auto Standby On/Off á á á á á á á á á á á á á á á á á á á á á á... -
Page 9: Technical Specification
List of PWBs, Features, Technical specifications VR120 GB 9 Technical specification Cinch Audio/Video input on front panel (OPTION) Mains voltage : 220 - 240 V, +/- 10% Mains frequency : 45 - 65 Hz Audio: Power consumption : mono 12.5 W during AINFR (audio right in) red 0.2 V... -
Page 10: Safety Instructions, Modifications
GB 10 VR120 Safety instructions, Modifications 2. Safety instructions, Modifications Safety instructions 2.1.1 Remarks • The direct voltages and oscillograms ought to be • Safety regulations demand that the set be restored to its measured relative to the set mass. -
Page 11: Modifications
Safety instructions, Modifications VR120 GB 11 Modifications Tape deck 2.2.1 Updating the service manual 011731 12WD44 12345678 10001 A12T-P2/0LP All modifications and/or supplements to the Service Manual are published by means of Service Information bulletins. Production code Factory indication Each Service Information is numbered:... -
Page 12: Direction For Use
GB 12 VR120 Direction for use 3. Direction for use RT111 RT116 RT112 RT114 RT123 RT128 RT121... -
Page 13: Remote Control Overview
Direction for use VR120 GB 13 Remote control SMART: To adjust the picture setting during playback SMART STANDBY/ON m Switch off : To switch off set, interrupt menu function, interrupt a programmed recording (TIMER) Delete : To delete last entry/Clear programmed recording (TIMER) -
Page 14: Front Overview Of The Sets
GB 14 VR120 Direction for use Set width 380 mm VR120 VR402 VR520 VR170 VR570 VR572 VR220 VR420 VR270B VR270W VR670B VR670W VR620 VR622 VR627 SB140 SB145 SB445 SB645 SB745 20DV30 45DV30 65DV30... - Page 15 Direction for use VR120 GB 15 Set width 435 mm VR720 VR870L VR870CC...
-
Page 16: Direction For Use Introduction
GB 16 VR120 Direction for use... - Page 17 Direction for use VR120 GB 17...
- Page 18 GB 18 VR120 Direction for use...
- Page 19 Direction for use VR120 GB 19...
- Page 20 GB 20 VR120 Direction for use...
- Page 21 Direction for use VR120 GB 21...
- Page 22 GB 22 VR120 Direction for use...
- Page 23 Direction for use VR120 GB 23...
- Page 24 GB 24 VR120 Direction for use...
- Page 25 Direction for use VR120 GB 25...
- Page 26 GB 26 VR120 Direction for use...
- Page 27 Direction for use VR120 GB 27...
- Page 28 GB 28 VR120 Direction for use...
- Page 29 Direction for use VR120 GB 29...
- Page 30 GB 30 VR120 Direction for use...
- Page 31 Direction for use VR120 GB 31...
- Page 32 GB 32 VR120 Direction for use...
- Page 33 Direction for use VR120 GB 33...
- Page 34 GB 34 VR120 Direction for use...
- Page 35 Direction for use VR120 GB 35...
- Page 36 GB 36 VR120 Direction for use...
- Page 37 Direction for use VR120 GB 37...
- Page 38 GB 38 VR120 Direction for use...
- Page 39 Direction for use VR120 GB 39...
- Page 40 GB 40 VR120 Direction for use...
- Page 41 Direction for use VR120 GB 41...
- Page 42 GB 42 VR120 Direction for use...
- Page 43 Direction for use VR120 GB 43...
- Page 44 GB 44 VR120 Direction for use...
-
Page 45: Remote Control Codes
Direction for use VR120 GB 45 Remote control codes Acura ..........Finlandia ........32, 18 Marantz ........... Schneider ........21, 23 Adyson ........05, 20 Finlux ........32, 13, 10 Matsui 02,39,18,20,04,06,07,10,28 Sentra ..........Akai ..........33,18 Firstline ....31, 02, 20, 23, 28 Memorex ........ -
Page 46: Dismantling Instructions
GB 46 VR120 Dismantling instructions 4. Dismantling instructions Dismantling instructions General guidelines for dismantling housing components, electronic parts and the drive mechanism Always disconnect from mains before dismantling or assembly. Due to the supply voltages (hot circuit) on the primary side of the switched-mode power supply, an isolating transformer is required for the operation of the device. -
Page 47: Dismantling Of The Motherboard/Drive Combination
Dismantling instructions VR120 GB 47 Dismantling of the motherboard/drive combination (Figure 4-3 and 4-4) Preparation Remove the housing cover as described in section 1. Remove the front panel as described in section 3. – Move device into operational position (Figure 4-3). -
Page 48: Dismantling The Drive
GB 48 VR120 Dismantling instructions Dismantling the drive (Figure 4-3, 4-5 and 4-6) Preparation Remove the housing cover as described in section 1. Remove the front panel as described in section 3. – Undo the two screws (B) of the stay and pull it up to remove it. -
Page 49: Service Modes, Repair Tips
Service modes, Repair tips VR120 GB 49 5. Service modes, Repair tips Special functions The display shows, for instance: 5.1.1 Erasing the EEPROM – Disconnect from mains – Push and hold down the Standby key, reconnect to mains and keep the Standby key depressed for a further Central control Product ID. - Page 50 GB 50 VR120 Service modes, Repair tips 5.2.4 Description of steps with modes: A: DC, 2 V/Div, 0.5 s/Div Step 00: Display of mask version number B: DC, 2 V/Div, 0.5 s/Div After activating the service test program, step 00 and the mask version number are automatically displayed.
- Page 51 Service modes, Repair tips VR120 GB 51 Error table: Step 04: Display of the operating hours counter: By pressing the SELECT key whilst step 04 is flashing, the operating hours counter shows how many hours the head no error disk has turned. The hours are displayed as a 4-digit decimal threading error number.
- Page 52 GB 52 VR120 Service modes, Repair tips Step 10: Operation without drive - dummy mode Before activating this mode with the SELECT key, the recorder must be in the EJECT position. Enter the mode by pressing the SELECT key. The motors are then switched off and the sensors will be ignored by the deck microprocessor.
-
Page 53: Repair Tips
Service modes, Repair tips VR120 GB 53 Repair tips b. Using tweezers press down the part and solder both electrodes as shown below. 5.3.1 Replacement procedure for leadless components (chip) Tweezers The following procedures are recommended for replacing leadless components used in this unit. - Page 54 GB 54 VR120 Service modes, Repair tips • Using a soldering iron • Using a special removal device a. Use unsoldering braid to remove the solder from all a. Apply extra tin-lead solder onto the pins pins of the Flat Pack IC. Apply solder flux to all pins of the Flat Pack IC, to allow easy removal.
- Page 55 Service modes, Repair tips VR120 GB 55 How to read wave forms Presolder Connecting point Soldering iron Aplitude Time base Operating mode of the VCR C.B.A. Flat Pack IC Figure 5-7 c. Solder all pins of the Flat Pack IC. Make sure that none of...
- Page 56 GB 56 VR120 Service modes, Repair tips Engineer's remarks:...
-
Page 57: Block Diagrams, Waveforms, Wiring Diagram
Block diagrams, Waveforms VR120 6. Block diagrams, Waveforms Block diagram Video SDA 5650 SDA 5652 Interconnections: AF page 73 AL page 72 AIO1 page 66 TDA9817 TDA9818 AIO2 page 65 DE page 67 FM ST page 70 FM NIC-page 71... -
Page 58: Block Diagram Audio Mono
Block diagrams, Waveforms VR120 Block diagram Audio Mono Engineer's remarks: Interconnections: AF page 73 AL page 72 AIO1 page 66 AIO2 page 65 DE page 67 FM ST page 70 ADJ. FM NIC-page 71 FV page 69 FOME page 78... -
Page 59: Block Diagram Audio Stereo
Block diagrams, Waveforms VR120 Block diagram Audio Stereo Interconnections: AF page 73 AL page 72 AIO1 page 66 AIO2 page 65 DE page 67 FM ST page 70 FM NIC-page 71 FV page 69 FOME page 78 I/O page 77... -
Page 60: Supply Voltages And Bus Diagram
Block diagrams, Waveforms VR120 Supply voltages and Bus diagram 1941 SAT MOUSE M63100BFP... -
Page 61: Supply Voltages And Bus Diagram
Block diagrams, Waveforms VR120 Supply voltages and Bus diagram Engineer's remarks: Interconnections: AF page 73 AL page 72 AIO1 page 66 AIO2 page 65 DE page 67 FM ST page 70 FM NIC-page 71 FV page 69 FOME page 78... -
Page 62: Block Diagram Central Control
Block diagrams, Waveforms VR120 Block diagram Central Control (AIO1, AIO2) AC3P1 - xU AC3P7 - xU not used for M63100BFP AC3B1 - xU Interconnections: AF page 73 AL page 72 AIO1 page 66 AIO2 page 65 DE page 67 FM ST page 70... -
Page 63: Waveforms
Block diagrams, Waveforms VR120 Waveforms PLAY A: DC, 2 V/Div, 10us/Div A: DC, 2 V/Div, 500us/Div A: AC, 500mV/Div, 20us/Div A: DC, 200mV/Div, 500us/Div A: DC, 2 V/Div, 10ms/Div A: DC, 1 V/Div, 20us/Div A: AC, 100mV/Div, 500us/Div A: DC, 1 V/Div, 20us/Div... -
Page 64: Circuit Diagrams And Pwb Layouts
Circuit diagrams and PWB layouts, Wiring diagram VR120 Circuit diagrams and PWB layouts, Wiring diagram Power supply (PS) 0040 B5 1309 A13 2306 C13 2313 G11 2325 G10 3304 H5 3311 C12 3320 G13 3328 A12 3336 B11 3352 F12... -
Page 65: Display Control (Aio2)
Circuit diagrams and PWB layouts, Wiring diagram VR120 Display control (AIO2) 0005 A3 1170 D5 1171 D6 2170 C1 18VNEG 7170 2171 D7 VPS/PDC PROG. START DATE 2172 D9 25U39143SAN 2173 D8 2174 D8 0005 5V_1WSTBY 18VNEG 5V_STBY 2175 E5... -
Page 66: Central Control (Aio1)
Circuit diagrams and PWB layouts, Wiring diagram VR120 Central control (AIO1) 0020 B10 3896 H6 I864 H13 0021 B1 3897 H9 I865 H12 0022 A8 3898 I9 I866 G8 0030 I13 3899 G11 I867 G7 0031 I13 5007 C11 I868 I10 for <1W only... -
Page 67: Deck Control (De)
Circuit diagrams and PWB layouts, Wiring diagram VR120 Deck control (DE) 0007 H8 F4701 C10 0008 I8 F4703 C10 0011 H9 F471 E6 1946 F10 F4801 B1 1947 C10 F4802 A1 GNDDE GNDDE GNDDE GNDDE 1948 A1 F4803 A1 1948... -
Page 68: Variant List Frontend (Fv)
Circuit diagrams and PWB layouts, Wiring diagram VR120 Variant List Frontend (FV) PAL I PAL, BG/I, PAL, SEC PAL, SEC, PAL,SEC DK PAL, BG/I/DK, PAL, SEC PAL,SEC PAL,SEC DK PAL BG PAL I fullband PAL BG PAL I fullband PAL BG UHF only SEC L/L’... -
Page 69: Frontend (Fv)
Circuit diagrams and PWB layouts, Wiring diagram VR120 Frontend (FV) 1701 D1 1707 G10 2704 C8 2710 C14 2716 G4 2722 G2 2728 F9 3704 B2 3710 C13 3716 E14 3722 H5 3728 H6 3734 E13 5701 D13 5707 G1... -
Page 70: Fm Stereo (Fm-St)
Circuit diagrams and PWB layouts, Wiring diagram VR120 FM stereo (FM-ST) 1760 E5 2760 E3 2763 E3 2770 D4 2772 A3 2773 A3 2775 A5 2778 A5 2779 E6 2780 E5 2775 2781 A5 2782 C7 2783 E5 2778 2784 C2... -
Page 71: Fm Stereo + Nicam (Fm-St-Nic)
Circuit diagrams and PWB layouts, Wiring diagram VR120 FM Stereo + Nicam (FM-ST-NIC) 1761 E6 2761 A6 2764 A6 2765 D8 Interconnections: 6760 2766 A6 3760 9VASW GNDFMS 2767 B8 9VASW AF page 73 1N4148 2768 B8 2761 AL page 72... -
Page 72: Audio Linear (Al)
Circuit diagrams and PWB layouts, Wiring diagram VR120 Audio Linear (AL) 0010 E1 4602 B1 0200 F2 4603 B6 1961 D5 5600 E3 1965 F5 5601 D6 I603 F608 3601 2601 A6 5602 D7 AIN1 14AL 14VM1 2602 A7 5603 D7... -
Page 73: Fm - Audio (Af)
Circuit diagrams and PWB layouts, Wiring diagram VR120 7.10 FM - Audio (AF) 1501 A1 F672 B5 2650 C9 F673 A1 2651 C9 F674 B1 2652 C2 I651 E2 2653 C9 I652 E2 2654 C1 I653 E2 2655 D9 I654 D2... -
Page 74: Video Signal Processing - Secam (Vs-Sec)
Circuit diagrams and PWB layouts, Wiring diagram VR120 7.11 Video Signal Processing - SECAM (VS-SEC) 2071 A4 I074 A5 2072 A4 I075 B6 2.6V 2073 A3 I076 B7 BC857BW 2074 B2 I077 B7 7071 I087 3071 F078 2075 A6 I079 E7... -
Page 75: Video Signal Processing (Vs)
Circuit diagrams and PWB layouts, Wiring diagram VR120 7.12 Video Signal Processing (VS) 0050 D1 F006 B13 0051 E1 F007 D12 1001 C8 F008 H12 1911 B2 F009 G10 1912 B1 F010 G10 2000 A8 F011 G9 2001 A10 F012 G8... -
Page 76: Vps/Pdc & Osd Part (Vpo)
Circuit diagrams and PWB layouts, Wiring diagram VR120 7.13 VPS/PDC & OSD Part (VPO) 2500 B6 2503 B4 2506 E4 2509 E8 2512 E3 3504 B9 3507 E3 3510 D1 3513 D8 3517 E8 3520 B3 4502 A7 4505 D2... -
Page 77: In/Out Part (Io)
Circuit diagrams and PWB layouts, Wiring diagram VR120 7.14 In/Out Part (IO) 1951 A4 6901 B14 1952 A9 6902 A3 1954-A A1 6903 A4 1954-B C1 6904 B11 5V_STBY 14VM1 18VNEG 9VASW 1954-C B1 6905 F8 1955 D1 6906 B5... -
Page 78: Follow Me Part (Fome)
Circuit diagrams and PWB layouts, Wiring diagram VR120 7.15 FOLLOW ME Part (FOME) Engineer's remarks: 2530 A1 2531 B3 2532 D1 2533 D3 5V_1WSTBY 2534 D1 2530 2535 D3 100n 2536 E1 2537 E3 3530 3530 A1 3531 A2 3532 B1... -
Page 79: Wiring Diagram
Circuit diagrams and PWB layouts, Wiring diagram VR120 7.16 Wiring Diagram Motherboard... -
Page 80: Mother Board - Solder Side
Circuit diagrams and PWB layouts, Wiring diagram VR120 7.17 Mother board - solder side CLOCK ADJUST 7172... - Page 81 Circuit diagrams and PWB layouts, Wiring diagram VR120 Engineer's remarks:...
- Page 82 Circuit diagrams and PWB layouts, Wiring diagram VR120 Engineer's remarks:...
-
Page 83: Mother Board - Component Side
Circuit diagrams and PWB layouts, Wiring diagram VR120 7.18 Mother board - component side TP BIAS TP MOT. ADJ. (option) DRUM 5VS1 SYNC TRIV FMPV ZF-out 40.4 TRAP CSRP SEC-CHR. 3.3 MHz BAND I CURRENT 17 /3.3 MHz TP... -
Page 84: Connector Print (Acp10)
Circuit diagrams and PWB layouts, Wiring diagram VR120 7.19 Connector print (ACP10) 7.21 Connector print lay out (ACP10) ACP10 ACP10 +12V +12V +12V +12V 5001 2403 7001 GNDA GNDA BC847C 220u 1953 GNDA GNDA +12V +12V GNDA GNDA GNDA GNDESD... -
Page 85: Connector Print (Qboe1)
Circuit diagrams and PWB layouts, Wiring diagram VR120 7.23 Connector print (QBOE1, QBOG1) 7.24 Connector print (QBOE1) 0005 F 5 1103 C 6 1103 2401 B 3 +12V 2402 A 5 2403 B 4 1103 2404 D 3 2405 D 4... -
Page 86: Connector Print (Acp35)
Circuit diagrams and PWB layouts, Wiring diagram VR120 7.26 Connector print (ACP35) 1141 E2 1943 D1 2143 A2 3143 A2 3149 C2 3156 E3 5145 E1 6145 D3 F404 C1 F410 C4 F416 E4 I404 C2 1142 E3 1944 B4... -
Page 87: Key Print (Akp35)
Circuit diagrams and PWB layouts, Wiring diagram VR120 7.27 Key print (AKP35) 1145 A7 1148 A8 3161 A4 3164 B5 3167 C3 3170 C8 3173 D5 3176 D7 6146 C7 6149 C8 7164 C7 F421 B1 F424 C1 F428 B10... -
Page 88: Illumination Print (Akp13)
Circuit diagrams and PWB layouts, Wiring diagram VR120 7.28 Illumination print (AKP13) 1980 B1 3180 E3 3181 E4 3182 E5 3183 E2 3184 E2 3185 C6 3186 C7 3187 C8 3188 C9 3189 C2 3190 C2 3191 B3 3192 B4... -
Page 89: Key Print (Akp36)
Circuit diagrams and PWB layouts, Wiring diagram VR120 7.29 Key print (AKP36) 7.30 Shuttle board (ASP10) 7.31 Shuttle board (QKP21) 1190 A2 1192 A3 3195 B2 3197 B3 I991 B2 I993 A1 1191 A2 1990 A1 3196 B2 I990 B2... -
Page 90: Test Point Overview
Circuit diagrams and PWB layouts, Wiring diagram VR120 7.32 Test point overview BIAS 1965 1961 MOT1 ADJ. DUMMY for 1948 1947 MOTOR 2 head sets CINCH ADJ. SAT- MAIN rear contr. 2613 DRUM 3625 9417 1956 1941 5VS1 9869 2492... -
Page 91: Electrical Alignments
Electrical alignments VR120 GB 91 8. Electrical alignments Measuring instruments Video signal processing (VS-SEC) The following instruments are required to carry out the Service tasks after replacement of ICs 7004, 7072: electrical setting work: Before commencing adjustment: 1. Dual trace oscilloscope... -
Page 92: Front End (Fv)
GB 92 VR120 Electrical alignments Notes: 8.4.2 HF - AGC adjustment [3707]: With varying frame amplitudes, the setting is made for the greatest amplitude. Service tasks after replacement of ICs 7705, or TUMOD: Purpose: Set amplifier control. Symptom, if incorrectly set: Picture jitter if input level is too low and picture distortion if input level is too high. -
Page 93: Deck Electronics (De)
Electrical alignments VR120 GB 93 Deck electronics (DE) Service tasks after replacement of IC 7463: 8.5.1 Motor frequency - adjustment [2492] (OPTION): Purpose: To adjust the working frequency of the head motor driver (not necessary for M63100 BFP). Result of an incorrect adjustment: Head motor doesn’t start correctly. -
Page 94: Audio Linear (Al)
GB 94 VR120 Electrical alignments Audio linear - ( AL) Service tasks after replacement of coil L5600, IC7004 or the audio heads: 8.7.1 Adjusting the erasing frequency [5600]: Purpose: To set the correct recording erasing frequency. Symptom, if incorrectly set: Erasing frequency or its harmonics cause audio faults. - Page 95 Electrical alignments VR120 GB 95 Determining the deviation (in ppm): ..measured frequency mess ..target frequency (8192,00 Hz) Deviation = 1x10⁶ x (f mess fnom Determining the correction value for Step 53: Correction value = Deviation / 0.763 + 128 (round off to whole...
- Page 96 GB 96 VR120 Electrical alignments Adjustment table of the clock frequency: Measured frequency in Hertz: measured measured clock corrected Time clock corrected Time frequency value deviation frequency value deviation pos. 7899-A for Step 53 minutes / pos. 7899-A for Step 53...
-
Page 97: Circuit Descriptions And List Of Abbreviations
Circuit descriptions and List of abbreviations VR120 GB 97 9. Circuit descriptions and List of abbreviations Switched-mode power supply PS (PS Part) 9.1.3 Supply voltage part The supply voltage part extends from the mains socket 9.1.1 Technical data: [1300] to the capacitor [2318]. Using the diodes [6310, 6311, 6312 and 6313] the a.c. -
Page 98: Operating Unit (Dc Part)
GB 98 VR120 Circuit descriptions and List of abbreviations 9.1.5 Normal mode: followed by another start-up attempt ( Burst Mode ). The amount of power taken up from the mains in burst mode is low. With the power supply in normal mode, the periodic... -
Page 99: Central Control (Aio Part)
Circuit descriptions and List of abbreviations VR120 GB 99 9.2.1 Evaluation of the keyboard matrix Central Control AIO (AIO part) There are 12 different keys. Each key function is assigned a The microcontroller (µC) TMP93CT76F [7899-B] includes fixed voltage value. This value is decoded using an the following functions: analogue/digital (A/D) port (7899-B, pin 56). -
Page 100: Deck Electronics (De Part)
GB 100 VR120 Circuit descriptions and List of abbreviations 9.3.3 CMT detection (video detection with CSYNC) The five-stage AGC alone cannot cover the large dynamic range of the input voltage. The amplifier is therefore also equipped with a low pass characteristic (fg = 3kHz typ.;... -
Page 101: Front End (Fv Part)
Circuit descriptions and List of abbreviations VR120 GB 101 Comparator 4: In = FG, pin 35; Out = FGD, pin 30: 9.4.6 Interface to the capstan motor FG = capstan tachometer. This signal stems from an amplifier for the tachometer hall sensor on the motor unit The driver IC on the capstan motor is activated via connector [1946 pin 4]. -
Page 102: Video Signal Processing Vs (Vs Part)
GB 102 VR120 Circuit descriptions and List of abbreviations used to demodulate pos. or neg. modulated video carriers. It PAL/SECAM/MESECAM/NTSC via IIC bus is possible to generate a QSS-audio-IF signal or an intercarrier IF signal for demodulation in the audio SP/LP/SLP via IIC bus demodulator [7761]. - Page 103 Circuit descriptions and List of abbreviations VR120 GB 103 • Y-REC path: The video signal passes via a 3.5 MHz low SECAM L pass filter to vertical emphasis comprising the YNR block The video signal (VREC) from the SE IC pin 32 [7004] passes...
-
Page 104: Audio Linear (Al Part)
GB 104 VR120 Circuit descriptions and List of abbreviations Chroma PAL 9.6.4 General This is first adjusted in the AGC stage to a constant level and filtered in the FM processing (PB-EQ). The signal exits the IC SECAM: on pin 18 [7004], and passes via an E-follower [7010] with Automatic cloche and anti-cloche comparison: During the drop (1.07MHz ). -
Page 105: Audio Hifi - For Stereo Units (Af Part)
Circuit descriptions and List of abbreviations VR120 GB 105 9.7.4 Audio linear playback 9.8.3 Audio HiFi recording During playback the switch [T7604, T7607] is controlled by The signal coming from the input selector switch (INPUT pin 99 and is closed. The playback signal from the head is... -
Page 106: In/Out (Io Part)
GB 106 VR120 Circuit descriptions and List of abbreviations IN/OUT (IO part) 9.11 VPS/PDC, on-screen display (VPO part) 9.9.1 Video 9.11.1 VPS/PDC The entire video-I/O is carried out in 2-scart units using the The VPS and PDC data is either decoded by the VPS-PDC... -
Page 107: Simple Blockdiagram
Circuit descriptions and List of abbreviations VR120 GB 107 9.12 Simple Blockdiagram... - Page 108 GB 108 VR120 Circuit descriptions and List of abbreviations STV6401 7904 PB-Head Scart1 1951 SYCA Audio-Part 1701 AIN1 AIN1 Audio In 1 PLAY MODULATOR AMLP AMLP AIN2 - AINF TUMOD AOUT1 REC/EE LA71595M Audio Out 1 7004-A Front plug 1954A...
-
Page 109: Simple Blockdiagram Fm Audio / Linear Audio Processing
Circuit descriptions and List of abbreviations VR120 GB 109 9.13 Simple Blockdiagram FM Audio / Linear Audio processing... -
Page 110: List Of Abbreviations
GB 110 VR120 Circuit descriptions and List of abbreviations 9.14 List of abbreviations Signal Description Application +5V analog in < 1W mode 5V_1WSTBY PS AIO1 AIO2 DE FOME +5V analog in STDBY mode 5V_STBY AIO2 DE VPO IO +5V analog... - Page 111 Circuit descriptions and List of abbreviations VR120 GB 111 Signal Description Application Composite sync pulse CSYNC AIO1 CTL1 CTL-Synch-1 CTL2 CTL-Synch-2 Audio switching voltage AIN1/AFV DECK_INIT Init switch AIO1 DRUM Head motor speed phase signal AIO1 Envelope comparator signal ENVC...
- Page 112 GB 112 VR120 Circuit descriptions and List of abbreviations Signal Description Application Audio mute / Colour rotation on/off MTA_CROT AIO1 Frame pulse AIO1 PB-switch Head wheel position/-speed PG_FG AIO1 PGIN Scanner-Motor-Pulse PAL or secam-L AIO1 Record protection RECP AIO1 Red signal between scart 1/2...
-
Page 113: Tape Deck
Tape deck VR120 GB 113 10. Tape deck 10.1 Drive assembly Auxiliary tools for deck adjustment: This tape deck has three motors; one providing precision drive for the scanner unit; the second providing direct drive for the capstan and belt drive for the reel tables; the third motor drives the lift and tape threading/dethreading operations. -
Page 114: Top View
GB 114 VR120 Tape deck 10.1.2 Deck layout diagram Deck in position „threaded out“. The following diagrams indicate the relative position of the gearwheels and levers when the deck is in the threaded out (cassette-compartment down) position. Top view Pos. 46 Cam shaft Pos. - Page 115 Tape deck VR120 GB 115 10.1.4 Scanner replacement 10.1.6 Threading motor (Pos. 38) Removal: Remove the belt and disconnect the connector plug. Nylon gloves should be worn when handling the head disc. Remove the threading motor from the motor supports ( see Remove the deck from the set/mobo.
- Page 116 GB 116 VR120 Tape deck 10.1.8 Pressure roller (Pos. 37) Remove the tape deck. Unhook and remove the pressure roller tension spring. Release the pressure roller guide (pos. 41) from the guide in the threading motor holder by pressing the top of the motor...
-
Page 117: Adjustments
Tape deck VR120 GB 117 10.2 Adjustments Adjustment: Adjust the left and right roller units to make the tracking signal TRIV straight and flat as possible ( see figure 10-11 ). Adjustments must not be made in the service position. - Page 118 GB 118 VR120 Tape deck 10.2.3 Brake band and tape tension 10.2.5 Reverse brake control Due to further development it is no longer necessary to make Set the drive to „Reverse“ position. theseadjustments after replacement of the brake band. Place a torquemeter on the right reel and turn the latter If the brake band or tape tension are completely misadjusted, counterclockwise, until the reel just starts to flip.
- Page 119 Tape deck VR120 GB 119...
-
Page 120: Deck Exploded View (Top)
GB 120 VR120 Tape deck 10.3 Deck exploded view (TOP) 5322 390 10096 Oil 4822 390 20154 Grease Cleaning set: 4822 390 80166 Isopropanol 4822 466 91591 Cleaning cloth... -
Page 121: Deck Exploded View (Bottom)
Tape deck VR120 GB 121 10.4 Deck exploded view (BOTTOM) 5322 390 10096 Oil 4822 390 20154 Grease Cleaning set: 4822 390 80166 Isopropanol 4822 466 91591 Cleaning cloth... -
Page 122: Mechanical Parts List
GB 122 VR120 Tape deck 10.5 Mechanical parts list K I T S K I T S Code Code Pos. Description number Pos. Description number B I L P Q S T U 4822 B I L P Q S T U 4822 Rec. - Page 123 Tape deck VR120 GB 123 Engineer's remarks:...
-
Page 124: Exploded Views
GB 124 VR120 Exploded views 11. Exploded views 11.1 Exploded view set 2422 128 02922 2422 128 02922 11xx 11xx 12xx 12xx (2422 128 02497) (2422 128 02497) 2422 128 02842 2422 128 02842... - Page 125 3103 104 25950 CINCH COVER 3103 104 25890 CINCH COVER SAT 8622 666 10101 VCR SAT MOUSE 3103 141 23810 COVER VR120, 402, 520 3103 141 23680 COVER VR170, 220, 270x, 420, 57x, 620, 622, 670x 3103 141 23790 COVER VR720, VR870x...
- Page 126 Exploded views Service Code Description Lift Flap pos 6 Service Code Description Control Panel pos 20 3103 178 33150 LIFT FLAP VR120 3103 138 92280 CONTROL PANEL VR120 3103 178 33250 LIFT FLAP VR170/02/07/58 3103 138 92420 CONTROL PANEL VR170/02/58...
- Page 127 3103 104 27650 FOOT VR620, 622 3103 111 02450 LEG SPRING 3103 178 34170 AV-COVER FR VR620, 622 3103 110 01560 WORDMARK VR120, 402,520 3103 178 33700 AV-COVER GB VR620, 622 3103 110 01570 WORDMARK VR170,270x,57x,670x 3103 178 34200 AV-COVER GB VR627...
-
Page 128: Spare Parts List
GB 128 VR120 Spare parts list 12. Spare parts list MOBO 1706 2422 549 42824 FILTER 5,5MHz PAL BG 2074 2022 552 05335 220 pF 50V 1706 2422 549 42825 FILTER 6,0MHz PAL I 2075 3198 017 31030 10 nF 50V... - Page 129 Spare parts list VR120 GB 129 2530 3198 023 41040 100 nF 25V 2727 3198 016 31010 100 pF 50V 3017 2120 108 92618 1.8 k 1% 3198 029 31090 10 µF 25V 2531 2728 3198 016 31010 100 pF 50V 3018 3198 021 31020 1 k 0.063W...
- Page 130 GB 130 VR120 Spare parts list 3328 2322 156 23309 33 R 1% 3622 3198 021 31230 12 k 0.063W 3810 3198 011 03310 330 R 0.17W 3329 3198 011 04730 47 k 0.17W 3623 3198 021 32220 2.2 k 0.063W 3811 3198 011 03310 330 R 0.17W...
- Page 131 Spare parts list VR120 GB 131 3907 2122 551 00008 VDR MAX 21V 5460 2422 535 94674 330 nH 7071 3198 010 42320 BC857BW 3198 018 11090 10 µH 3907 2322 574 10402 VDR MAX 21V 5500 7072 9322 147 59682 LA7339A 3198 018 11090 10 µH...
- Page 132 GB 132 VR120 Spare parts list ACP1/ACP10 QBOE1/QBOG1 CABLES Various Various 1950 2422 025 14535 CONNECTOR 6PIN 1103 2422 025 14535 CONNECTOR 6PIN 8001 310314026250 FFC 7POL TD1-1960 1951 3103 100 24170 CINCH YELLOW 1106 3103 100 23840 CINCH WHITE...