Table of Contents
Advertisement
Advertisement
Table of Contents

Related Manuals for JVC Kaboom ! Series RV-B550BU


Summary of Contents for JVC Kaboom ! Series RV-B550BU
- Page 1 CD PORTABLE SYSTEM RV-B550 BU/RD TIMER ON/OFF CLOCK TIMER SLEEP DOWN PROGRAM RANDOM AUTO PRESET REPEAT TUNER TAPE BAND FM MODE REVERSE MODE MULTI CONTROL DISPLAY SOUND AHB PRO VOLUME RM-RXVB55 REMOTE CONTROL INSTRUCTIONS LVT0492-002A...
-
Page 2: Table Of Contents
ENGLISH Thank you for purchasing this JVC product. Please read these instructions carefully before starting operation to be sure to obtain optimum performance and a longer service life from the unit. CONTENTS Features ... 4 Safety precautions ... 4 Handling precautions ... 5 Shoulder strap attachment/detachment ... - Page 3 IMPORTANT for the U.K. DO NOT cut off the mains plug from this equipment. If the plug fitted is not suitable for the power points in your home or the cable is too short to reach a power point, then obtain an appropriate safety approved extension lead or consult your dealer.
-
Page 4: Features
FEATURES ÷ Active Hyper-Bass (AHB) Pro circuit for low-frequency sound reproduction ÷ Active Clear Sound (ACS) circuit for enhanced sound reproduction ÷ Speaker illumination ÷ Sound mode control ÷ One-touch operation (COMPU PLAY) ÷ 34-key remote control unit operates all CD, cassette deck and tuner functions ÷... -
Page 5: Handling Precautions
HANDLING PRECAUTIONS Do not use this unit in direct sunlight where it would be exposed to high temperatures above 40°C (104°F). ÷ When abnormal operation occurs * Unplug the AC power cord from the AC wall outlet and remove all the batteries. Then reload the batteries after a few minutes, reconnect the AC power cord and switch the power ON. -
Page 6: Connections
ÓAC IN CAUTIONS: 1. ONLY USE WITH JVC POWER CORD PROVIDED WITH THIS UNIT TO AVOID MALFUNCTION OR DAMAGE TO THE UNIT. 2. BE SURE TO UNPLUG THE POWER CORD FROM THE OUTLET WHEN GOING OUT OR WHEN THE UNIT IS NOT IN USE FOR AN EXTENDED PERIOD OF TIME. - Page 7 TWO WEEKS) OR WHEN ALWAYS USING HOUSEHOLD AC, REMOVE THE BATTERIES TO AVOID A MALFUNCTION OR DAMAGE TO THE UNIT. ÷ WHEN THE JVC POWER CORD PROVIDED WITH THIS UNIT IS CONNECTED, THE POWER IS AUTOMATICALLY SWITCHED FROM THE BATTERIES TO THE HOUSEHOLD AC EVEN WHEN THE BATTERIES ARE LOADED.
-
Page 8: Names Of Parts And Their Functions
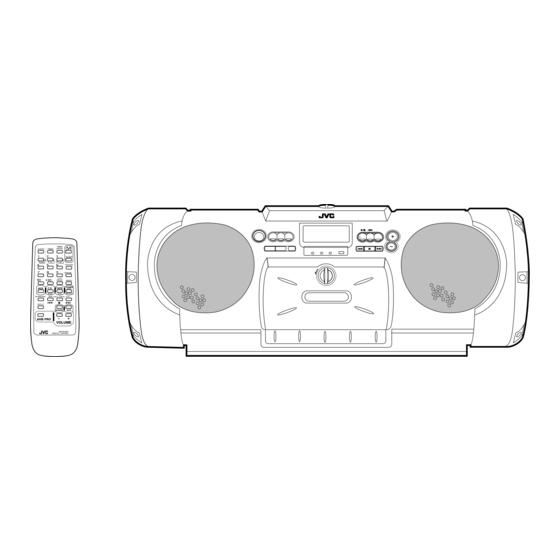
NAMES OF PARTS AND THEIR FUNCTIONS CD player/General section 34 5 6 Shoulder strap hook button AHB (Active Hyper Bass) PRO button SPEAKER ILLUMINATION/ACS (Active Clear Sound) button SOUND button OPEN knob Turn the OPEN knob to the left to open the CD door. To close the CD door, press it down until it clicks shut. - Page 9 Tuner/Deck section PRESET TUNING/BEAT CUT button Display window Band display Radio frequency display Mode display during FM broadcast (STEREO/MONO) Tape (TAPE) display Reverse mode indicator ( / Recording indicator (REC) Tape direction indicators (2/3) TAPE 23 button Press to select the tape mode. Press to select the tape direction.
-
Page 10: Remote Control Unit
REMOTE CONTROL UNIT Preparation before use ÷ Installing batteries in the remote control unit 1. Remove the battery cover from the back of the remote control unit. 2. Insert two “R6/AA (15F)” size batteries. ÷ Insert the batteries with the ª and · terminals matching the indication inside the battery compartment. -
Page 11: Switching The Power On/Off
SWITCHING THE POWER ON/OFF Switching the power on/off ÷ Switching on: ON/STANDBY STANDBY The STANDBY indicator goes out. ÷ Switching off: ON/STANDBY STANDBY One touch operation (COMPU PLAY) (only when AC power is used) Even when the power is set to STANDBY, pressing the button shown below switches on the power and selects the source. -
Page 12: Volume, Sound Mode And Other Controls
VOLUME, SOUND MODE AND OTHER CONTROLS VOLUME buttons + : Use to increase the volume. – : Use to decrease the volume. (Control range from VOL 0 to VOL 50.) Main unit VOLUME AHB (Active Hyper Bass*) PRO button BASS 1: The AHB PRO indicator lights up, and a mild bass boost is added to the sound. -
Page 13: Handling Cds
HANDLING CDs Since dirty, damaged and warped CDs may damage the unit, take care regarding the following: 1. Usable CDs Use CDs with the Compact Disc mark shown below. 2. Notes on handling CDs ÷ Do not touch the reflective recorded surface. ÷... -
Page 14: Playing Cds
PLAYING CDs Playing an entire CD The following example of playing an entire CD assumes a CD with 12 tracks and a total playing time of 48 minutes 57 seconds. Operate in the order shown ÷ When AC power is used (When battery power is used, switch on the operation): SPEAKER... - Page 15 Direct access play (using the remote control unit) ÷ Pressing any of the track number buttons will start play from the beginning of the designated track. (This function cannot be used during programmed play.) CLOCK DOWN REVERSE MODE Programmed play (using the remote control unit) ÷...
-
Page 16: Handling Cassette Tapes
Repeat play (using the remote control unit) Press the REPEAT button before or during play. A single track or all the tracks can be repeated. Whether a single track or all tracks are to be repeated can be specified. Each time the REPEAT button is pressed, the mode will change from single track ( ), to all tracks ( ALL), to clear mode, in this order. -
Page 17: Cassette Playback
CASSETTE PLAYBACK Operate in the order shown ÷ When AC power is used (When battery power is used, switch on the operation): SPEAKER ON/STANDBY ILLUMINATION /ACS AHB PRO SOUND PRESET ONE TOUCH TUNING STANDBY AHB PRO BEAT CUT OPEN Load a cassette tape with side A facing out. Press to start playback. -
Page 18: Radio Reception
RADIO RECEPTION Operate in the order shown ÷ When AC power is used (When battery power is used, switch on the operation): Press the TUNER BAND button. ÷ The power is switched on. Select the band by pressing the TUNER BAND button. ÷... - Page 19 Presetting the desired stations (using the remote control unit) 30 stations in the FM band and 15 stations in the AM (MW/LW) band can be preset as follows: ÷ Example: (Presetting an FM station broadcasting at 103.5 MHz to preset button “15”) SLEEP DOWN...
-
Page 20: Recording
RECORDING ÷ During recording, the ALC (Automatic Level Control) circuit automatically optimizes the recording level, so manual recording level adjustment is unnecessary. ÷ Check that the safety tab on the cassette tape is not broken off. Synchronized recording with the CD player ÷... - Page 21 Recording from the radio or an external source connected to the AUX IN terminals Operate in the order shown SPEAKER ON/STANDBY ILLUMINATION AHB PRO /ACS SOUND PRESET ONE TOUCH TUNING STANDBY BEAT CUT OPEN Load a cassette with side A facing out. (Wind past the tape leader before starting recording.) ÷...
-
Page 22: Clock Adjustment
CLOCK ADJUSTMENT USING THE REMOTE CONTROL UNIT) Names of parts in the clock/timer section, and their functions: 1 2 3 Timer mode indicator Timer indicator (ON/OFF) SLEEP indicator CLOCK indicator Time display Setting the current time (when this unit is used for the first time) (Example: To set the clock to 13:15.) CLOCK... -
Page 23: Timer Operations
TIMER OPERATIONS (USING THE REMOTE CONTROL UNIT) Setting the timer ÷ The current time must be set before the timer can be used. Set the button to ON. Press the TIMER button. TIMER Set the start time. (Example: To set the timer to 12:15.) DOWN Set the stop time. - Page 24 Timer recording of broadcast ÷ The current time must be set before the timer can be used. ÷ Make sure that the safety tabs of the cassette have not been broken off. Operations SPEAKER ON/STANDBY ILLUMINATION /ACS AHB PRO SOUND PRESET ONE TOUCH TUNING...
- Page 25 Timer playback ÷ Timer playback of tapes, broadcasts and CDs is possible. Operations SPEAKER ON/STANDBY ILLUMINATION AHB PRO /ACS SOUND PRESET ONE TOUCH TUNING BEAT CUT Set the button to ON. Set the timer. (Refer to “Setting the timer” on page 23.) Source sound CD play Tape playback...
-
Page 26: Maintenance
MAINTENANCE Cleaning is important! When the tape is running, magnetic powder and dust naturally accumulate on the heads, capstan and pinch roller. When they become too dirty... ÷ Sound quality deteriorates. ÷ The output sound level drops. ÷ Previously recorded tape is not completely erased. ÷... -
Page 27: Troubleshooting
TROUBLESHOOTING What appears to be trouble is not always serious. First make sure... ÷ Power cannot be turned on. * Is the power cord unplugged? ÷ No sound from the speakers. * Are headphones connected? ÷ Clock time is blinking in the display. * Was there a power failure? * Was the power cord unplugged while the memory back-up batteries were not installed? - Page 28 VICTOR COMPANY OF JAPAN, LIMITED 0200MNMUIAJEIN...