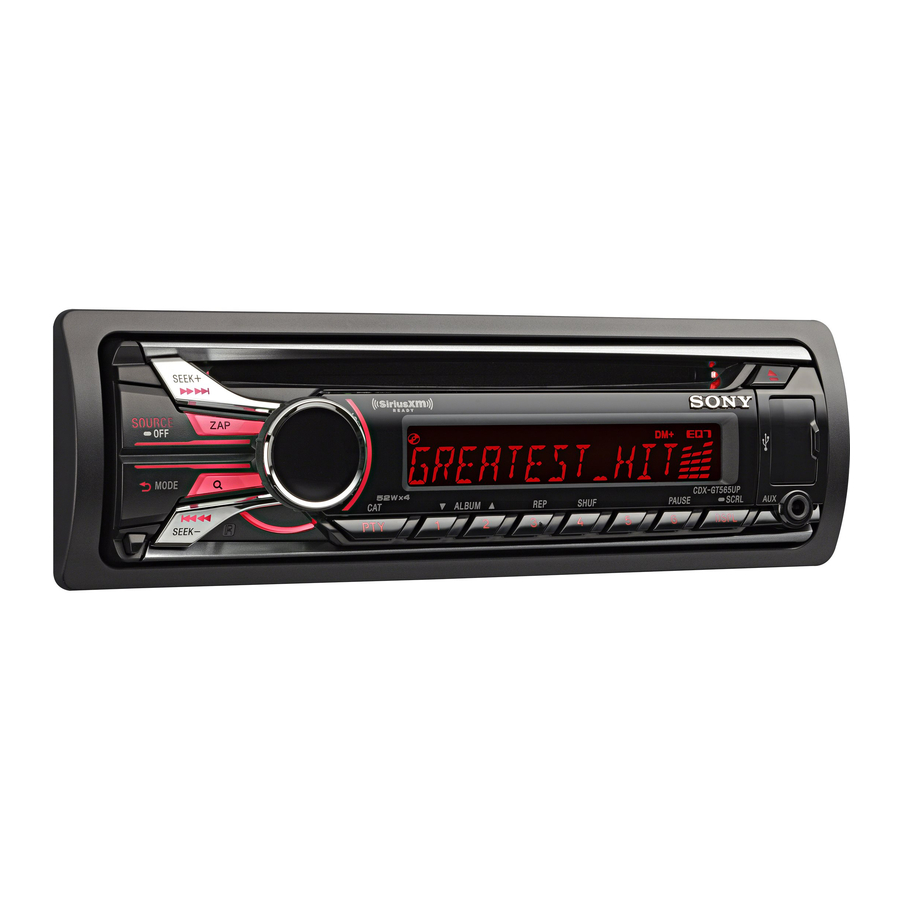
Sony CDX-GT565UP Operating Instructions Manual
Fm/am compact disc player
Hide thumbs
Also See for CDX-GT565UP:
- User manual ,
- Operating instructions manual (64 pages) ,
- Specifications (5 pages)
Table of Contents
Advertisement
FM/AM
Compact Disc
Player
Owner's Record
The model and serial numbers are located on the bottom of the unit.
Record the serial number in the space provided below.
Refer to these numbers whenever you call upon your Sony dealer
regarding this product.
Model No. CDX-GT565UP Serial No.
To cancel the demonstration (DEMO) display, see page 5.
Pour annuler l'affichage de démonstration (DEMO), reportez-
vous à la page 4.
CDX-GT565UP
4-284-261-12(1)
Operating Instructions US
Mode d'emploi
FR
Advertisement
Table of Contents

Related Manuals for Sony CDX-GT565UP


Summary of Contents for Sony CDX-GT565UP
- Page 1 The model and serial numbers are located on the bottom of the unit. Record the serial number in the space provided below. Refer to these numbers whenever you call upon your Sony dealer regarding this product. Model No. CDX-GT565UP Serial No.
- Page 2 ZAPPIN and Quick-BrowZer are interference to radio communications. trademarks of Sony Corporation. However, there is no guarantee that interference will not occur in a particular Windows Media is either a registered installation.
- Page 3 MPEG Layer-3 audio coding technology and patents licensed from Fraunhofer IIS and Thomson. PANDORA, the PANDORA logo, and the Pandora trade dress are trademarks or registered trademarks of Pandora Media, Inc., used with permission. Note on the lithium battery Do not expose the battery to excessive heat such as direct sunlight, fire or the like.
-
Page 4: Table Of Contents
Table of contents Getting Started ........... . . 5 Canceling the DEMO mode . -
Page 5: Getting Started
Detaching the front panel Getting Started You can detach the front panel of this unit to prevent theft. Canceling the DEMO Press and hold mode The unit is turned off. You can cancel the demonstration display Press the front panel release button which appears during turning off. -
Page 6: Location Of Controls
Location of controls Main unit This section contains instructions on the ZAP button page 16 location of controls and basic operations. To enter ZAPPIN™ mode. SOURCE/OFF button* Control dial/select button page 19, Press to turn on the power/change the source (Radio/CD/USB/Pandora USB/ To adjust volume (rotate);... - Page 7 (BROWSE) button page 15, 24 To enter the Quick-BrowZer™ mode; list the station (Pandora USB). PTY/CAT* button page 9, 24 To select PTY in RDS. Number buttons Radio: To receive stored stations (press); store stations (press and hold). CD/USB: : ALBUM / (during MP3/ WMA/AAC playback) To skip albums (press);...
- Page 8 RM-X211 Remote PTY button commander VOL (volume) +* /– button ATT (attenuate) button To attenuate the sound. To cancel, press again. MENU MODE button* SOURCE SOUND MODE Press to select the radio band (FM/AM). Press and hold to enter/cancel the passenger control/enter the bookmark ENTER mode (Pandora USB).
-
Page 9: Radio
Tuning automatically Radio Select the band, then press +/– to search for the station. Storing and receiving Scanning stops when the unit receives a station. Repeat this procedure until the stations desired station is received. Caution When tuning in stations while driving, use If you know the frequency of the station you want Best Tuning Memory (BTM) to prevent an to listen to, press and hold... -
Page 10: Playing A Disc
Type of programs NEWS (News), INFORM (Information), SPORTS (Sports), TALK (Talk), ROCK (Rock), CLS ROCK (Classic Rock), ADLT Playing a disc HIT (Adult Hits), SOFT RCK (Soft Rock), TOP 40 (Top 40), COUNTRY (Country), OLDIES (Oldies), SOFT (Soft), NOSTALGA This unit can play CD-DA (also containing (Nostalgia), JAZZ (Jazz), CLASSICL CD TEXT) and CD-R/CD-RW (MP3/ (Classical), R AND B (Rhythm and Blues),... -
Page 11: Usb Devices
Notes • Do not use USB devices so large or heavy that USB devices they may fall down due to vibration, or cause a loose connection. • MSC (Mass Storage Class)-type USB • Do not detach the front panel during playback devices compliant with the USB standard of the USB device, otherwise USB data may be can be used. -
Page 12: Ipod
Caution for iPhone When you connect an iPhone via USB, telephone iPod volume is controlled by iPhone itself. In order to avoid sudden loud sound after a call, do not increase the volume on the unit during a In these Operating Instructions, “iPod” is telephone call. -
Page 13: Operating An Ipod Directly - Passenger Control
Operating an iPod directly — Passenger control Pandora® via USB (iPhone) You can operate an iPod directly even when connected to the dock connecter. Pandora Radio is available to stream music During playback, press and hold through your iPhone. You can control Pandora on a USB-connected iPhone from this unit. - Page 14 Press repeatedly until QuickMix “PANDORA USB” appears. QuickMix allows you to listen to songs played on one or more Pandora stations in Launch Pandora on the iPhone. your station list randomly. Edit your QuickMix station selections on Adjust the volume on this unit. the device before connection.
-
Page 15: Searching And Playing Tracks
SHUF GENRE* genre in random order. Searching and SHUF DEVICE* device in random order. playing tracks SHUF OFF track in normal order (Normal play). Playing tracks in various modes *1 iPod only *2 CD only You can listen to tracks repeatedly (repeat *3 USB and iPod only play) or in random order (shuffle play). -
Page 16: Searching A Track By Listening To Track Passages - Zappin
To cancel Alphabet search, press Searching by skip items (BACK) or –. — Jump mode Notes When many items are in a category, you can search the desired item quickly. • In Alphabet search, a symbol or article (a/an/ the) before the selected letter of the item is Press + in Quick-BrowZer excluded. -
Page 17: Changing The Illumination
Customizing the display and Changing the button color — Custom Color illumination You can register a customized color for the display and buttons. Changing the color of display and Press and hold the select button. buttons — Dynamic Color Illuminator The setup display appears. -
Page 18: Advanced Color Setting
Advanced color setting Start up effect — Start White When you push on, the Changing the color with color of display and the buttons on the main sound synchronization unit turns white once, and then the color changes to the customized color. —... -
Page 19: Sound Settings And Setup Menu
SW LEVEL* (Subwoofer Level) Adjusts the subwoofer volume level: Sound Settings and “+10 dB” – “0 dB” – “–10 dB.” Setup Menu (“ATT” is displayed at the lowest setting.) Changing the sound AUX VOL* (AUX Volume level) settings Adjusts the volume level for each connected auxiliary equipment: “+18 dB”... - Page 20 Optimizing sound by Time The equalizer curve setting can be memorized for Alignment — Listening each source. Position The unit can simulate a natural sound field Customizing the equalizer by delaying the sound output from each speaker to suit your position. curve —...
-
Page 21: Adjusting The Listening Position
Rotate the control dial to select the Using rear speakers as subwoofer position from “NEAR,” subwoofer — Rear Bass “NORMAL” or “FAR,” then press it. Enhancer Press (BACK). Rear Bass Enhancer enhances the bass To cancel listening position, select “OFF” sound by applying the low pass filter setting on step 3. -
Page 22: Adjusting Setup Items
Adjusting setup items DIMMER Changes the display brightness. – “AT”: to dim the display automatically Press and hold the select button. when you turn lights on. (Available only The setup display appears. when the illumination control lead is connected.) Rotate the control dial until the desired –... -
Page 23: Using Optional Equipment
LPF SLOP* (Low Pass Filter Slope) Selects the LPF slope: “1,” “2,” “3.” Using optional SW PHASE* (Subwoofer Phase) equipment Selects the subwoofer phase: “NORM,” “REV.” Auxiliary audio HPF FREQ (High Pass Filter Frequency) equipment Selects the front/rear speaker cut-off frequency: “OFF,”... -
Page 24: Siriusxm Tuner
To change the passcode SiriusXM tuner On the set up menu (page 23), rotate the control dial to select “PARENTAL,” then By connecting an optional SiriusXM tuner, press it. you can use the features and functions of Rotate the control dial to select “CODE the SiriusXM satellite radio (Sirius and XM EDIT,”... -
Page 25: Additional Information
• Discs that this unit CANNOT play – Discs with labels, stickers, or sticky tape or Additional paper attached. Doing so may cause a malfunction, or may ruin the disc. Information – Discs with non-standard shapes (e.g., heart, square, star). Attempting to do so may damage the unit. -
Page 26: Maintenance
In order to prevent this, this manual, consult your nearest Sony dealer. detach the front panel (page 5) and clean the connectors with a cotton swab. Do not apply too much force. -
Page 27: Specifications
CD Player section Notes Signal-to-noise ratio: 120 dB • For safety, turn off the ignition before cleaning Frequency response: 10 – 20,000 Hz the connectors, and remove the key from the Wow and flutter: Below measurable limit ignition switch. • Never touch the connectors directly with your USB Player section fingers or with any metal device. -
Page 28: Troubleshooting
Troubleshooting During playback or reception, demonstration mode starts. If no operation is performed for 5 minutes The following checklist will help you remedy with “DEMO-ON” set, demonstration mode problems you may encounter with your unit. starts. Before going through the checklist below, –... -
Page 29: Usb Playback
CD playback The USB device takes longer to play back. The USB device contains files with a The disc cannot be loaded. complicated tree structure. Another disc is already loaded. The disc has been forcibly inserted upside The sound is intermittent. down or in the wrong way. - Page 30 There may be an internal malfunction. – Check the connection. If the error indication CHECKING remains on in the display, consult your The unit is confirming the connection of a nearest Sony dealer. USB device. – Wait until confirming the connection is OVERLOAD finished.
- Page 31 “Thumbs” feedback is not allowed. If these solutions do not help improve the – Wait until the commercial ends. situation, consult your nearest Sony dealer. – Some functions, such as Shared Station, do If you take the unit to be repaired because of not permit feedback.
-
Page 32: Operating Instructions
Web suivant : http://esupport.sony.com http://www.sony.com/mobileAV If you have any questions/problems regarding this product, try the following: Read Troubleshooting in these Operating Instructions. Please contact (U.S.A. only); 1-800-222-7669 Call http://www.SONY.com http://www.sony.net/ ©2011 Sony Corporation Printed in Thailand... -
Page 33: Connection Example
Syntoniseur radio satellite (SiriusXM)* * not supplied non fourni SIRIUSXM IN CDX-GT565UP Cautions Connection example This unit is designed for negative ground (earth) 12 V Notes (-A) Be sure to connect the ground (earth) lead before connecting the DC operation only. - Page 34 Satellite radio tuner (SiriusXM) Syntoniseur radio satellite (SiriusXM) FRONT SIRIUSXM AUDIO OUT RCA pin cord (not supplied) AUDIO OUT can be switched SUB or REAR. For from car antenna (aerial) details, see the supplied Operating Instructions. à partir de l’antenne du Separate adaptor may be required.
- Page 35 Montage de l’appareil dans You may not be able to install this unit in some makes of remplacez le fusible. Si le nouveau Japanese cars. In such a case, consult your Sony dealer. une voiture japonaise fusible grille également, il est Note possible que l’appareil soit...
- Page 36 TOYOTA NISSAN size size 5 × max. 8 mm 5 × max. 8 mm × max. × max. dimension dimension 5 × max. 8 mm to dashboard/center console 5 × max. 8 mm to dashboard/center console × po max.) vers le tableau de bord/la console centrale ×...