JVC TH-SW8 Instructions Manual
Dvd digital cinema system
Hide thumbs
Also See for TH-SW8:
- Instructions manual (102 pages) ,
- Service manual (85 pages) ,
- Instructions manual (52 pages)

Related Manuals for JVC TH-SW8


Summary of Contents for JVC TH-SW8
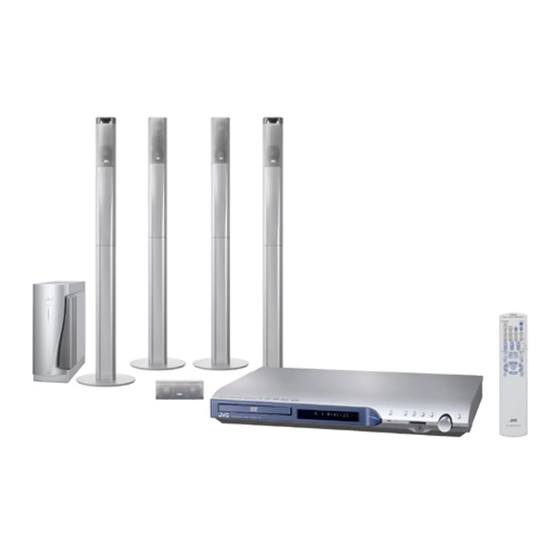
- Page 1 DVD DIGITAL CINEMA SYSTEM Consists of XV-THSW9, RX-THSW8, SP-PWSW9, SP-THS9F, SP-THS9C and SP-THS9S Consists of XV-THSW8, RX-THSW8, SP-PWSW8, SP-THS5F, SP-THS5C and SP-THS7S INSTRUCTIONS LVT1150-003C...
- Page 2 Warnings, Cautions and Others IMPORTANT for the U.K. DO NOT cut off the mains plug from this equipment. If the plug fitted is not suitable for the power points in your home or the cable is too short to reach a power point, then obtain an appropriate safety approved extension lead or consult your dealer.
- Page 3 Warnings, Cautions and Others Caution: Proper Ventilation To avoid risk of electric shock and fire and to protect from damage, place the apparatus on a level surface. The minimal clearances are shown below: Wall or XV-THSW9/ obstructions XV-THSW8 3 cm Wall or obstructions SP-PWSW9/...
-
Page 4: Safety Instructions
Warnings, Cautions and Others “SOME DOS AND DON’TS ON THE SAFE USE OF EQUIPMENT” This equipment has been designed and manufactured to meet international safety standards but, like any electrical equipment, care must be taken if you are to obtain the best results and safety is to be assured. Do read the operating instructions before you attempt to use the equipment. - Page 5 Warnings, Cautions and Others IMPORTANT FOR LASER PRODUCTS 1. CLASS 1 LASER PRODUCT CAUTION serviceable parts inside the unit; leave all servicing to qualified service personnel. CAUTION interlock failed or defeated. Avoid direct exposure to beam. 4. REPRODUCTION OF LABEL: CAUTION LABEL, PLACED INSIDE THE UNIT.
-
Page 6: Table Of Contents
Table of contents Introduction ... 2 Notes on handling ...2 Supplied accessories ...2 About discs ... 3 Playable disc types ...3 Description of parts and controls ... 5 Connections ... 8 Connecting the FM and AM (MW) antennas ...8 Assembling the front and surround speakers ...9 Connecting the satellite (front, center, surround) speakers ... -
Page 7: Introduction
Introduction Notes on handling 7 Important cautions Installation of the system • Select a place which is level, dry and neither too hot nor too cold; between 5°C and 35°C. • Leave sufficient distance between the system and the TV. •... -
Page 8: About Discs
About discs Playable disc types This system has been designed to play back the following discs: DVD VIDEO, DVD AUDIO, Video CD (VCD), Super Video CD (SVCD), Audio CD (CD), CD-R and CD-RW. • This system accommodates the PAL system, and also can play discs recorded with NTSC system. - Page 9 About discs Notes on MP3/WMA/JPEG/MPEG4 discs • MP3/WMA/JPEG/MPEG4 discs (either CD-R or CD-RW) require a longer readout time. (It differs due to the complexity of the directory/file configuration.) • When making an MP3/WMA/JPEG/MPEG4 disc, select ISO 9660 Level 1 or Level 2 for the disc format. •...
-
Page 10: Description Of Parts And Controls
Description of parts and controls The illustrations of the center unit and the subwoofer used in this manual are of TH-SW9 unless otherwise noted. Front panel (center unit) Display window pg. 26 pg. 41 pg. 32 pg. 22 pg. 19 pg. -
Page 11: Powered Subwoofer
Description of parts and controls Wireless receiver unit RX-THSW8 Do not block the ventilation openings. Left side Powered subwoofer SP-PWSW9/SP-PWSW8 Front NOTE • For safety reasons, always ensure that there is sufficient space behind the powered subwoofer. pg. 12 pg. 17 Front pg. -
Page 12: Remote Control
Description of parts and controls Remote control F AUDIO OPEN/CLOSE pg. 21 pg. 15 TV/VIDEO MUTING pg. 18 FM/AM TV SOUND pg. 31 AUDIO SUBTITLE SURR. FL DISP. pg. 30 TV VOL CHANNEL AUDIO VOL AUDIO pg. 15 pg. 15 TUNING TA/NEWS/INFO TUNING... -
Page 13: Connections
Connections Connecting the FM and AM (MW) antennas 7 AM (MW) loop antenna Setting up supplied AM (MW) loop antenna If the antenna cord is covered with the insulation coat, twist and pull the insulation coat off and remove. Connecting AM (MW) loop antenna Center unit Antenna cord •... -
Page 14: Assembling The Front And Surround Speakers
Connections Assembling the front and surround speakers The following procedure explains the front speaker assembly. The assembly of both the front and surround speakers are done in the same manner. Front speaker Surround speaker (×2) (×2) NOTE • The stands and the base plates are commonly used for both front and surround speakers assembly. -
Page 15: Connecting The Satellite (Front, Center, Surround) Speakers
Connections Connecting the satellite (front, center, surround) speakers Before connecting the speaker cords; Twist and pull the insulation coat off and remove. Powered subwoofer SP-PWSW9 Surround speakers SP-THS9S CAUTION • When you connect speakers other than the supplied ones, use speakers of the same speaker impedance (SPEAKER IMPEDANCE) indicated near the speaker terminals on the rear of the powered subwoofer. - Page 16 Connections Before connecting the speaker cords; Twist and pull the insulation coat off and remove. Powered subwoofer SP-PWSW8 Center speaker SP-THS5C Surround speakers SP-THS7S (Bottom) Route the speaker cord through the hole on the bracket. Silver Black Front speakers SP-THS5F •...
- Page 17 Connections Setting up the wireless receiver unit Make sure that the CHANNEL SELECTOR is set to the 1 position. CHANNEL SELECTOR Wireless receiver unit Fully extend the telescopic antenna upright. • If necessary, turn the telescopic antenna until you have the best reception while hearing the sound of the surround speakers.
-
Page 18: Speaker Layout
Connections Speaker layout Center speaker Front left speaker Surround left speaker Wireless receiver unit NOTE • Although the satellite speakers and the powered subwoofer are magnetically shielded, the TV screen may appear mottled. In this case, keep enough distance between the speakers and the TV. •... -
Page 19: Connecting The Powered Subwoofer
Connections Connecting the powered subwoofer Center unit System cord (supplied) Align the 5 marks. Connecting to an analog component You can enjoy the sound of an analog component. RCA pin plug cord (not supplied) To audio output Cassette recorder NOTE •... -
Page 20: Operating External Components With The Remote Control
• Set the codes again after replacing the batteries of the remote control. Operating the TV 7 To set the manufacturer’s code You can operate a JVC TV without setting the manufacturer’s code. Slide the remote control mode selector to TV. -
Page 21: Operating The Vcr
Operating external components with the remote control Operating the VCR 7 To set the manufacturer’s code Slide the remote control mode selector to VCR. Press and hold F VCR. Keep the button pressed until step 4 is finished. Press ENTER. Press number buttons (1-9, 0) to enter the manufacturer’s code (2 digits). -
Page 22: Basic Operations
Basic operations The buttons on the remote control are used to explain most of the operations in this manual. You can use the buttons on the center unit same as on the remote control for operations unless otherwise noted. IMPORTANT Before using the remote control for the following operation;... -
Page 23: Selecting The Source To Play
Basic operations Selecting the source to play On the remote control: Press one of the source selecting buttons (DVD, FM/AM, AUX or TV SOUND). DVD: To play back a disc (DVD VIDEO, VCD etc.). (A pg. 21) FM/AM: To tune in an FM or AM (MW) station. (A pg. 41) Each time you press the button, the band alternates between FM and AM (MW). -
Page 24: Sleep Timer [Sleep]
DVD VIDEO in the progressive scan mode. In such a case, change the scan mode to “RGB” or “Y/C”. To check the compatibility of your TV, contact your local JVC customer service center. • All JVC progressive TVs and High-Definition TVs are fully... -
Page 25: Optimizing The Speaker Settings [Smart Surround Setup]
Basic operations Optimizing the speaker settings [Smart Surround Setup] Be sure to connect the surround speakers to the powered subwoofer before performing Smart Surround Setup function. (A pg. 10 or 11) NOTE • When you change the positioning of the speakers or listener, or replace the supplied speakers with other ones, perform Smart Surround Setup again. -
Page 26: Playback
Playback • The icon such as shows the types of discs the operation is available for. IMPORTANT Before using the remote control for the following operation; 1 Set the remote control mode selector to AUDIO. 2 Press DVD. The buttons described below are used on pages 21 to 24. OPEN/CLOSE FL DISP. - Page 27 Playback NOTE • (For JPEG) The system cannot accept operations even though you press any buttons before the entire picture appears on the TV screen. • If you do not want the on-screen guide icons to appear, see page 39. 7 Playback information on the display window DVD VIDEO Example:...
-
Page 28: One Touch Replay
Playback 7 Screen saver A TV screen may burn out if a static picture is displayed for a long time. To prevent this, the system automatically dims the screen if a static picture is displayed for over 5 minutes (the screen saver function). -
Page 29: Locating A Desired Title/Group Using Number Buttons
Playback Locating a desired title/ group using number buttons 7 During playback or while stopped Press TITLE/ GROUP. “_ _” or “_” is shown in the title/group display area in the display window. Example: During DVD VIDEO playback T _ _ 1 : 2 3 : 4 5 While the display window shows “_ _”... -
Page 30: Advanced Operations
Advanced operations • The icon such as shows the types of discs the operation is available for. IMPORTANT Before using the remote control for the following operation; 1 Set the remote control mode selector to AUDIO. 2 Press DVD. • There are exceptions in the operation mentioned above. In such a case, follow each instruction. -
Page 31: Using The On-Screen Bar
Advanced operations 7 All Channel Stereo (DSP) All Channel Stereo (ALL CH ST.) mode can reproduce a larger stereo sound field using all the connected (and activated) speakers. All Channel Stereo can be used while reproducing 2 channel stereo source. Normal stereo sound All Channel Stereo 7 Indicators on the display window... -
Page 32: Changing The Time Information
Advanced operations 7 Contents of the on-screen bar during playback DVD VIDEO DVD AUDIO SVCD MPEG4* 7 – N are not available. A Shows disc type. B Shows current transfer rate (Megabits per second). C Shows current title (for DVD VIDEO) or group (for DVD AUDIO) number. -
Page 33: Playing From A Specified Position On A Disc
Advanced operations Playing from a specified position on a disc You can start playing a title, chapter or track you specify. You can also play a disc from specified time. Locating a desired scene from the DVD menu DVD VIDEOs generally have their own menus which show disc contents and you can display them on the TV screen. -
Page 34: Using The File Control Display
Advanced operations Locating a desired position by specifying the time 7 For DVD VIDEO/DVD AUDIO: During playback For VCD/SVCD: While stopped or during playback without PBC function For CD: During playback or while stopped 7 When specifying the elapsed playing time from the beginning of the disc Perform the following procedure while stopped. -
Page 35: Resume Playback
Advanced operations 7 For MP3/WMA: During playback or while stopped For JPEG/MPEG4: While stopped Press Cursor 3/2/Y/5 to select the desired group/track/file. • For MP3/WMA, playback starts from the selected track. Press 3 (play button) or ENTER. • Track playback/slide-show starts from the selected track/ file. -
Page 36: Selecting The Audio
Advanced operations When using the on-screen bar: Press ON SCREEN twice. The on-screen bar appears on the TV screen. Press Cursor 3/2 to highlight Press ENTER. Press Cursor Y/5 repeatedly to select the desired subtitle. Press ENTER. Press ON SCREEN. The on-screen bar disappears. -
Page 37: Changing The Vfp Setting
Advanced operations Selecting browsable still picture recorded on DVD AUDIO Most DVD AUDIOs include browsable still pictures (B.S.P.), which usually appear by turns automatically during playback according to the playback sequence. You can change the picture (turn the page) manually when the current group/track has selectable pictures (pages). -
Page 38: Program Playback
Advanced operations Press ENTER. Example: Press Cursor Y/5 to change the setting. Press ENTER. The current VFP settings appear again. Repeat steps 3 to 6 to adjust other parameters. Press VFP. NOTE • Although the setting display disappears in the middle of the procedure, the setting at that time will be stored. -
Page 39: Random Playback
Advanced operations Random Playback You can play titles or tracks on a disc in random order. 7 While stopped Press PLAY MODE repeatedly until appears on the TV screen. Press 3 (play button). To quit Random mode While stopped, press PLAY MODE repeatedly until both program window and disappear from the TV screen. -
Page 40: Tray Lock
Advanced operations Repeating a desired part [A-B Repeat] You can repeat playback of a desired part by specifying the beginning (point A) and ending (point B). 7 During playback When using the A-B RPT button: Press A-B RPT at the beginning of the part you want to repeat (point A). -
Page 41: Sound And Other Settings
Advanced operations Sound and other settings IMPORTANT Before using the remote control for the following operation; • Set the remote control mode selector to AUDIO. NOTE Before you start operation; • There is a time limit when doing the following steps. If the setting is cancelled before you finish, start from step 1 again. -
Page 42: Setting Dvd Preferences
Setting DVD preferences Using the setup menus • You can change the language used in the setup menus. See “Menu description” below. Basic operation on the setup menus IMPORTANT Before using the remote control for the following operation; 1 Set the remote control mode selector to AUDIO. - Page 43 Setting DVD preferences : Picture menu (PICTURE) 7 MONITOR TYPE You can select the monitor type to match your TV when you play DVDs recorded in the picture’s height/width ratio of 16:9. • 16:9 (Wide television conversion) Select this when the aspect ratio of your TV is 16:9 (wide TV).
- Page 44 Setting DVD preferences 7 Distance menu (DISTANCE) Example: Center speaker Front right Front left 3.0 m 2.7 m 2.4 m 2.1 m Surround left Surround right In this case, set the distance of each speaker as follows; • Distance of front speakers: 3.0 m •...
- Page 45 Setting DVD preferences Country/Area codes list for Parental Lock Andorra United Arab Emirates Afghanistan Antigua and Barbuda Anguilla Albania AM Armenia Netherlands Antilles Angola Antarctica Argentina American Samoa Austria Australia AW Aruba Azerbaijan Bosnia and Herzegovina Barbados Bangladesh Belgium GM Gambia Burkina Faso Bulgaria Bahrain...
-
Page 46: Tuner Operations
Tuner operations IMPORTANT Before using the remote control for the following operation; 1 Set the remote control mode selector to AUDIO. 2 Press FM/AM. The buttons described below are used on pages 41 to 44. FM/AM AUDIO TUNING TA/NEWS/INFO TUNING MEMORY FM MODE SEARCH... -
Page 47: Selecting The Fm Reception Mode
Tuner operations Selecting the FM reception mode When the stereo FM program currently tuned in is noisy, you can change the FM reception mode to improve the reception. 7 While listening to an FM station Press FM MODE. The FM reception mode appears on the display window. Each time you press the button, the FM reception mode changes. -
Page 48: Searching For A Program By Pty Codes
Tuner operations Searching for a program by PTY codes One of the advantages of the RDS service is that you can locate a particular kind of program from the preset channels (A pg. 41) by specifying the PTY codes. 7 To search for a program using the PTY codes NOTE Before you start operation;... - Page 49 Tuner operations Switching to broadcast program of your choice temporarily Another convenient RDS service is called “Enhanced Other Network”. This allows the system to switch temporarily to a broadcast program of your choice (TA, NEWS, and/or INFO) from a different station except in the following cases;...
-
Page 50: References
References Maintenance 7 Handling Discs • Remove the disc from its case by holding it at the edge while pressing the center hole lightly. • Do not touch the shiny surface of the disc or bend the disc. • Put the disc back in its case after use to prevent warping. -
Page 51: Specifications
References Specifications 7 Center unit (XV-THSW9/XV-THSW8) Wireless section Transmission frequency: CH1: 863.3 MHz CH2: 863.7 MHz CH3: 864.1 MHz CH4: 864.5 MHz Audio section Total Harmonic Distortion 0.02 % NOTE: This value is measured at System cord CONNECTOR for reference. Digital input* DIGITAL IN: –21 dBm to –15 dBm... - Page 52 References 7 Satellite Speakers Front speakers (SP-THS5F) Speakers: Woofer: 8.0 cm Tweeter: 1.5 cm Bass-reflex, Magnetically Shielded Power Handling Capacity: 120 W Impedance: Frequency Range: 90 Hz to 20 kHz Dimensions (W M H M D): 106 mm M 139.5 mm M 102 mm Mass: 0.67 kg Surround speakers (SP-THS7S)