JVC SP-PWC3 Instructions Manual
Dvd digital cinema system
Hide thumbs
Also See for SP-PWC3:
- Instructions manual (97 pages) ,
- Service manual (36 pages) ,
- Instructions manual (49 pages)

Related Manuals for JVC SP-PWC3


Summary of Contents for JVC SP-PWC3
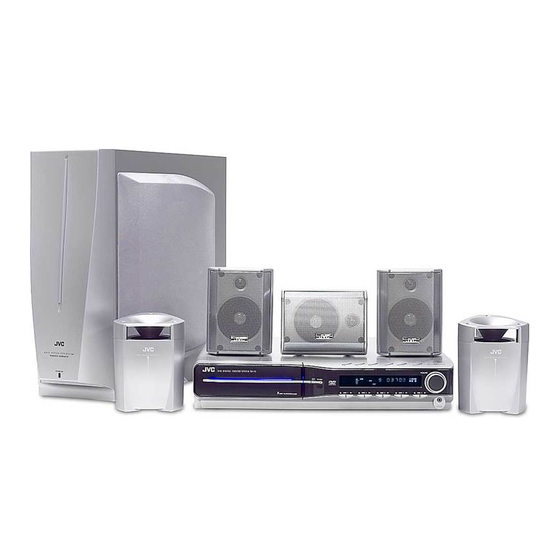
- Page 1 DVD DIGITAL CINEMA SYSTEM TH-C3 Consists of XV-THC3, SP-PWC3, SP-THC3F, SP-THC3C and SP-THC3S INSTRUCTIONS GVT0150-003A...
- Page 2 • When the system is turned on, the STANDBY lamp goes off. The power can be remote controlled CAUTION (SP-PWC3) The power supply to the subwoofer is linked to the center unit. The POWER ON lamp on the subwoofer lights green when the power is turned on.
-
Page 3: Safety Instructions
Wall or obstructions 3 cm Wall or SP-PWC3 obstructions 15 cm “SOME DOS AND DON’TS ON THE SAFE USE OF EQUIPMENT” This equipment has been designed and manufactured to meet international safety standards but, like any electrical equipment, care must be taken if you are to obtain the best results and safety is to be assured. -
Page 4: Table Of Contents
Table of contents Introduction ... 2 Notes on handling ...2 Supplied accessories ...2 About discs ... 3 Playable disc types ...3 Notes on file types ...3 Description of parts and controls ... 4 Connections ... 7 Connecting the FM and AM (MW) antennas ...7 Connecting the satellite (front, center, surround) speakers ... -
Page 5: Introduction
Introduction Notes on handling 7 Important cautions Installation of the system • Select a place which is level, dry and neither too hot nor too cold; between 5°C and 35°C. • Leave sufficient distance between the system and the TV. •... -
Page 6: About Discs
About discs Playable disc types This system has been designed to play back the following discs: DVD VIDEO VCD/SVCD • DVD Logo is a trademark of DVD Format/Logo Licensing Corporation. • The Non-DVD side of a “DualDisc” does not comply with the “Compact Disc Digital Audio”... -
Page 7: Description Of Parts And Controls
Description of parts and controls Front panel (center unit) Display window pg. 19 pg. 22 pg. 35 FM AM P L PCM SURR CH RESUME PROGRESSIVE B.S.P. CHAP. TRK PG PL BONUS ST pg. 18 pg. 26 pg. 28 pg. 15 Disc tray (inside): Rear panel (center unit) pg. -
Page 8: Powered Subwoofer
Description of parts and controls Powered subwoofer SP-PWC3 Front NOTE • For safety reasons, always ensure that there is sufficient space behind the powered subwoofer. * Do not block the ventilation openings. pg. 10 CAUTION: SPEAKER IMPEDANCE 4Ω 16Ω pg. 8 POWER ON lamp: pg. -
Page 9: Remote Control
Description of parts and controls Remote control pg. 11 F AUDIO TV/VIDEO pg. 11 DISC 1 DISC 2 pg. 17 DISC 3 DISC 4 DISC 5 MUTING FM/AM TV SOUND pg. 14 TV VOL CHANNEL AUDIO VOL pg. 11 pg. 11 TUNING TUNING pg. -
Page 10: Connections
Connections Connecting the FM and AM (MW) antennas 7 AM (MW) loop antenna Setting up supplied AM loop antenna If the antenna cord is covered with the insulation coat, twist and pull the insulation coat off and remove. Connecting AM (MW) loop antenna Center unit Antenna cord •... -
Page 11: Connecting The Satellite (Front, Center, Surround) Speakers
Connections Connecting the satellite (front, center, surround) speakers Before connecting the speaker cords; Twist and pull the insulation coat off and remove. Powered subwoofer SP-PWC3 FROM XV-THC3 XV-THS55 XV-THS58 XV-THS66 4Ω 16Ω Center speaker SP-THC3C CAUTION • When you connect speakers other than the supplied ones, use... -
Page 12: Speaker Layout
Connections Speaker layout Center speaker Front left speaker Surround left speaker • Place the satellite speakers on a flat and level surface. • The front and center speakers are magnetically shielded to avoid color distortions on TVs. However, if not installed properly, they may cause color distortions. -
Page 13: Connecting The Powered Subwoofer
Connections Connecting the powered subwoofer Center unit System cord (supplied) Align the 5 marks. NOTE • The way of connecting the system cord varies depending on the type of the powered subwoofer. Connecting to an analog component You can enjoy the sound of an analog component. Center unit RCA pin plug cord (not supplied) -
Page 14: Operating External Components With The Remote Control
• Set the codes again after replacing the batteries of the remote control. Operating the TV 7 To set the manufacturer’s code You can operate a JVC TV without setting the manufacturer’s code. Slide the remote control mode selector to TV. -
Page 15: Operating The Vcr
Operating external components with the remote control Operating the VCR 7 To set the manufacturer’s code Slide the remote control mode selector to VCR. Press VCR. Press and hold F VCR. Keep the button pressed until step 5 is finished. Press ENTER. -
Page 16: Basic Operations
Basic operations The buttons on the remote control are used to explain most of the operations in this manual. You can use the buttons on the center unit same as on the remote control for operations unless otherwise noted. IMPORTANT Before using the remote control for the following operation;... -
Page 17: Selecting The Source To Play
Basic operations Selecting the source to play On the remote control: Press one of the source selecting buttons (DVD, FM/AM, AUX or TV SOUND). DVD: To play back a disc (DVD VIDEO, VCD etc.). (A pg. 17) FM/AM: To tune in an FM or AM station. (A pg. 35) Each time you press the button, the band alternates between FM and AM. -
Page 18: Sleep Timer [Sleep]
DVD VIDEO in the progressive scan mode. In such a case, change the scan mode to “RGB” or “Y/C”. To check the compatibility of your TV, contact your local JVC customer service center. • All JVC progressive TVs and High-Definition TVs are fully... -
Page 19: Optimizing The Speaker Settings [Smart Surround Setup]
Basic operations Optimizing the speaker settings [Smart Surround Setup] NOTE • When you change the positioning of the speakers or listener, or replace the supplied speakers with other ones, perform Smart Surround Setup again. 7 While DVD is selected as the source and stopped Take your position where you listen to the sound. -
Page 20: Playback
Playback • The icon such as shows the disc formats or file types the VIDEO operation is available for. IMPORTANT Before using the remote control for the following operation; 1 Set the remote control mode selector to AUDIO. 2 Press DVD. The buttons described below are used on pages 17 to 20. - Page 21 Playback 7 Playback information on the display window DVD VIDEO Example: When a DVD VIDEO encoded with Dolby Digital 5.1ch is played Chapter number SURR Signal and speaker indicators (A pg. 22) Surround mode and digital signal format (A pg. 22) Pressing FL DISPLAY Title number Chapter number...
-
Page 22: One Touch Replay
Playback Example: During playback on the Playlist* Elapsed playing time Title number (hour:minute:second) PL (Playlist) indicator Pressing FL DISPLAY Playlist number Chapter number * Pressing TOP MENU/PG or MENU/PL, you can change the play mode. (A pg. 20) NOTE • You can change the time information mode (except for MP3/WMA/ JPEG). -
Page 23: Locating A Desired Title/Group Using Number Buttons
The system can play back the playlist edited by the recording equipment. See page 17 for button locations. ORIGINAL PROGRAM No Date Time Title 1 25/04/04 4ch 19:00 JVC DVD World 2004 2 17/05/04 8ch 10:30 3 22/05/04 8ch 17:00 Music Festival 4 26/05/04 L-1 13:19 children 001... -
Page 24: Advanced Operations
Advanced operations • The icon such as shows the disc formats or file types the VIDEO operation is available for. IMPORTANT Before using the remote control for the following operation; • Set the remote control mode selector to AUDIO. • There are exceptions in the operation mentioned above. -
Page 25: Using The On-Screen Bar
Advanced operations 7 All Channel Stereo (DSP) All Channel Stereo (ALL ST) mode can reproduce a larger stereo sound field using all the connected (and activated) speakers. All Channel Stereo can be used while reproducing 2 channel stereo source. Normal stereo sound All Channel Stereo 7 Indicators on the display window Digital signal format indicators... -
Page 26: Changing The Time Information
Advanced operations 7 Contents of the on-screen bar during playback DVD VIDEO Dolby D 2/0 . 0ch DVD AUDIO Dolby D 2/0 . 0ch SVCD DVD VR disc Dolby D CHAP 3 TOTAL 0 : 00 : 34 DVD-VR 2/0 . 0ch A Shows disc type. -
Page 27: Playing From A Specified Position On A Disc
Advanced operations Playing from a specified position on a disc You can start playing a title, chapter or track you specify. You can also play a disc from specified time. Locating a desired scene from the DVD menu DVD VIDEOs generally have their own menus which show disc contents and you can display them on the TV screen. -
Page 28: Using The File Control Display
Advanced operations Locating a desired position by specifying the time 7 For DVD VIDEO/DVD AUDIO/DVD VR: During playback For VCD/SVCD: While stopped or during playback without PBC function For CD: During playback or while stopped 7 When specifying the elapsed playing time from the beginning of the disc Perform the following procedure while stopped. -
Page 29: Resume Playback
Advanced operations Resume Playback When Resume Playback is set to “ON” (A pg. 34) and you stop playback by the following operations, the position where playback has been stopped is stored. (“RESUME” appears on the display window.) • Turning off the power (A pg. 13) •... -
Page 30: Selecting The Audio
Advanced operations Selecting the audio 7 During playback of a disc containing audio in several languages When using the AUDIO button: Press AUDIO. Example (DVD VIDEO): “ENGLISH” is selected out of 3 audio languages recorded. Press AUDIO repeatedly or press Cursor Y/5 to select the desired audio. -
Page 31: Changing The Vfp Setting
Advanced operations Selecting browsable still picture recorded on DVD AUDIO Most DVD AUDIOs include browsable still pictures (B.S.P.), which usually appear by turns automatically during playback according to the playback sequence. You can change the picture (turn the page) manually when the current group/track has selectable pictures (pages). -
Page 32: Program Playback
Advanced operations Program Playback 7 While stopped Press PLAY MODE repeatedly until program window appears on the TV screen. USE NUMERIC KEYS TO PROGRAM TRACKS. USE CANCEL TO DELETE THE PROGRAM. Follow the instructions that appear on the TV screen to program the desired chapters/tracks. -
Page 33: Repeat Playback
Advanced operations Repeat Playback Repeating the current selection or all discs 7 For DVD VIDEO/DVD VR: During playback For VCD/SVCD: During playback without PBC function or stopped For DVD AUDIO/CD/MP3/WMA/JPEG: During playback or stopped When using the REPEAT button: Press REPEAT. 1: 3 1: 0 1 Repeat mode indicator Each time you press REPEAT, the Repeat mode changes. -
Page 34: Tray Lock
Advanced operations Tray lock You can lock the tray and prohibit the unwanted disc ejection. On the center unit ONLY: While the system is turned off Press and hold • The system turns on and “LOCKED” appears on the display window. -
Page 35: Setting Dvd Preferences
Setting DVD preferences Using the setup menus • You can change the language used in the setup menus. See “Menu description” below. Basic operation on the setup menus IMPORTANT Before using the remote control for the following operation; 1 Set the remote control mode selector to AUDIO. - Page 36 Setting DVD preferences : Picture menu (PICTURE) 7 MONITOR TYPE You can select the monitor type to match your TV when you play DVDs recorded in the picture’s height/width ratio of 16:9. • 16:9 (Wide television conversion) Select this when the aspect ratio of your TV is fixed on 16:9 (wide TV).
- Page 37 Setting DVD preferences : Speaker setting menu (SPK. SETTING) 7 Level menu (LEVEL) FRONT LEFT SPEAKER/FRONT RIGHT SPEAKER/ CENTER SPEAKER/SURROUND RIGHT SPEAKER/ SURROUND LEFT SPEAKER While monitoring the test tone, adjust the output level of the speakers. TEST TONE* Outputs the test tone. * The test tone comes out of all of the activated speakers in the following sequence: s Front left speaker s Center speaker s Front right...
-
Page 38: Tuner Operations
Tuner operations IMPORTANT Before using the remote control for the following operation; 1 Set the remote control mode selector to AUDIO. 2 Press FM/AM. NOTE • When FM or AM is selected as the source, you can select All Channel Stereo (ALL ST) and SURR OFF mode. -
Page 39: Selecting The Fm Reception Mode
Tuner operations Selecting the FM reception mode When the stereo FM program currently tuned in is noisy, you can change the FM reception mode to improve the reception. 7 While listening to an FM station Press FM MODE. The FM reception mode appears on the display window. Each time you press the button, the FM reception mode changes. -
Page 40: Searching For A Program By Pty Codes
Tuner operations Searching for a program by PTY codes One of the advantages of the RDS service is that you can locate a particular kind of program from the preset channels (A pg. 35) by specifying the PTY codes. 7 To search for a program using the PTY codes NOTE Before you start operation;... - Page 41 Tuner operations Switching to broadcast program of your choice temporarily Another convenient RDS service is called “Enhanced Other Network”. This allows the system to switch temporarily to a broadcast program of your choice (TA, NEWS, and/or INFO) from a different station except in the following cases;...
-
Page 42: References
References Maintenance 7 Handling Discs • Remove the disc from its case by holding it at the edge while pressing the center hole lightly. • Do not touch the shiny surface of the disc or bend the disc. • Put the disc back in its case after use to prevent warping. -
Page 43: Specifications
Power Consumption: 19 W (at operation) 1.4 W (in standby mode) Dimensions (W M H M D): 400 mm M 85 mm M 399 mm Mass: 4.2 kg 7 Subwoofer (SP-PWC3) Amplifier section Front: Center/Surround: Subwoofer: Speaker section Speaker unit:... - Page 44 © 2005 Victor Company of Japan, Limited 0405TMMMDWJEM...