Table of Contents
Advertisement
Quick Links
Operating Instructions
DVD Recorder
Model No. DMR-EZ45VEBS
PAL NTSC
®
This DVD Recorder is for viewing and recording free to view channels
only, not pay TV or encrypted channels.
Read the operating instructions, the safety precautions, and the
information on setting up the unit on page 3 thoroughly before you
connect, operate or adjust any settings on the unit.
Trademark of the DVB Digital Video Broadcasting Project (1991 to 1996)
Declaration of Conformity No.3957, 12 January 2006
th
Advertisement
Table of Contents

Related Manuals for Panasonic Diga DMR-EZ45VEBS


Summary of Contents for Panasonic Diga DMR-EZ45VEBS
-
Page 1: Operating Instructions
Operating Instructions DVD Recorder Model No. DMR-EZ45VEBS PAL NTSC ® This DVD Recorder is for viewing and recording free to view channels only, not pay TV or encrypted channels. Read the operating instructions, the safety precautions, and the information on setting up the unit on page 3 thoroughly before you connect, operate or adjust any settings on the unit. -
Page 2: Table Of Contents
Table of contents Page Page Page Safety Precautions Changing the audio channel Change Profile Subtitles Automatic SP/LP switching during a VHS Information about the unit recording Playback (VHS) Licence information 28-29 Checking or changing Timer Recordings Preparation Timer Off/On Before you start Playing a video cassette Delete Included accessories... -
Page 3: Safety Precautions
Safety Precautions Important Safety Warnings The moulded three pin mains plug is supplied for your safety and convenience and must NOT be cut off. A 5 amp fuse is fitted in the mains Fuse cover 1. Open the fuse plug. If the fuse has to be replaced, cover with a it must be of the same rating and screwdriver. -
Page 4: Information About The Unit
Information about the unit DVB-T This unit is a DVD Recorder with integrated tuner. You can receive and record both analog and terrestrial digital channels (DVB-T) without an additional reception unit (Set Top Box) GUIDE The TV Guide gives you a preview of the TV programmes for the next 7 days from your digital stations. -
Page 5: Before You Start
Dear customer Thank you for your trust and your decision to purchase this top-quality unit. Panasonic is one of the leading manufacturers of entertainment electronics units. We are sure that you will be completely satisfied with this unit. Matsushita Electric Industrial Co., Ltd. -
Page 6: Remote Control
Setting up the remote control Setup Remote Control DVD 1 If you are using another Panasonic unit at the same location, change the setting of Clock Tuning the remote control so that you can operate the units independently of each other. - Page 7 Remote Control Standby/on switch DVD/VHS Switch the TV on and off. DVD/VHS Press to switch the unit from on to Select the AV input on the TV set. standby mode or vice versa. In CH = Select the programme position on the standby mode, the unit is still VOLUME DRIVE...
-
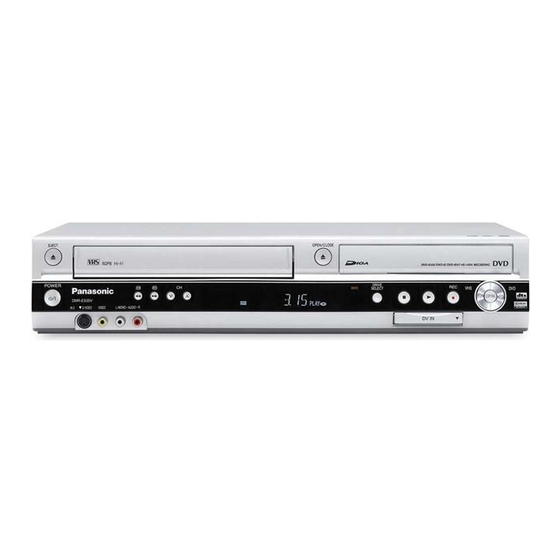
Page 8: Front Panel, Display
Front Panel Cassette Compartment Display Disc Tray SD Card slot RECORDING 7 11 Standby/on switch : Press to switch the unit from on to standby mode or vice versa. In standby mode, the unit is still consuming a small amount of power. Switching this unit into standby mode does not disconnect it from the mains. EJECT: Eject the cassette. -
Page 9: Rear Panel
Rear Panel RF IN AV OUT COMPONENT VIDEO OUT S VIDEO OUT OPTICAL VIDEO OUT RF OUT AC IN AUDIO OUT AV 2 (EXT) AV 1 (TV) 10 11 AC IN~ = Power supply OPTICAL Digital audio output Connection for the AC mains lead. HDMI AV OUT Audio output, right/left channel Digital audio output... -
Page 10: Connections
Basic connections Before connection, turn off all connected equipment and read the appropriate operating instructions. BE SURE TO READ THE CAUTION FOR THE AC MAINS LEAD Choose from one of the connection types A-B that suits your requirement. Use of the supplied RF coaxial cable To prevent interference patterns from appearing on your TV, use only the supplied RF coaxial cables when you connect this unit to your TV and aerial outlet or aerial cable and satellite receiver, as shown in connection types A-B. -
Page 11: Auto-Setup
Auto-Setup Automatic setup of the unit After being switched on for the first time, the unit proceeds with an automatic station search for digital channels. This is followed by the search for analogue channels. Turn on the television and select the AV input that this unit is connected to. Switch the unit on using the Standby/on-switch. -
Page 12: Connecting To A Television And Satellite Receiver
Connecting to a television and satellite receiver Satellite receiver’s rear panel LNB IN RF OUT AV OUT RF IN To household mains socket RF coaxial cable (included, black) Fully wired 21-pin Scart cable This unit’s rear panel RF IN AV OUT COMPONENT VIDEO OUT S VIDEO OUT OPTICAL... -
Page 13: Auto-Setup
Connecting to a television and satellite receiver If you receive your television programme via a satellite receiver (digital/analogue), connect your DVD Recorder as shown in connection type B. If your television supports Q Link, use a fully wired 21-pin Scart cable to connect it to the TV. -
Page 14: Connection With Hdmi Cable
Connection with HDMI cable (not included) The HDMI connection can be used only with units that are suited for HDMI. Connect the aerial to RF IN (Aerial input) of the DVD Recorder. Connect RF OUT (Aerial output) of the DVD Recorder with the aerial input of the TV. -
Page 15: Connection With Hdmi Cable
The following systems from other manufacturers automatically selects the input channel for the DVD Recorder. have similar function to Q Link from Panasonic. If you are recording on the DVD drive, the TV does not automatically change to - Easy Link (Trademark of Philips) the input channel. -
Page 16: Connection To Component Video Terminal
Connection to COMPONENT VIDEO terminal The terminal can be used for INTERLACE or PROGRESSIVE output and deliver a clearer picture than S VIDEO OUT terminal. The Q Link functions are not available with this kind of connection. Connect the aerial to RF IN (Aerial input) of the DVD Recorder. Connect RF OUT (Aerial output) of the DVD Recorder with the aerial input of the TV. - Page 17 Connection to COMPONENT VIDEO terminal COMPONENT VIDEO OUT terminal The terminals can be used for INTERLACE or PROGRESSIVE output and deliver a clearer picture than the S VIDEO OUT terminal. Connections via these terminals output the colour difference signals (P ) and the brightness signal (Y) separately.
-
Page 18: Connection With Video Cable Or S Video Cable
Connection with Video cable or S Video cable Connect the aerial to RF IN (Aerial input) of the DVD Recorder. You can use this frequently used standard connection with the Connect RF OUT (Aerial output) of the DVD Recorder with the provided accessories (Video cable). -
Page 19: External Units
External units For all connections described: Before you connect cables, make sure that all units are switched off. Switch on the units after you have connected the cables. Connecting a digital amplifier or a digital system component AV OUT If an amplifier equipped with Dolby Digital, DTS or an MPEG-decoder is connected, a DVD-Video-Disc with multi-channel surround sound can be played back. -
Page 20: Status Displays
Status displays Screen information DVD-RAM PLAY Every time you change the station, a status display and banner appear automatically. 1 DVB BBC1 They disappear again after a short time. You can change how long they appear for in the setup menu. Press to show the screen information again. -
Page 21: Banner
Banner The banner contains information about the current (NOW) and following (NEXT) programme. It cannot be selected during playback or recording. Banners can only be selected for digital stations. Press to display the banner. to change between NOW and NEXT. Use CH to select the available stations. -
Page 22: Disc Formats
Disc formats Playback and recording discs DVD-RAM DVD-RAM: DVD Video Recording format The DVD-RAM can be compared with the hard disc and can be written to 100,000 times on average. The disc can only be played on DVD-RAM-compatible players. DVD-RAM The recording occurs in DVD Video Recording format (VR). -
Page 23: Playback Discs
Compatible models: Only for Panasonic's DVD recorders. Remove the 8-cm disc from the Do NOT use this cleaner with any other Panasonic DVD products or with the DVD cartridge before using it with this unit. products of any other companies since doing so may damage the products. -
Page 24: Sd Card
(based on SD Memory Card spec.). for miniSD™ cards. Additional information is available on the Internet http://panasonic.co.jp/pavc/global/cs Do not touch the Keep the small memory cards such as the SD Memory Card out of reach of children. memory card contacts. -
Page 25: Playback (Dvd)
Playback Preparation Turn on the television and select the AV input that this unit is connected to. Switch on the DVD Recorder. Insert with label facing upwards. In the case of double-sided discs, the label of the side that you want to play should be facing Press OPEN/CLOSE on the unit to open the disc tray. -
Page 26: Pausing Playback
Playback PAUSE Pausing playback Press PAUSE to pause playback. Press PAUSE again to resume playback. STOP Stopping playback Press STOP . Playback stops and the television picture appears. During playback of DVD-A, DVD-V, VCD and CD press STOP twice to return to the television picture. -
Page 27: Time Slip
Playback TIME SLIP DVD-V DVD-A VCD TIME SLIP JET REW Press TIME SLIP during playback. 0 min to select the time span by which playback is to jump forward or backward. Each time the button is pressed, the time span increases or decreases in minute increments. -
Page 28: Preparation
Playback Preparation Switch on the DVD Recorder and use DRIVE SELECT to select the VHS drive. Enter a recorded video cassette. PLAY Playing a video cassette Press PLAY to start playback. Playback starts automatically if a video cassette was inserted and its write- protection strip was removed. -
Page 29: S-Vhs Quasi Playback (Sqpb)
Do not open the housing or the protective flap on the front side of the cassette and do not touch the tape. Use high-quality name-brand cassettes, such as those made by Panasonic. When playing cassettes recorded on another VHS-Recorder, there may be a slight decrease in picture quality. -
Page 30: Recording
Recording Before recording You can record to DVD-RAM, DVD-R, DVD-RW(V), -R DL, +R DL, +R or +RW with this unit. DVD-R/-RW(V) is the most common medium. DVD-Video format is used to record to discs. The format is compatible with most DVD-Video players and DVD-ROM drives in computers. -
Page 31: Record
Recording You cannot record to DVD and VHS at the same time. DVD: Insert a disc. If you activated write-protection, cancel it. VHS: Insert a video cassette with an intact write-protection tab. Press FUNCTIONS. In the Setup menu, select the appropriate tape length under VHS. Confirm with ENTER. -
Page 32: Specifying A Time As The Recording Duration
Recording Specifying a time as the recording duration This function is not available for Timer Recordings. Press REC on the unit during recording. The recording time changes each time the button is pressed on the unit display: 0:30 1:00 1:30 2:00 3:00 4:00... -
Page 33: Functions
FUNCTIONS You can access the main functions via FUNCTIONS. The illustrations show DVD-RAM menus. The menu entries may differ depending on the disc or the medium. Press FUNCTIONS. During Recording or Timer Recording, some menus have a grey ENTER background and cannot be selected. Select a menu with and confirm with ENTER. -
Page 34: Entering Text / Symbols
FUNCTIONS Entering text Enter Name You can give titles to your programmes or discs in the different menus and while Terra X_ setting up the Timer Recording. Entering a title or disc name using the menu Select the desired character with and confirm with ENTER. -
Page 35: Direct Navigator
FUNCTIONS Playback FUNCTIONS DIRECT NAVIGATOR Overview of DIRECT NAVIGATOR You can archive, edit or start playback after selecting a title in DIRECT NAVIGATOR. The DIRECT NAVIGATOR cannot be called if the VHS drive is selected. Title View Editing is not possible DIRECT NAVIGATOR Titel View VIDEO... -
Page 36: Enter Name
FUNCTIONS Playback FUNCTIONS DIRECT NAVIGATOR Editing titles in the SUB MENU Delete Enter Name Properties Set up Protection Select [Edit] with and confirm with ENTER. Edit Cancel Protection In the submenu, select the desired option with confirm with ENTER. Partial Delete Chapter View Enter Name Change Thumbnail... -
Page 37: Editing Chapters In The Sub Menu
FUNCTIONS Playback FUNCTIONS DIRECT NAVIGATOR Editing chapters in the SUB MENU Delete Delete Chapter Properties Create Chapter Press FUNCTIONS. Edit Combine Chapters Confirm [Playback] with ENTER. Title View Chapter View Select the desired title with in the Title View menu. Press SUB MENU. -
Page 38: Picture Playback
FUNCTIONS JPEG/TIFFplayback from DVD-RAM/SD DIRECT NAVIGATOR JPEG (Joint Photographic Experts Group), a system for compressing/decoding Album View DIRECT NAVIGATOR PICTURE DVD-RAM VIDEO colour still pictures. Despite strong compression, there is only a slight loss of picture quality. 6/ 3/06 Total 10 23/ 9/ 05 Total 12 1/ 10/ 05 Total 5 100_DVD... - Page 39 FUNCTIONS Album View DIRECT NAVIGATOR Album View Picture VIDEO DVD-RAM Slide Show from the Album View Select the required Album from the Album View with Press PLAY . 6/ 3/ 06 Total 10 5/ 3/ 06 Total 12 1/ 10/ 06 Total 5 100_DVD SUB MENU in the Album View Start Slide Show...
- Page 40 FUNCTIONS SUB MENU in the Album View Press SUB MENU. Select the required option with and press ENTER to confirm. Start Slide Show Enter Album Name Edit Album Slide Show Setting Delete Album Select [Edit Album] with and press ENTER to confirm. Add Pictures Set up Protection Select the required option with...
-
Page 41: Jpeg/Tiff Playback Of Cd/Dvd-R
FUNCTIONS Menu JPEG/TIFF playback from CD/DVD-R If your disc contains other formats such as MP3 in addition to JPEG, a message Select file type. regarding the preset play mode will appear after the disc has been inserted. Confirm the message with ENTER. JPEG Press FUNCTIONS and confirm [Menu] with ENTER. -
Page 42: Timer Recording
FUNCTIONS Recording FUNCTIONS Manual programming Timer Remain DVD 0:02 SP Recording VHS --:-- -- 12:40:46 24/ 2 FRI Make sure that there is a recordable disc or cassette in the selected drive. Otherwise, the Timer Recording will not run. Press FUNCTIONS. Name Date Start Stop... -
Page 43: Checking Or Changing Timer Recordings
FUNCTIONS PROG/CHECK Checking or changing Timer Recordings Check the settings and correct them if necessary. Press PROG/CHECK. Checking or changing Select the desired Timer programming with and press ENTER. Select the position that you want to change with and confirm with ENTER. Programmes that are currently being recorded cannot be changed. -
Page 44: Delete (Delete Navigator)
FUNCTIONS Delete FUNCTIONS Deleting titles and pictures NAVIGATOR LÖSCHEN Titelansicht DELETE Navigator Title View VIDEO PICTURE You can delete titles or write-protect recordings so that they are not accidentally DVD-RAM deleted or overwritten. Press FUNCTIONS. BBC1 6/ 3 MON Select [Delete] with and confirm with ENTER. -
Page 45: Copy
FUNCTIONS Copy FUNCTIONS Copy pictures Pictures can be put together in the required order in a copy list and then copied Copy Press FUNCTIONS. Cancel All Select [Copy] with and confirm with ENTER. Source Copy Direction Select the desired option with SD CARD SD CARD Destination... -
Page 46: Copying With A Copy List
FUNCTIONS Copy FUNCTIONS Copying with a copy list RAM +RW -RW(VR) Copy Cancel All Press FUNCTIONS. Source Copy Direction Select [Copy] with and confirm with ENTER. Select the desired option with Destination Copy Mode VIDEO Cancel All All created settings are cancelled! Create List Select [Yes] with and confirm with ENTER. -
Page 47: Time-Triggered Copying
FUNCTIONS Copy FUNCTIONS S-VHS +R DL -RW(V) -R DL Time-triggered copying Copy DVD-V Press FUNCTIONS. Cancel All Source Select [Copy] with and confirm with ENTER. Copy Direction Select the desired option with Destination Copy Mode Cancel All VHS-Video All created settings are cancelled! Copy Time Select [Yes] with and confirm with ENTER. -
Page 48: Copying (Front Of Unit)
COPYING COPYING On the front of the unit You can copy the contents of a cassette to disc or the contents of a disc to cassette at the push of a button. COPYING of a disc starts with the first title and copies till the end of the disc. COPYING COPYING VHS to DVD starts at the selected position and copies till the end of the cassette. -
Page 49: Tv Guide
FUNCTIONS TV Guide FUNCTIONS To Others The TV Guide gives you a 7-day preview of the programme for your digital television and radio stations. For many of these programmes, you can select additional information provided by the stations. You can sort the programme preview according to various topics such as sport, films etc. -
Page 50: Portrait View
FUNCTIONS TV Guide FUNCTIONS To Others Portrait view The station bar is positioned horizontally over the programme preview. You can see the programme of one station at a time. The programme that is currently running is at the top of the list when you select this function.. TV Guide: Porträt Mon 06/03/06 17:35 Moving in the Portrait view... -
Page 51: Programming The Timer In The Tv Guide
FUNCTIONS TV Guide FUNCTIONS To Others Programming the timer in the TV Guide The TV Guide makes it easy to set a programme for recording. Timer Recording menu for digital stations Timer Remain DVD 0:02 SP Recording VHS --:-- -- 12:40:46 20/ 2 FRI The data required for programming have been taken from the TV Guide. -
Page 52: Video Plus+ Record
FUNCTIONS VIDEO Plus+ Record FUNCTIONS To Others VIDEO Plus+ Record VIDEO Plus+ Remain DVD 0:02 SP Entering a VIDEO Plus+ Code causes the data for programmes provided by Record VHS --:-- -- 12:40:46 24/ 2 FRI broadcasters to be saved. The appropriate codes can be found in newspapers and TV guides. -
Page 53: Timer Recording Via External Units
FUNCTIONS Timer Recording via external units Setup AV2 Settings RGB / Video AV2 Input Tuning Setting for external units (EXT LINK) Disc Ext Link Ext Link 1 You control the recording function via an external unit (e.g. a receiver) with EXT LINK. Picture Connect the unit to the AV2 terminal with a 21-pin Scart cable. -
Page 54: Playlists
FUNCTIONS Playlists FUNCTIONS To Others Use this function to edit your movies/recordings made by a recorder or camcorder. You can remove unwanted scenes (e.g. commercials) or change the sequence. You can also divide your recordings (titles) into chapters. You can create a playlist with your favourite chapters and edit this later. Source Title: Title 1 Title 2... -
Page 55: Launching The Playlists Menu
FUNCTIONS Playlists FUNCTIONS To Others Launching the Playlists menu Press FUNCTIONS. Select [To Others] with and confirm with ENTER. Select [Playlists] with and confirm with ENTER. -RW(VR) Playback Select a playlist with and start playback with ENTER. Delete Properties Edit Edit Select a playlist with Press SUB MENU. -
Page 56: Editing Chapters In The Sub Menu
FUNCTIONS Playlists FUNCTIONS To Others Delete Add Chapter Editing chapters in the SUB MENU Properties Move Chapter Press FUNCTIONS. Edit Create Chapter Use [To Others] with and confirm with ENTER. Combine Chapters Chapter View Select [Playlists] with and confirm with ENTER. Delete Chapter Select a playlist in the Playlist View with Playlist View... -
Page 57: Copy All Pictures
FUNCTIONS FUNCTIONS Copy All Pictures To Others Copy All Pictures Copying all pictures of an SD card You can copy the entire contents of the SD card onto DVD with the function [Copy All Copy from SD Card Pictures]. Copy to Press FUNCTIONS. -
Page 58: Flexible Rec (Fr)
DV Auto Rec Each time the picture is interrupted, a chapter is created and a playlist is Model of DV Panasonic automatically created. NV-DX100 Switch off this unit and the DV unit (e.g. digital camcorder) before you connect it to... -
Page 59: Setup
FUNCTIONS SETUP Setup FUNCTIONS To Others Edit Profiles Setup menu overview Setup Auto-Setup Restart Press FUNCTIONS. Tuning Digital Select [To Others] with and confirm with ENTER. Disc Add New DVB Services Select [Setup] with and confirm with ENTER. Picture Signal Condition Select the desired sub menu with and switch to setup with . - Page 60 FUNCTIONS SETUP Setup FUNCTIONS To Others Add New DVB Services Tuning Add New DVB Services ENTER Finished Ch 21 Add New DVB Service Prog. Channel Service Name Net ID TS ID Quality The unit looks for new digital stations. Channel 4 12306 11398 The station search is automatic.
-
Page 61: Disc
FUNCTIONS SETUP Setup FUNCTIONS To Others Download from TV Download from TV Tuning ENTER Warning--all currently stored stations will be Download from TV (with Q Link or similar functions) replaced by new ones !! Select [Yes] with and confirm with ENTER. Data transfer begins. To cancel the procedure, use to select [No] with and confirm with ENTER or press RETURN. -
Page 62: Picture
FUNCTIONS SETUP Setup FUNCTIONS To Others Setup Comb Filter Picture Setting Option ENTER ENTER Still Mode Automatic Tuning [On] [Off] Comb Filter Seamless Play Disc Picture On: The picture is clear and contour-rich. The setting is always set to [On] if you Sound selected [TV System - NTSC]. -
Page 63: Sound
FUNCTIONS SETUP Setup FUNCTIONS To Others Setup Dynamic Range Compression Sound Setting Option ENTER ENTER Bilingual Audio Selection Tuning [On] [Off] (Dolby Digital Only) Dynamic Range Compression DVD-V Digital Audio Output Disc Audio Mode for XP Recording Dolby Digital Picture On: The level of quieter passages increases and the level of louder passages Audio Mode for DV Input Stereo1... -
Page 64: Connection
FUNCTIONS SETUP Setup FUNCTIONS To Others Setup 16:9 TV Aspect Connection Setting Option ENTER ENTER Progressive Tuning [16:9] [4:3] [Letterbox] TV Aspect TV System Disc HDMI Settings Picture Select the TV screen format of your television. Programmes in 16:9 format are recorded Sound RGB 2 AV1 Output... -
Page 65: Hdmi
FUNCTIONS SETUP Setup FUNCTIONS To Others Setup 16:9 TV Aspect Connection HDMI Option ENTER ENTER Progressive Tuning [Automatic] [576i / 480i] [576p / 480p] TV System Disc HDMI Video Format [720p] [1080i] HDMI Settings Picture Sound Video AV1 Output Select the screen resolution of your connected television set. Display AV2 Settings Automatic: automatically selects the setting belonging to the connected unit. -
Page 66: Others
System Update Setting the remote control Sound Initialize If you use another Panasonic unit at the same location, change the mode of the remote Display control so that you can operate the units independently of each other. Connection Remote Control... -
Page 67: Setup
FUNCTIONS SETUP Setup FUNCTIONS To Others Owner ID Others Owner ID Option ENTER ENTER PIN number * * * * Owner ID Name House No To set the PIN number press . Use to enter a four-digit PIN number. Postcode Press to correct the digit. -
Page 68: Dvd Management
FUNCTIONS FUNCTIONS DVD Management To Others If you activated write-protection, deactivate it. Management Titles 1 Remain 0:59(SP) DVD-RAM Used 0:01 Press FUNCTIONS. Select [To Others] with and confirm with ENTER. Disc Name Select [DVD Management] with and confirm with ENTER. Disc Protection Select the desired menu with and confirm with ENTER. -
Page 69: Card Management
FUNCTIONS FUNCTIONS DVD Management To Others -RW(V) -R DL +R DL Auto-Play Select Management Titles 1 Remain 0:59(LP) Before finalization, you can select whether playback should start from the beginning +R DL Used 0:01 of the first layer of the disc or whether it should be lauched from a disc menu. Select [Top Menu] or [Title 1] with and confirm with ENTER. -
Page 70: Picture And Sound Settings
Picture and sound settings DISPLAY menus contain information on the disc or the unit. With DVD-Videos, you can use the repeat function, change subtitles and the angle, change the picture and sound settings for DVD playback. Depending on the status of the unit (playback, STOP), there are some entries that cannot be selected or changed. -
Page 71: Picture And Sound Settings
Picture and sound settings Play Option Setting Repeat Play [On] [Off] The function is only available if the elapsed time is displayed. CD VCD Track RAM -R -RW(V) -RW(VR) -R DL +R DL DVD-V Title Chapter DVD-A MP3 Track Group RAM -RW(VR) During playback of a playlist PL (Playlists) -
Page 72: If You Need Help
If the disc cannot be played due to poor quality, try it again with a disc from Panasonic. Page ERROR MESSAGES The unit is malfunctioning. - Page 73 If you need help Page PICTURE Check the connection to the TV, e.g. AV1. The PROGRESSIVE output is activated, but the connected TV is not No picture. progressive-capable. There is picture interference. Press and hold STOP and PLAY on the unit at the same time for more than 5 seconds.
- Page 74 If you need help Page PLAYBACK No disc or video cassette inserted. Playback does not start. The disc is dirty or badly scratched. You inserted a disc that is not suitable for playback. You inserted a blank disc. DVD-Video will not play. Some DVD-Videos cannot be played if the security level has been changed.
- Page 75 If you need help Page TV GUIDE The displayed information is The broadcasting companies are responsible for the information. Deviations are wrong. possible when changes are made at the last minute. No or incomplete data. Date/time incorrectly set. The signal is too weak or no signal was found. Check the aerial.
-
Page 76: If You Need Help
If you need help Page HDMI Which accessories are required Multi-channel sound can only be played back with this unit if it is connected with an to hear multi-channel Surround HDMI cable or a digital audio optical fibre cable to an amplifier with an integrated Sound? decoder. -
Page 77: What Can I Do With Which Disc
What can I do with which disc? The table shows an overview of the most important functions which can be recorded, played back and edited with the various formats on this unit. Not all functions are available to the same extent for all formats. Restrictions are stated separately in the corresponding description of the function. -
Page 78: Folder Structure Jpeg/Mp3/Sd Card
Folder structure RAM/CD DVD(JPEG), CD(JPEG) P0000001.jpg Format ISO9660 level 1 or 2 (except for extended formats), P0000002.jpg Joliet Compatible pixels between 34x34 and 6144x4096 pixels 002 Folder Sub Sampling 4 : 2 : 2 or 4 : 2 : 0 P0000003.jpg P0000004.jpg This unit is not compatible with MOTION JPEG. -
Page 79: Specifications
Specifications Dimensions Power source approx. 430 mm (W) x 84 mm (H) x 351 mm (D) AC 220V-240V 50 Hz Weight Power consumption approx. 5.4 kg 30 W Operating temperature 5°C - 40°C Operating humidity 35% - 80% RH no condensation Tape Speed/ PAL,MESECAM: SP: 23.39 mm/s 240 min. -
Page 80: Index
Index Page Page Page AC IN 4,19,63,70 Profile Add New DVB Services Dual-channel audio Prog Type Album DV IN 4,19,58,63 Progressive 17,64,71 Angle DVB Multi Audio Audio Channel 27,32,70 DVB Preferred Subtitles Q Link 15,65 Audio Mode for DV Input DVD Video Recording format Quick View Audio Mode for XP Recording...