Miele T 6351 Operating Instructions Manual
Tumble dryers
Hide thumbs
Also See for T 6351:
- Operating instructions manual (22 pages) ,
- Operating instructions manual (26 pages) ,
- Operating instructions manual (28 pages)

Related Manuals for Miele T 6351


Summary of Contents for Miele T 6351
- Page 1 Operating Instructions Tumble Dryers T 6351 T 6551 T 6751 To prevent accidents and machine damage read these instructions before installation or use. M.-Nr. 05 640 910...
-
Page 2: Table Of Contents
Contents WARNING AND SAFETY INSTRUCTIONS ........3 Caring for the environment . -
Page 3: Warning And Safety Instructions
Laundry must not be removed from the Installation, repair and maintenance work dryer before the drying program has fin- should be by a Miele authorized service ished, i.e., the cooling down phase must technician. Work by unqualified persons be completed. - Page 4 Check the condition of the air inlet and air outlet vents. If no damage is evident to any of the parts checked, the dryer can be re- started. If the fault occurs again, call the Miele Tech- nical Service Department.
-
Page 5: Caring For The Environment
Caring for the environment Disposal of packing material Disposal of an old machine The transport and protective packing are en- Old machines contain materials which can vironmentally friendly for disposal and can be recycled. Please contact your local recy- be recycled. cling authority about the possibility of recy- cling these materials. -
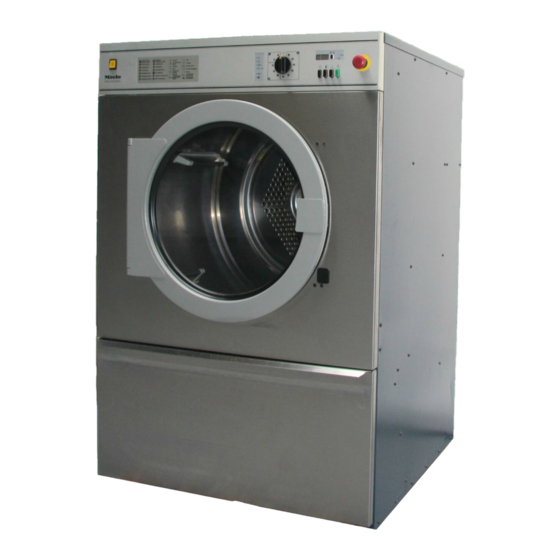
Page 6: Guide To The Tumble Dryer
Guide to the tumble dryer 1 Power main switch 5 Drum door 2 Vent pipe / Vent socket 6 Door handle 3 Four height adjustable feet 7 Lint filter 4 Control panel 8 Lint compartment flap Control panel 9 Program sequence/Fault indicators Program selector with selector button Push buttons Additional display... -
Page 7: Program Sequence And Fault Indicators
Guide to the tumble dryer Program sequence and fault Push buttons indicators "s On-Off" button "L Low temperature" button Lowers the drying temperature for delicate fabrics (e.g. acrylics). Press in the button to select this feature. "l Buzzer" button Program selector The end of a program can be indicated by a buzzer. -
Page 8: Additional Display
Guide to the tumble dryer Additional display Residual moisture Time Vented air Display Displays the residual Displays the time set Displays the current for program J or K. moisture set for pro- vented air temperature grams A to I. A few The hours are shown for 5 seconds while a minutes after the pro-... -
Page 9: Emergency Stop" Button
Guide to the tumble dryer "Emergency Stop" button Conversion plate of °C to °F °C °F °C °F Only use in an emergency. Do not use this button to turn off the machine during nor- mal operation. ^ To reset the "Emergency Stop" button after it has been used, turn the ribbed knob clockwise. -
Page 10: Before Using For The First Time
Before using for the first time Before use Preparing the laundry ^ Wipe out the inside of the drum with a soft ^ Sort the laundry according to fabric type dry cloth. and weave for even drying results. Not all textiles are suitable for drying. Pay special attention to the manufacturer’s in- structions on the wash care label. -
Page 11: Operation
Operation Selecting a program Available programs ^ Load the machine. ^ Close the drum door. ^ Turn on the power main (on site). ^ Press in the "s On/Off" button. ^ Select a program by turning the program selector clockwise or counterclockwise. ^ The "... -
Page 12: Special Programs
Operation Special programs 2. Bedding To dry bedding, which has a laundry care la- 1. Wet Cleaning bel stating that it is machine washable: For drying washable materials which are also stated on the laundry care label to be Bedding (e.g. non-seamed duvets, suitable for machine drying *: seamed/pocketed feather duvets, synthetic duvets, pillows, etc.) -
Page 13: Program End
Operation Program end Note At the end of drying the "~ t Anti- If the "l Check lint filter" light comes on, the crease / End" indicator lights up and the lint filter needs to be cleaned. Clean the filter buzzer sounds (if selected). -
Page 14: Anti-Crease
Operation Anti-crease "Emergency Stop" If the "Emergency Stop" has been activated, If the laundry is not removed from the ma- the dryer will shut off immediately. chine at the end of the program an an- ti-crease cycle will automatically start. The Do not use this button in normal drum turns at intervals to minimize creasing operation to turn the machine off. -
Page 15: Reprogramming
Reprogramming Changing the standard setting of a drying program ^ Press in the "s On-Off" switch. The "On" indicator will light. Individual drying programs can be repro- grammed to meet special requirements. To make program changes, the unit must be set to the "basic position". - Page 16 Reprogramming Example 1: Reprogramming the drum reversing action period (standard = 1 minute and 27 seconds) in the cotton programs. A drum reversing action period can be se- lected from 20 seconds to 2 minutes. Here a reversing time of 1 minute and ^ Press and release the "Start"...
- Page 17 Reprogramming Example 2: Changing the residual moisture value in pro- gram 5 to E Machine iron . (20%) from 20% to 18%. ^ Set the unit to the basic position. ^ Turn the program selector to A / C. The following will alternate in the display. ^ Turn the program selector to the "t End"...
-
Page 18: Reprogramming Possibilities
Reprogramming Reprogramming possibilities Program Position Options Notes Enter alterations of the program Standard Bed- Adjust- Program changes setting clean ding able selector here Cotton Reversing time* in the 1 min 20 secs *) Drum reverses to Cotton Programs 1 to secs secs the left and to the right... -
Page 19: Programmable Residual Moisture Values
Reprogramming Programmable residual moisture values Program T 6351 T 6551 / T 6751 Enter Options Options program changes here Standard Adjustable Standard Adjustable - 4 % - 3 % or - 5 % - 4 % - 3 % or - 5 %... -
Page 20: Cleaning And Care
They will damage the surface. The following should be checked and if nec- essary serviced once a year by an autho- rized Miele technician: Cleaning the drum – Heater element and heater shaft. ^ After drying starched laundry the drum –... -
Page 21: Fault Indicators
Heating will stop flashing once the "Start" button is Fault in the heating system. pressed. ^ Call Miele’s Technical Service Department. Safety period The maximum running time of the drying program was exceeded because the resid- ual moisture at the start of the program was too high. -
Page 22: After Sales Service
After sales service If there is there is a problem, please contact: Miele Technical Service USA 1-800-999-1360 techserv@mieleusa.com CDN 1-800-565-6435 service@miele.ca When contacting Technical Service please quote the model and serial number of the machine. These can be found on the data plate with... -
Page 23: Guide To The Data Plate Symbols
Guide to the data plate symbols 1 Model type Top running time * 2 Serial number Braking time * 3 Voltage/Frequency Heating 4 Mains fusing Electric heating 5 Drive motor Fusing (on site) 6 Plate diameter/Plate qty * Steam heating indirect 7 Drum data Steam heating direct * 8 Drum diameter/Drum depth *... -
Page 25: Installation Instructions
Installation instructions... -
Page 26: Installation
Installation, repair and maintenance work heated appliance. The warm humid air should be by a Miele authorized service should be directed by the shortest route into technician. Work by unqualified persons the open air or into a suitable venting duct. -
Page 27: Leveling The Unit
Installation Leveling the unit The machine must be leveled for proper op- eration. The machine does not need to be in- stalled on a base, however any unevenness in the floor must be compensated for. The machine can be leveled by adjusting the screw feet. -
Page 28: Electrical Connection
Installation Electrical connection WARNING The electrical connections to the dryer must Verify that the unit is in-phase: be in accordance with instructions given on the installation diagram and comply with lo- – the ventilation motor should turn clockwise cal regulations. (open the panel to the lint filter.) Once installed in position all detachable –... -
Page 29: Steam Connection
Installation Steam connection Important notes for the heat exchanger Please pay attention to the installation dia- To avoid damage to the heat exchanger the gram and instructions supplied with the ma- following must be observed during installa- chine. These are important for the connec- tion: tion to steam. - Page 32 Alteration rights reserved / 000 USA - 4001 This paper is made from cellulose bleached without the use of chlorine.