Table of Contents
Advertisement
Quick Links
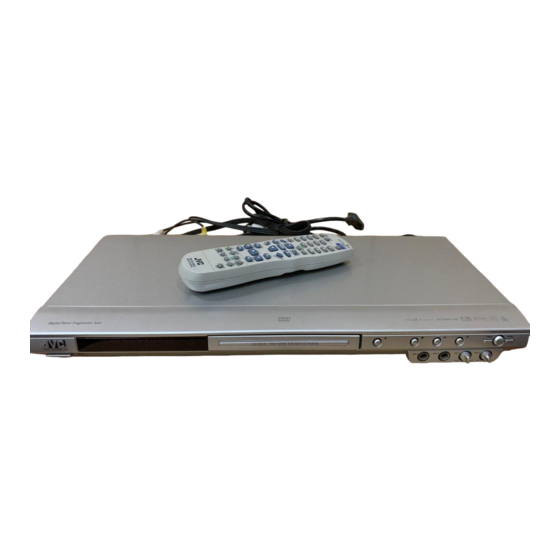
DVD PLAYER
XV-N318S
Region code of DVD VIDEO
DVD players and DVD VIDEO discs have their own Region Code
numbers. This player can play back DVD VIDEO discs whose
Region Code numbers include the player's Region Code, which is
indicated on the region code symbol on the rear panel.
Example of playable DVD VIDEO discs when the player's Region
Code is "2":
2
ALL
1
2
1
2
2
5
4
5
3
4
INSTRUCTIONS
3
6
15
GNT0042-001A
[US/UB/UG/UX]
2
4
8
11
20
24
28
33
Advertisement
Table of Contents

Related Manuals for JVC GNT0042-001A


Summary of Contents for JVC GNT0042-001A
-
Page 1: Table Of Contents
Example of playable DVD VIDEO discs when the player’s Region Code is “2”: INSTRUCTIONS Before operation Preparations Basic playback Various kinds of playback Audio/Video files playback KARAOKE operation Changing the initial settings Additional information GNT0042-001A [US/UB/UG/UX]... - Page 2 Warnings, Cautions and Others CAUTION To reduce the risk of electrical shocks, fire, etc.: 1. Do not remove screws, covers or cabinet. 2. Do not expose this appliance to rain or moisture. Caution –– STANDBY/ON button! Disconnect the mains plug to shut the power off completely. STANDBY/ON button in any position does not disconnect the mains line.
-
Page 3: Supplied Accessories
Supplied accessories Check that you have all the following accessories supplied to you. If anything is missing, consult your dealer immediately. • Audio/video cable (Yellow/White/Red) (× 1) • Remote control unit (× 1) • R6P(SUM-3)/AA(15F) battery (× 2) • AC power plug adaptor (× 1) (except for Hongkong model) About this manual •... -
Page 4: V I D E O
Before operation About discs Playable disc types Discs with the following marks can be played back on the player. DVD VIDEO SVCD Video CD V I D E O The DVD Logo is a trademark. The player can also play back the following discs: •... -
Page 5: Remote Control Unit
Names of parts and controls Front panel STANDBY/ON button (8) 2 STANDBY/ON indicator (8) 3 Disc tray (9) 4 0 button (9) 5 7 button (10, 13) 6 3 button (9, 10, 11) 7 8 button (10, 11) 8 4 button (11, 12, 21) 9 ¢... -
Page 6: Preparations
Preparations Connections Before using the player, connect the player to a TV and/or amplifier. Connecting to a TV The following sections A to C describe TV connections where only a TV is connected to the player so that you will hear audio from the TV. - Page 7 To check the compatibility of your TV set, contact your local JVC customer service center. • All JVC progressive TV and High-Definition TV sets are fully compatible with the player (Example: AV-61S902). • The VIDEO jack, S-VIDEO jack and COMPONENT VIDEO OUT jacks cannot be used at the same time.
-
Page 8: Connecting To Optional Audio Equipment
Connecting to optional audio equipment Connecting to a stereo audio amplifier/receiver Connect the player’s AUDIO OUT (LEFT/RIGHT) jacks to any line-level inputs (such as AUX, DVD, CD, etc.) of an audio amplifier or receiver. The player Audio cable (not supplied) Connecting to a digital audio device You can enjoy sound of enhanced quality by connecting the player’s DIGITAL OUT (COAXIAL) jack to a digital input of an... -
Page 9: Connecting The Power Cord
Connecting the power cord When all the audio/video connections have been made, connect the AC power plug to the wall outlet. Make sure that the plugs are inserted firmly. The STANDBY/ON indicator lights in red. Warning • Disconnect the power cord: - if you are not going to use the player for a long time. -
Page 10: Basic Playback
You can set the display language, TV monitor type and digital output before using the player, by following the procedure below. Press ENTER. The first page of the DVD PLAYER SET UP display appears. The pull-down menu of the [ON SCREEN LANGUAGE] is already open. -
Page 11: Starting Playback
Press ENTER. The TV screen returns to the opening display. To bring up the DVD PLAYER SET UP display later Press SET UP for a few seconds until the DVD PLAYER SET UP display appears. Starting playback Press 0 on the player (or OPEN/CLOSE on the remote control unit) to open the disc tray. -
Page 12: Restarting Playback After Stopping (Resuming Playback)
(SELECT) To stop playback completely Press 7. Hint If you press 0 during playback, the player stops playback and opens the disc tray. To stop playback temporarily Press 8. To resume playback, press 3 (SELECT). (See “About On-screen guide icons” on this page.) Restarting playback after stopping (resuming playback) The player resumes playback from the position you interrupted... -
Page 13: Various Kinds Of Playback
Various kinds of playback QUICK PLAYBACK ¢ (SELECT) NOTE Make sure that the KARAOKE - DVD switch on the remote control unit is set to “DVD” when using the 5/∞/2/3 and KARAOKE numeric buttons for controlling the player. Playback at various speeds x1.5 Quick Playback with sound During playback, press QUICK PLAYBACK on the player. -
Page 14: Locating The Beginning Of A Scene Or Song
Numeric buttons RESERVE - TITLE/ RETURN GROUP MENU - THUMBNAIL/ TOP MENU 5/∞/2/3 LIST ENTER ON SCREEN ¢ - KARAOKE To replay the previous scenes (One touch replay function) During DVD VIDEO playback, press KARAOKE. The playback position moves back 10 seconds before the current position. -
Page 15: Changing The Playback Order
Press the numeric buttons to select the desired item. To select 5: press 5. To select 23: press +10, +10, then 3. To select 40: press +10, +10, +10, then 10. The player starts playback of the selected item. To return to the menu, press RETURN. Hint If something like [NEXT] or [PREVIOUS] appears on the TV screen, pressing ¢... - Page 16 Numeric buttons 5/∞/2/3 ENTER (SELECT) SUBTITLE - ECHO Press the numeric buttons to specify tracks in the desired order. To select 5: press 5. To select 23: press +10, +10, then 3. To select 40: press +10, +10, +10, then 10. The total program time Total Program Time PROGRAM...
-
Page 17: Repeat Playback
Repeat playback To repeat the current selection or all tracks For DVD VIDEO: During playback For SVCD/Video CD/Audio CD: In any condition except SVCD/ Video CD playback with PBC Press REPEAT - KARAOKE SOUND. If you press REPEAT - KARAOKE SOUND in stop mode, press 3 (SELECT) to start playback. -
Page 18: Special Picture And Sound Effects
5/∞/2/3 ENTER VFP - PROGRESSIVE SCAN SOUND EFFECT - VOCAL ZOOM - KEY+ ANGLE - AUDIO SLIDE EFFECT To change the audio language or sound (AUDIO) The audio selection setting allows you to change the audio language of a movie, or to listen to karaoke with or without the vocal. - Page 19 NOTES • While zoomed, the picture may look coarse. • This function may not work with some DVD VIDEO discs. • When the KARAOKE function is turned on, you cannot zoom in pictures even if the KARAOKE - DVD switch on the remote control player is set to “DVD.”...
-
Page 20: Basic Operation Procedure
Numeric buttons 5/∞/2/3 ENTER ON SCREEN Menu bar functions To bring up the menu bar When a disc is inserted, press ON SCREEN. A status bar for the type of disc inserted will appear on the TV screen. See page 9 for details about the status bar. Press ON SCREEN again. -
Page 21: Menu Bar Functions For Dvd Video
Menu bar functions for DVD VIDEO Time mode selection During playback, selects the time mode shown in the display window and in the status bar. Press ENTER to select the time mode from the following. • TOTAL: Current title elapsed time •... -
Page 22: Audio/Video Files Playback
Audio/Video files playback Numeric buttons (SELECT) NOTE Make sure that the KARAOKE - DVD switch on the remote control unit is set to “DVD” when using the 5/∞/2/3 and KARAOKE numeric buttons for controlling the player. Outline The player can play back MP3/JPEG/MPEG-4 (simple profile/asf file) files on either a personally recorded CD-R/RW disc, or a commercially available CD. -
Page 23: Basic Operations
Basic operations When you insert a disc with groups and files, the Control display that shows the contents of the disc automatically appears on the TV screen. You can specify and play back the desired group/file from the Control display using the following procedure. Make sure that the cursor bar is in the left (group) column on the Control display. -
Page 24: Direct Selection For Jpeg Files
CANCEL ENTER MENU - THUMBNAIL/ 5/∞/2/3 LIST SET UP ¢ (SELECT) ANGLE - SLIDE EFFECT Direct selection for JPEG files You can select a particular JPEG file from the thumbnail screen. Press and hold MENU - THUMBNAIL/LIST while a JPEG file is selected on the Control display. -
Page 25: Slide Show Playback
• The previous picture of the opening display is overwritten by the newly saved file. To dismiss the menu screen Press SET UP. To resume the JVC’s opening screen Select [STANDARD] in step 4. -
Page 26: Karaoke Operation
KARAOKE operation Numeric buttons RESERVE - TITLE/ GROUP CANCEL 5/∞/2/3 ENTER ON SCREEN - KARAOKE AUDIO NOTE Make sure that the KARAOKE - DVD switch on the remote control unit is set KARAOKE to “KARAOKE” when using the karaoke-related buttons for controlling the player. -
Page 27: Selecting Audio
Press the numeric buttons to specify tracks in the desired order. To select 5: press 5. To select 23: press +10, +10, then 3. To select 40: press +10, +10, +10, then 10. Track To correct the reservation Press 5/∞ to move to the song to be corrected, then press CANCEL. - Page 28 5/∞/2/3 ENTER SOUND EFFECT - VOCAL SUBTITLE - ECHO To select KARAOKE sound (KARAOKE SOUND) Among KARAOKE DVD VIDEO discs, there are “multi-sound KARAOKE” discs. With such a disc, for example, you can sing along with the other vocal part recorded on a disc. Using the KARAOKE menu See page 24 for how to turn on the KARAOKE menu.
-
Page 29: Adding An Effect To Your Voice
NOTES • If [KARAOKE] is set to [L] or [R], the “MASK” and “REPLACE” functions do not work correctly. • With some materials, such as those recorded in monaural and sung by multiple voices, the voice may not be satisfactorily masked. -
Page 30: Changing The Initial Settings
Changing the initial settings ENTER 5/∞/2/3 SET UP NOTES • Make sure that the KARAOKE - DVD switch on the remote control unit is KARAOKE set to “DVD” when using the 5/∞/2/ 3 and numeric buttons for controlling the player. •... -
Page 31: Language Menu
LANGUAGE menu MENU LANGUAGE You can select the default menu language to be displayed if it is contained on a DVD VIDEO disc. Setting options ENGLISH, SPANISH, FRENCH, CHINESE, GERMAN, ITALIAN, JAPANESE, language code from AA to ZU • If the disc does not have a menu in the selected language, the disc’s default language will be used. -
Page 32: Others Menu
Setting options STANDARD, USER, SAVE AS BACKGROUND [STANDARD]: select when you use the JVC original image as the opening display (initial setting). [USER]: select when you use your favorite image as the opening display. This item will be taken effect after you register a new image in the next item. -
Page 33: Limiting Playback By Children
Numeric buttons 5/∞ Limiting playback by children This function restricts playback of DVD VIDEO discs which contain violent (and other) scenes according to the level set by the user. For example, if a movie which includes violent scenes supports the parental lock feature, such scenes which you do not want to let children view can be cut or replaced with other scenes. -
Page 34: To Temporarily Release The Parental Lock
Numeric buttons 5/∞ To change the settings You can change the parental lock settings later. In stop mode, bring up the OTHERS menu. Press 5/∞ to move to select [PARENTAL LOCK] and press ENTER. The parental lock on-screen display appears on the TV screen. -
Page 35: Additional Information
AV COMPU LINK remote control system The JVC AV COMPU LINK system allows you to enjoy video or audio with the simplest operation. If your video/audio player (such as a DVD player, CD player and VCR) and television or/and... -
Page 36: Troubleshooting
Troubleshooting Power Power does not come on. \ Power plug is not inserted securely. Plug in securely. Operation “REGION CODE ERROR!” is shown on the TV screen. \ Region code of the inserted disc does not match the player. Check the region code of the disc printed on the disc jacket. Operation is not possible. -
Page 37: Specifications
Specifications Specifications and appearance are subject to change without prior notice. General Readable discs DVD VIDEO, DVD-R (Video format), DVD- RW (Video format), SVCD, Video CD, Audio CD (CD-DA), CD-R/RW (CD-DA, SVCD, Video CD, MP3 format, JPEG, MPEG-4) Video format PAL, 625i (Interlaced scan) NTSC, 525i (Interlaced scan)/525p (Progressive scan) selectable... -
Page 38: Appendix B: Country/Area Code List For Parental Lock
Appendix B: Country/Area code list for Parental Lock Eritrea Andorra Spain United Arab Emirates Ethiopia Afghanistan Finland Antigua and Barbuda Fiji Anguilla Falkland Islands Albania Micronesia (Federated States Armenia Netherlands Antilles Faroe Islands Angola France Antarctica France, Metropolitan Argentina Gabon American Samoa United Kingdom Austria... -
Page 39: Appendix D: Glossary
Appendix D: Glossary 525i/525p/625i Indicates the number of scanning lines and scanning format of an image signal. 525i indicates 525 scanning lines with interlace format, 525p indicates 525 scanning lines with progressive format, and 625i indicates 625 scanning lines with interlace format. - Page 40 VICTOR COMPANY OF JAPAN, LIMITED 0504STYBICJSC © 2004 VICTOR COMPANY OF JAPAN, LIMITED...