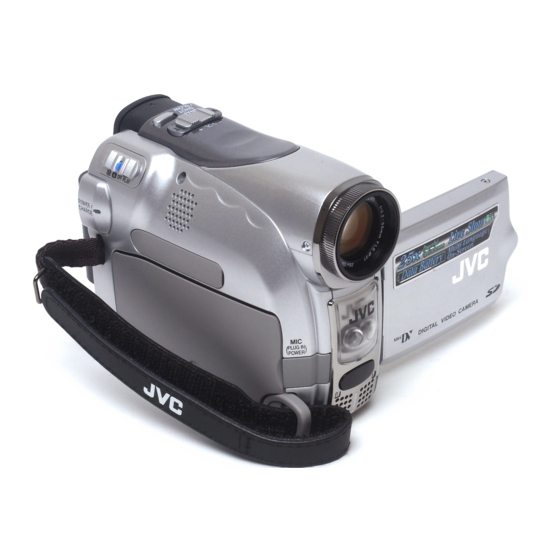
JVC GR-D290 GR-D270 Instructions Manual
Digital video camera
Hide thumbs
Also See for GR-D290 GR-D270:
- Brochure & specs (5 pages) ,
- Instructions (3 pages) ,
- Manual (73 pages)
Table of Contents
Advertisement
DIGITAL VIDEO CAMERA
GR-D290
GR-D270
Please visit our Homepage on the World Wide Web for
Digital Video Camera:
http://www.jvc.co.jp/english/cyber/
For Accessories
:
http://www.jvc.co.jp/english/accessory/
INSTRUCTIONS
Dear Customer,
Thank you for purchasing this digital
video camera. Before use, please
read the safety information and
precautions contained in the pages
3 - 4 and 10 to ensure safe use of
this product.
DIGITAL STILL CAMERA
(D.S.C.) RECORDING &
REFERENCES
For Customer Use:
Enter below the Model No. and
Serial No. which is located on the
bottom of the camcorder. Retain this
information for future reference.
Model No.
Serial No.
To deactivate the demonstration,
set "DEMO MODE" to "OFF".
(
pg. 31, 33)
LYT1354-001A
ENGLISH
6
18
25
31
47
Back cover
EN
Advertisement
Table of Contents

Related Manuals for JVC GR-D290 GR-D270


Summary of Contents for JVC GR-D290 GR-D270
-
Page 1: Table Of Contents
DIGITAL VIDEO CAMERA GR-D290 GR-D270 Please visit our Homepage on the World Wide Web for Digital Video Camera: http://www.jvc.co.jp/english/cyber/ For Accessories http://www.jvc.co.jp/english/accessory/ INSTRUCTIONS Dear Customer, Thank you for purchasing this digital video camera. Before use, please read the safety information and precautions contained in the pages 3 –... - Page 2 Major Features of this Camcorder Wipe/Fader Effects You can use the Wipe/Fader Effects to make pro-style scene transitions. ( Fade out Program AE with Special Effects For example, “SPORTS” mode allows fast- moving images to be captured one frame at a time, for vivid, stable slow-motion.
-
Page 3: Safety Precautions
This product includes patented and other proprietary technology and will operate only with JVC Data Battery. Use the JVC BN-VF707U/VF714U/VF733U battery packs and, to recharge them or to supply power to the camcorder from an AC outlet, use the provided multi-voltage AC Adapter. - Page 4 When the equipment is installed in a cabinet or on a shelf, make sure that it has sufficient space on all sides to allow for ventilation (10 cm (3-15/16") or more on both sides, on top and at the rear). Do not block the ventilation holes.
- Page 5 GETTING STARTED Index ... 6 Provided Accessories ... 11 Power... 13 Operation Mode ... 14 Language Settings... 15 Date/Time Settings ... 15 Grip Adjustment ... 15 Viewfinder Adjustment ... 16 Brightness Adjustment Of The Display ... 16 Tripod Mounting... 16 Loading/Unloading A Cassette ...
-
Page 6: Getting Started
GETTING STARTED Index... - Page 7 Controls Stop Button [8] ( pg. 20) Index Button [INDEX] ( pg. 27) Backlight Compensation Button [BACK LIGHT] ( pg. 40) Play/Pause Button [4/9] ( Manual Focus Button [FOCUS] ( Rewind Button [ pg. 20) Menu select Button [–] ( pg.
- Page 8 GETTING STARTED LCD Monitor/Viewfinder Indications During Video Recording Only 1 23 SOUND 12 B I T 15:55 Selected Wipe/Fader Effect Indicator pg. 41) Tape Running Indicator ( (Rotates while tape is running.) Selected Wide Mode Indicator ( : Live Slow Indicator ( : Snapshot Indicator ( Recording Speed Mode (SP/LP) ( Tape Remaining Time (...
- Page 9 Approximate Zoom Ratio ( Zoom Indicator ( pg. 19) O: (Appears when taking Snapshot.) pg. 25, 38) SLOW: (Appears when using Live Slow.) pg. 37) Brightness Control Indicator (LCD monitor/ Viewfinder) ( pg. 16) Battery Remaining Power Indicator pg. 49) Date/Time ( pg.
- Page 10 So, for important recordings, we recommend using SP mode. It is recommended that you use JVC brand cassette tapes. Your camcorder is compatible with all brands of commercially available cassette tapes complying...
-
Page 11: Provided Accessories
Provided Accessories AC Adapter AP-V16U or AP-V14U Battery Pack BN-VF707U Audio/Video Cable (ø3.5 mini-plug to RCA plug) USB Cable Core Filter (for USB cable, attachment) CD-ROM Remote Control Unit RM-V720U (GR-D290 only) Lithium Battery CR2025* (for remote control unit) (GR-D290 only) Memory Card 8 MB (Already inserted in the camcorder) (GR-D290 only) Shoulder Strap (see the right column for... - Page 12 GETTING STARTED How To Attach The Core Filter Attach the core filters to the cables. The core filter reduces interference. Release the stoppers on both ends of the core filter. Stopper Run the cable through the core filter, leaving approx. 3 cm (1-3/16") of cable between the cable plug and the core filter.
-
Page 13: Power
BN-VF707U* BN-VF714U BN-VF733U * Provided NOTES: It is recommended that only genuine JVC batteries are used in this camcorder. Using generic non-JVC batteries can cause damage to the internal charging circuitry. If the protective cap is attached to the battery pack, remove it first. -
Page 14: Operation Mode
DATA several times, there may be a problem with your battery. In such a case, consult your nearest JVC dealer. Using AC Power Perform step 4 in “Charging The Battery Pack”. -
Page 15: Language Settings
VIDEO/MEMORY Switch Position VIDEO: Allows you to record on a tape or play back a tape. If “REC SELECT” is set to “ pg. 35), still images are recorded both on the tape and the memory card. MEMORY: Allows you to record in a memory card or access data stored in a memory card. -
Page 16: Viewfinder Adjustment
GETTING STARTED Viewfinder Adjustment Set the Power Switch to “A” or “M” while pressing down the Lock Button located on the switch. Make sure the LCD monitor is closed and locked. Pull out the viewfinder fully and adjust it manually for best viewability. Turn the Diopter Adjustment Control until the indications in the viewfinder are clearly focused. -
Page 17: Loading/Unloading A Memory Card
When the battery pack’s charge is low, you may not be able to close the cassette holder cover. Do not apply force. Replace the battery pack with a fully charged one or use AC power before continuing. Close the cassette holder cover firmly until it locks into place. -
Page 18: Video Recording
VIDEO RECORDING Basic Recording NOTE: Before continuing, perform the procedures listed below: Power ( pg. 13) Loading A Cassette ( pg. 16) VIDEO/MEMORY Power Zoom Lever Power Switch Lock Button POWER/CHARGE Lamp Recording Start/Stop Button Remove the lens cap. ( Open the LCD monitor fully. -
Page 19: Zooming
Zooming Produces the zoom in/out effect, or an instantaneous change in image magnification. Zoom In Slide the Power Zoom Lever towards “T”. Zoom Out Slide the Power Zoom Lever towards “W”. The further you slide the Power Zoom Lever, the quicker the zoom action. -
Page 20: Quick Review
NOTES: The time code cannot be reset. During fast-forwarding and rewinding, the time code indication does not move smoothly. The time code is displayed only when “TIME CODE” is set to “ON”. ( pg. 34) Quick Review Enables to check the end of the last recording. 1) Press during the Recording-Standby mode. -
Page 21: Shuttle Search
Shuttle Search Allows high-speed search in either direction during video playback. 1) During playback, press 5 for forward search, or 3 for reverse search. 2) To resume normal playback, press 4/9. During playback, press and hold 5 or 3. The search continues as long as you hold the button. -
Page 22: Connections To A Tv Or Vcr
VIDEO PLAYBACK Connections To A TV Or VCR To AV connector Audio/Video cable (provided) Yellow to VIDEO IN (Connect when your TV/ VCR has only A/V input connectors.) Red to AUDIO R IN* White to AUDIO L IN* * Not required for watching still images only. Make sure all units are turned off. -
Page 23: Playback Using The Remote Control (Gr-D290 Only)
Playback Using The Remote Control (GR-D290 only) The Full-Function Remote Control Unit can operate this camcorder from a distance as well as the basic operations (Playback, Stop, Pause, Fast-Forward and Rewind) of your VCR. It also makes additional playback functions possible. pg. -
Page 24: Playback
VIDEO PLAYBACK Zoom (T/W) SLOW (YI) PLAY (Left) SHIFT Slow-Motion Playback During normal video playback, press SLOW (YI or IU) more than approx. 2 seconds. After approx. 10 minutes, normal playback resumes. To pause Slow-Motion playback, press PAUSE (9). To stop Slow-Motion playback, press PLAY (U). NOTES: You can also engage Slow-Motion Playback from Still Playback by pressing SLOW (YI or IU) more... -
Page 25: D.s.c. Recording
Basic Shooting (D.S.C. Snapshot) You can use your camcorder as a Digital Still Camera for taking snapshots. Still images are stored in the memory card. NOTE: Before continuing, perform the procedures listed below: Power ( pg. 13) Loading a Memory Card ( pg. -
Page 26: D.s.c. Playback
To cancel Interval Shooting mode Set “INT.SHOT” to “OFF” in step 1. NOTES: It is recommended to use the AC Adapter as the power supply instead of the battery pack. pg. 13, 14) To distinguish between still images taken in Interval Shooting mode and other still images, it is recommended that you reset the file names before shooting. -
Page 27: Auto Playback Of Images
Auto Playback Of Images You can run through all the images stored in memory card automatically. Perform steps 1 – 3 in “Normal Playback Of Images” ( pg. 26). Press 4/9 to start Auto Playback. If you press – during Auto Playback, files are displayed in descending order. -
Page 28: Additional Features For D.s.c
ADDITIONAL FEATURES FOR D.S.C. Dubbing Still Images Recorded On A Tape To A Memory Card Still images can be dubbed from a tape to a memory card. Load a cassette. ( pg. 16) Load a memory card. ( Set “SNAP/SLOW” to the desired mode. (except “SLOW”, pg. -
Page 29: Deleting Files
To Remove Protection Before doing the following, perform steps 1 – 3 in “Protecting Files”. To remove protection from the currently displayed file Press + or – to select “CURRENT”, and press MENU. The PROTECT screen appears. Slide the Power Zoom Lever towards “T” or “W”... -
Page 30: Initializing A Memory Card
ADDITIONAL FEATURES FOR D.S.C. Press + or – to select “EXECUTE”, and press MENU. The normal playback screen appears. To cancel selection, select “RETURN”. To Print By Selecting Still Images And Number Of Prints Perform steps 1 – 3 in “To Print All Still Images (One Print For Each)”. -
Page 31: Menus For Detailed Adjustment
Changing The Menu Settings This camcorder is equipped with an easy-to-use, on-screen menu system that simplifies many of the more detailed camcorder settings. pg. 32 – 36) – VIDEO/MEMORY MENU For Video and D.S.C. Recording Menus: Set the VIDEO/MEMORY Switch to “VIDEO” or “MEMORY”. -
Page 32: Recording Menus
MENUS FOR DETAILED ADJUSTMENT Recording Menus CAMERA The “m CAMERA” settings are effective when the Power Switch is set to both “A” and “M”. However, the menu settings can be changed only when the Power Switch is set to “M”. [ ] = Factory-preset REC MODE [SP]: To record in the SP (Standard Play) mode... - Page 33 [OFF]: Disables 5-Second Recording. 5S: Enables 5-Second Recording. ( Anim.: Allows you to record a few frames only. By using an inanimate object and changing its position between shots, you can record the subject as though it is moving. TELE MACRO [OFF]: Disables the function.
-
Page 34: Camera Display
MENUS FOR DETAILED ADJUSTMENT PRIORITY [LCD]: The image is displayed on the LCD monitor when the viewfinder is pulled out while the LCD monitor is opened. FINDER: The image is displayed in the viewfinder when the viewfinder is pulled out while the LCD monitor is opened. -
Page 35: Playback Menus
REC SELECT (TAPE)]: When Snapshot recording is performed with the VIDEO/MEMORY Switch set to “VIDEO”, still images are recorded only onto the tape. (TAPE/CARD): When Snapshot recording is performed with the VIDEO/ MEMORY Switch set to “VIDEO”, still images are recorded not only onto the tape but also in the memory card (640 x 480 pixels). -
Page 36: Video Display
MENUS FOR DETAILED ADJUSTMENT BLANK SRCH pg. 21, “Blank Search” SYSTEM Each setting is linked with “s SYSTEM”, which appears when the Power Switch is set to “M”. pg. 31) The parameters are the same as in the description on page 33. VIDEO DISPLAY The “n”... -
Page 37: Features For Recording
LED Light LED Light can be used to brighten the subject in the dark place during video recording or D.S.C. shooting. Press LIGHT repeatedly to change the setting. OFF: Turns off the light. ON: The light is on always. ( AUTO: The light turns on automatically when dark. -
Page 38: Night-Alive
FEATURES FOR RECORDING Night-Alive Makes dark subjects or areas even brighter than they would be under good natural lighting. Although the recorded image is not grainy, it may look as if it is strobing due to the slow shutter speed. Set the Power Switch to “M”. -
Page 39: Exposure Control
Exposure Control Manual exposure control is recommended in the following situations: When shooting using reverse lighting or when the background is too bright. When shooting on a reflective natural background such as at the beach or when skiing. When the background is overly dark or the subject is bright. -
Page 40: Backlight Compensation
FEATURES FOR RECORDING Backlight Compensation Backlight compensation brightens the subject quickly. With simple operation, backlight compensation feature brightens the dark subject portion by increasing the exposure. Set the Power Switch to “M”. Press BACK LIGHT so that the Backlight Compensation indicator “ To cancel Backlight Compensation Press BACK LIGHT twice so that the “... -
Page 41: Manual White Balance Adjustment
Manual White Balance Adjustment Adjust the white balance manually when shooting under various types of lighting. Set the Power Switch to “M”. Select “MWB” in “u W.BALANCE” menu. ( pg. 31) indication blinks slowly. Hold a sheet of plain white paper in front of the subject. -
Page 42: Program Ae With Special Effects
FEATURES FOR RECORDING Program AE With Special Effects Set the Power Switch to “M”. Set “r” to the desired mode. ( The PROGRAM AE menu disappears and the selected effect is activated. The selected effect indicator appears. To deactivate the selected effect Select “OFF”... -
Page 43: Editing
Dubbing To A VCR Open the cover. To AV connector Audio/Video cable (provided) Yellow to VIDEO IN Red to AUDIO R IN White to AUDIO L IN To use this camcorder as a player Following the illustrations, connect the camcorder and the VCR’s input connectors. Start playback on the camcorder. -
Page 44: Dubbing To Or From A Video Unit Equipped With A Dv Connector (Digital Dubbing)
DV IN/OUT connector. When using a DV cable, be sure to use the optional JVC VC-VDV204U DV cable. To use this camcorder as a recorder Make sure all units are turned off. -
Page 45: Connection To A Personal Computer
To DV connector When using a DV cable, be sure to use the optional JVC VC-VDV206U or VC-VDV204U DV cable depending on the type of DV connector (4 or 6 pins) on the PC. If the PC connected to the camcorder via the USB cable is not powered, the camcorder does not enter the USB mode. -
Page 46: Audio Dubbing (Gr-D290 Only)
EDITING Audio Dubbing (GR-D290 only) The audio track can be customized only when recorded in the 12-BIT and SP modes. pg. 32) Use the provided remote control. Speaker START/ STOP PAUSE PLAY STOP INSERT A.DUB Play back the tape to locate the point where editing will start, then press PAUSE (9). -
Page 47: Advanced Features
If, after following the steps in the chart below, the problem still exists, please consult your nearest JVC dealer. The camcorder is a microcomputer-controlled device. External noise and interference (from a TV, a radio, etc.) might prevent it from functioning properly. In such cases, first disconnect its power supply unit (battery pack, AC Adapter, etc.) and wait a few minutes;... - Page 48 The date/time is not set. HSet the date/time. ( The built-in clock battery has run out and the previously set date/time has been erased. HConsult your nearest JVC dealer for replacement. pg. 25, 38) Files stored in the memory card cannot be deleted.
- Page 49 SET DATE/TIME! Appears when the date/time is not set. pg. 15) The built-in clock battery has run out and the previously set date/time has been erased. Consult your nearest JVC dealer for replacement. TROUBLESHOOTING Exhausted pg. 16) pg. 14)
- Page 50 TROUBLESHOOTING LENS CAP Appears for 5 seconds after power is turned on if the lens cap is attached or when it is dark. A. DUB ERROR! Appears if Audio Dubbing is attempted on a blank portion of a tape. ( pg.
-
Page 51: User Maintenance
(battery, etc.) and wait a few minutes for the indication to clear. When it does, you can resume using the camcorder. If the indication remains, consult your nearest JVC dealer. UNIT IN SAFEGUARD MODE EJECT AND REINSERT TAPE The error indications (03 or 04) show what type of malfunction has occured. -
Page 52: Cautions
In case of connecting the unit’s power cord to an AC wall outlet other than American National Standard C73 series type use an AC plug adapter, called a “Siemens Plug”, as shown. For this AC plug adapter, consult your nearest JVC dealer. Battery Packs The supplied battery pack is a lithium-ion battery. - Page 53 20 seconds, it stops automatically. Also refer to the cleaning cassette’s instructions. If, after using the cleaning cassette, the problems still exist, consult your nearest JVC dealer. Mechanical moving parts used to move the video heads and video tape tend to become dirty and worn out over time.
- Page 54 Changes or modifications not approved by JVC could void the user’s authority to operate the equipment. This equipment has been tested and found to comply with the limits for a Class B digital device, pursuant to Part 15 of the FCC Rules.
-
Page 55: Specifications
Camcorder For General Power supply DC 11 V (Using AC Adapter) DC 7.2 V (Using battery pack) Power consumption Approx. 3.2 W (3.5 W*) (LCD monitor off, viewfinder Approx. 4.2 W (4.5 W*) (LCD monitor on, viewfinder off) Approx. 6.5 W (Maximum; when charging the battery pack) * Using LED Light Dimensions (W x H x D) -
Page 56: Terms
TERMS AC Adapter ... 14 Animation ... 33 Audio Dubbing ... 46 Backlight Compensation ... 40 Battery Pack ... 13, 14, 52 Beep ... 33 Blank Search ... 21 Changing The Menu Settings ... 31 – 36 Charging The Battery Pack ... 13 Connection To A Personal Computer ...