Panasonic KX-TG6821AL Operating Instructions Manual
Digital cordless answering system
Hide thumbs
Also See for KX-TG6821AL:
- Operating instructions manual (56 pages) ,
- Operating instructions manual (56 pages)
Table of Contents
Advertisement
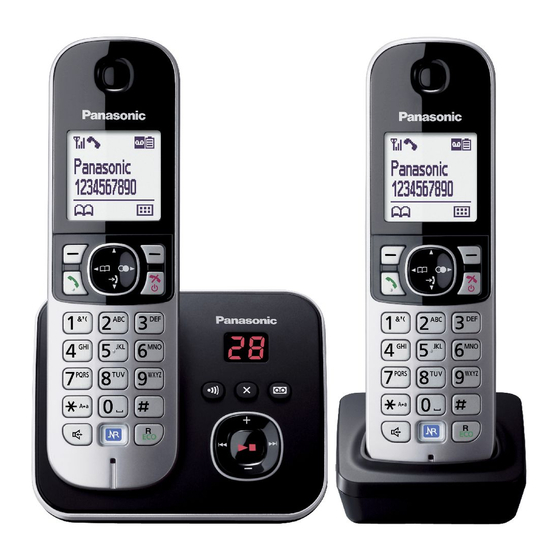
Model shown is KX-TG6821.
Before initial use, see "Getting Started"
on page 10.
Thank you for purchasing a Panasonic product.
Please read these operating instructions before using the unit and save them for
future reference.
Please access our online customer survey:
http://panasonic.net/pcc/tel/q
Operating Instructions
Digital Cordless Answering System
Model No.
KX-TG6821AL
KX-TG6822AL
KX-TG6891AL
Advertisement
Table of Contents

Related Manuals for Panasonic KX-TG6821AL


Summary of Contents for Panasonic KX-TG6821AL
-
Page 1: Operating Instructions
Model shown is KX-TG6821. Before initial use, see “Getting Started” on page 10. Thank you for purchasing a Panasonic product. Please read these operating instructions before using the unit and save them for future reference. Please access our online customer survey:... -
Page 2: Table Of Contents
Table of Contents Introduction Listening to messages using the base unit .............37 Model composition ........3 Listening to messages using the Accessory information ........3 handset ............38 Important Information Advanced new message alerting For your safety ..........6 features ............39 Important safety instructions ......7 Remote operation ........40 For best performance ........7 Answering system settings ......41... -
Page 3: Introduction
By attaching the key finder to an easy-to-lose item in advance, you can locate and find the mislaid item. Read the installation guide for more information on the key finder. R The suffix (AL) in the following model numbers will be omitted in these instructions: KX-TG6821AL/KX-TG6822AL/KX-TG6891AL Accessory information Supplied accessories... - Page 4 Replacement batteries may have a different capacity from that of the supplied batteries. By registering the key finder (4 max.) to a Panasonic Digital Cordless Phone and attaching it to an easy-to-lose item in advance, you can locate and find the mislaid item to which the key finder is attached.
-
Page 5: Expanding Your Phone System
Introduction Expanding your phone system Handset (optional): KX-TGA681AZ You can expand your phone system by registering optional handsets (6 max.) to a single base unit. R Optional handsets may be a different colour from that of the supplied handsets. -
Page 6: Important Information
Important Information R Do not allow the AC adaptor or telephone line cord to be excessively pulled, bent or For your safety placed under heavy objects. R It is advised not to use the equipment at a To prevent severe injury and loss of life/ refuelling point. -
Page 7: Important Safety Instructions
Base unit location/avoiding noise R This equipment will be inoperable when The base unit and other compatible Panasonic mains power fails. units use radio waves to communicate with R When a failure occurs which results in the each other. -
Page 8: Other Information
Important Information the handset and base unit in an indoor environment. Other information – away from electronic appliances such as TVs, radios, personal computers, CAUTION: Risk of explosion if battery is wireless devices, or other phones. replaced by an incorrect type. Dispose of used –... - Page 9 Important Information Maximum: Approx. 1.8 W R Operating conditions: 0 °C–40 °C, 20 %–80 % relative air humidity (dry) Note: R Design and specifications are subject to change without notice. R The illustrations in these instructions may vary slightly from the actual product.
-
Page 10: Getting Started
Getting Started n Charger R Use only the supplied Panasonic AC Setting up adaptor PNLV233AL. Connections “Click” n Base unit R Use only the supplied Panasonic AC adaptor PNLV226AL. Press plug firmly. To power outlet Battery installation Hook “Click” R USE ONLY Ni-MH batteries AAA (R03) size. -
Page 11: Note When Setting Up
R Use the supplied rechargeable batteries. charger without any ill effect on the For replacement, we recommend using the batteries. Panasonic rechargeable batteries noted on R The battery level may not be displayed page 4, 7. correctly after you replace the batteries. In... -
Page 12: Controls
Getting Started ECO: Eco mode shortcut key Controls N (Smart Function Key/Noise reduction key) Handset NR indicator Charge contacts n Control type Soft keys The handset features 2 soft keys. By pressing a soft key, you can select the feature shown directly above it on the display. -
Page 13: Display
Getting Started Message indicator Item Meaning N (Answer on) Battery level Alarm is on. (page 29) Equalizer is set. (page 19) Display Privacy mode is on. (page 27) Handset display items Ringer volume is off. (page 18) Item Meaning Night mode is on. (page 30) Range status: The more bars visible, the closer the handset Blocked call... -
Page 14: Turning The Power On/Off
Getting Started This menu icon is displayed when the key Icon Action finder is not registered. Places a call on hold. Opens the phonebook. Turning the power on/off Allows you to edit phone numbers. (page 31) Power on Adds new entry. (page 23, 31) Press MeN for about 1 second. -
Page 15: Smart Function Key (Nr Key)
Getting Started you want to perform further operations, lift Enter the current hour and minute. up the handset. Example: 9:30 R When the unit has new messages and 09 30 missed calls, the unit can be operated to R You can select 24-hour or 12-hour play the new messages first and then show clock format (“AM”... - Page 16 Getting Started – When the one touch eco mode is on: “Low” is temporarily displayed and is shown on the handset display instead of – When the one touch eco mode is off: “Normal” is temporarily displayed and goes off from the handset display. Note: R When there is another cordless phone nearby and it is in use, the base unit...
-
Page 17: Making/Answering Calls
Making/Answering Calls MbN: Select the desired phone number. Making calls MbN: “Yes” a MOKN a MeN Lift the handset and dial the phone number. Pause (for PBX/long distance service R To correct a digit, press MCN. users) Press M A pause is sometimes required when making When you finish talking, press MeN or calls using a PBX or long distance service. -
Page 18: Useful Features During A Call
Making/Answering Calls Auto talk Mute You can answer calls simply by lifting the While mute is turned on, you can hear the handset off the base unit or charger. You do other party, but the other party cannot hear not need to press M N. -
Page 19: Key Lock
To turn key lock on, press M N for about 3 seconds. Panasonic Ni-MH battery is displayed. performance (supplied batteries) R To turn key lock off, press M N for about 3 during power back-up mode seconds. - Page 20 Making/Answering Calls n When 2 or more handsets are registered: Making calls during a power If you want to continue the conversation, failure you should leave another handset on the base unit for supplying power. n When only 1 handset is registered: Lift the handset and dial the phone number.
-
Page 21: Shared Phonebook
Shared Phonebook Press the dial key (0 to 9, or #) which Shared phonebook contains the character you are searching for (page 45). The shared phonebook allows you to make R Press the same dial key repeatedly to calls without having to dial manually. Any display the first entry corresponding to handset registered to the base unit can use each character located on that dial key. - Page 22 Shared Phonebook MbN: “Phonebook” a MOKN MbN: Select the desired entry. Press M N (right soft key) to dial the number. Note: R When storing a calling card access number and your PIN in the phonebook as one phonebook entry, press MDN (Pause) to add pauses after the number and PIN as necessary (page 17).
-
Page 23: Speed Dial
Speed Dial MbN: “Yes” a MOKN Speed dial You can assign 1 phone number to each of the dial keys (1 to 6) on the handset. Viewing speed dial key assignments Adding phone numbers to speed You can see the speed dial key assignments dial keys on the handset display. -
Page 24: Programming
Programming Programmable settings You can customise the unit by programming the following features using the handset. To access the features, there are 2 methods. n Scrolling through the display menus Press MCN, MDN, MEN, or MFN to select the desired main menu. a MOKN Press MCN or MDN to select the desired item from the next sub-menus. - Page 25 Programming Sub-menu 1 Sub-menu 2 Settings Code Outgoing Call 1: On 0: <Off> #338 New Message Alert – On/Off Outgoing Call – – Notification to Outgoing Call 1: Activate – Remote Code 0: <Inactivate> Base Unit Beep 1: On 0: <Off> #339 Settings 2-9: 2-9 Rings...
- Page 26 Programming Main menu: “Initial Setup” Sub-menu 1 Sub-menu 2 Settings Code Ringer Setup 0-6: Off-6 <6> #160 Ringer Volume – Handset 0-6: Off-6 <3> #G160 – Ringer Volume – Base Unit *4, *5 <Ringtone 1> #161 – Ringtone (Handset) Night Mode 1: On 0: <Off>...
- Page 27 Programming Sub-menu 1 Sub-menu 2 Settings Code Speed Dial – – #261 Eco Setup Transmission 1: <Normal> 2: Low #725 Power Display Setup LCD & Key 1: <On> 0: Off #276 – Backlight 1-6: Level 1-6 #145 – Contrast <4> (Display contrast) Smart Function Key –...
- Page 28 Programming Main menu: “Key Finder” Sub-menu 1 Sub-menu 2 Settings Code Search – – #655 – Battery Check – – Main menu: “Ringer Setup” Sub-menu 1 Sub-menu 2 Settings Code Ringer Volume Handset 0-6: Off-6 <6> #160 0-6: Off-6 <3> #G160 –...
-
Page 29: Special Programming
Programming *13 The recall/flash time depends on your telephone exchange or host PBX. Contact your PBX supplier if necessary. You can access your service provider/telephone company “call waiting” service by having the recall/flash time set at “100 msec.”, and then follow your service provider/telephone company “call waiting”... -
Page 30: Setting The Ring Delay
Programming outside calls. This feature is useful for time Note: periods when you do not want to be disturbed, R When the answering system answers the for example, while sleeping. Night mode can call, this feature does not work. be set for each handset. Important: Changing the handset name R Set the date and time beforehand... - Page 31 Programming Important: N#255 R You must store the phone number with an Enter an area code (5 digits max.). a area code in the call barred list. MOKN a MeN n From the caller list: MCN ( ) Setting call restriction MbN: Select the entry to be barred.
-
Page 32: Registering A Unit
You can increase the signal range of the base Handset: unit by using a DECT repeater. Please use N#130 only the Panasonic DECT repeater noted on page 4. Contact your Panasonic dealer for Base unit: details. Press and hold M N for about 5 seconds, until the registration tone sounds. - Page 33 Programming momentarily. This is normal and the handset can be used once is displayed. Registering the DECT repeater (KX-A405AL) to the base unit Note: R Please use a repeater that has not yet been registered to another unit. If the repeater is registered to another unit, deregister it first, referring to the Installation Guide for the DECT repeater.
-
Page 34: Caller Id Service
Caller ID Service Phonebook name display Using Caller ID service When caller information is received and it matches a phone number stored in the Important: phonebook, the stored name in the R This unit is Caller ID compatible. To use phonebook is displayed and logged in the Caller ID features (such as displaying caller caller list. - Page 35 Caller ID Service N a MbN: “Edit” a MOKN Viewing the caller list and calling Edit the number. back R Press dial key (0 to 9) to add, MCN to delete. MCN ( ) Press MCN to search from the most recent call, or press MDN to search from the oldest call.
-
Page 36: Answering System
Answering System Answering system Turning the answering system on/off The answering system can answer and record calls for you when you are unavailable to The answering system is preset to on. answer the phone. You can also set the unit to play a greeting Base unit message but not to record caller messages by Press M... -
Page 37: Listening To Messages Using The Base Unit
Answering System Recording your greeting message Listening to messages N#302 using the base unit MbN: “Yes” a MOKN When new messages have been recorded, After a beep sounds, hold the handset N on the base unit flashes. about 20 cm away and speak clearly into Press M the microphone (2 minutes and 30 R If new messages have been recorded, the... -
Page 38: Listening To Messages Using The Handset
Answering System Operation Erasing all messages Pause message Press M N 2 times while the unit is not in use. 9 or MnN Stop recording Stop playback Turn answering system off Listening to messages Erase currently playing using the handset message Erase all messages When new messages have been recorded,... -
Page 39: Advanced New Message Alerting Features
Answering System MbN: Select the desired phonebook Advanced new message entry. a MOKN a MeN n By entering a phone number: alerting features N#338 MbN: “Notification to” a MOKN Audible message alert This feature allows the base unit to beep to MbN: “Manual”... -
Page 40: Remote Operation
Answering System call. This is so that unauthorised parties Remote access code cannot listen to your messages. The default setting is “Inactivate”. A 3-digit remote access code must be entered – “Inactivate”: You can listen to the when operating the answering system message by pressing 4 to play new remotely. -
Page 41: Answering System Settings
Answering System Remote commands Answering system settings You can press dial keys to access certain answering system functions without waiting for Number of rings before the unit the voice guidance to prompt you. answers a call Operation You can change the number of times the Repeat message phone rings “Number of Rings”... - Page 42 Answering System Alternatively you can leave this service connected and change the “Number of Rings” to a shorter duration on your unit so your unit’s answering machine can pick up the call prior to the voice mail provided by your service provider/telephone company.
-
Page 43: Voice Mail Service
Voice Mail Service Voice mail service Voice mail is an automatic answering service offered by your service provider/telephone company. After you subscribe to this service, your service provider/telephone company’s voice mail system answers calls for you when you are unavailable to answer the phone or when your line is busy. -
Page 44: Intercom/Locator
Intercom/Locator Intercom Transferring calls, conference calls Intercom calls can be made between handsets. Outside calls can be transferred or a Note: conference call with an outside party can be made between 2 handsets. R When paging the handset, the paged handset beeps for 1 minute. -
Page 45: Useful Information
Useful Information Character entry The dial keys are used to enter characters and numbers. Each dial key has multiple characters assigned to it. The characters that can be entered depend on the character entry mode (page 45). – Press MFN or MEN to move the cursor left or right. –... - Page 46 Useful Information Extended 1 character table ( R The following are used for both uppercase and lowercase: Extended 2 character table ( R The following are used for both uppercase and lowercase: Cyrillic character table (...
-
Page 47: Error Messages
Useful Information Error messages Display message Cause/solution R The handset has lost communication with the base unit. Move Base no power closer to the base unit and try again. R Unplug the base unit’s AC adaptor to reset the unit. No link. -
Page 48: Troubleshooting
Useful Information Troubleshooting If you still have difficulties after following the instructions in this section, disconnect the base unit’s AC adaptor and turn off the handset, then reconnect the base unit’s AC adaptor and turn on the handset. General use Problem Cause/solution The handset does not turn... - Page 49 Useful Information Problem Cause/solution I cannot activate the eco R You cannot set eco mode when you set the repeater mode mode. “On”. If required, set the repeater mode to “Off” (page 32). I cannot register a handset R The maximum number of handsets (6) is already registered to to a base unit.
- Page 50 Useful Information Problem Cause/solution I cannot make a call. R You dialled a call restricted number (page 31). R The key lock feature is turned on. Turn it off (page 19). R The unit is not designed to be used with rotary/pulse dialling services.
- Page 51 Useful Information Problem Cause/solution I cannot operate the R The remote access code is not set. Set the remote access answering system code (page 40). remotely. R You are entering the wrong remote access code. If you have forgotten your remote access code, enter the remote access code setting to check your current code (page 40).
-
Page 52: Index
Index Keytones: 27 Making calls: 17 Index Missed calls: 34 Mute: 18 Additional handsets: 32 Night mode: 29 Alarm: 29 Noise reduction: 18 Answering calls: 17 Answering system: 36 Pause: 17 Call screening: 36 Phonebook: 21 Erasing messages: 37, 38, 41 PIN: 31 Greeting message: 36 Power failure (power back-up... - Page 53 Notes...
- Page 54 Notes...
- Page 55 Notes...
- Page 56 Attach your purchase receipt here. Customer Care Centre Tel. No.: 132600 or website www.panasonic.com.au Sales Department: 1 Innovation Road, Macquarie Park NSW 2113, Australia 1-62, 4-chome, Minoshima, Hakata-ku, Fukuoka 812-8531, Japan © Panasonic System Networks Co., Ltd. 2013 *PNQX5802ZA* *PNQX5802ZA* PNQX5802ZA TT0213YK0 (E)