Table of Contents
Advertisement
Operation and maintenance manual
Before using the machine, please read the attached operating instructions.
Carefully read the safety rules
Mode d'emploi
Veuillez lire attentivement le mode d'emploi
(notamment les consignes de sécurité) avant d'utiliser l'appareil.
FOR HOUSEHOLD USE ONLY
USAGE DOMESTIQUE SEULEMENT
Advertisement
Chapters
Table of Contents
Troubleshooting

Related Manuals for Gaggia Platinum swing up


Summary of Contents for Gaggia Platinum swing up
- Page 1 Operation and maintenance manual Before using the machine, please read the attached operating instructions. Carefully read the safety rules Mode d'emploi Veuillez lire attentivement le mode d'emploi (notamment les consignes de sécurité) avant d'utiliser l'appareil. FOR HOUSEHOLD USE ONLY USAGE DOMESTIQUE SEULEMENT...
-
Page 2: Important Safeguards
IMPORTANT SAFEGUARDS When using electrical appliances, basic safety precautions should always be followed, including the following: 1. Read all instructions. 2. Do not touch hot surfaces. Use handles or knobs. 3. To protect against fire, electric shock and injury to persons do not immerse cord, plugs, or appliance in water or other liquid. - Page 3 CAUTION This appliance is for household use only. Any servicing, other than cleaning and user maintenance, should be performed by an authorized service centre. Do not immerse machine in water. To reduce the risk of fire or electric shock, do not disassemble the machine. There are no user serviceable parts inside the machine serviceable by the user.
-
Page 4: Table Of Contents
CONTENTS GENERAL INFORMATION ........................3 APPLIANCE ............................4 ..............................4 ACCESSORIES INSTALLATION ............................ 5 ............................5 STARTING THE MACHINE ............................6 SETTING THE LANGUAGE “ ” ........................... 7 AQUA PRIMA WATER FILTER DISPLAY .............................. 8 ....................8 OPTI DOSE INDICATES THE COFFEE DOSE PER CUP ADJUSTMENTS ........................... -
Page 5: General Information
GENERAL INFORMATION The coffee machine is suitable for preparing espresso coffee using coffee beans, and it is equipped with a device to dispense steam and hot water. The machine is designed for domestic use only, and is not suitable for heavy or professional use. Warning: no liability is assumed for any damage caused by: •... -
Page 6: Appliance
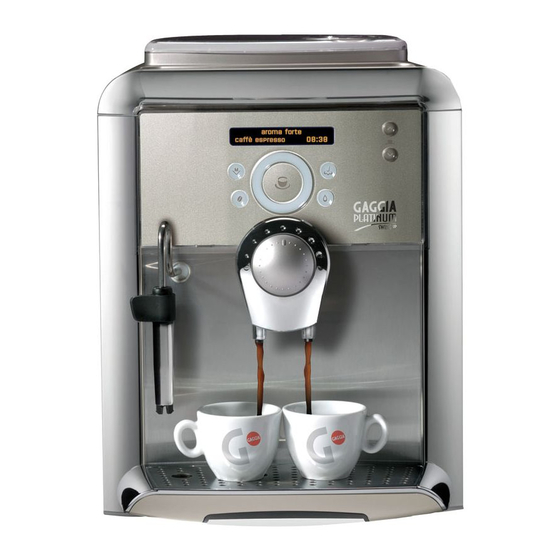
APPLIANCE Coffee bean hopper Coffee bean hopper cover Cup warming surface Compartment for pre- ground coffee Control panel Button for raising/lowering Power button the drip tray Service door E-Plus System Dispensing head Coffee grounds drawer Brew Group Hot water / steam knob Drip tray + grill Hot water / steam spout “Milk Island”... -
Page 7: Installation
INSTALLATION STARTING THE MACHINE Make sure that the main power button is not pressed in the “ON” position. Remove the coffee bean hopper Close the cover pushing it down Remove the water tank. We cover. completely. recommend installing the “Aqua Fill the hopper with coffee beans. -
Page 8: Setting The Language
INSTALLATION SETTING THE LANGUAGE When the machine is switched-on for the fi rst time, it requires the selection of the desired language. This allows you to adjust the parameters of the beverages to the typical parameters of the country where the machine is used. This is why some languages are differentiated also by country. language language language... -
Page 9: Aqua Prima" Water Filter
“AQUA PRIMA” WATER FILTER To improve the quality of the water you use, and guarantee longer machine life at the same time, it is recommended that you install the “Aqua Prima” water fi lter. After installation, go to the fi lter initialization program (see programming). -
Page 10: Display
THE BEVERAGE. espresso coffee 08:33 The Gaggia coffee machine allows using all types of coffee beans available on the market (except caramelized ones). However, coffee is a natural product and its features may change according to its origin and blend. -
Page 11: Adjustments
ADJUSTMENTS COFFEE INTENSITY The E-Plus System has been carefully designed to give your coffee the intense taste you desire. Simply turn the knob and you will notice that the coffee goes from mild intensity to strong intensity. E-PLUS SYSTEM - ESPRESSO PLUS SYSTEM MEDIUM COFFEE To adjust the intensity of the brewed coffee. -
Page 12: Beverage Dispensing
BEVERAGE DISPENSING COFFEE BREWING CAN BE STOPPED AT ANY TIME BY PRESSING THE BUTTON AGAIN. THE STEAM SPOUT MAY REACH HIGH TEMPERATURES: DANGER OF SCALDING. DO NOT TOUCH IT WITH BARE HANDS. Check that all the containers are clean. To carry out this operation, follow the instructions in the “Cleaning and Maintenance”... -
Page 13: Dispensing Beverages With Ground Coffee
DISPENSING BEVERAGES WITH GROUND COFFEE The machine allows you to use pre-ground and decaffeinated coffee. Pre-ground coffee must be poured into the appropriate compartment positioned next to the coffee bean hopper. Only use coffee ground for espresso machines and never coffee beans or instant coffee. WARNING: ONLY PUT PRE-GROUND COFFEE INTO THE COMPARTMENT WHEN YOU WISH TO DISPENSE THIS TYPE OF BEVERAGE. -
Page 14: Hot Water Dispensing
BEVERAGE DISPENSING HOT WATER DISPENSING DISPENSING MAY BE PRECEDED BY SHORT SPURTS OF HOT WATER AND SCALDING IS POSSIBLE. THE HOT WATER/STEAM SPOUT MAY REACH HIGH TEMPERATURES: DO NOT TOUCH IT WITH BARE HANDS. USE THE APPROPRIATE HANDLE ONLY. selected hot water Place a container beneath the Press the... -
Page 15: Dispensing Steam
DISPENSING STEAM DISPENSING MAY BE PRECEDED BY SHORT SPURTS OF HOT WATER AND SCALDING IS POSSIBLE. THE HOT WATER/STEAM SPOUT MAY REACH HIGH TEMPERATURES: DO NOT TOUCH IT WITH BARE HANDS. USE THE APPROPRIATE HANDLE ONLY. selected steam Place a container with the Turn the knob to the Press the button. -
Page 16: Making Cappuccino
BEVERAGE DISPENSING MAKING CAPPUCCINO DISPENSING MAY BE PRECEDED BY SHORT SPURTS OF HOT WATER AND SCALDING IS POSSIBLE. THE HOT WATER/STEAM SPOUT MAY REACH HIGH TEMPERATURES: DO NOT TOUCH IT WITH BARE HANDS. USE THE APPROPRIATE HANDLE ONLY. selected steam Fill 1/3 of the cup with cold milk. -
Page 17: Milk Island (Optional)
MILK ISLAND (OPTIONAL) This device, which may be purchased separately, enables you to easily and comfortably prepare delicious cappuccinos. Warning: before using the Milk Island, read the manual and all precautions carefully for correct use. Important note: the quantity of milk in the carafe must never be below the “MIN” minimum level nor exceed the “MAX”... -
Page 18: Beverage Programming
BEVERAGE PROGRAMMING Every beverage can be programmed according to your individual tastes. 1. PROGRAMMING FOR SELF-LEARNING You can program the quantity of coffee and/or milk you wish to be dispensed into the cups when you press the button for any beverage. Select the type of beverage you want to program, then press and hold the button until the display shows (for example):... - Page 19 strong aroma beverage settings espresso coffee 08:33 Check that the water and coffee bean Select “beverage settings”. Press Press the button. container are full; place the cup under button to confi rm. the dispensing head. espresso coffee medium aroma When the settings are espresso coffee changed, the message on the display starts fl...
-
Page 20: Programming The Machine
PROGRAMMING THE MACHINE Some of the machine’s functions can be programmed to customize operations according to your individual preferences. beverage settings Press the button to: - confi rm the selection; - save the new settings. 1 Press the button. 2 Navigate the click wheel with your fi nger to: select the functions change the function settings. -
Page 21: Machine Settings
MACHINE SETTINGS To change the machine’s operation settings, press the button, select “machine settings” and press the button. Navigate the click wheel with your fi nger to: language rinsing English set the coffee circuit rinse cycle. set the menu language. water hardness cup-warming surface activate/deactivate the operation of... -
Page 22: Water Hardness" Menu
PROGRAMMING THE MACHINE “WATER HARDNESS” MENU > machine settings > water hardness With the “Water hardness” function you can adapt your machine to the degree of hardness of the water you use, so that the machine will request descaling at the right moment. Hardness is expressed on a scale from 1 to 4. -
Page 23: Filter Alarm" Menu
“FILTER ALARM” MENU > machine settings > filter alert To turn on/off signalling the need to change the “Aqua Prima” water fi lter. The machine informs the user when the “Aqua Prima” fi lter needs to be replaced. Select by navigating the click machine settings filter alert wheel with your fi... -
Page 24: Clock Setting" Menu
PROGRAMMING THE MACHINE “CLOCK SETTING” MENU > machine settings > clock setting To set the current time, date and hour format to display. In this menu you can set: machine settings clock setting - the current time (hour and minutes) - the hour format (24 hours - AM/PM) - the current date (day - month - year - day of the week) -
Page 25: Time Format
Time format > machine settings > clock setting > time format To set the time view mode. This setting adjusts all clock functions to either “am/pm” or “24 hour” formats. clock setting 2.7.2 time format 2.7.2 time format 2.7.2 time format The machine also allows displaying the time in the American format (am/pm). - Page 26 PROGRAMMING THE MACHINE 2.7.3 date setting 2.7.3 date setting tuesday 18/04/06 tuesday 18/04/06 The day of the week is automatically set according to the set date. Select the month and press the Select the year and press the button to confi rm. button to confi...
-
Page 27: Maintenance
MAINTENANCE MAINTENANCE To access the machine’s maintenance programs, press the button, select “maintenance” and press the button. Navigate the click wheel with your fi nger to: water filter group wash access the specifi c “Aqua Prima” wash the Brew Group. water fi... - Page 28 MAINTENANCE Filter state > maintenance > water filter > filter status To turn the fi lter check on/off; the machine checks when the “Aqua Prima” water fi lter needs to be changed and informs the user. This function must be activated when the fi lter is installed. maintenance water filter 3.1.2...
-
Page 29: Descaling" Menu
“DESCALING” MENU > maintenance > descaling. To manage the decalcifi cation of the machine’s circuits. In this menu you can: maintenance descaling - check the number of litres before descaling; - carry out the machine descaling cycle. Litres remaining > maintenance > descaling > litres left To display how many litres of water can still be used before the machine requests a descaling cycle. - Page 30 MAINTENANCE Note: before beginning the descaling cycle make sure that: 1. a large enough container is positioned under the water spout; 2. THE “AQUA PRIMA” FILTER HAS BEEN REMOVED. maintenance descaling 3.2.2 descaling execute now Descaling is carried out at a controlled temperature. If the machine is cold, you must wait until it has reached the right temperature;...
- Page 31 When the solution is fi nished the following message appears on the display: descaling cycle passage fill the please wait [ 2/15] water tank The machine begins to dispense The intervals are displayed in such Remove the water tank, rinse the descaling solution through the a way as to check the state of with fresh drinking water to...
-
Page 32: Brew Group Washing
Brew Group Washing > maintenance > group wash To clean the machine’s internal circuits used for brewing coffee. To wash the Brew Group, simply clean with water as shown on page 35. This wash completes the maintenance process of the Brew Group. We recommend carrying out this cycle on a monthly base or every 500 coffees using the tablets, which can be purchased separately at your local dealer. -
Page 33: Programming The Machine
PROGRAMMING THE MACHINE ENERGY SAVING To adjust the energy saving parameters, press the button, select “energy saving” and press the button. Navigate the click wheel with your fi nger to: turn-off delay monday Set the machine’s turn on/off times (one Set the time which must pass after the last setting for each day of the week) product dispensing before the machine... -
Page 34: Monday" Timer Setting
“MONDAY” TIMER SETTING > energy saving > monday This and the following menus are used to set the turn on/off times for each day of the week. The procedure described below shows how to set the turn on/off times for “Monday”. To set the turn on/off times for the other days of the week, follow the same procedure after selecting the desired day. -
Page 35: Special Functions
SPECIAL FUNCTIONS This menu allows you to access special functions present on the machine. Press the button to access and select “special function” and press the button. Navigate the click wheel with your fi nger to: reset settings execute now restore the basic machine operating parameters. -
Page 36: Cleaning And Maintenance
CLEANING AND MAINTENANCE MAINTENANCE DURING OPERATION During normal operation, the “empty grounds” message may appear. This operation must be performed when the machine is on. If you remove grounds with the machine off or when not signaled on the display, the count of the grounds emptied into the drawer is not reset. -
Page 37: Cleaning The Brew Group
CLEANING THE BREW GROUP The Brew Group must be cleaned at least once a week. Before removing the group, remove the coffee grounds drawer as shown in fi g.1 on page 34. Wash the Brew Group with lukewarm water. Lubricate the Brew Group after approximately 500 brewing cycles. The grease for the Brew Group’s lubrication may be purchased in authorized service centres. -
Page 38: Error Codes
ERROR CODES GUIDE MESSAGE THAT APPEARS HOW TO REMOVE THE MESSAGE out of service (xx) Where (xx) identifi es an error code.Turn off and after 30 restart to fix… seconds turn the machine on again to restore normal operation.If the problem persists, call the service centre and give the code (xx) shown on the display. -
Page 39: Troubleshooting
TROUBLESHOOTING GUIDE MESSAGE THAT APPEARS HOW TO REMOVE THE MESSAGE descale A descaling cycle must be performed on the machine’s internal circuits. stand-by… Press the button. energy saving… ROBLEMS AUSES OLUTIONS The machine does not turn on. The machine is not connected to the Connect the machine to the power power source. -
Page 40: Safety Rules
SAFETY RULES IN CASE OF EMERGENCY IMMEDIATELY UNPLUG THE CORD FROM THE OUTLET. ONLY USE THE APPLIANCE • Indoors. • For preparing coffee, hot water and for frothing milk. • For domestic use. • This appliance is not intended for use by persons (including children) with reduced physical, sensory or mental capabilities, or lack of experience and knowledge, unless they have been given supervision or instruction concerning use of the appliance by a person responsible for their safety. -
Page 41: Replacement Parts
concentration of dust or oily substances suspended in the air. • Do not install the machine on top of other appliances. DANGERS • The appliance must not be used by children and persons who have not been informed of its operation. •... -
Page 42: Technical Data
SAFETY RULES - TECHNICAL DATA ADDITIONAL INFORMATION FOR CORRECTLY USING THE “AQUA PRIMA” FILTER. Please follow these simple instructions to correctly use the “Aqua prima” fi lter: 1. Keep the “Aqua prima” fi lter cool and away from sunlight; the room temperature should be between +5°C and +40°C;... - Page 43 EC DECLARATION OF CONFORMITY EC 73/23, EC 89/336 EC92/31, EC93/68 Gaggia s.p.a. Strada prov. per Abbiategrasso, snc 20087 Robecco sul Naviglio - Milano . Italy declare under our responsability that the product: AUTOMATIC COFFEE MAKER SUP 034BR to which this declaration relates is in conformity with the following standards or other normative documents : •...
- Page 44 GAGGIA S.p.A. 20087 Robecco sul Naviglio - MI - Italia Tel. +39 02949931 Fax +39 029470888 The manufacturer reserves the right to change the features of the product without prior notice. Le producteur se réserve le droit d“apporter toutes modifications sans préavis.
- Page 45 Milk Island Manuale d’uso e manutenzione Prima di utilizzare la macchina consultare le presenti istruzioni. Leggere attentamente le norme di sicurezza Operation and maintenance manual Before using the machine, please read the attached operating instructions. Carefully read the safety rules Bedienungsanleitung Bitte lesen Sie diese Bedienungsanleitung und die Sicherheitsvorschriften vor Verwendung des Milk Island aufmerksam durch.
-
Page 46: General Information
GENERAL INFORMATION ..........12 TECHNICAL SPECIFICATIONS . -
Page 47: Technical Specifications
COMPONENTS – TECHNICAL SPECIFICATIONS Emulsifying group Sugar container Handle Connection/support base Jug support LED (indicates the operating status of the Milk Island) Electro-hydraulic connection Release button to the coffee machine TECHNICAL SPECIFICATIONS Power supply Milk Island is directly powered by the coffee machine Housing material Thermoplastic Jug material... -
Page 48: Installing The Milk Island
INSTALLATION INSTALLING THE MILK ISLAND Warning: Before installing the Milk Island, remove the water tank, drip tray, dregs drawer and empty the coffee bean hopper of the espresso machine. To connect the Milk Island, place the machine on its side. Turn the coffee machine off and unplug the power cord from the socket. Remove the Milk Island from After removing the necessary items Remove the cover and keep it... -
Page 49: Operating The Milk Island
OPERATING OPERATING THE MILK ISLAND Warning: Before using the Milk Island, clean the milk jug and all components. Ensure that all the components have been installed properly. The glass of the milk jug can reach very high temperatures: danger of scalding! Only use the Milk Island with milk or water. DO NOT USE any other liquid (other than milk or water) or chemical compound in the Milk Island. -
Page 50: Cleaning The Milk Island
CLEANING CLEANING THE MILK ISLAND Warning: Do not immerse the Milk Island base in any liquid. Maintenance and cleaning operations of the base can only be carried out when the machine is cold and disconnected from the power supply. All components described in this section may be washed in a dishwasher for home use. Do not use sharp objects or harsh chemical products (solvents) for cleaning. - Page 51 Re-assemble all the covered Assemble the handle. Keep the upper part in contact components. Replace the Place the upper part as shown in and insert the lower part of the emulsifying group onto the jug. the fi gure. handle. Warning: make sure that the cover is correctly inserted in the tube located inside the jug.
-
Page 52: Removing The Milk Island
REMOVING THE MILK ISLAND REMOVING THE MILK ISLAND Warning: Before removing the Milk Island remove the water tank, drip tray and dregs drawer and empty the coffee bean hopper. Turn the coffee machine off and unplug machine. To disconnect the Milk Island, gently position the coffee machine onto its right side, so the left side is up. Turn the coffee machine off and unplug the power cord from the socket. -
Page 53: Trouble Shooting
The coffee machine is not ready to Check machine operation. dispense steam. Please contact Gaggia customer service for problems not covered in the above trouble shooting section or when a problem cannot be resolved. SAFETY RULES Never place live parts in contact with water: danger of short circuit! Steam and hot water can cause scalding! NTENDED USE The Milk Island is exclusively intended for domestic use. - Page 54 SAFETY RULES Hot water or steam may spill out: danger of scalding! Do not use the Milk Island and the coffee machine outdoors. Do not keep the machine at a temperature below 0°C (32°F); freezing may damage the machine. Do not place the machine or the Milk Island on hot surfaces or close to open fl ames to prevent the housing from melting or being damaged.
- Page 55 GAGGIA S.p.A. 20087 Robecco sul Naviglio - MI - Italia Tel. +39 02949931 Fax +39 029470888 Il produttore si riserva il diritto d`apportare qualsiasi modifica senza preavviso. The manufacturer reserves the right to change the features of the product without prior notice.