Table of Contents
Advertisement
Operation / Installation Manual
(Residential and Commercial indoor unit)
WARNING: If the information in these instructions is not followed exactly, a fire
or explosion may result causing property damage, personal injury or death.
– Do not store or use gasoline or other flammable vapors and liquids in the vicinity
of this or any other appliance.
– WHAT TO DO IF YOU SMELL GAS
• Do not try to light any appliance.
• Do not touch any electrical switch; do not use any phone in your building.
• Immediately call your gas supplier from a neighbor's phone. Follow the gas
supplier's instructions.
• If you cannot reach your gas supplier, call the fire department.
– Installation and service must be performed by a qualified installer, service agency
or the gas supplier.
To Suit Models:
REU-V2520FFU......
REU-V2520FFUC...
REU-V2532FFU......
REU-V2532FFUC....
ANS Z21.10.3=CSA 4.3
R53
C53
R85
C85
Advertisement
Chapters
Table of Contents

Related Manuals for Rinnai V2532FFU Series


Summary of Contents for Rinnai V2532FFU Series
- Page 1 Operation / Installation Manual To Suit Models: REU-V2520FFU..REU-V2520FFUC... REU-V2532FFU..REU-V2532FFUC..(Residential and Commercial indoor unit) ANS Z21.10.3=CSA 4.3 WARNING: If the information in these instructions is not followed exactly, a fire or explosion may result causing property damage, personal injury or death.
-
Page 2: Specifi Cations
If remote fails or becomes disconnected unit defaults to 100°F with water flowing, this is an anti-scald feature. Rinnai is continually updating and improving products, therefore, specifications are subject to change without prior notice. Local, state, provincial and federal codes must be adhered to prior to installation. -
Page 3: Limited Warranty
Rinnai will replace the product with a comparable product, at Rinnai’s discretion. If a component or product returned to Rinnai is found to be free of defects in material or workmanship, or damaged by improper installation or damaged during return shipping, the warranty claim for product, parts and labor may be denied. - Page 4 . Please complete the Warranty registration either online or mail it to Rinnai at the address shown on the card. Receipt of warranty registration by Rinnai will constitute proof-of-purchase for this product.
-
Page 5: Table Of Contents
Controllers Set Pattern/Temperature Tables .......18 Error Messages ................19 Maintenance & Service Information ........20,21 Trouble Shooting and Common Questions ........22 For Your Safety Read Before Operating ........23 Operating Instructions ............23,24 Care & Lime Condition Warning ..........24 Installer’s Instructions ............25-47 Rinnai America FF Models... -
Page 6: Owner's Installation Information
O W N E R ’ S I N S T A L L A T I O N I N F O R M A T I O N All Rinnai water heater(s) MUST be installed by a state qualifi ed or licensed contractor. -
Page 7: Features Of Your New Water Heater
Ignition is electronic, there is no pilot light. When the hot water tap is off, no gas is used. You save energy and money with the Rinnai Water Heater. The temperature of the outgoing hot water is constantly monitored by a built in sensor. If... -
Page 8: Safety Issues
S A F E T Y I S S U E S Depending on the weather conditions and Always check water temperature by hand the length of the pipe between the Rinnai before entering the shower or bath. The Water Heater and the tap in use, there may temperature may have been changed. -
Page 9: Basic Operation
TAP IS OPEN. WATER TEMPERATURE SETTING ALLOWED WHEN USED IN NURSING HOMES, To take control of the Rinnai Water Heater SCHOOL, DAY CARE all hot water taps must be closed. Press CENTERS, AND ALL the "Priority button" on the Controller you... -
Page 10: About Hot Water
A B O U T H O T W A T E R Hot Water Is Dangerous, especially for the young and the elderly or the infi rm. The Rinnai Water Heater allows you to precisely control the temperature of your hot water, ensuring safe hot water temperatures. -
Page 11: General Controller Information
REMOTE CONTROLLERS IDENTIFICATION MC-91-1US (comes with the unit) MC-100V-1US (optional) BC-100V-1US (optional) The controller(s) for the Rinnai Water Heater allow the customer to control the functions of the water heater and to diagnose certain fault conditions Rinnai America FF Models... -
Page 12: Remote Controller Operation
Press and hold ‘On/Off’ button for 5 seconds while water heater is OFF. To change back from C to F, please repeat step 1. MUTE To eliminate the beeping sound, press and hold button simultaneously until a ‘beep’ is heard (approximately 5 seconds). FF Models Rinnai America... -
Page 13: Deluxe Controller
Thermostat Sound Volume Water Volume Increases or decreases the desired Used to select the voice prompt Used to select Water Smart / Bath water temperature. volume. Fill volumes. Rinnai America FF Models... - Page 14 Once the hot water is running, if the set temperature is either too hot or cold, press the buttons until the desired temperature is reached. COLD COLD TEMPERATURE CANNOT BE ADJUSTED EXCEPT BETWEEN F AND 110 F WHEN ANY HOT WATER TAP IS OPEN. FF Models Rinnai America...
- Page 15 Temperature Controller Up and Down buttons simultaneously for more than 3 seconds. To return to original settings, repeat this step. Avoid getting water in the speaker as this may cause damage. FF Models Rinnai America...
- Page 16 = Remain by the bath during the fi lling process. = Use a low bath fi ll volume such as 25 gallons or less. ‘Water Smart / Bath Fill’ button is unavailable with the MSA Controller System. Rinnai America FF Models...
- Page 17 Kitchen Controller monitor will go out. COMBINING CONTROLLERS AND DELUXE CONTROLLERS Controller and Deluxe Controller can be combined and will function as described in other sections of this manual. Refer to the table on page 18 FF Models Rinnai America...
-
Page 18: Controllers Set Pattern/Temperature Tables
Controllers allow the water temperature to be set from the various locations where they are installed. The temperature selected will be available to all outlets. Below are the combination of Controllers that are offered by Rinnai: Controllers Combination Pattern —... -
Page 19: Error Messages
E R R O R M E S S A G E S The Rinnai Water Heater has the ability to check its own operation continuously. If a fault occurs, an Error Message will fl ash on the Digital Monitor of the Remote Controllers. This assists with diagnosing the fault, and may enable you to overcome a problem without a service call. -
Page 20: Maintenance & Service Information
5) Do not obstruct fl ow of combustion and ventilation air. In the case of any fault or error message from the Rinnai Water Heater, fi rst turn all hot water taps off. Wait for 5 seconds. Turn the hot water tap back on. - Page 21 The water heater must be cleaned annually. Keep the water heater clear of dust and debris especially in and around burner. Cleaning procedures for the Rinnai Water Heater are as follows: 1) Turn off and disconnect electrical power. Allow to cool for one hour.
-
Page 22: Trouble Shooting And Common Questions
fi xture, water pressure, fl ow rate of fi xture in use, etc. - After I turn off the hot water tap, the fan on the Rinnai Water Heaters continues to run! - The fan is designed to be on for 65 seconds after the fl... -
Page 23: For Your Safety Read Before Operating
STOP! Follow “B” in 5) Turn the manual valve located at gas the safety information above on this label. inlet of the appliance clockwise If you don’t smell gas, go to next step. to “OFF”. FF Models Rinnai America... -
Page 24: Care & Lime Condition Warning
If you notice “LC” fl ashing on the remote key pad, this means the unit is beginning to lime up, and MUST be fl ushed. Contact a qualifi ed Rinnai service technician to fl ush the appliance. Failure to fl ush the appliance when “LC” is fl ashing, will cause damage to the heat exchanger. -
Page 25: Installer's Instructions
If you are not properly trained, you should not install this unit. The warranty may be voided due to installation by a non-qualifi ed installer. For information on Rinnai Training Courses, call 1-800-621-9419. Warnings ..............26,27 Locating the Vent Terminal ........28,29 Performance Data ............ -
Page 26: Warnings
DO NOT use this water heater for space heating, combination space heating/ domestic water heating, or commercial water heating applications. 3) The Rinnai Water Heater is not suitable for use in pool or spa applications. 4) This unit is designed to be installed indoors using the proper vent piping to exhaust by-products of combustion to the outside environment. - Page 27 Toxic chemicals such as those used for boiler water treatment are NOT to be introduced to the portable water used for space heating. The Rinnai Water Heater, if it will be used as a potable water source, must not be connected to a system that was previously used with a nonpotable water heating appliance.
-
Page 28: Locating The Vent Terminal
I N S TA L L E R ’ S I N S TA L L AT I O N I N S T R U C T I O N S Locating the vent terminal FF Models Rinnai America... - Page 29 ONLY Rinnai Approved vent materials and components can be used to vent the water heaters. When installing your Rinnai vent system, you MUST follow Rinnai’s Venting Instructions found in each vent terminal box. These instructions provide the maximum allowable vent heights for both horizontal and vertical venting, how to cut the vent components, and pipe installations.
-
Page 30: Performance Data
PRESSURE DROP CURVE V2520FFU/C V2532FFU/C I N S TA L L E R ’ S I N S TA L L AT I O N I N S T R U C T I O N S OUTLET FLOW DATA... -
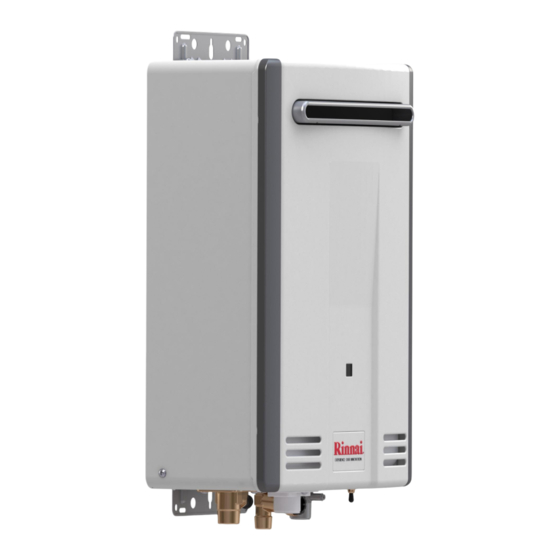
Page 31: Dimensions
INSTALLER’S INSTALLATION INSTRUCTIONS Dimensions MC-91-1US 3-1/2” MC-100V-1US 5” BC-100V-1US 8” FITTING DIAMETER REU-V2532FFU REU-V2520FFU DESCRIPTION REU-V2532FFUC REU-V2520FFUC Width 13.8" Depth 9.2" - 10.8" Height - Unit 23.6" Height - Including Brackets 24.7" Hot Water Outlet (from wall) 3.6" - 5.1"... -
Page 32: Recommended Piping For Basic Installation
Confer Pressure Relief Valve Solenoid Valve with local building officials before installation. RINNAI WATER HEATERS Domestic Hot Water - Standard Installation 103 International Drive 1 Rinnai Water Heater Peachtree City, Georgia 30269 Rinnai America FF Models... -
Page 33: Recommended Piping For Circulation Systems
Confer Pressure Relief Valve Solenoid Valve with local building officials before installation. RINNAI WATER HEATERS Domestic Hot Water - Circulation Systems 103 International Drive 1 Rinnai Water Heater with Electric Storage Tank Peachtree City, Georgia 30269 FF Models Rinnai America... -
Page 34: Optional Piping For Circulation Systems
Confer Pressure Relief Valve Solenoid Valve with local building officials before installation. RINNAI WATER HEATERS Domestic Hot Water with Circulation 103 International Drive 1 Rinnai Water Heater Peachtree City, Georgia 30269 Rinnai America FF Models... -
Page 35: Circulating Pump
I N S TA L L E R ’ S I N S TA L L AT I O N I N S T R U C T I O N S RECOMMENDED SCALE FLUSH PROCEDURE RINNAI Water Heater Flush Procedure Disconnect power to the Rinnai Water Heaters. Close valves V3 and V4. Connect pump outlet hose H1 to service valve V2. -
Page 36: Venting
I N S TA L L E R ’ S I N S TA L L AT I O N I N S T R U C T I O N S Venting The maximum allowable “Equivalent Length (D)” of vent pipe for the Rinnai water heater is 41 feet (as determined using the formula below). If “D” is greater than 41, the vent/air intake piping is too long or there are too many elbows, redesign the vent pipe run. - Page 37 Vent/Air Intake for Internal “FFU” model Hot Water Systems The only vent/air intake system approved for use with this appliance by CSA is the Rinnai/ Ubbink vent system or the Heatfab Saf-T Vent SC vent system. The vent system must vent directly to the outside of a building and use outside air for combustion as indicated in the diagrams below.
-
Page 38: Freeze Protection
There is no warranty on freeze damaged water heater components. Rinnai is continually updating and improving products, therefore, specifi cations are subject to change without prior notice. Local, state, provincial and federal codes must be adhered to prior to installation. -
Page 39: Gas Piping Sizing Chart
After determining the length of pipe required select the pipe size that will supply the cubic feet per hour of gas required for the input rating of the Rinnai Water Heaters. The formula for fi guring the cubic feet per hour required is:... -
Page 40: Gas Piping Notes
I N S TA L L E R ’ S I N S TA L L AT I O N I N S T R U C T I O N S Gas Piping Notes 1) A manual gas control valve must be placed upon the gas supply line to the Rinnai Water Heater. A union can be used on the connection above the shut off valve for the future servicing or disconnection of the unit. -
Page 41: Water Piping Notes
2) All soldering materials and piping must be compatible with potable water. 3) Purge the water line to remove from it all debris and air. Debris will damage the Rinnai Water Heaters. -
Page 42: Electrical Connection Notes
INSTALLER’S INSTALLATION INSTRUCTIONS Electrical Connection Notes WARNING: The Rinnai Water Heaters must be electrically grounded in accordance with local codes or in the absence of local codes with the most recent edition of the National Electrical Code, ANSl/NFPA 70. In Canada, all electrical wiring to the Rinnai Water Heaters should be in accordance with local codes and the Canadian Electrical Code, CSA C22.1 Part 1. -
Page 43: Lighting The Unit
3) Turn the manual gas control valve on. STOP!! READ THE SAFETY ISSUES ON PAGES 8 4) Turn on any hot water tap. The Rinnai Water Heater should light and begin heating your water. If the Rinnai Water Heater fails to light 1) DO NOT ATTEMPT TO LIGHT BY HAND. -
Page 44: Remote Controllers
I N S TA L L E R ’ S I N S TA L L AT I O N I N S T R U C T I O N S Remote Controllers- General The remote controls for the Rinnai Water Heater allow the customer to control the functions of the water heater and to diagnose certain fault conditions. - Page 45 fl ush mounting with the wall Disconnect the power from the Rinnai Water Heater. Remove the cover of the Rinnai Water Heater. Remove the plastic cover from the PCB and electrical connections.
-
Page 46: Testing
11) Check the operation of the unit. Check the operation of each of the remote controller(s). Check the operation of the Power failure protection system. 12) Explain the proper operation of the Rinnai Water Heaters to the customer. Rinnai America... -
Page 47: Schematic Diagram
I N S TA L L E R ’ S I N S TA L L AT I O N I N S T R U C T I O N S Schematic Diagram 2532FFU (R85) & 2532FFUC (C85) 2520FFU (R53) - (Fixed By-Pass) *2520FFUC (C53) - (No By-Pass) FF Models Rinnai America... - Page 48 060 00012 30775 7 U245-2602(01) Printed in Japan_05/05...