DeWalt DWS780 Operating Instructions Manual
Mitre saw
Hide thumbs
Also See for DWS780:
- User manual ,
- Original instructions manual (168 pages) ,
- Instruction manual (61 pages)
Table of Contents
Advertisement
Advertisement
Table of Contents

Related Manuals for DeWalt DWS780


Summary of Contents for DeWalt DWS780
- Page 1 DWS780 www.
- Page 2 Figure 1A Figure 1B...
- Page 3 Figure 2 Figure 3 Figure 4 Figure 5 Figure 6 Figure 7...
- Page 4 Figure 8 Figure 9 Figure 10A Figure 10B Figure 10C Figure 10D...
- Page 5 Figure 11 Figure 12 Figure 13 Figure 14 Figure 15 Figure 16...
- Page 6 Figure 17A Figure 17B Figure 18 Figure 19 Figure 20 Figure 21...
- Page 7 Figure 22 Figure 23 “A” Figure 24A Figure 24B Figure 25A Figure 25B...
- Page 8 Figure 26A Figure 26B Figure 27 Figure 28A Figure 28B...
-
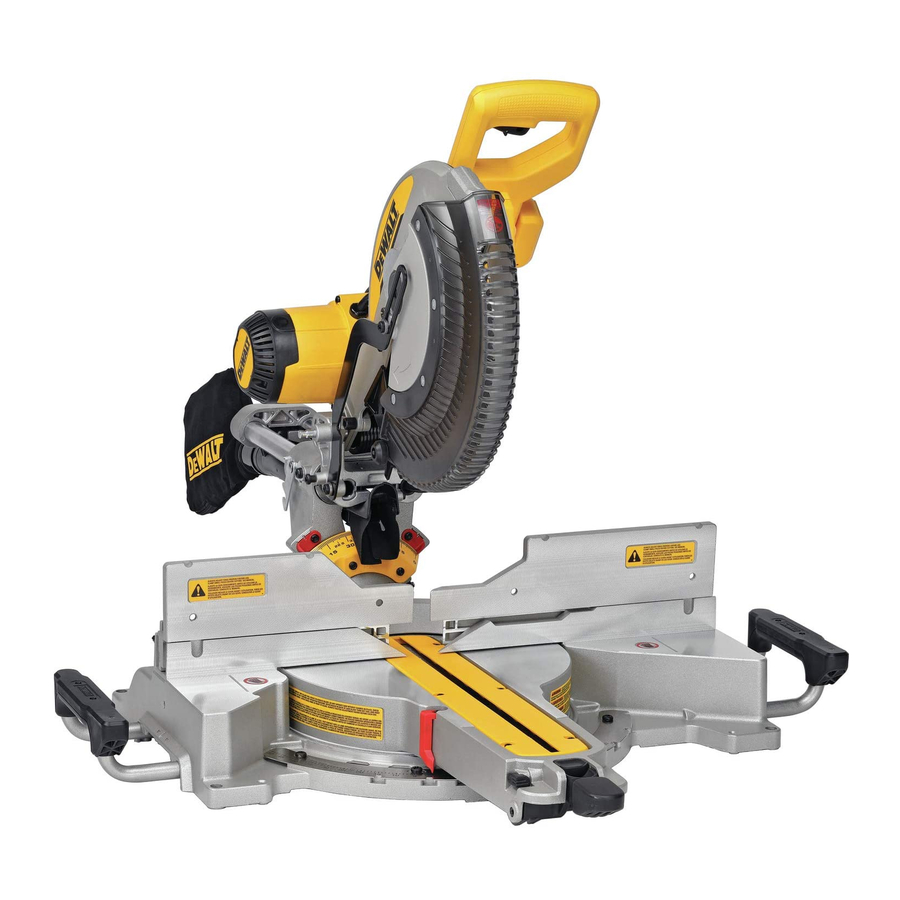
Page 9: Technical Data
EN G LI S H MITRE SAW DWS780 Congratulations! An estimation of the level of exposure to vibration should also take into account the times when the tool is switched You have chosen a D WALT tool. Years of experience, thorough off or when it is running but not actually doing the job. -
Page 10: Safety Instructions
E NG L I S H Safety Instructions 15. Disconnect tools. When not in use, before servicing and when changing accessories WARNING! When using electric tools basic safety such as blades, bits and cutters, disconnect tools from the power precautions should always be followed to reduce the risk supply. -
Page 11: Residual Risks
EN G LI S H • Do not use HIGH SPEED STEEL blades. Turn the machine on and start new cutting operation with reduced feed force. • Do not use cracked or damaged saw blades. • Never cut light alloy, especially magnesium. •... -
Page 12: Electrical Safety
INTENDED USE WARNING: Never modify the power tool or any part of it. Your D WALT DWS780 Mitre Saw has been designed for professional Damage or personal injury could result. cutting of wood, wood products and plastics. It performs the sawing Fig. -
Page 13: Assembly And Adjustments
EN G LI S H ASSEMBLY AND ADJUSTMENTS 3. Assemble the outer clamp washer onto the spindle. 4. Install the blade screw and, engaging the spindle lock, tighten the WARNING: To reduce the risk of injury, turn unit off screw firmly with wrench provided (turn counterclockwise, left-hand and disconnect machine from power source before threads). - Page 14 E NG L I S H 22.5° BEVEL PAWLS (FIG. 12) BEVEL POINTER ADJUSTMENT (FIG. 12) Your saw is equipped to rapidly and accurately set a 22.5° bevel, left If the bevel pointers (yy) do not indicate zero, loosen each screw (xx) or right.
-
Page 15: Prior To Operation
EN G LI S H MITRE LOCK ADJUSTMENT (FIG. 1A, 16) • ALWAYS MAKE DRY RUNS (UNPOWERED) BEFORE FINISH CUTS SO THAT YOU CAN CHECK THE PATH OF THE BLADE. The mitre lock rod (a7) should be adjusted if the table of the saw can be DO NOT CROSS HANDS, AS SHOWN IN FIGURE 17B. - Page 16 E NG L I S H MITRE CROSSCUT should be fully inserted into the base. Ensure this groove is fully inserted into the base of the mitre saw. If the groove is visible, the The mitre angle angle is often 45° for making corners, but can be set clamp will not be secure.
-
Page 17: Special Cuts
EN G LI S H The chart (Table 1) shown below will assist you in selecting the proper INSTRUCTIONS FOR CUTTING CROWN MOULDING LAYING FLAT AND USING THE bevel and mitre settings for common compound mitre cuts. COMPOUND FEATURES (FIG. 24A) •... -
Page 18: Maintenance
ENGLISH CUTTING LARGE MATERIAL (FIG. 27) • Use only identical D WALT brushes. Use of the correct grade of brush is essential for proper operation of electric brake. New brush Occasionally you will encounter a piece of wood a little too large to fit assemblies are available at D WALT service centres. -
Page 19: Protecting The Environment
ENG LI SH CROWN MOULDING FENCE: DE7084-XJ GUARANTEE The crown moulding fence (ll) is used for precision cutting of crown moulding. WALT is confident of the quality of its products and offers an DUST BAG: DE7053-XJ outstanding guarantee for professional users of the product. Equipped with a zipper for easy emptying, the dust bag (mm) will This guarantee statement is in addition to and in no way capture the majority of the sawdust produced.