Chamberlain KLIK3U User Manual
Universal remote control
Hide thumbs
Also See for KLIK3U:
- User manual (19 pages) ,
- Manual (52 pages) ,
- Getting started (22 pages)
Table of Contents
Advertisement
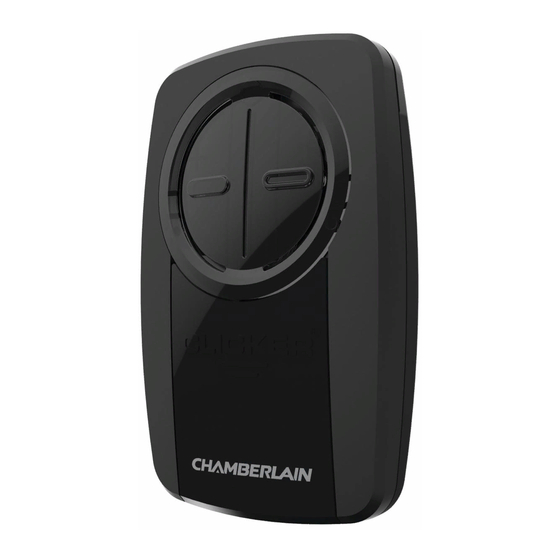
MODEL KLIK3U
Universal Remote Control
Read instructions thoroughly BEFORE beginning.
If using the Universal Remote Control with residential door openers, the remote control must be used only with
STOP
door openers manufactured after 1993 that utilize photoelectric sensors. The photoelectric sensors are always
located on or near the bottom of the door track.
To prevent possible SERIOUS INJURY or DEATH from a moving gate or door:
•
ALWAYS keep remote controls out of reach of children. NEVER permit children to operate, or play with remote control
transmitters.
•
Activate gate or door ONLY when it can be seen clearly, is properly adjusted and there are no obstructions to door travel.
•
ALWAYS keep gate or door in sight until completely closed. NEVER permit anyone to cross path of moving gate or door.
Advertisement
Table of Contents

Related Manuals for Chamberlain KLIK3U


Summary of Contents for Chamberlain KLIK3U
- Page 1 MODEL KLIK3U Universal Remote Control Read instructions thoroughly BEFORE beginning. If using the Universal Remote Control with residential door openers, the remote control must be used only with STOP door openers manufactured after 1993 that utilize photoelectric sensors. The photoelectric sensors are always located on or near the bottom of the door track.
-
Page 2: Getting Started
GETTING STARTED The remote control can be programmed to activate up to two products, such as a garage door opener, gate operator, or commercial door operator. The images throughout this manual are for reference only and your product may look different. Gate Operator Commercial Door Operator Garage Door Opener... -
Page 3: Programming To Door Opener With Learn Button
GARAGE DOOR OPENERS Programming to a Garage Door Opener with a LEARN Button The LEARN button is typically located on the back or side panel of the garage door opener or an external receiver. For help locating your LEARN button refer to the Help section in this manual or contact your garage door opener manufacturer. ®... -
Page 4: Genie Intellicode2 Door Opener
GARAGE DOOR OPENERS (continued) Programming to a Genie ® Intellicode ® 2 Garage Door Opener Before starting, you MUST have a Genie ® Intellicode ® 2 remote control with at least one button already programmed to the garage door opener. The images throughout this manual are for reference only and your product may look different. -
Page 5: Programming To A Commercial Door Operator With A Learn Button
COMMERCIAL DOOR OPERATORS Programming to a Commercial Door Operator with a LEARN Button The LEARN button is typically located on the logic board of the operator or an external receiver. For help locating your LEARN button contact your commercial door operator manufacturer. The images throughout this manual are for reference only and your product may look different. -
Page 6: Gate Operators
GATE OPERATORS Programming to a Gate Operator with a LEARN Button The LEARN button is typically located on the control board of the operator or an external receiver. For help locating your LEARN button contact your gate operator manufacturer. The images throughout this manual are for reference only and your product may look different. Press the program button on the remote control until Press and release the LEARN button* on your gate the LED turns on. -
Page 7: Programming To A Gto/Mighty Mule Gate Operator Without A Remote Control
GATE OPERATORS (continued) Programming to a GTO/Mighty Mule Gate Operator without a Remote Control If you have an existing GTO remote control go to the next page. The images throughout this manual are for reference only and your product may look different. Set the remote control DIP switches 1-9 to any Press the program button on the remote control until combination. -
Page 8: Programming To A Gto/Mighty Mule Gate Operator With A Remote Control
GATE OPERATORS (continued) Programming to a GTO/Mighty Mule Gate Operator with a Remote Control If you don’t have an existing GTO remote control go to the previous page. STOP Before beginning, check the DIP switches on the GTO remote control. If any of the DIP switches are in the "0" position, move them to either the "+"... -
Page 9: Programming To An External Receiver With Dip Switches
2 Position DIP Switch: 3 Position DIP Switch: For Chamberlain remotes DO NOT use the “0” position, use “+” or “-”. If programming fails reverse DIP switches (OFF to ON and ON to OFF). If you already have a 3-button remote, DIP switch #1 must be set to “-” if the large button is to open the door. - Page 10 EXTERNAL RECEIVERS (continued) Programming to an External Receiver with a LEARN Button If using the Universal Remote Control with residential door openers, the remote control must be used only with door STOP openers manufactured after 1993 that utilize photoelectric sensors. The photoelectric sensors are always located on or near the bottom of the door track.
-
Page 11: Alternative Programming Options
The images throughout this manual are for reference only and your product may look different. ** LiftMaster, Do-It, Master Mechanic, Raynor, True Value and Sears Craftsman are compatible with Chamberlain technology. Press the program button on the remote control until Press and release the LEARN button* on your product. -
Page 12: Alternative Programming Option For Products With Dip Switches
The images throughout this manual are for reference only and your product may look different. ** LiftMaster, Do-It, Master Mechanic, Raynor, True Value and Sears Craftsman are compatible with Chamberlain technology. Press the program button on the Universal Remote Match the DIP switches between the existing remote Control until the LED turns on. -
Page 13: Need Help
• For Chamberlain remote controls DO NOT use the “0” position, use “+” or “-”. If you already have a 3-button remote, DIP switch #1 must be set to “-” if the large button is to open the door. It may be necessary to reprogram original remote controls. -
Page 14: Chamberlain Products
NEED HELP? Locate the LEARN button CHAMBERLAIN PRODUCTS... - Page 15 NEED HELP? Locate the LEARN button GENIE PRODUCTS Learn Code Button Program Set Button...
-
Page 16: Linear Products
NEED HELP? Locate the LEARN button LINEAR PRODUCTS Learn Button Learn Button WAYNE DALTON PRODUCTS Program SW Button... -
Page 17: Liftmaster Products
NEED HELP? Locate the LEARN button LIFTMASTER PRODUCTS Yellow Learn Button Purple Learn Button Orange Learn Button Green Learn Button OVERHEAD DOOR PRODUCTS Learn Code Button... -
Page 18: Stanley Products
NEED HELP? Locate the LEARN button STANLEY PRODUCTS Learn Button... -
Page 19: Battery
1-800-442-1255 Chamberlain and LiftMaster are Trademarks of Chamberlain Group. Genie is a Trademark of Overhead Door Corporation. Overhead Door is a Trademark of Overhead Door Corporation. Linear is a Trademark of Linear Corporation. Master Mechanic is a Trademark of TruServ. Sears is a Trademark of Sears & Roebuck. Stanley is a Trademark of The Stanley Works. Wayne Dalton is a trademark of Wayne Dalton Corporation.