Table of Contents
Advertisement
Advertisement
Table of Contents

Related Manuals for Pride Mobility CELEBRITY DELUXE


Summary of Contents for Pride Mobility CELEBRITY DELUXE
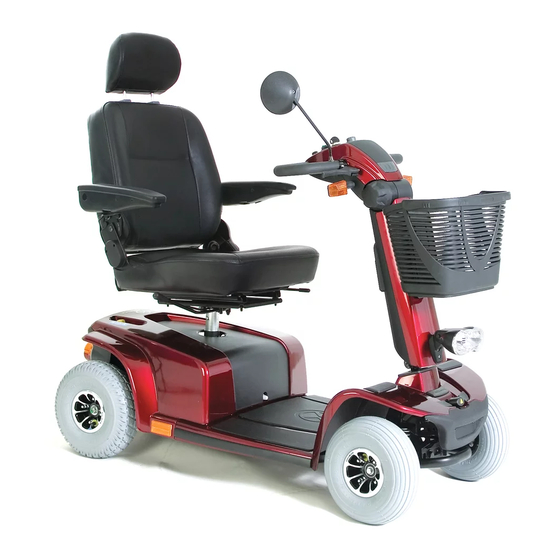
- Page 1 CELEBRITY DELUXE...
- Page 2 The latest/current version of this manual is available on our website. Copyright © 2008 Pride Mobility Products Ltd. INFMANU3054/Rev. D/September 2008...
- Page 3 SAFETY ............................5 III. YOUR SCOOTER ........................18 IV. BATTERIES AND CHARGING ..................23 OPERATION ..........................28 VI. COMFORT ADJUSTMENTS ....................30 VII. DISASSEMBLY AND ASSEMBLY ...................34 VIII. BASIC TROUBLESHOOTING ..................36 IX. CARE AND MAINTENANCE ....................38 WARRANTY ..........................41 APPENDIX I - SPECIFICATIONS ....................42 Celebrity Deluxe www.pridemobility.com...
- Page 4 I . I N T R O D U C T I O N SAFETY Welcome to Pride Mobility Products Ltd. (Pride). The product you have purchased combines state-of- the-art components with safety, comfort and styling in mind. We are confident the design features will provide you with the conveniences you expect during your daily activities.
- Page 5 Do not lift the mobility product while seated in it. Do not place your scooter in freewheel mode while on a decline. Do not place your scooter in freewheel mode while on an incline. Explosive conditions exist! Celebrity Deluxe www.pridemobility.com...
- Page 6 Locked and in drive mode. Front-to-rear plug orientation. Wear safety goggles. Do not mistake the tiller adjustment lever for a brake. Use only AGM or Gel-Cell batteries to reduce the risk of leakage or explosive condition. www.pridemobility.com Celebrity Deluxe...
- Page 7 3-pronged adapter to an electrical outlet having 2-pronged plug access. Do not connect an extension lead to the AC/DC converter or the battery charger. Keep tools and other metal objects away from battery terminals. Contact with tools can cause electrical shock. Celebrity Deluxe www.pridemobility.com...
- Page 8 Always replace both batteries at the same time. Battery charger for indoor use only. Disposal and recycling-contact your authorised Pride Dealer for information on pro- per disposal of your Pride product and its packaging. Contains Lead. www.pridemobility.com Celebrity Deluxe...
- Page 9 PRE-RIDE SAFETY CHECK Get to know the feel of your scooter and its capabilities. Pride recommends that you perform a safety check before each use to make sure your scooter operates smoothly and safely. Celebrity Deluxe www.pridemobility.com...
- Page 10 When driving down a ramp, keep the scooter’s speed adjustment set to the slowest speed setting to ensure a safely controlled descent. Avoid sudden stops and starts. www.pridemobility.com Celebrity Deluxe...
- Page 11 1 and 1A may put your scooter in an unstable position and cause it to tip. WARNING! Never carry an oxygen tank weighing more than 6 kg (13 lbs.). Never fill the front or rear basket with contents exceeding 6 kg (13 lbs.). Celebrity Deluxe www.pridemobility.com...
- Page 12 Reduce your scooter’s speed when driving on uneven terrain and/or soft surfaces. Avoid tall grass that can become tangled in the running gear. Avoid loosely packed gravel and sand. If you feel unsure about a driving surface, avoid that surface. www.pridemobility.com Celebrity Deluxe...
- Page 13 See figures 3 and 3A. WARNING! Do not attempt to negotiate a kerb that has a height greater than 5 cm (2 in.). Figure 3. Correct Kerb Approach Figure 3A. Incorrect Kerb Approach Celebrity Deluxe www.pridemobility.com...
- Page 14 Use your hand to turn the knob or push the handle or push-bar. Drive your scooter gently and slowly forward to push the door open. Or drive your scooter gently and slowly rearwards to pull the door open. www.pridemobility.com Celebrity Deluxe...
- Page 15 PREVENTING UNINTENDED MOVEMENT WARNING! If you anticipate being seated in a stationary position for an extended period of time, turn off the power. This will prevent unexpected motion from inadvertent throttle control lever contact. Celebrity Deluxe www.pridemobility.com...
- Page 16 WARNING! If you require a positioning belt to safely operate your scooter, make sure it is fastened securely in order to reduce the possibility of a fall from the scooter. www.pridemobility.com Celebrity Deluxe...
- Page 17 NOTE: For further information on EMI/RFI, visit the Resource Centre on www.pridemobility.com. If unintended motion or brake release occurs, turn your scooter off as soon as it is safe to do so. Contact your authorised Pride Dealer to report the incident. Celebrity Deluxe www.pridemobility.com...
- Page 18 Use these buttons to turn on the left and right turn indicator (amber) lights. See figure 4. Push the left button to activate the left turn indicator light. Push the right button to activate the right turn indicator light. The signals are timed to shut off automaticaly. www.pridemobility.com Celebrity Deluxe...
- Page 19 The image of the tortoise represents the slowest speed setting. The image of the hare represents the fastest speed setting. Off-board Charger Port The off-board charger power lead plugs into this port when charging the batteries. See figure 5. Figure 5. Off-board Charger Port Celebrity Deluxe www.pridemobility.com...
- Page 20 The motor/transaxle assembly is an electromechanical unit that converts electrical energy from your scooter’s batteries into the controlled mechanical energy that drives the scooter’s wheels. BATTERY BATTERY MANUAL FREEWHEEL LEVER MOTOR/TRANSAXLE ASSEMBLY ANTI-TIP WHEELS Figure 7. Rear Section www.pridemobility.com Celebrity Deluxe...
- Page 21 NOTE: If the scooter is placed in freewheel mode (manual freewheel lever forward) while the key is in the “on” position, the scooter will not run until the manual freewheel lever is pushed rearward and the key is turned to the “off” position, then back to the “on” position. Celebrity Deluxe www.pridemobility.com...
- Page 22 WARNING! DO NOT leave the scooter in freewheel mode when securing it for transport. WARNING! DO NOT use your scooter as a seat in a moving vehicle. SECUREMENT POINTS SECUREMENT POINTS Figure 9A. Front Securement Points (3-wheel) Figure 9. Rear Securement Points SECUREMENT POINTS Figure 9B. Front Securement Points (4-wheel) www.pridemobility.com Celebrity Deluxe...
- Page 23 Refer to the manual supplied with the battery charger for more information. Celebrity Deluxe www.pridemobility.com...
- Page 24 Therefore, when the charger is plugged in, it maintains the charge on your scooter’s bat- teries, but does not overcharge them. We do not recommend that you charge your scooter’s batteries for more than 24 consecutive hours. www.pridemobility.com Celebrity Deluxe...
- Page 25 Plan your route ahead to avoid as many hills, cracked, broken or soft surfaces as possible. Limit your baggage weight to essential items. Try to maintain an even speed while your scooter is in motion. Avoid stop-and-go driving. Celebrity Deluxe www.pridemobility.com...
- Page 26 (-) battery terminal. See figure 12A. 9. Ensure that the battery terminals are cov- ered with the tiller boots. NOTE: See figure 12B for correct hardware placement for battery terminal connections. Figure 12A. Battery Cable Figure 12B. Cable To Terminal Orientation Connection www.pridemobility.com Celebrity Deluxe...
- Page 27 What about public transport? If you intend to use public transport with your scooter, you must contact the transportation dealer in advance to determine their specific requirements. Celebrity Deluxe www.pridemobility.com...
- Page 28 Pull on the right handgrip to steer your scooter to the right. Move the tiller to the centre position to drive straight ahead. To stop, slowly release the throttle control lever. The electronic brakes will automatically engage, bringing your scooter to a stop. www.pridemobility.com Celebrity Deluxe...
- Page 29 Although the controller is shut down, power will still be supplied to the scooter’s lighting system. If the power down timer feature takes effect, perform the following steps to resume normal operation. 1. Remove the key from the key switch. 2. Reinsert the key and power up your scooter. Celebrity Deluxe www.pridemobility.com...
- Page 30 SEATBACK ADJUSTMENT WARNING! Do not operate your scooter with the seatback in a reclined position. WARNING! Always keep your back pressed firmly against the seatback while adjusting the angle. SEATBACK ADJUSTMENT LEVER Figure 15. Seatback Adjustment www.pridemobility.com Celebrity Deluxe...
- Page 31 6. Insert the seat height adjustment bolt through ADJUSTMENT the locating holes of both the upper and lower BOLT seat posts. CLAMP-ACTION 7. Tighten the clamp-action bolt. BOLT 8. Reinstall the rear shroud and the seat. LOWER SEAT POST Figure 16. Seat Height Adjustment Celebrity Deluxe www.pridemobility.com...
- Page 32 MANDATORY! Make sure the positioning belt is properly secured to the scooter and is adjusted for operator comfort. MANDATORY! Inspect the positioning belt for loose or damaged parts before each use of the scooter. If you discover a problem, contact your authorised Pride Dealer maintenance and repair. www.pridemobility.com Celebrity Deluxe...
- Page 33 Do not attempt to raise or lower the seat while in motion! Do not drive your scooter unless the power seat is fully retracted (in the lowest position). Celebrity Deluxe www.pridemobility.com...
- Page 34 7. Unfasten the battery tie-down straps and remove the batteries from the battery wells. 8. Squeeze the tiller adjustment lever and lower the tiller to its lowest point. LOCKED UNLOCKED POSITION POSITION Figure 20. Tiller Lock Knob (Locked) Figure 20A. Tiller Lock Knob (Unlocked) www.pridemobility.com Celebrity Deluxe...
- Page 35 90° anticlockwise. See figure 20A. LOWER FRAME TUBE WARNING! After assembly, make UPPER FRAME TUBE absolutely certain the tiller lock knob is in the unlocked position before riding your scooter. FRAME HOOK Figure 23. Frame Separation Celebrity Deluxe www.pridemobility.com...
- Page 36 Push in the main circuit breaker reset button. See III. “Your Scooter.” Make certain that both battery harnesses and the front-to-rear harness are firmly connected. See VII. “Disassembly and Assembly.” Be sure the power down timer feature hasn’t been activated. See V. “Operation.” www.pridemobility.com Celebrity Deluxe...
- Page 37 Or, see the previous troubleshooting question for load testing the batteries yourself. If you experience any problems with your scooter that you are not able to solve, immediately contact your authorised Pride Dealer for information, maintenance and service. Celebrity Deluxe www.pridemobility.com...
- Page 38 Failure to comply may result in skin irritation or premature deterioration of upholstery and/or scooter finishes. BATTERY TERMINAL CONNECTIONS Make certain that the terminal connections remain tight and uncorroded. The batteries must sit flat in the battery wells. www.pridemobility.com Celebrity Deluxe...
- Page 39 3. Insert a new fuse of the proper rating. WARNING! The replacement fuse must exactly match the rating of the old fuse. Failure to use properly rated fuses may cause damage to the electrical system. Figure 24. Working Fuse Figure 24A. Blown Fuse (Replace) Celebrity Deluxe www.pridemobility.com...
- Page 40 Your scooter must be disposed of according to applicable local and national statutory regulations. Contact your local waste disposal agency or authorised Pride Dealer for information on proper disposal of packag- ing, metal frame components, plastic components, electronics and batteries. www.pridemobility.com Celebrity Deluxe...
- Page 41 Pride Mobility Products Ltd. cannot be deemed responsible. NOTE: Pride Mobility Products Ltd. provides parts only under warranty. Your Pride Dealer is respon- sible for labour and service. Please contact your Pride Dealer for information about these services and for any applicable charges.
- Page 42 A P P E N D I X I - S P E C I F I C A T I O N S 16" Figure 25. Scooter Dimensions 8.89 cm 10.16 cm (3.5”) (4”) 25.40 cm 25.40 cm (10”) (10”) Figure 25A. Front Tyre Dimensions Figure 25B. Rear Tyre Dimensions www.pridemobility.com Celebrity Deluxe...
- Page 43 Due to manufacturing tolerances and continual product improvement, this specification can be subject to a variance of (+ or – ) 3 %. AGM or Gel-Cell type required. See IV. “Batteries and Charging.” NOTE: This product conforms to all applicable ANSI-RESNA testing requirements and ISO 7176 series EN12184 standards. All specifications subject to change without notice. Celebrity Deluxe www.pridemobility.com...
- Page 44 N O T E S www.pridemobility.com Celebrity Deluxe...
- Page 45 N O T E S Celebrity Deluxe www.pridemobility.com...
- Page 46 N O T E S www.pridemobility.com Celebrity Deluxe...
- Page 48 32 Wedgwood Road Bicester, Oxon OX26 4UL *INFMANU3054*...