Samsung GT-S7562 Quick Start Manual
Hide thumbs
Also See for GT-S7562:
- User manual (151 pages) ,
- User manual (21 pages) ,
- User manual (36 pages)
Table of Contents
Advertisement
Quick Links
Download this manual
See also:
User Manual
Advertisement
Table of Contents

Related Manuals for Samsung GT-S7562


Summary of Contents for Samsung GT-S7562
-
Page 1: Quick Start Guide
GT-S7562 quick start guide You can access the full user manual for more information. To learn to access the user manual, see “View the user manual” in this quick start guide. - Page 2 1.5 cm from the body to ensure compliance with RF exposure requirements. Thank you for choosing this Samsung mobile device. This device will provide you with high-quality mobile communication and entertainment based on Samsung’s exceptional technology and high standards.
-
Page 3: Instructional Icons
• Other accessories may not be compatible with your device. • Samsung is not liable for performance issues or incompatibilities caused by edited registry settings or modified operating system software. Attempting to customise the operating system may cause your device or applications to work improperly. - Page 4 Samsung Electronics. Trademarks • SAMSUNG and the SAMSUNG logo are registered trademarks of Samsung Electronics. ™ ™ • The Android logo, Google...
- Page 5 ® ™ ™ • Wi-Fi , Wi-Fi Protected Setup , Wi-Fi Direct ™ Wi-Fi CERTIFIED , and the Wi-Fi logo are registered trademarks of the Wi-Fi Alliance. ® • Windows Media Player is a registered trademark of the Microsoft Corporation. •...
-
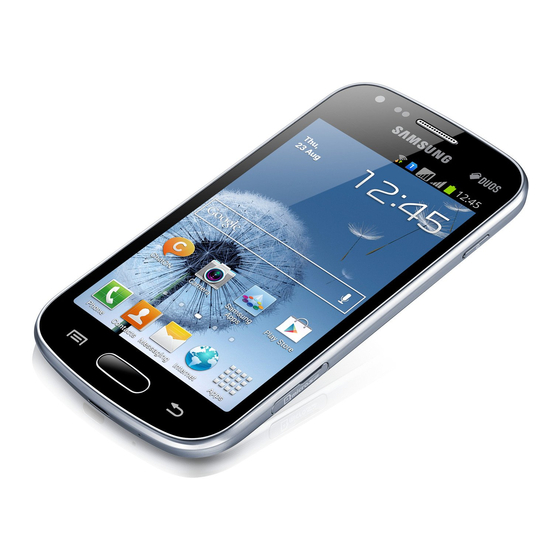
Page 6: Device Layout
Assembling Device layout Front view... - Page 7 Number Function Earpiece Front camera lens Proximity sensor Volume key Home key Option key Multifunction jack Touch screen Back key Microphone...
- Page 8 Rear view Number Function Headset jack Power/Reset/Lock key Speaker Memory card slot GPS antenna Rear camera lens Service light Back cover Main antenna 1. Do not touch or cover the area around the antenna with your hands or other objects while using the GPS functions.
-
Page 9: Key Function
Keys Function Turn on the device (press and hold); Access the device options (press and hold); Reset the device (press and hold Power/ for 8-10 seconds); Turn off and lock the Reset touch screen or turn it on. Lock Open the list of options available on the current screen;... - Page 10 Insert the SIM or USIM card and the battery 1. Remove the back cover. Be careful not to damage your fingernails when you remove the back cover. 2. Insert the SIM or USIM card with the gold-coloured contacts facing downwards. Your device has two SIM card slots to allow you to use two SIM or USIM cards, and switch between them.
-
Page 11: Insert The Battery
Do not insert a memory card into the SIM card slots. If the memory card becomes lodged in the SIM card slots, you must take your device to a Samsung Service Centre to have the memory card removed. • The SIM card slot of your device is only suited for standard SIM cards. -
Page 12: Charge The Battery
Before using the device for the first time or when the battery has been unused for an extended period, you must charge the battery. Use only Samsung-approved chargers and cables. Unapproved chargers or cables may cause batteries to explode or damage your device. - Page 13 2. Plug the large end of the travel adapter into an electrical socket. If the device receives an unstable power supply while charging, the touch screen may not function. If this happens, unplug the travel adapter from the device. 3. When the battery is fully charged, first unplug the travel adapter from the device, and then from the electrical socket.
-
Page 14: Getting Started
Getting started Turn on or off your device To turn on your device, press and hold the Power key. If you are turning on your device for the first time, follow the on-screen instructions to set up your device. You must sign in to Google or create a Google account to use applications that interact with the Google server. -
Page 15: Access Applications
Access applications 1. On the Home screen, select to access the application list. 2. Scroll left or right to another screen. You can also select one of the dots at the bottom of the screen to move directly to the corresponding screen. -
Page 16: Open The Notifications Panel
Open the notifications panel To open the notifications panel, tap the indicator icons area and drag it downwards. To hide the panel, drag the bottom of the panel upwards. Make or answer a call You can use calling functions, such as making and answering calls, using options available during a call, or customising and using call-related features. -
Page 17: Switch Sim Or Usim Cards
Answer a call During an incoming call, select and then drag your finger outside of the large circle. Switch SIM or USIM cards Once you insert two SIM or USIM cards, you can switch back and forth between each card. To switch between SIM or USIM cards, open the notifications panel and select a SIM card icon, except for when the device is sending or receiving messages or... -
Page 18: Send Messages
Send messages You can create and send text (SMS) or multimedia (MMS) messages. You may incur additional charges for sending or receiving messages while you are outside your home service area. For details, contact your service provider. 1. Open the messaging application. 2. -
Page 19: Connect To The Internet
3. Select the bookmark for the user manual. To access the user guide more easily, place a shortcut or widget for the user guide on the Home screen. From your computer Access www.samsung.com and then search for the user manual by the model name of your device. -
Page 20: Safety Information
For safe disposal of your Li-Ion battery, contact your nearest authorised service centre. Handle and dispose of the device and charger with care • Use only Samsung-approved battery and charger specifically designed for your device. Incompatible battery and charger can cause serious injuries or damage to your device. - Page 21 • Never dispose of the battery or device in a fire. Follow all local regulations when disposing of used battery or device. • Never place the battery or device on or in heating devices, such as microwave ovens, stoves, or radiators. The device may explode when overheated.
- Page 22 If you use a hearing aid, contact the manufacturer for information about radio interference The radio frequency emitted by your device may interfere with some hearing aids. Before using your device, contact the manufacturer to determine whether or not your hearing aid will be affected by radio frequencies emitted by the device.
- Page 23 • Do not take notes or look up phone numbers. Jotting down a “to do” list or flipping through your address book takes attention away from your primary responsibility of driving safely. • Dial sensibly and assess the traffic. Place calls when you are not moving or before pulling into traffic.
- Page 24 Do not store your device in very hot or very cold areas. It is recommended to use your device at temperatures from 5 °C to 35 °C • Your device can explode if left inside a closed vehicle, as the internal temperature can reach up to 80 °C. • Do not expose your device to direct sunlight for extended periods of time (on the dashboard of a car, for example).
-
Page 25: Reduce The Risk Of Repetitive Motion Injuries
• Using generic battery or charger may shorten the life of your device or cause the device to malfunction. • Samsung cannot be responsible for the user’s safety when using accessories or supplies that are not approved by Samsung. Do not bite or suck the device or the battery • Doing so may damage the device or cause an explosion. - Page 26 Do not disassemble, modify, or repair your device • Any changes or modifications to your device can void your manufacturer’s warranty. If your device needs servicing, take your device to a Samsung Service Centre. • Do not disassemble or puncture the battery, as this can cause explosion or fire.
- Page 27 Do not use the device if the screen is cracked or broken Broken glass or acrylic could cause injury to your hands and face. Take the device to a Samsung Service Centre to have it repaired. Do not use the device for anything other than its intended use...
- Page 28 Keep your personal and important data safe • While using your device, be sure to back up important data. Samsung is not responsible for the loss of any data. • When disposing of your device, back up all data and then reset your device to prevent misuse of your personal information.
-
Page 29: Specific Absorption Rate (Sar) Certification Information
For more information, visit www.samsung.com/sar and search for your device with the model number. -
Page 30: Correct Disposal Of Batteries In This Product
Correct disposal of this product (Waste Electrical & Electronic Equipment) (Applicable in countries with separate collection systems) This marking on the product, accessories or literature indicates that the product and its electronic accessories (e.g. charger, headset, USB cable) should not be disposed of with other household waste. - Page 31 ADVISED OF THE POSSIBILITY OF SUCH DAMAGES. ” Third party services may be terminated or interrupted at any time, and Samsung makes no representation or warranty that any content or service will remain available for any period of time. Content and services are transmitted by third parties by means of networks and transmission facilities over which Samsung has no control.
-
Page 33: Declaration Of Conformity (R&Tte)
(name and signature of authorised person) * It is not the address of Samsung Service Centre. For the address or the phone number of Samsung Service Centre, see the warranty card or contact the retailer where you purchased your product. - Page 34 Some contents in this manual may differ from your device depending on the software of the device or your service provider. To install Samsung Kies (PC Sync) 1. Download the latest version of Samsung Kies from the Samsung website (www.samsung.com/kies) and install it on your computer.