Table of Contents
Advertisement
Advertisement
Table of Contents

Related Manuals for Garrett CSI 250


Summary of Contents for Garrett CSI 250
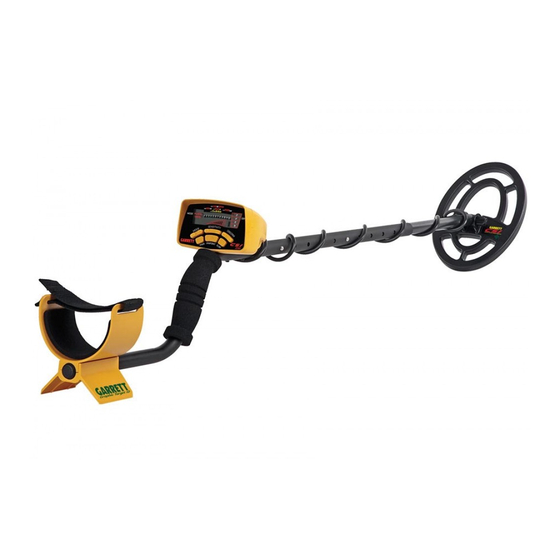
- Page 2 CSI 250 detector is the most advanced of its kind in the industry. In order to take full advantage of the special features and functions of the CSI 250 metal detector, please carefully read this instruction manual in its entirety. Csi 250...
- Page 3 Illustration Searchcoil Parts Assembly Lower Control Upper Stem Features Housing Stem Pushbuttons / Controls Searching with the CSI 250 Screen Making Adjustments Bench Tests Test Plot Construction Spring Pushbutton Knob Clip Troubleshooting Guide Washer Controls Caring for your CSI 250...
- Page 4 Parts No tools are required to assemble the CSI 250. Four (4) AA batteries are included with the detector. Before assembling your CSI metal detector make certain you have the complete set of parts, which include: Control Housing with S-shaped Ramrod...
- Page 5 Figure 1-3. Figure 1-1 Figure 1-3 2. Slide the Searchcoil onto the Stem. Figure 1-2. 4. Depress the Spring Clip and insert the Control Housing into the Upper Stem. Figure 1-4. Figure 1-2 Figure 1-4 Csi 250 garrett Metal Detectors...
- Page 6 6.Wrap the Searchcoil cable snugly about the stem removing the screw on the bottom and rotating the with the first turn of the cable over the stem. Arm Cuff 180°. Figure 1-8. Figure 1-6. Figure 1-8 Figure 1-6 Csi 250 garrett Metal Detectors...
- Page 7 1. Mode - Indicates which detection mode is selected by highlighting the corresponding word on the LCD. The CSI 250 is designed with Garrett’s exclusive Graphic Target ID technology, which indicates the probable identification of a target along a horizontal 2.
- Page 8 2”, 4” or 6” or 8+ inches. Sweep over the cover off the control housing. Remove batteries the target with the searchcoil 1” from the soil to get from the CSI 250 when the unit will be stored for the most accurate reading. longer than 30 days.
- Page 9 10. numeric reference scale - The numbers 1 - 12 are shown on the Lower Scale of the LCD 8. tone iD - The CSI 250 makes three (Low, and serve as a visual reference guide for detected Standard, Bell) audible tones when a target is targets based on the target’s conductivity.
- Page 10 2. MoDe - Press the MODE pushbutton to select one of two desired detection modes: • ALL-METAL Mode - This is the CSI 250’s factory default mode and is designed to detect every type of metal (i.e. no discrimination or type of metals eliminated).
- Page 11 The next time matching earring with the CSI 250 while in the the CSI 250 encounters the same trash item, it will CUSTOM mode. Note where the target ID cursor not produce an audible signal.
- Page 12 OFF. The detector will resume searching with detectors, or there is nearby electrical interference the changes made in the CUSTOM mode when the such as power lines. detector is turned back ON. However, all changes made to the Notch Csi 250 garrett Metal Detectors...
-
Page 13: Proper Scanning Techniques
With the Csi 250 Your CSI 250 is a highly sophisticated, yet easy to operate metal detector. To search a crime scene, simply press the PWR pushbutton and begin searching in the factory preset ALL-METAL mode. This mode will allow you to detect every type of metal object. - Page 14 LCD segments (increasing that you cannot maintain detection sound with the left to right on the scale) is shown, the center of the searchcoil held completely still above the target. Csi 250 garrett Metal Detectors...
- Page 15 Or, pass the particular target across the face of the searchcoil Discrimination When your CSI 250 is turned ON for the first time, about two inches from its surface. If the segment is it will begin operating in the ALL-METAL mode.
-
Page 16: Bench Tests
However, you many not always be able to operate at full sensitivity. Electromagnetic interference, irregular ground mineralization and As you operate the CSI 250 you will quickly grow other environmental conditions may sometimes more efficient in its use. You can also conduct... -
Page 17: Test Plot Construction
CSI 250 will create one of three tones for each target. These differences in tone are related to Next, select targets such as .22 caliber bullets, the conductivity of the detected target. -
Page 18: Troubleshooting Guide
Caring For Your Csi 250 sYMPtoM solution 1. Ensure batteries are installed in the correct position. Your Garrett detector is a rugged machine, designed no power 2. Replace all old batteries with all new batteries for outdoor use. However, as with all electronic 1. - Page 19 • Protect your control housing from heavy mist, rain WarrantY & serViCe and blowing surf. Your CSI 250 detector is warranted for 24 months, • Disassemble the stem, and wipe it and the limited parts and labor, but does not cover damage searchcoil clean with a damp cloth.
- Page 20 2. Contacted your dealer, particularly if you are not You can call Garrett’s Customer Service Department familiar with the CSI 250 detector. at 1-800-234-6151 (U.S.A.) or 1-972-494-6151 (Outside U.S.A.) if you have further questions. 3. Included a letter that fully describes the problem and conditions under which they occur.
- Page 21 2. 9x12” searchcoil $99.95 - #2221900 Garrett offers a complete line of CSI 250 accessories. Use the 9x12” searchcoil These accessory products are available from your to obtain greater coverage local or dealer or by calling the Garrett factory at when searching large 1-800-234-6151.
- Page 22 Metal Detectors 1881 West State Street Garland, Texas 75042 Toll Free: 1.800.234.6151 Tel: 972.494.6151 Fax: 972.494.1881 Email: security@garrett.com Web: garrett.com garrett Metal Detectors...
- Page 23 1526200.C.1009...