Honeywell AlarmNet 7845GSM Installation And Setup Manual
Digital cellular communicator
Hide thumbs
Also See for AlarmNet 7845GSM:
- Quick setup manual (1 page) ,
- Installation manual (2 pages) ,
- Quick manual (2 pages)
Table of Contents
Advertisement
K14184V1 11/06 Rev. A
WWW.DIYALARMFORUM.COM
7 7 7 7
8 8 8 8
4 4 4 4
5 5 5 5
7 7 7 7
8 8 8 8
4 4 4 4
5 5 5 5
D
i
g
D
i
g
Installation and Setup Guide
WWW.DIYALARMFORUM.COM
G G G G
S S S S
M M M M
/ / / /
7 7 7 7
8 8 8 8
G G G G
S S S S
M M M M
/ / / /
7 7 7 7
8 8 8 8
i
t
a
l
C
e
l
l
u
l
a
i
t
a
l
C
e
l
l
u
l
a
A A A A
l l l l
a a a a
r r r r
m m m m
N N N N
A A A A
l l l l
a a a a
r r r r
m m m m
N N N N
4 4 4 4
5 5 5 5
G G G G
S S S S
M M M M
4 4 4 4
5 5 5 5
G G G G
S S S S
M M M M
r
C
o
m
m
u
n
r
C
o
m
m
u
n
Requires
Compass Version
1.5.8.54A
(or higher)
for GSM
Downloading
e e e e
t t t t
e e e e
t t t t
C C C C
N N N N
C C C C
N N N N
i
c
a
t
o
r
i
c
a
t
o
r
Advertisement
Table of Contents

Related Manuals for Honeywell AlarmNet 7845GSM


Summary of Contents for Honeywell AlarmNet 7845GSM
- Page 1 A A A A l l l l a a a a r r r r m m m m N N N N e e e e t t t t A A A A l l l l a a a a...
- Page 2 WWW.DIYALARMFORUM.COM WWW.DIYALARMFORUM.COM...
-
Page 3: Table Of Contents
Wiring for Module Fault Relay...........................2-4 Power Connections and Options ..........................2-5 Backup Battery Connection ..........................2-5 Initial Power-Up Sequence ..........................2-6 SECTION 3: Programming the 7845GSM ....................3-1 General Information..............................3-1 Using the AlarmNet Direct website ........................3-1 Using a 7720P Programming Tool........................3-2 Using the Control Panel Programming Mode .....................3-2 Programming Conventions ..........................3-3... - Page 4 7845GSM/7845GSMCN Installation and Setup Guide Exiting Programming Mode.............................3-16 Setting Factory Defaults ...........................3-16 SECTION 4: Registration .......................... 4-1 Registering the 7845GSM............................4-1 Registering through AlarmNet Direct Website....................4-1 Using the Tamper Switch............................4-2 Using the Programming Tool..........................4-2 Replacing an existing module using the programming tool................4-3 Register by Phone ...............................4-4...
-
Page 5: Section 1: General Information
• Reports fire, burg, and status messages via wireless network • Allows uploading and downloading of control panel data via the wireless network. Modes of Operation The 7845GSM provides four modes of operation so it can be used with various types of control panels, as summarized below: ECP Mode •... -
Page 6: Zone Trigger Mode
• Reports are sent in ADEMCO High-Speed format 4204 Mode and Two-4204 Mode • This mode is for use with Honeywell controls that do not support LRR-ECP communication, but that do support 4204 Relay Modules • The module connects to the control’s keypad terminals •... -
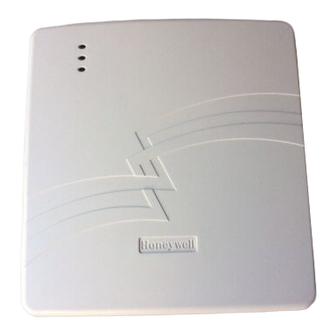
Page 7: Antenna
Section 1: General Information Antenna The 7845GSM comes equipped with an internal antenna. This feature provides additional security to the installation by making the device tamper resistant. AMPS antennas, such as the 7825-OC antenna, cannot be used with this product. - Page 8 7845GSM/7845GSMCN Installation and Setup Guide WWW.DIYALARMFORUM.COM WWW.DIYALARMFORUM.COM...
-
Page 9: Section 2: Mounting And Wiring
The 7845GSM must be mounted indoors. To mount the 7845GSM, see Figure 1 and complete the following steps: Unpack the 7845GSM and detach the case back by pushing up into the two tabs located at the bottom of the 7845GSM with the blade of a screwdriver while pulling the case back and case front apart. -
Page 10: Wiring The 7845Gsm
7845GSM 7845GSM-009-V0 Figure 2. Wiring a VISTA for ECP Mode or 4204 Modes To install a 7845GSM with a LynxR-I Security System, wire the devices as shown in Figure 3. Refer to the LynxR-I Installation and Setup Guide. WWW.DIYALARMFORUM.COM WWW.DIYALARMFORUM.COM... -
Page 11: Wiring For Zone Trigger Mode
Figure 3. Wiring a LynxR-I for ECP Mode Wiring for Zone Trigger Mode To trip a zone on the 7845GSM in V+ trigger mode, the positive triggering voltage from the control panel must be within 2.0V-14.5V. Trigger levels above this range may cause permanent damage to the unit. -
Page 12: Wiring For Module Fault Relay
BELL (+) ZONE INPUT Z1/Z2 BELL ( ) CONTROL PANEL 7845GSM BATTERY K14139 Figure 5. Wiring the 7845GSM Zone 1 Input for a Ground (-) Triggered Bell Output TRANSFORMER AC INPUT 1 AC INPUT 2 LRR / AAV 2K EOL TRIGGER... -
Page 13: Power Connections And Options
Figure 8. Wiring the 7845GSM Zone 1 Input for EOL Supervised N.O./N.C. Triggers Power Connections and Options Primary power for the 7845GSM is provided by the AC plug-in transformer. For ECP communication, you must also connect the +12VDC AUX voltage output of the control panel (9.6V-13.8V typical) (see Figure 9). -
Page 14: Initial Power-Up Sequence
2. Snap the right side of the battery clip onto the inside of the case back and secure the left side with the screw provided. 1. Do not plug the battery in until after you have powered-up the 7845GSM. 2. If using a LynxR-I, do not connect the module's backup battery. The LynxR-I backup battery will supply backup power in the event of a power outage. -
Page 15: Section 3: Programming The 7845Gsm
• • • • • • • • • • • • • • • • • • • • • • • • • • • • • • • • • • • • • • • • • • • • • • • • • General Information The 7845GSM is designed to deliver alarms via the GSM network to an AlarmNet central station when it is registered with a valid AlarmNet account. -
Page 16: Using A 7720P Programming Tool
7845GSM/7845GSMCN Installation and Setup Guide Using a 7720P Programming Tool Connect the 7720P Programming Tool as shown below. The 7845GSM powers the 7720P Programming Tool via the programming jack, and automatically senses the presence of the 7720P when it is plugged in. -
Page 17: Programming Conventions
The 7845GSM supports ECP messaging to communicate with the control panel. LRR- enabled control panels send Contact ID format alarms to the 7845GSM directly on the 4-wire console bus. Not all control panels support the LRR interface on ECP, so be sure to check the Installation and Setup Guide of the control panel to see if it supports this feature. - Page 18 [0001-9999] Sub ID Enter the 4-digit subscriber account number for the (????)_ second central station, 0001-9999. In ECP mode, the 7845GSM communicates with the Device Address [01-30] panel as a Long Range Radio (LRR) device. Enter the (03)_ appropriate ECP device address. For VISTA-10 and VISTA-20 series control panels, use address 03.
- Page 19 [Y], [N] controls. (N)_ Enables Direct Wire Downloading over GSM. If [N], skip to Prompt 20: "Supervision." When using Direct Wire downloading, the 7845GSM Direct Wire Addr [01-30] communicates with the panel as an alpha keypad to (28)_ initiate the direct wire download session. Enter the appropriate device address.
- Page 20 7845GSM/7845GSMCN Installation and Setup Guide PROMPTS ENTRY OPTIONS DESCRIPTION Sends a low-battery report when a low battery Low Bat Rpt Y/N [Y], [N] condition exists. (Y)_ UL NOTE: Must be set to "Y" unless used with LynxR-I series controls. Must be set to "N" when using LynxR-I series controls.
-
Page 21: Ecp Status Codes
Lynx Panic option). If the programming option “Lynx Panic” is enabled, the 7845GSM reports an alarm on zone 3. No restores are reported for this zone. If this option is selected, the second physical zone input is ignored. -
Page 22: 4204 Emulation Mode
Selection of momentary activation will cause the 7845GSM to generate an alarm and NOT a restore, even if the 7845GSM is programmed to send a restore for the given zone. In 4204 mode, messages are reported in ADEMCO High-Speed format. Zone alarms (status 7) are reported with “1”... -
Page 23: Alternative Mode Programming
NOTE: The central station can remotely block access to Access to Prog local device programming. If this has been done, Mode Denied the following prompt appears: Table 5: Programming a 7845GSM for Zone Trigger, 4204 Emulation, or Two-4204 Emulation modes. 4204/ ZONE PROMPTS ENTRY... - Page 24 Installation and Setup Guide. NOTES: 1. The 4204 protocol limits address range to 01-15. If using 2-4204 mode, the 7845GSM assigns the second 4204 to the next higher device address (e.g., if entering address 12 for the first 4204, then address 13 is automatically assigned to the second 4204 module).
- Page 25 Section 3: Programming the 7845GSM 4204/ ZONE PROMPTS ENTRY OPTIONS DESCRIPTION 2-4204 TRIG. • 30 Day The AlarmNet network must hear at least one ✔ ✔ Supervision supervisory message from the module during this • 24 Hrs (24 Hours)_ supervision period; otherwise, AlarmNet notifies •...
- Page 26 7845GSM zone causes a bell fault on the control panel, enable the "Trip Inputs 1or2" option. The 7845GSM reports an alarm on zone 1 (fire) when it detects a pulsed signal and an alarm on zone 2 (burglary) when it detects a steady signal.
- Page 27 Section 3: Programming the 7845GSM PROMPTS ZONE 4204/ ENTRY OPTIONS DESCRIPTION TRIG. 2-4204 ✔ ✔ See "Important Information Regarding Zone Zone Trig: [3-7] Telco Zone Input Options" on previous page. (0)_ 4204: [1-4] Enter the zone number to be used for telco line fault reports.
- Page 28 7845GSM/7845GSMCN Installation and Setup Guide PROMPTS ZONE 4204/ ENTRY OPTIONS DESCRIPTION TRIG. 2-4204 ✔ ✔ [Y], [N] Enables restore reporting for zone 2. Restore Zn2 Y/N (Y)_ ✔ ✔ [01-15] Defines the reporting delay in seconds for zone 2. Delay Zn2 (secs)
- Page 29 Section 3: Programming the 7845GSM PROMPTS ZONE 4204/ ENTRY OPTIONS DESCRIPTION TRIG. 2-4204 ✔ [Y], [N] Enables restore reporting for zone 5. Restore Zn5 Y/N 4204 (Y)_ only ✔ [01-15] Defines the reporting delay in seconds for zone 5. Delay Zn5 (secs)
-
Page 30: Exiting Programming Mode
A message is displayed telling the user that this step is being executed. When complete, the message "DONE" is displayed to indicate the file was successfully uploaded. If critical configuration changes were made, such as the mode of operation, the 7845GSM will reset to ensure that the programming features are enabled. -
Page 31: Section 4: Registration
• • • • • • • • • • • • • • • • • • • • • • • • • • • • • • • • • • • • • • • • • • • • • • • • • Registering the 7845GSM Once you have initialized and programmed the 7845GSM, it must be registered to enable the account. -
Page 32: Using The Tamper Switch
4204 or 2x4204 modes. Using the Programming Tool The interactive registration feature allows the installer to register the 7845GSM through a series of keyboard commands on the 7720P Programming Tool. This method of registration lets the installer monitor the registration process. -
Page 33: Replacing An Existing Module Using The Programming Tool
Press the [ENTER] key. The registration message is sent and the unit waits for Registering … acknowledgement. If the PIN is valid, the new 7845GSM is registered and Registration the old unit unregistered. Additionally, AlarmNet sends SUCCESS a substitution alarm to the central station. -
Page 34: Register By Phone
7845GSM/7845GSMCN Installation and Setup Guide If you entered an invalid PIN, the appropriate message Registration BAD is displayed depending on which account number is being replaced (see above for exact wording). The registration process is repeated. NOTE: Each attempt causes a substitution alarm to be sent to the central station. -
Page 35: Section 5: Programmer Keyboard Commands
Module Identification Displays MAC Address xxxxxxxxxxxx MAC CRC yyyy “xxxxxxxxxxxx” indicates the 7845GSM's unique identification number. "yyyy" indicates the MAC CRC number. This number is also found on the label on the module, as well as the label on the box. -
Page 36: Gsm Status Displays
7845GSM/7845GSMCN Installation and Setup Guide GSM Status Displays GSM Status Display Screen 1 PriRSSI GPRS REG -xxxdbm PriRSSI – Primary Site RSSI level in dbm GPRS – GPRS Service availability where “x” can be: “Y” if GPRS is available “N” if GPRS is Not available –... - Page 37 The voltage levels of the battery connected to the 7845GSM can be viewed on the 7720P. The first line of the display shows the voltage level of the battery with no load The second line of the display shows loaded battery voltage.
- Page 38 Line Voltage Display Line Voltage xx.xxV The line voltage of the 7845GSM can be viewed on the 7720P. An asterisk (*) next to the voltage indicates that this is below the accepted level. Press the [space] key to go back to the System Status Display.
-
Page 39: Section 6: Appendices
• • • • • • • • • • • • • • • • • • • • • • • • • • • • • • • • • • • • • • • • • • • • • • • • • Appendix A: Summary of LED Operation 7845GSM Status Display Operation The 7845GSM Status Display has three LEDs used to indicate message and device status: • STATUS, green • MESSAGE, yellow •... - Page 40 FAULT, RED FAULT, RED Figure 15. A Registered 7845GSM Status Display (A) and an Unregistered 7845GSM Status Display in Normal Operating State(B) STATUS, GREEN MESSAGE, YELLOW FAULT, RED Figure 16. LED Sequence for a Registered 7845GSM Message Transmission WWW.DIYALARMFORUM.COM WWW.DIYALARMFORUM.COM...
-
Page 41: Signal Strength (Rssi) / Mode And Status Leds
Section 6: Appendices Signal Strength (RSSI) / Mode and Status LEDs The Signal Strength (RSSI) / Mode and Status LEDs normally display the module’s signal strength. LED 1 (red LED on the left) will be lit to indicate that the display is in RSSI mode, and the other LEDs indicate signal strength (lowest to highest, from left to right) between the module and the receiving tower. -
Page 42: Appendix B: Central Station Messages
7845GSM/7845GSMCN Installation and Setup Guide Appendix B: Central Station Messages The following messages are sent by the 7845GSM module for the conditions listed below. Table 8: 7845GSM Central Station Messages ECP Mode ECP Mode Zone and 4204 Zone and 4204... -
Page 43: Appendix C: Gsm Downloading
7845GSM communicates with the control panel as a keypad is entered (Direct Wire Address). Additionally, the 7845GSM must be connected by cable as shown below to the panels listed. NOTE: This feature is not available if device is set for zone trigger mode. -
Page 44: Appendix D: Glossary
DSL – Digital Subscriber Line ECP – Enhanced Console Protocol, which is a proprietary communications bus used in Honeywell VISTA control panels for wiring additional keypads and peripheral devices; consists of a four-wire data bus (power+/-, data in/out). Gateway IP Address - A gateway (sometimes called a router) is a computer and/or software used to connect two or more networks (including incompatible networks) and translates information from one network to the other. - Page 45 Section 6: Appendices Notes: WWW.DIYALARMFORUM.COM WWW.DIYALARMFORUM.COM...
- Page 46 7845GSM/7845GSMCN Installation and Setup Guide FCC AND INDUSTRY CANADA STATEMENT This device complies with Part 15 of the FCC Rules and RSS210 of Industry Canada. Operation is subject to the following two conditions: (1) This device may not cause harmful interference, and (2) this device must accept any interference received, including interference that may cause undesired operation.
- Page 47 MOUNTING HOLE BATTERY TAMPER SWITCH CLIP BATTERY SCREW SIGNAL STRENGTH (RSSI)/ BATTERY MODE AND STATUS INDICATOR CONNECTOR SWITCH 7845GSM-006-V0 TB1 Wiring for 7845GSM Cellular Communicator Zone 4204 2 x 4204 Trigger Mode Mode Mode Mode AC 1 AC 1 AC 1...
- Page 48 Warranty or otherwise if the product(s) is altered or improperly repaired or serviced by anyone other than Honeywell factory service. Connection of any device(s) to a communication bus of a Honeywell security system (e.g., keypad bus, polling loop) other than those manufactured or approved by Honeywell shall void this warranty.