Advertisement
Available languages
Available languages
D E 3 0 0 / D E 3 0 0 P / D E 4 0 0 / D E 4 0 0 P / D H 4 0 0 P / D E 5 0 0 / D E 5 0 0 P / D E 6 5 0
D E 3 0 0 / D E 3 0 0 P / D E 4 0 0 / D E 4 0 0 P / D H 4 0 0 P / D E 5 0 0 / D E 5 0 0 P / D E 6 5 0
• Use and maintenance manual . . . . . .
• Mode d'emploi et d'entretien . . . . . . .
• Instrucciones de uso . . . . . . . . . . . . .
• Istruzioni per l'uso . . . . . . . . . . . . . .
Register this product on-line and receive a free trial issue of "Cook's Illustrated". Visit www.prodregister.com/delon-
ghi.Visit www.delonghi.com for a list of service centers near you. (U.S. and Canada).
Veuillez enregistrer ce produit on-line et Vous recevrez une copie gratuite du magazine
Illustrated".Visitez www.prodregister.com/delonghi.
Visitez www.delonghi.com pour trouver le centre d'assistance le plus proche de chez vous (U.S. et Canada).
Registre su producto en nuestra web y reciba una muestra de prueba de "Cook's Illustrated".
visite www.prodregister.com/delonghi. Visite www.delonghi.com para consultar la lista de nuestros centros
de asistencia más cercanos (ee. uu. y Canada).
Registrate questo prodotto on-line e riceverete una copia gratuita della rivista "Cook's Illustrated".
Visitate www.prodregister.com/delonghi. Visitate il sito www.delonghi.com per trovare il centro assistenza
autorizzato a Voi più vicino (U.S. e Canada).
CARACTERISTICAS ELECTRICAS
115V-60Hz
pag. 3
pag. 14
pag. 25
pag. 37
"Cook's
Advertisement
Table of Contents

Related Manuals for DeLonghi DE300


Summary of Contents for DeLonghi DE300
- Page 1 “Cook's Illustrated”.Visitez www.prodregister.com/delonghi. Visitez www.delonghi.com pour trouver le centre d'assistance le plus proche de chez vous (U.S. et Canada). Registre su producto en nuestra web y reciba una muestra de prueba de “Cook's Illustrated”. visite www.prodregister.com/delonghi. Visite www.delonghi.com para consultar la lista de nuestros centros de asistencia más cercanos (ee.
-
Page 2: Important Safeguards
I n t r o d u c t i o n a n d Wa r n i n g hank you for choosing this appliance. This Owner's Manual will provide you with valuable information necessary for the proper care and maintenance of your new appliance. If pro- perly maintained, your appliance will give you many years of trouble-free operation. -
Page 3: Overview
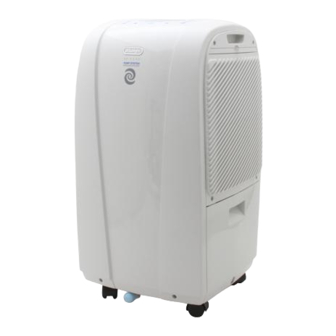
Description escription of the appliance 1. Control panel 5. Water Tank 2. Cabinet 6. Power Cord Wheels 7. Continuous Draining Outlet 8. Pump connection (only on some 4. Air Filter models) escription of the control panel Room MODE Display temperature button button °F/°C... - Page 4 C o n t r o l p a n e l TAND-BY button Press this button to start /stop the appliance. To turn the appliance completely off, remo- ve the plug from the outlet. oom temperature button Press this button to display the Temperature on the LCD display. If you press the button once the display will show the °F .
-
Page 5: Display Lights
D i s p l a y l i g h t s N light When the STAND-BY button is pressed to start the unit, the ON light will come on automati- cally. The light will go off again when the unit is switched off. NOTE: After a power outage, the unit will not switch itself on again automatically. -
Page 6: Installation
I n s t a l l a t i o n I n s t r u c t i o n s 1. Allow at least 12 inches (30cm) of space on all sides of the unit for good air circulation. 2. -
Page 7: Disposing Of Collected Water
D i s p o s i n g o f t h e c o l l e c t e d w a t e r A) Empty the tank manually. When the tank is full, remove (fig.1) and empty it into a sink. -
Page 8: Selecting Operations
S e l e c t i n g t h e o p e r a t i o n s tand-by position Once the power outlet is plugged in, the display will show on the left side the degree of humi- dity you want to reach (the default data is 60) and on the right side the display will show (for a minute) two dots, followed by the room humidity level. - Page 9 S e l e c t i n g t h e o p e r a t i o n s ow to Program the delayed stop function: From the ON Position 1) Press the button and use the button to set the number of hours after which the appliance should stop functioning.
- Page 10 C a r e a n d M a i n t e n a n c e WARNING Electrical Shock Hazard Always disconnect power supply cord from outlet before performing any maintenance. Failure to follow the below precautions could result in the electrical shock or personal injuries.
- Page 11 Tr o u b l e s h o o t i n g t i p s Often times, a problem is minor and a service call may not be necessary. Use this trouble- shooting guide to identify possible problems you may be experiencing. Problem Possible cause Remedy...
- Page 12 For all accessories, spare parts or replacement parts, please contact our parts division at 1- 800-865-6330. Residents of Canada: Please contact our toll free hotline at 1-888-335-6644 or log onto our website at www.delon- ghi.com. Other countries: Please visit: www.delonghi.com.
-
Page 13: Précautions Importantes
Précautions importantes élicitations ! Vous avez choisi un produit capable de satisfaire aux exigences de toute la famille, à la maison ou au bureau. Ce manuel contient toutes les informations nécessaires au bon entretien de votre nouvel appareil. Un entretien correct le fera durer longtemps sans qu’il vous pose le moindre problème. - Page 14 C o m p o s a n t s éscription de l’appareil 1. Tableau de commande densation 2. Carrosserie 6. Câble d’alimentation Roulettes 7. Raccord d’évacuation en continu 8. Connexion de la pompe (seulement 4. Filtre à air sur certains modèles) 5.
- Page 15 Ta b l e a u d e c o m m a n d e outon STAND-BY Appuyez sur ce bouton pour allumer/ éteindre l’appareil. Pour éteindre complètement l’appareil, débrancher l’aappareil. outon température ambiente Appuyez sur ce bouton pour afficher la lecture de Température sur l’afficheur. En appuyant une fois sur le bouton , la température en °F sera affichée à...
- Page 16 Vo y a n t s oyant “ON” Lorsque le bouton STAND-BY est appuyé, le voyant “ON” s’allume. Le voyant s’éteint quand l’appareil s’arrête. NOTA: Après une coupure de courant, l’appareil ne repart pas automatiquement. Appuyez sur le bouton STAND-BY pour mettre l’appareil en marche. oyant réservoir Si le réservoir de récupération d’eau est plein ou mal positionné, le voyant rouge clignote, et ensuite émet un signal acoustique.
- Page 17 I n s t a l l a t i o n 1. Laissez au moins 30 cm (12 pouces) de chaque côté de l’appareil pour permettre une bonne circulation de l’air. 2. Installez le déshumidificateur sur le sol, sur une table ou sur une étagère. Assurez-vous que la table ou l’étagère peut supporter le poids de l’appareil quand son réservoir est plein.
- Page 18 É v a c u a t i o n d e l ’ e a u d e c o n d e n s a t i o n r é c u p é r é e A) Videz le réservoir manuellement.
- Page 19 S é l e c t i o n d e s f o n c t i o n s tand-by Après avoir branché l’appareil, l’afficheur visualise à gauche le niveau d’humidité qu’ on dési- re atteindre (la valeur affichée automatiquement est 60) et à droite l’afficheur visualise pour une minute deux traits d’union suivi par le niveau d’humidité.
- Page 20 S é l e c t i o n d e s f o n c t i o n s omment programmer l’arrêt retardé avec appareil allumé 2) Avec appareil allumé, appuyer sur le bouton et appuyer sur les boutons pour sélectionner les heures aprè...
- Page 21 N e t t o y a g e e t e n t re t i e n ATTENTION Risque de décharges électriques Avant toute opération d’entretien, débranchez l’appareil. Le non-respect des précautions susmentionnées pourrait provoquer des décharges électriques ou des blessures corporelles.
- Page 22 Pr o b l è m e s e t s o l u t i o n s Souvent, les problèmes sont faciles à résoudre, sans appeler le service technique. Ce guide vous aidera à identifier les éventuelles pannes. PROBLÈME CAUSE POSSIBLE SOLUTIONS...
- Page 23 été acheté ou le centre de services agréé de DeLonghi le plus proche de chez vous pour tous travaux d’entretien et de réparation sur les climatiseurs.) Tout appareil devant être réparés doit être expédié à un cen- tre de réparation autorisé...