Rinnai E75CN User's Information Manual
High efficiency condensing gas boiler
Hide thumbs
Also See for E75CN:
- Installation & servicing instructions manual (186 pages) ,
- User's information manual (33 pages) ,
- Installation & servicing instructions manual (108 pages)
Table of Contents
Advertisement
Available languages
Available languages
User information manual
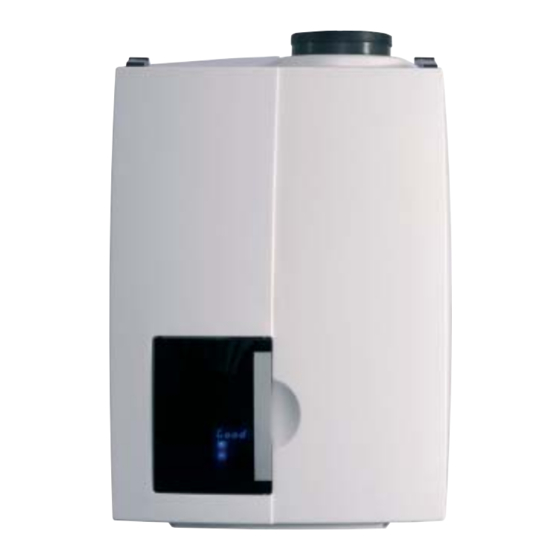
High efficiency condensing gas boiler
WARNING!
If you do not follow these instructions exactly, a fire or
explosion may result causing property damage, personal
injury or loss of life.
- Do not store or use gasoline or other flammable
vapors and liquids in the vicinity of this or any other
appliance.
- WHAT TO DO IF YOU SMELL GAS
- Do NOT try to light any appliance.
- Do NOT touch any electrical switch.
- Do NOT use any phone in your building.
- Immediately call your gas supplier from a
neighbor's phone. Follow the gas supplier's
instructions.
- If you cannot reach your gas supplier, call the fire
Address: 103 International Drive, Peachtree City, GA, 30269
Toll-free: 1-800-621-9419 • Fax: 678-829-1666 • www.rinnai.us
Notice! This manual must be retained for future reference.
E75CN / E110CN
E75CP / E110CP
Installation and service must be
performed by a qualified installer,
service agency or the gas supplier.
WARNING!
Français: voir page 17
Advertisement
Table of Contents

Related Manuals for Rinnai E75CN


Summary of Contents for Rinnai E75CN
- Page 1 - If you cannot reach your gas supplier, call the fire Français: voir page 17 Address: 103 International Drive, Peachtree City, GA, 30269 Toll-free: 1-800-621-9419 • Fax: 678-829-1666 • www.rinnai.us Notice! This manual must be retained for future reference.
- Page 2 Contents of instructions These instructions contain important information for the safe use of Rinnai E-Series gas boilers. These user instructions are intended for the owner or responsible tenant of the premises where the boiler is installed. Subject to technical changes Changes may be made to the illustrations, process steps and technical data as a result of our policy of continuous improvement without prior notice.
-
Page 3: Safety And General Instructions
Safety and general instructions Please observe these instructions in the interest of your own safety. Designated use The boiler is designed to heat water for a central heating system and, if applicable, generating domestic hot water. The boiler is delivered with a burner controller pre-installed.The boiler can be fitted with a modulating outdoor reset control ARV12 (included), a room controller RS100... - Page 4 These operating instructions describe operation of the Rinnai E-Series condensing gas boilers. This manual is for the end user. For installation and servicing there is a installation & servicing instructions manual for the installer. Read this manual fully before operating the boiler.
-
Page 5: For Your Safety Read Before Operating
Safety FOR YOUR SAFETY READ BEFORE OPERATING WARNING: If you do not follow these instructions exactly, a fire or explosion may result causing property damage, personal injury or loss of life. A. This appliance does not have a pilot. It is equipped with an ignition device which automatically lights the burner. - Page 6 New building construction Remodeling areas Garages with workshops Checking the water pressure NOTICE Check the water pressure in the central heating installation regularly. Use only potable water for filling. Additives only after clearance by Rinnai. Contact your installer in case of doubt.
-
Page 7: Description Of The Boiler
Description of the boiler The Rinnai E boiler is a room sealed, condensing and modulating central heating boiler with an integrated hot water facility. The boiler is provided with a integrated control system. Because an outdoor sensor is connected to the boiler, the boiler works weather dependantly. -
Page 8: Explanation Of The Function Buttons
Explanation of the function buttons Only qualified personel who are trained for NOTICE these boilers are permitted to make alterations in the controller to chronolize the boiler to the installation. 1. Display. See following pages for further information. 2. ON-OFF Switch (Placed separately next to the boiler). - Page 9 6 Mode-button. Only for Service personel 7 Step-button. After briefly pressing, the water pressure can be retrieved. After pressing for 5 seconds it switches from the Good-state to technical read out and vice versa (see following pages); 8 Reset-button. When a fault occurs it will be shown by the flashing E (Error) with a number code after which the boiler is shut down.
-
Page 10: The Boiler Display
The boiler display Two boiler displays, “Good or Technical” see below. Good or standard read out. During this reading the display will only show what is necessary. Under normal circumstances the display will give a Good reading. In case of a fault this will be shown with, alternate display of Good, with an or BL code. -
Page 11: Water Pressure In The Central Heating System
Water pressure in the central heating system The installation will function optimally with a water pressure of between 16 and 18 PSI (1.1 and 1.3 bar). If the water pressure drops below 12 PSI (0.8 bar), the display will show FILL. During this message the boiler will remain functioning at a reduced level. - Page 12 Replenishing the central heating system The central heating installation needs to be filled with potable (drinking) water. For topping up the installation you use the filling loop according to the following procedure: Contact your installer if your installation is not NOTICE provided with a filling loop.
-
Page 13: Turning The Boiler Off
The boiler will not function directly. The automatic de-aeration program of about 17 minutes will start after one of the three program buttons is pressed. The display will show where A stands for Automatic de-aeration program Active and the number on the right indicates the actual water temperature of the boiler. Check the water pressure regularly and top up the installation when necessary. The working pressure of the installation should be between 16 and 18 PSI (1.1 and 1.3 bar) It can take a while before all air has disappeared from a filled installation. Especially in the first week noises can be heard which indicate the presence of air. The automatic air vent in the boiler will remove the air, which means the water pressure will reduce during this period and therefore topping up with water will... -
Page 14: Error, Maintenance And Warranty
Error, maintenance and warranty If a fault is detected the boiler will be blocked. This will be reflected, by an alternate display of Good, with an of Error or a BL of Blocking and a number code. You can try to reset the boiler by pressing the NOTICE Reset key once. - Page 15 - if there is a leak at the condensate trap (8) replace complete condensate trap by # 809000100; Step 2: Refitting is done in reverse order. Note that all gaskets seal completely. Maintenance or changes to the appliance may only NOTICE be carried out by a qualified technician.
- Page 17 - Si vous ne pouvez rejoindre le fournisseur de gaz, appelez le service des incendies. Addresse: 103 International Drive, Peachtree City, GA, 30269 Gratuit: 1-800-621-9419 • Fax: 678-829-1666 • www.rinnai.us Avis ! Ce manuel doit être conservé pour consultation ultérieure.
- Page 18 Contenu des instructions Ces instructions contiennent d’importantes informations pour l’utilisation en toute sécurité des chaudières à gaz de la série Rinnai Q. Ces instructions d’utilisation sont destinées au propriétaire ou au responsable locataire des locaux où la chaudière est installée.
-
Page 19: Sécurité Et Instructions Générales
Sécurité et instructions générales Veuillez observer ces instructions dans l’intérêt de votre propre sécurité. Utilisation prévue La chaudière est conçue pour chauffer de l’eau pour un circuit de chauffage central et, le cas échéant, pour produire de l’eau chaude domestique. La chaudière est livrée avec un contrôleur de brûleur pré... - Page 20 Ces instructions de fonctionnement décrivent le fonctionnement des chaudières à gaz à condensation de la série Rinnai Q. Ce manuel est destiné à l’utilisateur final. Pour l’installation et l’entretien, il existe un manuel d’instructions d’installation et d’entretien pour l’installateur.
-
Page 21: Instructions De Mise En Marche
Sécurité POUR VOTRE SÉCURITÉ LISEZ AVANT DE METTRE EN MARCHE AVERTISSEMENT: Quiconque ne respecte pas à la lettre les instructions dans la présente notice risque de déclencher un incendie ou une explosion entraînant des dommages, des blessures ou la mort. A. - Page 22 Garages avec ateliers Vérification de la pression d’eau REMARQUE Vérifiez régulièrement la pression d’eau dans l’installation centrale de chauffage. N’utilisez que de l’eau potable pour le remplissage. Additifs uniquement après autorisation de sécurité de Rinnai. Contactez votre installateur en cas de doute.
-
Page 23: Description De La Chaudière
Description de la chaudière La chaudière Rinnai E est une chaudière de chauffage central de pièce scellée à condensation et modulante avec une fonction eau chaude domestique intégrée La chaudière est équipée d'un système de régulation intégré. Grâce à un capteur extérieur connecté... -
Page 24: Explication Des Boutons De Fonctions
Explication des boutons de fonctions Seul du personnel qualifié formé pour ces REMARQUE chaudières est autorisé à effectuer des modifications dans le régulateur pour adapter la chaudière à l’installation. 1. Affichage. Consulter les pages suivantes pour d’autres informations. 2. Commutateur MARCHE-ARRÊT Ce commutateur commande la mise en marche ou l’arrêt de l’alimentation électrique de la chaudière. - Page 25 En cas de gel, il est possible (lorsqu’il n’existe REMARQUE pas de capteur extérieur connecté) de placer manuellement la pompe de circulation en mode de circulation continue, ce qui réduit le risque de gel des tuyaux (garage, grenier ou autres espaces/ pièces froids) qui sont sensibles au gel.
- Page 26 L’affichage de la chaudière Deux affichages sur la chaudière, “Good ou Technique” voir ci-dessous. Good ou affichage standard. Pendant cette lecture l’affichage ne fera apparaître que ce qui est nécessaire. En conditions normales, l’affichage donne Good comme résultat. En cas de panne, l’affichage donne alternativement Good, avec un code E ou BL.
- Page 27 Pression d’eau dans le circuit de chauffage central L’installation fonctionne de façon optimale avec une pression d’eau comprise entre 16 et 18 PSI (1.1 et 1.3 bar). Si la pression de l’eau chute en dessous de 12 PSI (0.8 bar), l’affichage indique FILL (REMPLIR).
- Page 28 Remplissage du circuit de chauffage central L’installation de chauffage central doit être remplie d’eau potable (à boire). Pour remplir l’installation, il vous faut utiliser la boucle de remplissage selon la procédure suivante : Contactez votre installateur si votre installation REMARQUE n’est pas équipée d’une boucle de remplissage.
-
Page 29: Arrêt De La Chaudière
La chaudière ne fonctionnera pas directement. Le programme de désaération automatique d’environ 17 minutes démarre après avoir appuyé sur l’un des trois boutons de programme. L’affichage indique où A signifie Automatique pour le programme de désaération actif et le numéro sur la droite indique la température réelle de l’eau dans la chaudière. Vérifiez régulièrement la pression de l’eau et, si nécessaire, refaites le plein de l’installation. - Page 30 Erreur, maintenance et garantie Si une panne est détectée, la chaudière est bloquée. Ceci se reflète par l’affichage alterné de Good, avec un E d’Erreur ou un BL de Blocage et un code numérique. Vous pouvez tenter de réinitialiser la chaudière en appuyant une fois sur la touche Reset.
- Page 31 Le nettoyage du condensat récupéré et du circuit de rejet doit être effectué périodiquement. Avant de mettre la chaudière en marche après un nettoyage périodique, remplissez le purgeur du condensat avec 1,27 tasse / 300 ml d’eau. Etape 1 : Purgeur de condensat - retirez le vis (7 ;...
- Page 32 Numéro de téléphone en dehors des horaires d’ouverture : 800000024 08/2010 Distributor for the USA and Canada Distributeur pour l'Etats-Unis et Canada Rinnai America Corporate • 103 International Drive • Peachtree City, GA 30269 To l l F r e e : ( 8 0 0 ) 6 2 1 - 9 4 1 9 •...