
Related Manuals for UTICA BOILERS UB90125


Summary of Contents for UTICA BOILERS UB90125
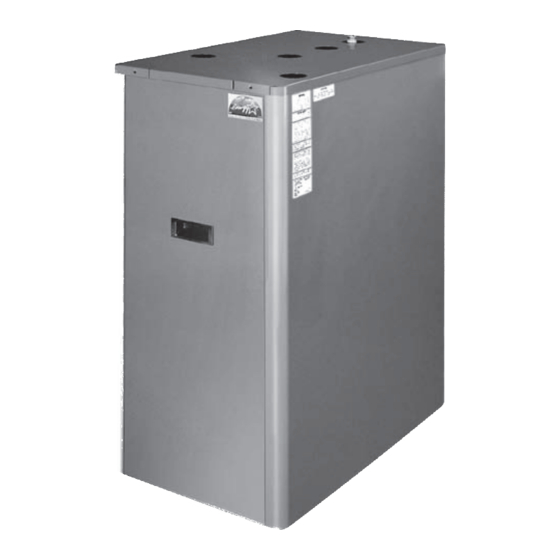
- Page 1 UB90 125-200 GAS-FIRED, DIRECT VENT, CONDENSING, HOT WATER BOIlER Utica Boilers An ISO 9001-2000 Certified Company P.O. Box 4729 Utica, NY 13504-4729 www.uticaboilers.com MEMBER: The Hydronics Institute P/N 240004826U, Rev. A [10/08]...
-
Page 2: Table Of Contents
90 125-200 cast alUMiNUM Boiler InstallatIon Manual and opERatIng InstRuctIons taBle oF coNteNts The forced draft fan draws in the outside combustion air to mix with gas, which flows into the pre-mix I. Introduction ............. 2 burner and combusts. The fan then forces the II. -
Page 3: Rules For Safe Installation And Operation
iii. rUles For saFe iNstallatioN aND oPeratioN WARNING this appliance has been equipped for residential installations. if used for commercial applications, any and all additional code requirements must be adhered to for installation. this may require additional controls, including but not limited to a manual reset low water cut off, a manual reset high temperature limit, and wiring and/or piping modifications. -
Page 4: Boiler Ratings And Capacities
iii. rUles For saFe iNstallatioN aND oPeratioN 7. Follow a regular service and maintenance schedule materials and methods described in this manual. for efficient and safe operation. Installation must comply with local codes. 8. Keep boiler area clean of debris and free of 10. -
Page 5: Before Installing The Boiler
iV. Boiler ratiNgs & caPacities taBlE #3 - lP gas 200,000 175,000 150,000 125,000 Nominal input Vent lengths Vent lengths Vent lengths Vent lengths altitude Min. Min. Min. Min. 200,000 200,000 175,000 175,000 150,000 150,000 125,000 125,000 1,000 195,900 195,750 171,900 171,200 146,900... -
Page 6: Locating The Boiler
V. BeFore iNstalliNg tHe Boiler The installation must conform to the requirements of locatIng tHE BoIlER the authority having jurisdiction or, in the absence of such requirements, to the National Fuel Gas Code, 1. Select a location which is level, central to the piping ANSI Z223.1 - latest revision. - Page 7 V. BeFore iNstalliNg tHe Boiler 5. Equipment shall be installed in a location which fa- Figure #2 cilitates the operation of venting and combustion air sIdEWall VEnt/IntaKE tERMInatIons intake piping systems as described in this manual. 6. Advise owner of boiler to keep venting and combus- OVERHANG tion air intake passages free of obstructions.
- Page 8 V. BeFore iNstalliNg tHe Boiler coMBustIon aIR/VEnt pIpE REQuIREMEnts continued Figure #5 WARNING FailUre to Follow tHese warNiNgs coUlD concEntRIc VEnt RooF InstallatIon resUlt iN Fire, ProPertY DaMage, PersoNal iNjUrY, or DeatH. When vent pipe is exposed to temperatures below freezing, such as when it passes through an unheated space or when a chimney is used as a chaseway, vent pipe must be insulated with 1/2”Armaflex or equivalent.
-
Page 9: Placing The Boiler
V. BeFore iNstalliNg tHe Boiler the appliances remaining connected to the com- FoundatIon REQuIREMEnts mon venting system are located and other spac- Boiler must be placed on level surface. Boiler is NOT es of the building. Turn on clothes dryer and any to be installed on carpeting. -
Page 10: Near Boiler Piping
Vii. Near Boiler PiPiNg contains 2.6 gallons (U.S.). Size expansion tank ac- CAUTION cordingly. Consult expansion tank manufacturer for proper sizing information. Connect properly sized ex- Copper supply and return piping must NOT be in- pansion tank (not furnished) as shown in Figure #6 for stalled directly into aluminum boiler section castings diaphragm type expansion tank. - Page 11 Vii. Near Boiler PiPiNg Figure #9b Figure #8 MultI ZonE BoIlER pIpIng WItH ZonE ValVEs sInglE ZonE BoIlER pIpIng Figure #9a MultIZonE BoIlER pIpIng WItH cIRculatoRs supplY and REtuRn lInEs The packaged boiler unit is set up to receive 1¼” NPT supply and return piping from top access.
-
Page 12: Condensate Drain Piping
Vii. Near Boiler PiPiNg condEnsatE dRaIn pIpIng condEnsatE dRaIn REQuIREMEnts Condensate drain line to be pitched down to floor drain The condensate trap is to be field installed as previ- at a minimum of ¼” per foot. An external condensate ously shown in Figure #10. -
Page 13: Combustion Air And Vent Pipe
Viii. coMBUstioN air aND VeNt PiPe pipe and pipe cement. SDR pipe is NOT approved in connEctIons and tERMInatIon Canada. IMpoRtant: To prevent damage to the gas burner For Canadian installations all plastic venting material and ensure proper operation of the unit, installer must be listed to ULC S636. - Page 14 Viii. coMBUstioN air aND VeNt PiPe 4. Combustion air and vent piping to be pitched back to vegetation. The venting system shall terminate at boiler at minimum ¼” per foot from intake and vent least 4 feet horizontally from, and in no case above terminals so that all moisture in combustion air and or below electric meters, gas meters, regulators, vent piping drains to boiler.
-
Page 15: Gas Supply Piping
Viii. coMBUstioN air aND VeNt PiPe 10. Handle pipe joint carefully until cement sets. 12. Slope combustion air and vent pipes toward boiler a minimum of ¼” per linear foot with no sags be- 11. Support combustion air and vent piping a minimum tween hangers. -
Page 16: Electrical Wiring
iX. gas sUPPlY PiPiNg 10. Propane gas piping should be checked out by the connEctIng tHE gas pIpIng continued propane installer. 2. Use pipe joint compound suitable for liquefied pe- 11. It is recommended to use a ½” union suitable for troleum gas on male threads only. - Page 17 X. electrical wiriNg power supply to the ground (green) screw on the ser- Locate the thermostat about five feet above the floor vice switch. The receptacle on the service switch is on an inside wall. It may be mounted directly on the always powered regardless of whether the switch is wall or on a vertical mounted outlet box.
- Page 18 X. electrical wiriNg Figure #14a scHEMatIc WIRIng connEctIons notE: If any of the original wire as supplied with this appliance must be replaced, it must be replaced with type 150°C Thermoplastic wire or its equivalent. 1013-10 INTEGRATED BOILER CONTROL CASTING TEMPERATURE SAFETY SWITCH (MANUAL RESET) HI LIMIT 24 VAC AQUASTAT...
- Page 19 X. electrical wiriNg Figure #14B laddER WIRIng dIagRaM notE: If any of the original wire as supplied with this appliance must be replaced, it must be replaced with type 150°C Thermoplastic wire or its equivalent. 120 VOLT POWER SUPPLY (NOTE: USE COPPER CONDUCTORS ONLY) ON/OFF SWITCH LWCO...
-
Page 20: Controls And Accessories
Xi. coNtrols aND accessories a lack of flame signal on three consecutive trials for ig- This section provides a brief description of the key nition, the IBC will lock out. The “Valve” and “Flame” di- controls and accessories found in this boiler. agnostic indicator lamps (see Figure #16) will blink in- See Section XVII, “Troubleshooting,”... -
Page 21: Circulator Pump
Xi. coNtrols aND accessories dRaIn ValVE castIng tEMpERatuRE saFEtY sWItcH The manual drain valve provides a means of draining In the event of lack of or loss of water in the boiler, the the water in the heating system, including the boiler and casting temperature safety switch (230°F setpoint) in- hot water supply and return piping systems installed stalled on the top of the aluminum boiler section be-... -
Page 22: Startup
Xi. coNtrols aND accessories The “Purge” indicator lamp (see Figure #16) will blink, EXtERnal condEnsatE puMp (optional) indicating a failure to prove adequate combustion air For installations where there is no floor drain or other ap- flow or flue gas flow. The IBC will automatically reset propriate drainage available to receive condensate from after 15 minutes or can be manually reset as noted in the boiler, an external float activated condensate pump... - Page 23 Xii. startUP Company at 1-800-422-2436 or your distribu- to rapidly bleed air from boiler, then let the relief tor for more information. valve snap shut. Use of an alternate manufacturer’s premix an- 2. Open the zone service valve on the supply pipe tifreeze is acceptable if the product specifica- for the first zone.
-
Page 24: Placing Boiler In Operation
Xii. startUP notE: DO NOT use stop leak compounds. Leaks 4. This appliance does not have a pilot. It is equipped in threaded connections in the aluminum boiler with an ignition device which automatically lights sections must be repaired immediately. Aluminum the burner. - Page 25 Xii. startUP iF BUrNer aPPears to PUlsate DUriNg igNitioN: 1. Turn off boiler power and shut off gas supply to the boiler. 2. Take the burner assembly apart by removing the combus- tion air blower and gas valve/venturi assembly from the boiler and visually inspect the inside of the burner.
-
Page 26: Checkout Procedures And Adjustments
Xiii. cHecKoUt ProceDUre & aDjUstMeNts VERIFY pRopER sEQuEncE oF opERatIon The sequence can be followed via the diagnostic indicator lamps on the Integrated Boiler Control in Figure #16 (Section XI). This is the normal sequence of operation. A more detailed sequence of op- eration containing potential faults can be found in the service hints section. - Page 27 Xiii. cHecKoUt ProceDUre & aDjUstMeNts InspEct VEntIng & aIR IntaKE sYstEM sEt tHERMostat HEat antIcIpatoR (if used) and VERIFY tHERMostat opERatIon Operate the boiler and verify that all vent/air intake connections are gastight and watertight. Repair any For a single thermostat connected to the yellow ther- leaks immediately.
- Page 28 Xiii. cHecKoUt ProceDUre & aDjUstMeNts aDjUstMeNts aND cHecKoUt It is important that this appliance operate between 8.5 and 10% CO . To verify that the appliance is operating in this range, follow the steps below. Important: Under all conditions CO levels should not exceed 100ppm. 1.
-
Page 29: Maintenance And Cleaning
XiV. MaiNteNaNce aND cleaNiNg Maintenance as outlined below can be performed 2. Check that boiler area is free from combustible ma- by the owner unless otherwise noted. terials, gasoline, and other flammable vapors and liquids. The acidic nature of flue gasses condensing on the aluminum boiler sections will cause the formation of 3. - Page 30 XiV. MaiNteNaNce aND cleaNiNg annual sHut doWn pRocEduRE (End of each heating surfaces of boiler (see “Repair Parts heating season) Manual” for diagram). Be sure that brush does not get stuck in heat exchanger! 1. Follow the instructions in “To Turn Off Gas To Ap- pliance”...
-
Page 31: Detailed Sequence Of Operation
DetaileD seQUeNce oF oPeratioN sERVIcE HInts POWER ON STAND BY THERMOSTAT CALLS FOR HEAT CIRCULATOR IF MAIN BURNER DOES NOT PROVE FLAME IN ENERGIZES THRU 3 TRIALS, CONTROL LOCKOUT. VALVE/FLAME 2K1 CONTACTS LIGHT BLINKS. MANUAL RESET IS REQUIRED OR CONTROL WILL AUTOMATICALLY RESET AFTER 1 HOUR. - Page 32 DetaileD seQUeNce oF oPeratioN saFEtY sEQuEncEs duRIng opERatIon castiNg teMPeratUre saFetY switcH DraFt iNDUcer teMPeratUre saFetY switcH If burner operates when boiler has no water, aluminum If draft inducer temperature reaches temperature boiler sections heat up rapidly. safety switch setpoint, safety switch contacts open immediately, closing gas valve (light goes out).
- Page 33 DetaileD seQUeNce oF oPeratioN End oF noRMal sEQuEncE oF opERatIon Thermostat ends call for heat. Gas valve and circulator pump are de-energized, valve and flame lights go out. Blower runs for 30 seconds post purge, purge light is on. Blower is de-energized after 30 seconds, purge light shuts off.
-
Page 34: Troubleshooting
troUBlesHootiNg DANGER Fire, Explosion or Shock Hazard may cause Property Damage, Sever injury or Death. do not attEMpt to ModIFY tHE pHYsIcal oR ElEctRIcal cHaRactERIstIcs oF tHIs BoIlER In anY WaY. iMPortaNt 1. In a reset from lockout condition, all electrical meter readings at the gas control valve (24 VAC) must be taken within the trial for ignition period. - Page 35 troUBlesHootiNg sYstEM status The indicator lights track the operating sequence. If the system locks out, the lights indicate the point in the sequence of operation were lockout occurs. If this table does not readily provide the reason for boiler malfunction or non-operation, refer to the following pages for more detailed troubleshooting procedures. ligHt statUs iNDicates...
- Page 36 troUBlesHootiNg tRouBlEsHootIng cHaRt 1 WARNING ElEctRIcal sHocK HaZaRd MaY causE sERIous InJuRY oR dEatH the following procedures may expose you to dangerous line voltage. Use caution to avoid touching live electrical contacts. service must be performed by a trained, experienced service technician.
- Page 37 troUBlesHootiNg tRouBlEsHootIng cHaRt 2...
- Page 38 troUBlesHootiNg tRouBlEsHootIng cHaRt 3 CHART 1 OPEN CHECK FOR VAC BLOWER STARTS BETWEEN TERMINALS 1 AND 3 REPLACE IBC AT CONNECTOR CN4 ON IBC CHECK FOR 120 VAC AT REPAIR/REPLCE BLOWER LEADS ON WIRING WIRING FROM IBC HARNESS TO BLOWER REPAIR/REPLACE BLOWER PRESSURE SWITCH...
- Page 39 troUBlesHootiNg tRouBlEsHootIng cHaRt 4 CHART 3 CHECK FOR 120 VAC IGNITER/SENSOR WARMS BETWEEN TERMINALS 1 UP AND GLOWS AND 2 AT CONNECTOR YELLOW/ORANGE REPLACE IBC CN1 ON IBC (DURING DURING 20 SECOND IGNITER WARM UP) WARM UP CHECK FOR 120 VAC AT IGNITER/SENSOR LEADS REPAIR/REPLACE WIRING ON WIRING HARNESS...
- Page 40 troUBlesHootiNg tRouBlEsHootIng cHaRt 5...
- Page 41 troUBlesHootiNg tRouBlEsHootIng cHaRt 6 CHART 5 CHART 5 CHART 5 REPLACE GAS CONTROL. NO #3 NO #2 CHECK GAS ORFICICE SIZE. IS GAS ORIFICE SIZE CORRECT. CHECK REPAIR PARTS LIST FOR CORRECT SIZE. IS GAS ORIFICE CLEAR OF BLOCKAGE. RUNS FOR 25-50 SECONDS, THEN TURNS OFF.
- Page 42 troUBlesHootiNg dIFFEREntIal aIR pREssuRE sWItcH cHEcK The differential air pressure switch is a safety device which will prevent the boiler from firing Locations of the connection points required to check if there is an air intake, boiler heat exchanger the differential air pressure. or vent blockage.
-
Page 43: Installation And Checkout Certificate
installation and cHecK-oUt certiFicate Boiler Model ___________ serial # _____________ Date installed___________ Measured BtU/Hr input ____________ installation instructions have been followed Checkout procedure and adjustments performed Maintenance and service issues reviewed with owner/ maintenance person Installation booklet affixed on or adjacent to boiler installer (company) __________________________________________ address ___________________________________________________ Phone _____________________________________________________... - Page 44 P.O. Box 4729 Utica, NY 13504-4729...