Table of Contents
Advertisement
Advertisement
Table of Contents

Related Manuals for Invacare TDX-SP


Summary of Contents for Invacare TDX-SP
-
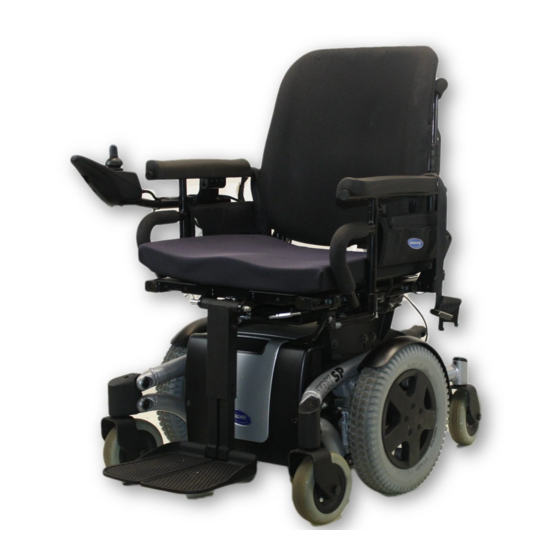
Page 1: Service Manual
Invacare TDX-SP / TDX-SP N ® SERVICE MANUAL Edition: 24.01.12... - Page 2 ® SERVICE MANUAL Invacare - TDX-SP / TDX-SP N These instructions contain information about: Testing work Repair Instructions This manual is part of the instructions for use. Service addresses : +43 6232 5 53 50 Invacare Austria GmbH Fax: +43 6232 5 53 54...
- Page 3 ® Invacare - TDX-SP / TDX-SP N SERVICE MANUAL : +353 18 10 70 84 Invacare Ireland Ltd. Fax: +353 18 10 70 85 Unit 5 Seatown Business Campus Seatown Rd, Swords ireland@invacare.com WWW: www.invacare.ie County Dublin Ireland (Kundeservice): +47 (0)22 57 95 00 Invacare®...
-
Page 4: Table Of Contents
Batteries, cables & battery charger ..................39 8.2.1 Making the batteries accessible ...................39 8.2.2 Replacing batteries (Standard TDX SP)...............41 8.2.3 Replacing batteries / replacing battery cables (TDX-SP N) .........43 8.2.4 Correct handling of damaged batteries ................45 8.2.5 Checking and replacing the main fuse (Standard TDX-SP).........46 8.2.6 Replacing the main fuse (TDX-SP N)................47... - Page 5 ® Invacare - TDX-SP / TDX-SP N SERVICE MANUAL Lighting unit ..........................52 8.4.1 Replacing the front bulb....................52 8.4.2 Replacing the front headlight complete ................53 8.4.3 Replacing the front bulbholder..................55 8.4.4 Replacing the rear bulb ....................56 8.4.5 Replacing the rear light complete .................57 8.4.6...
- Page 6 ® SERVICE MANUAL Invacare - TDX-SP / TDX-SP N 8.18 Top walking beam .........................128 8.18.1 Removing the top walking beam ................128 8.18.2 Refitting the top walking beam ...................130 8.19 Drive unit ..........................132 8.19.1 Replacing the motor/transmission unit (Standard motor)...........132 8.19.2 Replacing the motor/transmission unit (SSD motor) ..........134 8.19.3 Replacing or rotating the motor / gearbox unit sealing ring (SSD motor) ....137...
-
Page 7: Introduction
● Alterations to the mobility aid which occur as a result of incorrectly or improperly executed maintenance or overhaul work lead to the exclusion of all liability on the side of INVACARE. ● If you have any problems or questions please contact Invacare® Service. -
Page 8: Definition And Representation Of Information And Safety Information In This Manual
® SERVICE MANUAL Invacare - TDX-SP / TDX-SP N Definition and representation of information and safety information in this manual Different types of information and signal words are used throughout this manual. HAZARD! The signal word "HAZARD!" refers to immediate hazards. -
Page 9: Hazard Symbols And Symbols Used
® Invacare - TDX-SP / TDX-SP N SERVICE MANUAL Hazard symbols and symbols used Different types of hazard symbols and symbols are used throughout this manual. General hazards This symbol warns you of general hazards! ● Always follow the instructions to avoid injury to the user or damage to the product! -
Page 10: Images In This Manual
® SERVICE MANUAL Invacare - TDX-SP / TDX-SP N Images in this manual The detailed images in this manual are given digits to identify various components. Component numbers in text and operational instructions always relate to the image directly above. -
Page 11: Safety And Fitting Instructions
® Invacare - TDX-SP / TDX-SP N SERVICE MANUAL Safety and fitting instructions These safety instructions are intended to prevent accidents at work, and it is imperative that they are observed. Before any inspection or repair work ● Read and observe this repair manual and the associated operating manual! ●... - Page 12 Any changes to the drive program can affect the driving characteristics and the tipping stability of the vehicle! ● Changes to the drive program may only be carried out by trained Invacare® specialist dealers! ● Invacare® supplies all mobility aids with a standard drive program ex-works. Invacare® can...
-
Page 13: Tightening Torques
® Invacare - TDX-SP / TDX-SP N SERVICE MANUAL Tightening torques The tightening torques stated in the following list are based on the thread diameter for the nuts and bolts for which no specific values have been determined. All values assume dry and de-greased threads. -
Page 14: Layout Of Components And Componentry
® SERVICE MANUAL Invacare - TDX-SP / TDX-SP N Layout of components and componentry Overview At rear underneath seat: Electronic modules The electronic modules are located underneath the rear cover panel (1). The electronic modules used are described in Chapter 4.2. - Page 15 ® Invacare - TDX-SP / TDX-SP N SERVICE MANUAL At the front, underneath the seat: (1) – actuator module (optional) (2) – lifter actuator (optional) (3) – tilt actuator (optional)
-
Page 16: Electronic Modules
® SERVICE MANUAL Invacare - TDX-SP / TDX-SP N Electronic modules A variety of electronic modules can be fitted to the mobility aid. Before you connect any mobility aid components such as adjusting motors/actuators or motors to the electronic modules, you should first ensure that you know exactly which electronic module has been fitted. - Page 17 ® Invacare - TDX-SP / TDX-SP N SERVICE MANUAL Electronic module Designation Joystick boxes Notes G-Trac sensor The G-Trac sensor is optional Operating hours The operating hours counter counter is optional.
-
Page 18: Acs 2 Electronic Module
® SERVICE MANUAL Invacare - TDX-SP / TDX-SP N 4.2.1 ACS 2 electronic module Connections 1) Battery 24V 2) Bus cable (to remote or ACT) 3) Bus cable (to remote or ACT) 4) Motor M1 5) Light 6) Motor M2 4.2.2... -
Page 19: Act 4 Actuator Module
® Invacare - TDX-SP / TDX-SP N SERVICE MANUAL 4.2.4.2 ACT 4 actuator module Connections 1) ACI* 2) Bus cable (to remote or electronic module) 3) Bus cable (to remote or electronic module) 4) Actuator - Channel 4 5) Actuator - Channel 3... -
Page 20: Service Plan (1X Annually)
® SERVICE MANUAL Invacare - TDX-SP / TDX-SP N Service plan (1x annually) CAUTION! Danger of injury and damage to property, if the maximum speed reduction on a wheelchair with a lifter does not function correctly! The wheelchair’s control unit must reduce the maximum possible speed as soon as the lifter is raised. - Page 21 ® Invacare - TDX-SP / TDX-SP N SERVICE MANUAL Component Check Remedy Notes Check drive wheels for Adjust, replace wheel See chapters Wheel tight fit and side play hubs 8.13.1 and suspension and 8.13.3/8.13.4 wheels Check steering wheels Replace wheels, See chapter 8.12.
- Page 22 ® SERVICE MANUAL Invacare - TDX-SP / TDX-SP N Component Check Remedy Notes Check batteries for Replace batteries if See chapters Batteries damage necessary 8.2.2/8.2.3 and 8.2.4 Check battery voltage Charge batteries Check battery voltage Charge batteries See operating...
-
Page 23: Operational Faults
The tables for rectification of operational faults listed in the following chapters are only an excerpt from the original manufacturer's manuals. You can obtain the original manuals from Invacare®. If you have problems with the mobility aid, please proceed as follows: ●... -
Page 24: Drive Fault Diagnosis
® SERVICE MANUAL Invacare - TDX-SP / TDX-SP N Drive fault diagnosis PROBLEM OTHER POSSIBLE SOLUTION Documentation SYMPTOMS CAUSE Mobility aid The remote Drive motors Engage drive See operating manual will not status display disengaged motors start illuminates normally and displays blink code 5/6. - Page 25 ® Invacare - TDX-SP / TDX-SP N SERVICE MANUAL PROBLEM OTHER POSSIBLE SOLUTION Documentation SYMPTOMS CAUSE None High motor Stop journey and Motor runs loading causes allow electronic to but loses electronic cool down. power module to decrease voltage None...
- Page 26 ® SERVICE MANUAL Invacare - TDX-SP / TDX-SP N PROBLEM OTHER POSSIBLE SOLUTION Documentation SYMPTOMS CAUSE None Bad connections Check all cabling. See chapter 8.2.7. Motors do not run Fuse burnt out Check cabling and See chapters 8.2.7 and replace fuse 8.2.5/8.2.6...
- Page 27 ® Invacare - TDX-SP / TDX-SP N SERVICE MANUAL PROBLEM OTHER POSSIBLE SOLUTION Documentation SYMPTOMS CAUSE None Drive shaft Check drive shaft, See chapters Irregular movable or bent replace 8.19.1/8.19.2 and running transmission if 8.19.4/8.19.5 defective. None Parts lost Reattach parts Parts lost once found.
-
Page 28: Rem Remotes: Error Codes And Diagnostic Codes
® SERVICE MANUAL Invacare - TDX-SP / TDX-SP N REM remotes: Error codes and diagnostic codes Note The following table is applicable to remotes REM 24, REM A, REM B and REM 550, which are connected to electronic modules DX, ACS or ACS 2. - Page 29 ® Invacare - TDX-SP / TDX-SP N SERVICE MANUAL BLINK CODE POSSIBLE CAUSE SOLUTION DOCUMENTATION Drive motors overloaded / Switch remote on and off / 11 x blink overheated wait if necessary Compatibility problems Remove incorrect module See chapter 8.6.2.
-
Page 30: Shark Ii Remote: Error Codes And Diagnostic Codes
® SERVICE MANUAL Invacare - TDX-SP / TDX-SP N Shark II remote: Error codes and diagnostic codes The drive electronic can automatically rectify some faults. In this case the status display will stop blinking. Switch the remote on and off again several times. Wait around 5 seconds each time before switching the remote on again. -
Page 31: Diagnosis Of Charging Device Faults
® Invacare - TDX-SP / TDX-SP N SERVICE MANUAL Diagnosis of charging device faults SYMPTOM POSSIBLE CAUSE SOLUTION Charging device not Ensure that the battery No LEDs illuminating on connected to mains supply. charger has been plugged in. battery charger... -
Page 32: Test Procedures
® SERVICE MANUAL Invacare - TDX-SP / TDX-SP N Test procedures Testing the motor Requirements: ● Phillips screwdriver size 2 ● digital multimeter with resistance measurement ● Remove the rear panel as described in Chapter 8.1.2. ● Pull the motor plug (3) out of the electronic module. -
Page 33: Testing The Electro-Mechanical Parking Brake
Connect the digital multimeter to the adjacent central motor plug contacts (3) and measure the resistance between the contacts. ● If there is a defect, replace the motor and send it to Invacare® Service for inspection or repair. Note A resistance of between 40 and 80 ohms indicates an intact brake. - Page 34 ® SERVICE MANUAL Invacare - TDX-SP / TDX-SP N CAUTION! Material damage can be caused to the electronic module due to short-circuits in the electro-mechanical brake. ● NEVER connect an electro-mechanical brake to an intact electronic module with a short- circuit! ●...
-
Page 35: Repair Work
® Invacare - TDX-SP / TDX-SP N SERVICE MANUAL Repair work CAUTION! Danger of injury and damage to property, if the maximum speed reduction on a wheelchair with a lifter does not function correctly! The wheelchair’s control unit must reduce the maximum possible speed as soon as the lifter is raised. -
Page 36: Opening The Rear Cover Panel
® SERVICE MANUAL Invacare - TDX-SP / TDX-SP N 8.1.2 Opening the rear cover panel 8.1.2.1 Rear cover without an operating hours counter Requirements: ● Phillips screwdriver size 2 Note This chapter explains how to open the rear cover if no operating hours counter is installed. The procedure for opening the rear cover with an operating hours counter installed is described in chapter 8.1.2.2... -
Page 37: Rear Cover With An Operating Hours Counter
® Invacare - TDX-SP / TDX-SP N SERVICE MANUAL 8.1.2.2 Rear cover with an operating hours counter Requirements: ● Phillips screwdriver size 2 Note This chapter explains how to open the rear cover if an operating hours counter is installed. The procedure for opening the rear cover with no operating hours counter installed is described in chapter 8.1.2.1. -
Page 38: Opening The Top Cover Panel
® SERVICE MANUAL Invacare - TDX-SP / TDX-SP N 8.1.3 Opening the top cover panel Requirements: ● Phillips screwdriver size 2 Dismantling the top cover panel: ● Remove the seat. ● Undo the four Phillips screws (3) on the top cover panel (2). -
Page 39: Batteries, Cables & Battery Charger
® Invacare - TDX-SP / TDX-SP N SERVICE MANUAL Batteries, cables & battery charger 8.2.1 Making the batteries accessible ATTENTION! Injury hazard and possible material damages if batteries are handled improperly! ● The installation of new batteries may only be carried out by authorised specialists. - Page 40 ® SERVICE MANUAL Invacare - TDX-SP / TDX-SP N ● Remove the legrests. ● Undo the three Phillips screws (7) on the rear cover panel (1). ● Remove the rear cover panel. ● Disconnect the battery plugs (2). ● Remove the two bolts (5) on the front cover panel (4) with a 5/8" Allen key.
-
Page 41: Replacing Batteries (Standard Tdx Sp)
® Invacare - TDX-SP / TDX-SP N SERVICE MANUAL 8.2.2 Replacing batteries (Standard TDX SP) ATTENTION: Injury hazard and possible material damages if batteries are handled improperly! ● The installation of new batteries may only be carried out by authorised specialists. - Page 42 ® SERVICE MANUAL Invacare - TDX-SP / TDX-SP N Removing the batteries: ● Make the batteries accessible as described in Chapter 8.2.1. ● Remove the terminal caps. ● Remove the terminal bolts (3) with an 11 mm socket spanner. First remove the negative terminal bolt.
-
Page 43: Replacing Batteries / Replacing Battery Cables (Tdx-Sp N)
Invacare - TDX-SP / TDX-SP N SERVICE MANUAL 8.2.3 Replacing batteries / replacing battery cables (TDX-SP N) Note To replace the fuse, the battery cable with the fuse attached to it must be replaced. CAUTION: Danger of injury and danger of damage to property if the batteries are handled incorrectly! ●... - Page 44 ® SERVICE MANUAL Invacare - TDX-SP / TDX-SP N Uninstalling batteries/battery cables: ● Remove the batteries, as described in chapter 8.2.1. Positive terminal (+): ● Remove the cable ties (1) with side cutting pliers. ● Lift the battery terminal cap (2) off and move it up the cable and out of the way.
-
Page 45: Correct Handling Of Damaged Batteries
® Invacare - TDX-SP / TDX-SP N SERVICE MANUAL 8.2.4 Correct handling of damaged batteries WARNING: BURN HAZARD! Injury hazard due to discharged acid. ● Always wear acid-proof protective gloves when handling batteries. ● Always wear protective goggles when handling batteries. -
Page 46: Checking And Replacing The Main Fuse (Standard Tdx-Sp)
SERVICE MANUAL Invacare - TDX-SP / TDX-SP N 8.2.5 Checking and replacing the main fuse (Standard TDX-SP) CAUTION: Fire hazard! A short circuit can cause extremely high currents which can result in spark formation and fire! Always use an original strip fuse with the approved amperage. -
Page 47: Replacing The Main Fuse (Tdx-Sp N)
Refit all the parts again in reverse order. ● To conclude, check all the mobility aid functions. 8.2.6 Replacing the main fuse (TDX-SP N) Note To replace the fuse, the battery cable with the fuse attached to it must be replaced. ●... -
Page 48: Checking The Cable
® SERVICE MANUAL Invacare - TDX-SP / TDX-SP N 8.2.7 Checking the cable Requirements: ● 5/8“ Allen key ● Phillips screwdriver size 2 ● oblique pliers ● cable ties ● Remove the cover panels, disconnect the battery plugs and pull the batteries out of the battery compartment as described in Chapter 8.2.1. - Page 49 ® Invacare - TDX-SP / TDX-SP N SERVICE MANUAL ● Check all cables for visible damage and crushing locations. Replace any damaged cables. ● Pull each plug (1) carefully. The plug should not come out of the socket. ● If one of the plugs is loose, press it back into the socket with light pressure. The plug must engage.
-
Page 50: Cable Routing
® SERVICE MANUAL Invacare - TDX-SP / TDX-SP N 8.2.8 Cable routing Requirements: ● Phillips screwdriver size 2 ● oblique pliers ● cable ties ● Remove the rear panel as described in Chapter 8.1.2. ● When routing cables in the rear section, please ensure that the rear wheel stabilisers are movable. -
Page 51: Battery Carrier
® Invacare - TDX-SP / TDX-SP N SERVICE MANUAL Battery carrier Requirements: ● Phillips screwdriver size 2 ● 5/8“ Allen key ● 5/32“ Allen key Dismantling the battery carrier: ● Make the batteries accessible as described in Chapter 8.2.1. ●... -
Page 52: Lighting Unit
® SERVICE MANUAL Invacare - TDX-SP / TDX-SP N Lighting unit 8.4.1 Replacing the front bulb Requirements: ● Phillips screwdriver size 2 ● Undo the concealed Philips screw on the rear of the headlight/indicator combination. ● Remove the transparent plastic cover. -
Page 53: Replacing The Front Headlight Complete
® Invacare - TDX-SP / TDX-SP N SERVICE MANUAL 8.4.2 Replacing the front headlight complete Requirements: ● Phillips screwdriver size 2 ● oblique pliers ● cable ties Removing the front headlight: ● Remove the rear panel as described in Chapter 8.1.2. - Page 54 ® SERVICE MANUAL Invacare - TDX-SP / TDX-SP N ● Undo and remove the two Phillips screws which hold the front headlight. ● Replace the headlight unit. Refitting the front headlight: ● Refit the parts in reverse order. Route the cables carefully and fix them with cable ties.
-
Page 55: Replacing The Front Bulbholder
® Invacare - TDX-SP / TDX-SP N SERVICE MANUAL 8.4.3 Replacing the front bulbholder Requirements: ● Phillips screwdriver size 2 ● socket spanner, 13 mm Dismantling the bulbholder: ● Remove the complete front headlight as described in Chapter 8.4.2. ●... -
Page 56: Replacing The Rear Bulb
® SERVICE MANUAL Invacare - TDX-SP / TDX-SP N 8.4.4 Replacing the rear bulb Requirements: ● Phillips screwdriver size 2 ● Undo the Philips screw in the transparent cover over the rear light/indicator combination. ● Remove the transparent plastic cover. -
Page 57: Replacing The Rear Light Complete
® Invacare - TDX-SP / TDX-SP N SERVICE MANUAL 8.4.5 Replacing the rear light complete Requirements: ● Phillips screwdriver size 2 ● socket spanner, 8 mm Removing the rear light ● Remove the rear panel as described in Chapter 8.1.2. - Page 58 ® SERVICE MANUAL Invacare - TDX-SP / TDX-SP N ● Undo the two cap nuts (1) with an 8 mm socket spanner and remove the cap nuts complete with washers. ● Replace the rear light. Dismantling the bulbholder: ● Refit the parts in reverse order.
-
Page 59: Replacing The Rear Bulbholder
® Invacare - TDX-SP / TDX-SP N SERVICE MANUAL 8.4.6 Replacing the rear bulbholder Requirements: ● Phillips screwdriver size 2 ● socket spanner, 8 mm ● socket spanner, 13 mm Dismantling the bulbholder: ● Remove the complete rear light as described in Chapter 8.4.4. -
Page 60: Replacing The Safety Belt
® SERVICE MANUAL Invacare - TDX-SP / TDX-SP N Replacing the safety belt Requirements: ● socket spanner, 13 mm ● 5 mm Allen key ● Remove the plastic cap (5). ● Loosen the bolt (3) and the associated nut (in the figure this is covered by the plastic cap) with a 5 mm Allen key and a 13 mm socket spanner. -
Page 61: Electronic Module
● Changes to the drive program may only be carried out by trained Invacare® specialist dealers! ● Invacare® can only give a warranty for safe mobility aid driving behaviour - especially tipping stability - for unaltered standard drive programs! Note All electronic modules are delivered with a standard drive program. - Page 62 ® SERVICE MANUAL Invacare - TDX-SP / TDX-SP N Removing the electronic module: ● Remove the rear panel as described in Chapter 8.1.2. ● Carefully note the location of the cable and the connection locations of the various plugs. Either mark each plug and socket, or take a photograph with a digital camera.
- Page 63 ® Invacare - TDX-SP / TDX-SP N SERVICE MANUAL ● Pull the plug (1) out of the actuator module. ● Pull the plug (2) out of the light module. ● Pull the plug (3) out of the electronic module. ●...
- Page 64 ® SERVICE MANUAL Invacare - TDX-SP / TDX-SP N ● If a new software version is available, update the drive program as described in Chapter 8.7. ● Adapt the drive program using the programming software if necessary. ● To conclude, check all the mobility aid functions.
-
Page 65: Replacing The G-Trac Sensor
® Invacare - TDX-SP / TDX-SP N SERVICE MANUAL 8.6.3 Replacing the G-Trac sensor Requirements: ● 10 mm socket wrench Uninstalling the G-Trac sensor: ● Switch the electronic of the wheelchair OFF. ● Remove the rear cover, as described in chapter 8.1.2. -
Page 66: Replacing The Operating Hours Counter / Connecting Cable
® SERVICE MANUAL Invacare - TDX-SP / TDX-SP N 8.6.4 Replacing the operating hours counter / connecting cable Requirements: ● 10 mm socket wrench The operating hours counter is located on the rear cover (2). Removing the operating hours counter: ●... - Page 67 ® Invacare - TDX-SP / TDX-SP N SERVICE MANUAL Installing an operating hours counter: CAUTION! Property damage can result if the counter is wrongly connected. If the plus and minus wires are connected the wrong way, it will damage the electronic components of the operating hours counter.
- Page 68 ® SERVICE MANUAL Invacare - TDX-SP / TDX-SP N ● Place the locking washer (4) and the nut (5) on the threaded rod. ● Tighten the nut hand-tight. ● Install the rear cover again as described in chapter 8.1.2.2.
-
Page 69: Drive Program Selection After Component Replacement
® Invacare - TDX-SP / TDX-SP N SERVICE MANUAL 8.6.5 Drive program selection after component replacement The drive program is saved in the REM remote, and also in the DX, ACS or ACS 2 electronic module. If one of these two components is replaced, the system must be told which of the components has not been replaced so that it knows which contains the current controller profile. -
Page 70: Profile Selection With Remote Rem 550
® SERVICE MANUAL Invacare - TDX-SP / TDX-SP N 8.6.5.2 Profile selection with remote REM 550 ● Plug the plug into the remote or the ACS 2 controller. ● The display (2) shows that you need to select a profile. -
Page 71: Updating The Driving Program
● Alterations to the drive program must only be carried out by trained Invacare®-dealers! ● Invacare® can only assume a warranty for the safe vehicle handling of the wheelchair – in particular tipping stability - for unaltered standard drive programs! Requirements: ●... -
Page 72: Seat Support
® SERVICE MANUAL Invacare - TDX-SP / TDX-SP N Seat support Note This chapter deals with replacing the seat support for a seat without lifter or tilt modules. Please proceed as described in Chapter 8.9 to replace lifter or tilt modules. - Page 73 ® Invacare - TDX-SP / TDX-SP N SERVICE MANUAL Refitting the seat carrier: ● Hold the seat support (1) firmly while you fit the bolts (3) and the metal plates (2). ● Screw the bolts in but do not tighten them.
-
Page 74: Replacing Tilt Module / Lifter Module
® SERVICE MANUAL Invacare - TDX-SP / TDX-SP N Replacing tilt module / lifter module Note Depending on which tilt module is installed, either chapter 8.9.1 or ● applies. You can determine the type of tilt module by the maximum adjustment angle it allows: ●... - Page 75 ® Invacare - TDX-SP / TDX-SP N SERVICE MANUAL ● Pull the tilt module plug (1) out of the actuator module. ● Unclip the cable. Remove any cable ties which are fitted. ● Undo the six nuts (1) with a 13/32" socket spanner and remove the six 5/32" Allen screws.
-
Page 76: Replacing The Tilt Module Microswitch
® SERVICE MANUAL Invacare - TDX-SP / TDX-SP N 8.9.1.1 Replacing the tilt module microswitch Requirements: ● socket spanner, 10 mm ● 5 mm Allen key ● oblique pliers ● cable ties Note Either two microswitches, or one microswitch and an angular sensor, can be fitted. Replacing the angular sensor is described in Chapter 8.9.1.2. - Page 77 ® Invacare - TDX-SP / TDX-SP N SERVICE MANUAL ● Remove the servo motor including transmission. ● Undo the cable and plug for the microswitch. Remove any cable ties which are fitted. ● Undo the Allen screws (3) with a 5 mm Allen key.
-
Page 78: Replacing The Tilt Module Angular Sensor
® SERVICE MANUAL Invacare - TDX-SP / TDX-SP N 8.9.1.2 Replacing the tilt module angular sensor Requirements: ● socket spanner, 10 mm ● oblique pliers ● cable ties Removing the tilt module angular sensor: ● Undo and remove the two cap nuts (1) on the right-hand plastic cover (2) with a 10 mm socket spanner. -
Page 79: Replacing The Tilt Module (Max. < 30°) (Without A Lifter)
® Invacare - TDX-SP / TDX-SP N SERVICE MANUAL 8.9.2 Replacing the tilt module (max. < 30°) (without a lifter) Note This chapter discusses how to replace a tilt module (max. > 30°) on a chair without a lifter. Similar tasks are described In the following chapters: ●... - Page 80 ® SERVICE MANUAL Invacare - TDX-SP / TDX-SP N ● Pull the plug out of the actuator module. ● Open the cable holder on the underside of the seat. ● Uncover all the cables so that you can lift the seat up.
- Page 81 ® Invacare - TDX-SP / TDX-SP N SERVICE MANUAL ● Undo the two Allen screws (3) on both sides of the seat with a 6 mm Allen key. ● Remove the screws and the washers. ● Lift the tilt module (1) off the battery case.
-
Page 82: Replacing The Lifter / Tilt Module
® SERVICE MANUAL Invacare - TDX-SP / TDX-SP N 8.9.3 Replacing the lifter / tilt module Note This chapter deals with replacing the seat support for a seat with lifter / tilt module. Similar work is described in the following chapters: ●... - Page 83 ® Invacare - TDX-SP / TDX-SP N SERVICE MANUAL ● Remove the two knurled screws (1) including washers. ● Remove the cover (2). ● Pull the plug out of the actuator module. ● Open the cable holder on the underside of the seat.
- Page 84 ® SERVICE MANUAL Invacare - TDX-SP / TDX-SP N ● Open the lifter energy chain: - lift the cover (1) up. - pull the tab (2) out of the cover. - repeat this part by part. ● Remove the two cable ties which fix the cable to the ends of the energy chain.
- Page 85 ® Invacare - TDX-SP / TDX-SP N SERVICE MANUAL ● When routing the cable, ensure that it has been placed in the cable clamps so that it cannot be crushed or damaged in any way at any seat setting. ●...
-
Page 86: Replacing The Tilt Actuator
® SERVICE MANUAL Invacare - TDX-SP / TDX-SP N 8.9.4 Replacing the tilt actuator Note This chapter only deals with the replacement of the tilt actuator. If you wish to replace the complete tilt module, please proceed as described in Chapter 8.9.2 or 8.9.3. - Page 87 ® Invacare - TDX-SP / TDX-SP N SERVICE MANUAL WARNING: Danger of crushing! The seat is very heavy. Injury hazard to hands if the seat is unintentionally folded down! ● You should seek help from a second person. ● Ensure that the seat is properly secured against unintentional folding down before you start removing the actuator.
-
Page 88: Replacing The Lifter Actuator
® SERVICE MANUAL Invacare - TDX-SP / TDX-SP N 8.9.5 Replacing the lifter actuator Note This chapter only deals with the replacement of the lifter actuator. If you wish to replace the complete lifter module, please proceed as described in Chapter 8.9.3. - Page 89 ® Invacare - TDX-SP / TDX-SP N SERVICE MANUAL ● Remove the two knurled screws (1) including washers. ● Remove the cover (2). ● Pull the plug out of the actuator module. ● Open the cable holder on the underside of the seat.
-
Page 90: Method 2 - Removing The Lifter Actuator When The Lifter Is Lowered
® SERVICE MANUAL Invacare - TDX-SP / TDX-SP N 8.9.5.2 Method 2 - Removing the lifter actuator when the lifter is lowered WARNING: Danger of crushing! The seat is very heavy. Injury hazard to hands and feet! ● You should seek help from a second person. - Page 91 ® Invacare - TDX-SP / TDX-SP N SERVICE MANUAL ● Undo and remove the seat support Allen screws (1) on the left-hand and right-hand side of the mobility device. WARNING: Danger of crushing! The seat is very heavy. Injury hazard to hands and feet! ●...
- Page 92 ® SERVICE MANUAL Invacare - TDX-SP / TDX-SP N ● Fold the tilt lever (1) forwards. ● Remove the retaining ring (1) on the front bolts (4) on the lifter actuator (2) using the retaining ring pliers. ● Pull the bolts out of the guide using the angled long-nosed pliers until the bolt is almost...
- Page 93 ® Invacare - TDX-SP / TDX-SP N SERVICE MANUAL ● Lift the tilt actuator ((5) slightly. ● Pull the lifter actuator bolts (4) under the tilt actuator and out of the guide. ● Remove the retaining ring (1) on the rear bolts (3) on the lifter actuator (2) using the retaining ring pliers.
-
Page 94: Centre-Mounted Legrest (Electric & Manual)
® SERVICE MANUAL Invacare - TDX-SP / TDX-SP N 8.10 Centre-mounted legrest (electric & manual) 8.10.1 Replacing the manually operated centre-mounted legrest WARNING: Danger of crushing! The legrest is very heavy. Danger of injury to hands and feet! Pay attention to the heavy weight. -
Page 95: Replacing The Electrically Operated Centre-Mounted Legrest
® Invacare - TDX-SP / TDX-SP N SERVICE MANUAL 8.10.2 Replacing the electrically operated centre-mounted legrest WARNING: Danger of crushing! The legrest is very heavy. Danger of injury to hands and feet! Pay attention to the heavy weight. Requirements: ●... - Page 96 ® SERVICE MANUAL Invacare - TDX-SP / TDX-SP N ● Use the 6 mm Allen key to loosen and remove the two hexagon socket head screws (2) on both sides of the wheelchair. ● Completely remove both hexagon socket head screws, including the washers.
-
Page 97: Replacing An Electric Legrest Actuator
® Invacare - TDX-SP / TDX-SP N SERVICE MANUAL 8.10.3 Replacing an electric legrest actuator WARNING: Danger of crushing! The legrest is very heavy. Danger of injury to hands and feet! Pay attention to the heavy weight. Requirements: ● 1/2" socket wrench ●... - Page 98 ® SERVICE MANUAL Invacare - TDX-SP / TDX-SP N ● Use the 3/8" Allen key and a 1/2" socket wrench to loosen the screw (3). ● Use the 3/8" Allen key and a 1/2" socket wrench to loosen the screw (1).
-
Page 99: Replacing The Calf Plate On The Centre-Mounted Legrest (Electric & Manual)
® Invacare - TDX-SP / TDX-SP N SERVICE MANUAL 8.10.4 Replacing the calf plate on the centre-mounted legrest (electric & manual) Requirements: ● 1/64" Allen key A manual legrest can be seen in the illustration. The method of fixation to the seat is almost identical with both legrests. -
Page 100: Replacing The Foot Plate On The Centre-Mounted Legrest (Electric & Manual)
® SERVICE MANUAL Invacare - TDX-SP / TDX-SP N 8.10.5 Replacing the foot plate on the centre-mounted legrest (electric & manual) Requirements: ● 1/64" Allen key ● 1/4" Allen key A manual legrest can be seen in the illustration. The method of fixation to the seat is almost identical with both legrests. -
Page 101: Castor Housing Front
® Invacare - TDX-SP / TDX-SP N SERVICE MANUAL 8.11 Castor housing front Requirements: ● 5/16“ Allen key ● torque wrench 5 - 25 Nm (or similar) Removing the front castor housing: ● Remove the two Allen screws (1) with a 5/16" Allen key. -
Page 102: Wheel Forks Front/Rear
® SERVICE MANUAL Invacare - TDX-SP / TDX-SP N 8.12 Wheel forks front/rear 8.12.1 Replacing the wheel fork Requirements: ● Phillips screwdriver size 2 ● 5/8“ socket spanner Removing the wheel forks: ● Undo the Philips screw (2). ● Take the cover cap (2) off the castor housing (3). - Page 103 ® Invacare - TDX-SP / TDX-SP N SERVICE MANUAL Refitting the wheel fork: ● If you removed them, replace the tolerance rings (4) and (5) and the ball-bearings (3) and (6). ● Place the spacer (7) on the wheel fork (8).
-
Page 104: Adjusting The Wheel Fork
® SERVICE MANUAL Invacare - TDX-SP / TDX-SP N 8.12.2 Adjusting the wheel fork WARNING: Danger of crushing! The mobility device is very heavy. Injury hazard to hands and feet! ● You should seek help from a second person. Requirements: ●... -
Page 105: Replacing The Wheels On Double-Sided Wheel Forks
® Invacare - TDX-SP / TDX-SP N SERVICE MANUAL 8.12.3 Replacing the wheels on double-sided wheel forks Requirements: ● 7/16“ socket spanner ● 7/16“ jaw spanner ● torque wrench 5 - 25 Nm (or similar) Removing the wheel: ● Loosen the nut (2) with a 7/16" socket spanner. -
Page 106: Drive Wheels
® SERVICE MANUAL Invacare - TDX-SP / TDX-SP N 8.13 Drive wheels 8.13.1 Replacing the drive wheel WARNING: Danger of crushing! The mobility device is very heavy. Injury hazard to hands and feet! ● You should seek help from a second person. -
Page 107: Replacing The Tyre Or Inner Tube
® Invacare - TDX-SP / TDX-SP N SERVICE MANUAL 8.13.2 Replacing the tyre or inner tube Note There are three different types of tyres or inner tubes, and specific points must be observed for the replacement of each type. It is easy to tell the difference between the tyre or inner tube types: ●... - Page 108 ® SERVICE MANUAL Invacare - TDX-SP / TDX-SP N Removing the tyres: ● Remove the wheel as described in Chapter 8.13.1. ATTENTION: Explosion hazard! There is considerable pressure in the tyre. Danger of injury! Parts can be thrown out and injure you if you do not evacuate all the air from the tyre.
-
Page 109: Replacing Puncture-Protected Tyres
® Invacare - TDX-SP / TDX-SP N SERVICE MANUAL 8.13.2.2 Replacing puncture-protected tyres Note Pneumatic tyres have black valve caps. Puncture-protected tyres have red valve caps Requirements: ● 7/8" Allen key ● Two long wooden blocks, min. 14 x 14 x 30 cm ●... - Page 110 ® SERVICE MANUAL Invacare - TDX-SP / TDX-SP N Refitting the tyres: ● Refit the tyres to the rim in the reverse sequence. Note If the old inner tube is to be repaired and re-used, and has become wet during repair, you can make replacement easier by sprinkling the inner tube with a little talcum powder.
-
Page 111: Replacing Puncture-Proof Tyres
® Invacare - TDX-SP / TDX-SP N SERVICE MANUAL 8.13.2.3 Replacing puncture-proof tyres Requirements: ● 7/8" Allen key ● Two long wooden blocks, min. 14 x 14 x 30 cm ● Three joiner's clamps with plastic caps ● Torque spanner 5 - 25 Nm (or similar) ●... -
Page 112: Replacing The Drive Wheel Hub (Standard Motor)
® SERVICE MANUAL Invacare - TDX-SP / TDX-SP N 8.13.3 Replacing the drive wheel hub (Standard motor) CAUTION! Possible material damage to mobility device! Collisions can be caused if the adjusting washers are removed during fitting work to the drive wheels! Adjusting washers are often fitted between the drive shaft and the wheel hub to even out tolerances. -
Page 113: Replacing The Drive Wheel Hub (Ssd Motor)
® Invacare - TDX-SP / TDX-SP N SERVICE MANUAL 8.13.4 Replacing the drive wheel hub (SSD motor) CAUTION! Possible material damage to mobility device! Collisions can be caused if the adjusting washers are removed during fitting work to the drive wheels! Adjusting washers are often fitted between the drive shaft and the wheel hub to even out tolerances. -
Page 114: Replacing The Rubber Bumper
Invacare - TDX-SP / TDX-SP N 8.14 Replacing the rubber bumper Note Invacare® recommends that you replace all the rubber bumpers as soon as one needs replacing. Requirements: ● 5/16“ socket spanner ● 7/8“ Allen key ● two long wooden blocks, min. 14 x 14 x 30 cm ●... -
Page 115: Replacing The Splash Guard
® Invacare - TDX-SP / TDX-SP N SERVICE MANUAL 8.15 Replacing the splash guard Requirements: ● 5/6“ Allen key ● 7/8“ Allen key ● two long wooden blocks, min. 14 x 14 x 30 cm ● torque wrench 0 - 20 Nm (or similar) ●... -
Page 116: Anti-Tip System
® SERVICE MANUAL Invacare - TDX-SP / TDX-SP N 8.16 Anti-tip system 8.16.1 Removing the gas cylinder WARNING: Danger of crushing! The mobility device is very heavy. Injury hazard to hands and feet! ● You should seek help from a second person. - Page 117 ® Invacare - TDX-SP / TDX-SP N SERVICE MANUAL ● Rotate the top walking beam (5) so that you can reach the screw (4) on the gas cylinder through the drillhole (3) in the battery case. ● Remove the nut (6) with a 1/4" socket spanner. Use a 5/16" Allen key to counter the bolt while doing so.
- Page 118 ® SERVICE MANUAL Invacare - TDX-SP / TDX-SP N ● Undo the two Allen screws (9) with a 1/4" Allen key. ● Remove the bolts together with the washers (3) and the plates (2) and (4). ● Remove the gas cylinder from the mounting (5).
-
Page 119: Repairing The Gas Cylinder
® Invacare - TDX-SP / TDX-SP N SERVICE MANUAL 8.16.2 Repairing the gas cylinder When a gas cylinder has been removed, it can be completely replaced or to have a range of maintenance work carried out on it as described in the following sub-chapters. -
Page 120: Replacing The Guide Bush
® SERVICE MANUAL Invacare - TDX-SP / TDX-SP N 8.16.2.2 Replacing the guide bush Removing: ● Remove the guide bush (1) from the gas cylinder piston (2). Refitting: ● Apply a little Loctite 242 to the end of the gas cylinder piston in the area marked (A) on the graphic. -
Page 121: Refitting The Gas Cylinder
® Invacare - TDX-SP / TDX-SP N SERVICE MANUAL 8.16.3 Refitting the gas cylinder ● Move the gas cylinder guide bush into the battery case holder (5). ● Hold the gas cylinder in position and lift the rear axle so that the gas cylinder ball joint is pressed. - Page 122 ® SERVICE MANUAL Invacare - TDX-SP / TDX-SP N ● Rotate the top walking beam (5) so that you can insert the screw (4) through the drillhole (3) on the gas cylinder into the gas cylinder and walking beam. ●...
-
Page 123: Replacing The Setting Screw
● 1/4“ socket spanner ● two long wooden blocks, min. 14 x 14 x 30 cm ● M8 washer Note Invacare® recommends always replacing both setting screws simultaneously in order to ensure that the mobility aid works perfectly. Removing the setting screw: ●... - Page 124 ® SERVICE MANUAL Invacare - TDX-SP / TDX-SP N ● Undo and remove the lock nut (2), the setting screw (4) with a 1/4" socket spanner. ● Rotate the setting screw (4) towards the battery case until it can be removed from its holder (3).
- Page 125 ® Invacare - TDX-SP / TDX-SP N SERVICE MANUAL Note For the following operation, use an M8 washer as a thickness gauge. ● Rotate the setting screw (3) until it has a space of 1.5 mm (A) between it and the gas cylinder (4).
-
Page 126: Adjusting The Setting Screw
® SERVICE MANUAL Invacare - TDX-SP / TDX-SP N 8.16.5 Adjusting the setting screw Requirements: ● 1/4“ socket spanner ● M8 washer ● Remove both the anti-tip system protective caps. The protective caps on the anti-tip system will either be held using a screw or a cable tie depending on the mobility aid's date of manufacture. -
Page 127: Bottom Walking Beam
® Invacare - TDX-SP / TDX-SP N SERVICE MANUAL 8.17 Bottom walking beam Requirements: ● 5/8“ Allen key ● 5/16“ Allen key ● Phillips screwdriver size 2 ● 1/2“ socket spanner ● torque wrench 5 - 25 Nm (or similar) ●... -
Page 128: Top Walking Beam
® SERVICE MANUAL Invacare - TDX-SP / TDX-SP N 8.18 Top walking beam 8.18.1 Removing the top walking beam Requirements: ● 5/8“ Allen key ● 7/8“ Allen key ● 5/16“ Allen key ● Phillips screwdriver size 2 ● 1/2“ socket spanner ●... - Page 129 ® Invacare - TDX-SP / TDX-SP N SERVICE MANUAL ● Rotate the top walking beam (11) until the Allen screw (5) is in line with the opening (3) in the battery case (4). ● Remove the nut (10), which secures the 5/16" Allen screw (5) using a 1/4" socket spanner.
-
Page 130: Refitting The Top Walking Beam
® SERVICE MANUAL Invacare - TDX-SP / TDX-SP N 8.18.2 Refitting the top walking beam Requirements: ● 5/8“ Allen key ● 7/8“ Allen key ● 5/16“ Allen key ● Phillips screwdriver size 2 ● 1/2“ socket spanner ● 1/4“ socket spanner ●... - Page 131 ® Invacare - TDX-SP / TDX-SP N SERVICE MANUAL ● Refit the batteries as described in Chapters 8.2.1 and 8.2.2/8.2.3. ● Refit the rear panel as described in Chapter 8.1.2. ● Refit the front panel as described in Chapter 8.1.1.
-
Page 132: Drive Unit
® SERVICE MANUAL Invacare - TDX-SP / TDX-SP N 8.19 Drive unit 8.19.1 Replacing the motor/transmission unit (Standard motor) WARNING: Danger of crushing! The wheelchair is very heavy. Danger of injury to the hands and feet! ● Let a second person help you. - Page 133 ® Invacare - TDX-SP / TDX-SP N SERVICE MANUAL ATTENTION: Danger of crushing! The motor gearbox unit is extremely heavy. Injury hazards to hands! ● Please note the high weight ● Pull the motor/transmission unit (4) off the bolt. Refitting the motor/transmission unit: ●...
-
Page 134: Replacing The Motor/Transmission Unit (Ssd Motor)
® SERVICE MANUAL Invacare - TDX-SP / TDX-SP N 8.19.2 Replacing the motor/transmission unit (SSD motor) WARNING: Danger of crushing! The wheelchair is very heavy. Danger of injury to the hands and feet! ● Let a second person help you. - Page 135 ® Invacare - TDX-SP / TDX-SP N SERVICE MANUAL ● Use a 1/2" socket wrench to loosen the four hexagon head screws (3). ● Remove the screws. ● Pull the motor/gear box unit (1) off of the Walking Beam (2). Take into account the heavy weight of the unit.
- Page 136 ® SERVICE MANUAL Invacare - TDX-SP / TDX-SP N ● Connect the motor cable plug. ● Reinstall all components that were removed beforehand in reverse order.
-
Page 137: Replacing Or Rotating The Motor / Gearbox Unit Sealing Ring (Ssd Motor)
® Invacare - TDX-SP / TDX-SP N SERVICE MANUAL 8.19.3 Replacing or rotating the motor / gearbox unit sealing ring (SSD motor) CAUTION: Danger of crushing! The motor / gearbox unit is very heavy. Danger of injury to the hands! ●... - Page 138 ® SERVICE MANUAL Invacare - TDX-SP / TDX-SP N ● Install the washer and the self-locking nut. ● Do not tighten the self-locking nut completely, as the motor orientation must be adjusted during installation.
-
Page 139: Replacing The Motor/Transmission Clutch (Standard Motor)
® Invacare - TDX-SP / TDX-SP N SERVICE MANUAL 8.19.4 Replacing the motor/transmission clutch (Standard Motor) CAUTION: Danger of crushing! The motor / gearbox unit is very heavy. Danger of injury to the hands! ● Pay attention to the heavy weight. - Page 140 ® SERVICE MANUAL Invacare - TDX-SP / TDX-SP N Refitting the motor/transmission clutch: ● Place the new clutch (2) on the motor axle (3). Note the position of the groove. ● Push the motor carefully into the transmission. Observe the position of the groove in the transmission axle (4).
-
Page 141: Replacing The Motor/Transmission Clutch (Ssd Motor)
® Invacare - TDX-SP / TDX-SP N SERVICE MANUAL 8.19.5 Replacing the motor/transmission clutch (SSD Motor) CAUTION: Danger of crushing! The motor / gearbox unit is very heavy. Danger of injury to the hands! ● Pay attention to the heavy weight. - Page 142 ® SERVICE MANUAL Invacare - TDX-SP / TDX-SP N ● Pull the motor (4) and transmission unit (1) carefully apart. ● Remove the clutch individual parts (7). ● Replace the clutch if necessary. Refitting the motor/transmission clutch: ● Place the new clutch (7) on the motor axle. Pay attention to the position of the groove.
-
Page 143: Replacing The Carbon Brushes (Ssd Motor)
® Invacare - TDX-SP / TDX-SP N SERVICE MANUAL 8.19.6 Replacing the carbon brushes (SSD motor) Note Always replace all the carbon brushes on both motors. WARNING: Danger of crushing! The mobility device is very heavy. Injury hazard to hands and feet! ●... - Page 144 ® SERVICE MANUAL Invacare - TDX-SP / TDX-SP N ● Make a marking on the motor and the carbon brushes in order to guarantee correct refitting. ● Remove the carbon brushes complete from the mounting (2). ● Check the carbon brushes and springs for the level of wear, broken components or discolouration.
-
Page 145: Replacing The Carbon Brushes (Standard Motor)
® Invacare - TDX-SP / TDX-SP N SERVICE MANUAL 8.19.7 Replacing the carbon brushes (Standard motor) Note Always replace all the carbon brushes on both motors. WARNING: Danger of crushing! The mobility device is very heavy. Injury hazard to hands and feet! ●... - Page 146 ® SERVICE MANUAL Invacare - TDX-SP / TDX-SP N ● Remove the carbon brushes complete from the mounting (2). ● Check the carbon brushes and springs for the level of wear, broken components or discolouration. Refitting the carbon brushes: ●...
-
Page 147: Rear Wheel Suspension
® Invacare - TDX-SP / TDX-SP N SERVICE MANUAL 8.20 Rear wheel suspension 8.20.1 Removing the rear wheel suspension WARNING: Danger of crushing! The mobility device is very heavy. Injury hazard to hands and feet! ● You should seek help from a second person. - Page 148 ® SERVICE MANUAL Invacare - TDX-SP / TDX-SP N ● Undo the two bolts (3) with a 5/32" Allen key and remove the bolts including the nylon washer (2). ● Undo and remove the two bolts (4) with a 5/16" Allen key and remove the bolts including the bushes (5).
-
Page 149: Removing The Rear Wheel Suspension - Alternative Method
® Invacare - TDX-SP / TDX-SP N SERVICE MANUAL 8.20.2 Removing the rear wheel suspension – alternative method Requirements: ● more wooden blocks or ● joiner's clamps ● Carry out the following steps if only one of the two bolts (4) can be undone. - Page 150 ® SERVICE MANUAL Invacare - TDX-SP / TDX-SP N ● Remove the pivot bar (4) by putting it sideways out of the guides together with the remaining bolt and the socket. ● Please see Chapter 8.20.4 to replace the wheel suspension at a later time.
-
Page 151: Refitting The Rear Wheel Suspension
® Invacare - TDX-SP / TDX-SP N SERVICE MANUAL 8.20.3 Refitting the rear wheel suspension ● Position the complete rear wheel suspension between the two mounting points (6). ● Fit the two sockets (5) and the two bolts (4). ●... -
Page 152: Refitting The Rear Wheel Suspension - Alternative Method
® SERVICE MANUAL Invacare - TDX-SP / TDX-SP N 8.20.4 Refitting the rear wheel suspension – alternative method ● Position the complete rear wheel suspension between the two mounting points (6). ● Position the mounting (5) centrally between the two suspension arms (1). - Page 153 ® Invacare - TDX-SP / TDX-SP N SERVICE MANUAL ● Ensure that the rear springs are compressed: Block method: ● Lift the suspension arm and place wooden blocks or similar underneath it until the springs are pressed together and the nylon spacer (2) can be fitted into the recesses provided in the suspension (6).
-
Page 154: Rear Springs
Rear springs 8.21.1 Removing the rear springs Note Invacare® recommends always replacing both springs simultaneously in order to ensure that the mobility aid works perfectly. WARNING: Danger of crushing! The mobility device is very heavy. Injury hazard to hands and feet! ●... - Page 155 ® Invacare - TDX-SP / TDX-SP N SERVICE MANUAL ● Ensure that the rear springs (7) are compressed: Block method: ● Raise the suspension arms (6) and place wooden blocks underneath them until the springs are pressed together enough so that the nylon stopper (4) can be removed Clamp method: ●...
-
Page 156: Refitting The Rear Springs
- TDX-SP / TDX-SP N 8.21.2 Refitting the rear springs Note Invacare® recommends always replacing both springs simultaneously in order to ensure that the mobility aid works perfectly. WARNING: Danger of crushing! The mobility device is very heavy. Injury hazard to hands and feet! ●... - Page 157 ® Invacare - TDX-SP / TDX-SP N SERVICE MANUAL ● Put the springs (7) into position between the suspension arm (6) and the stop (1). ● Ensure that the rear springs are compressed: Block method: ● Raise the suspension arms and replace the wooden blocks underneath them until the springs are compressed.
-
Page 158: Replacing The Battery Case
® SERVICE MANUAL Invacare - TDX-SP / TDX-SP N 8.22 Replacing the battery case Requirements: ● 5/6“ Allen key ● 5/32“ Allen key ● Phillips screwdriver size 2 ● blade screwdriver ● 1/4“ socket spanner ● 5/16“ socket spanner ● torque wrench 0 - 20 Nm (or similar) ●... - Page 159 ® Invacare - TDX-SP / TDX-SP N SERVICE MANUAL ● Refit the covers as described in Chapter 8.1. ● Refit the seat including seat support as described in Chapter 8.8. ● Adjust the setting screw on the anti-tip system as described in Chapter 8.16.5.